1. Einleitung
1.1 Produktüberschussview
The Truman TM-I VISION PRO is a Full HD digital satellite receiver designed to provide a comprehensive entertainment experience. It features a powerful Sunplus 1506HV processor, ensuring smooth performance and high-quality video output. With multiple connectivity options including USB, HDMI, and Ethernet, it offers versatility for various home entertainment setups. The device supports Full HD resolution, multi-language interfaces, and includes parental control features for a family-friendly viewing environment. It also comes with a one-year activated IPTV service.

Abbildung 1.1: Vorderseite view of the Truman TM-I VISION PRO Satellite Receiver, showing its compact design and front-facing USB ports.
1.2 Packungsinhalt
Bitte überprüfen Sie, ob alle unten aufgeführten Artikel in Ihrem Paket enthalten sind:
- Truman TM-I VISION PRO Satellite Receiver
- Netzteil
- Standardfernbedienung
- Digital LED Lens
- HDMI-Kabel
- Bedienungsanleitung

Figure 1.2: Marketing image highlighting key features such as Wi-Fi, Ultra HD support, ISO 9001 certification, and 5G compatibility.
2. Sicherheitshinweise
Um einen sicheren Betrieb zu gewährleisten und Schäden zu vermeiden, lesen und befolgen Sie bitte die folgenden Sicherheitsrichtlinien:
- Setzen Sie das Gerät weder Wasser noch Feuchtigkeit aus.
- Vermeiden Sie es, den Empfänger direkter Sonneneinstrahlung oder der Nähe von Wärmequellen auszusetzen.
- Sorgen Sie für eine ausreichende Belüftung rund um das Gerät, um eine Überhitzung zu vermeiden.
- Verwenden Sie nur das mitgelieferte Netzteil.
- Versuchen Sie nicht, das Gerät selbst zu öffnen oder zu reparieren. Wenden Sie sich an qualifiziertes Servicepersonal.
- Bewahren Sie das Gerät und das Zubehör außerhalb der Reichweite von Kindern auf.
- Ziehen Sie bei Gewittern oder längerer Nichtbenutzung den Netzstecker.
3. Einrichtung
3.1 Anschließen des Empfängers
- Connect the Satellite Antenna: Connect your satellite dish cable to the "LNB IN" port on the back of the receiver.
- Anschluss an den Fernseher (HDMI): Use the provided HDMI cable to connect the receiver's HDMI OUT port to an available HDMI IN port on your television.

Figure 3.1: The included HDMI cable for connecting the receiver to your television.
- Strom anschließen: Connect the power adapter to the DC IN port on the receiver, then plug the adapter into a wall outlet.
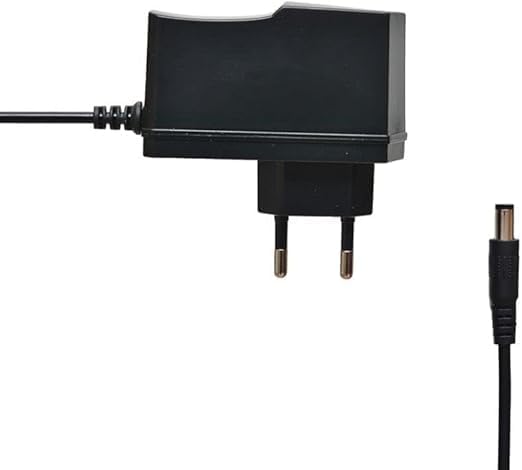
Figure 3.2: The power adapter supplied with the receiver.
- Connect Digital LED Lens: Plug the digital LED lens into its dedicated port on the receiver. This lens displays channel numbers and receives remote control signals.
- Optional: Connect Ethernet/USB: If you plan to use wired internet or external storage, connect an Ethernet cable to the LAN port or a USB drive to one of the USB ports.

Abbildung 3.3: Rückseite view of the receiver showing the LNB IN, HDMI OUT, USB, Ethernet, and DC IN ports.
3.2 Ersteinrichtungsassistent
Beim ersten Einschalten führt Sie der Receiver durch einen Einrichtungsassistenten:
- Sprachauswahl: Wählen Sie Ihre bevorzugte Sprache für die Bildschirmanzeige.
- Zeitzoneneinstellung: Set the correct time zone for your region.
- Antennenaufbau: Select your satellite (e.g., Nilesat, Hotbird) and configure LNB settings if necessary.
- Kanalsuchlauf: Perform an automatic or manual channel scan to find available TV and radio channels.
- Network Setup (Optional): Configure Wi-Fi or Ethernet connection for internet-based features like IPTV.
4. Bedienungsanleitung
4.1 Grundfunktionen
- Ein-/Ausschalten: Drücken Sie die LEISTUNG Taste auf der Fernbedienung.
- Kanalnavigation: Verwenden Sie die CH+/CH- Tasten zum sequenziellen Umschalten der Kanäle oder direkte Eingabe der Kanalnummer über das Ziffernfeld.
- Lautstärkeregelung: Verwenden Sie die VOL+/VOL- Tasten zum Einstellen der Lautstärke.
- Stumm: Drücken Sie die MUTE Taste zum Stummschalten des Tons.
- Menüzugriff: Drücken Sie die SPEISEKARTE Taste zum Aufrufen des Hauptmenüs für Einstellungen und Funktionen.
- OK-Taste: Confirms selections in menus or displays channel information during viewing.
- Ausfahrt: Drücken Sie die EXIT Taste zum Zurückkehren zum vorherigen Bildschirm oder zum Live-TV.
4.2 Erweiterte Funktionen
- Kindersicherung: Access the Parental Control menu to set age restrictions for channels or lock specific programs. A default PIN (usually 0000 or 1234) may be required.
- Mehrsprachige Unterstützung: Change audio languages (if available) or subtitle languages via the audio/subtitle options in the menu.
- IPTV: The receiver includes a pre-activated IPTV service for one year. Access this feature through the main menu. Ensure your receiver is connected to the internet for IPTV functionality.
- USB-Medienwiedergabe: Stecken Sie einen USB-Stick in einen der USB-Anschlüsse, um Medien abzuspielen. files (videos, music, photos) or record TV programs.
- Software-Update: Regularly check for software updates via USB or network to ensure optimal performance and access to new features. (Refer to Section 5.2 for details).
5. Wartung
5.1 Reinigung
Um den Receiver zu reinigen, trennen Sie ihn vom Stromnetz. Wischen Sie das Gehäuse mit einem weichen, trockenen Tuch ab. Verwenden Sie keine flüssigen Reinigungsmittel oder Scheuermittel.
5.2 Softwareaktualisierungen
Keeping your receiver's software updated is crucial for performance and security. Updates can be performed via USB or over the network (if connected to the internet).
- USB-Update: Laden Sie die neueste Firmware herunter (.bin). file) from the official Truman website to a USB flash drive. Insert the USB drive into the receiver and navigate to the "System Update" or "Software Upgrade" option in the menu. Follow the on-screen instructions.
- Netzwerk-Update: If your receiver is connected to the internet, navigate to the "Network Upgrade" or "Online Update" option in the system settings. The receiver will check for available updates and prompt you to install them.
Vorsicht: Do not power off the receiver during a software update, as this may cause permanent damage.
6. Fehlerbehebung
If you encounter issues with your Truman TM-I VISION PRO, refer to the following common problems and solutions:
| Problem | Mögliche Ursache | Lösung |
|---|---|---|
| Kein Strom | Netzteil nicht angeschlossen; Steckdose defekt. | Ensure power adapter is securely connected to the receiver and a working power outlet. |
| Kein Signal / Schwarzer Bildschirm | Antenna cable loose; Incorrect satellite selected; TV input not set to HDMI. | Check antenna cable connection. Verify satellite settings in menu. Ensure TV input is set to the correct HDMI port. |
| Fernbedienung funktioniert nicht | Batteries low/dead; Obstruction between remote and receiver's LED lens. | Replace remote control batteries. Ensure clear line of sight to the digital LED lens. |
| Frozen Picture / Lagging | Weak signal; Overheating; Software issue. | Check signal strength in menu. Ensure proper ventilation. Try a software update or factory reset (last resort). |
| IPTV Not Working | No internet connection; IPTV service expired. | Verify internet connection (Ethernet or Wi-Fi). Contact support if service is within the one-year period and still not working. |
7. Spezifikationen
| Besonderheit | Detail |
|---|---|
| Modell | TM-I VISION PRO |
| Prozessor | Sunplus 1506HV |
| Kastentyp | Full HD Digital |
| Flash-Speicher | 4 MB (SPI SOP8/SOIC8) |
| Videoausgang | HDMI (Full HD Resolution Support) |
| Audioausgabemodus | Stereo (Dolby Digital, DTS, PCM supported) |
| Konnektivität | USB, HDMI, Ethernet |
| Kompatible Geräte | Fernseher, Personal Computer |
| Besondere Merkmale | User-friendly display, Remote Control, Multi-language support, Parental Control, 1-year IPTV activation. |
| Artikelgewicht | 10 Gramm |
| Hersteller | Truman |
8. Garantie und Support
For warranty information, please refer to the warranty card included with your product or contact your point of purchase. The receiver includes a 1-year activated IPTV service.
For technical support or further assistance, please contact Truman customer service or visit their official website. Contact details are typically provided in the product packaging or on the manufacturer's webWebsite.