1. Einleitung
Vielen Dank für Ihren Einkauf.asing the Karlsson Vogue Alarm Clock. This versatile device combines a digital alarm clock, a wireless induction charger, and a Bluetooth speaker, designed to enhance your daily routine. Please read this manual carefully before using the product to ensure proper operation and to maximize its lifespan. Keep this manual for future reference.
Sicherheitsvorkehrungen
- Das Gerät darf weder Wasser noch übermäßiger Feuchtigkeit ausgesetzt werden.
- Vermeiden Sie extreme Temperaturen.
- Zerlegen Sie das Gerät nicht und versuchen Sie nicht, es selbst zu reparieren.
- Use only the provided or recommended USB adapter for power.
- Sorgen Sie während des Betriebs für ausreichende Belüftung rund um das Gerät.
2. Produktüberschreitungview
The Karlsson Vogue Alarm Clock features a sleek design with a fabric-covered front and intuitive controls. Below is an overview seiner Hauptkomponenten und Bedienelemente.

Abbildung 2.1: Vorderseite view of the Karlsson Vogue Alarm Clock, displaying the digital time and temperature.

Abbildung 2.2: Rückseite view of the alarm clock, highlighting the control buttons and USB-C power input.
Control Buttons (from left to right on rear panel):
- Alarm-1-Taste: Press to activate/deactivate Alarm 1. Long press to set Alarm 1 time.
- Alarm-2-Taste: Press to activate/deactivate Alarm 2. Long press to set Alarm 2 time.
- Brightness/Snooze Button: Press to adjust display brightness. When alarm sounds, press to snooze.
- Zeiteinstellungstaste: Lange drücken, um in den Zeiteinstellungsmodus zu wechseln.
- Abwärtstaste: Decrease values during setting, navigate menus.
- Aufwärts-Taste: Increase values during setting, navigate menus.
- Bluetooth/Play/Pause Button: Long press to enter Bluetooth pairing mode. Press to play/pause music.
- USB-C-Stromeingang: Schließen Sie hier das Netzteil an.
Oberes Bedienfeld:
- Kabelloses Ladepad: Place compatible devices here for wireless charging.
3. Einrichtung
3.1 Stromanschluss
- Connect the provided USB adapter to the USB-C Power Input port on the rear of the alarm clock.
- Stecken Sie den USB-Adapter in eine normale Steckdose.
- Das Display leuchtet auf und zeigt damit an, dass das Gerät eingeschaltet ist.
3.2 Anfangszeiteinstellung
- Drücken Sie lange die Zeiteinstellungstaste (clock icon) on the rear panel. The hour digits will start flashing.
- Verwenden Sie die Up Und Abwärts-Tasten um die Stunde einzustellen.
- Drücken Sie die Zeiteinstellungstaste Um die Stunde erneut zu bestätigen, wechseln Sie zur Minuteneinstellung. Die Minutenziffern blinken.
- Verwenden Sie die Up Und Abwärts-Tasten Minute einzustellen.
- Drücken Sie die Zeiteinstellungstaste one more time to confirm the minute and exit time setting mode.
4. Bedienungsanleitung
4.1 Alarme einstellen
Das Gerät unterstützt zwei unabhängige Alarme (Alarm 1 und Alarm 2).
- Alarm 1 einstellen: Drücken Sie lange die Alarm 1-Taste (bell icon with '1'). The hour digits for Alarm 1 will flash.
- Verwenden Sie die Up Und Abwärts-Tasten um die Weckzeit einzustellen.
- Drücken Sie die Alarm 1-Taste Um die Stunde erneut zu bestätigen, wechseln Sie zur Minuteneinstellung.
- Verwenden Sie die Up Und Abwärts-Tasten die Alarmminute einstellen.
- Drücken Sie die Alarm 1-Taste one more time to confirm and exit alarm setting. The alarm icon will appear on the display.
- Alarm 2 einstellen: Führen Sie die gleichen Schritte mit dem/der Alarm 2-Taste (bell icon with '2').
4.2 Aktivieren/Deaktivieren von Alarmen
- Drücken Sie die jeweilige Taste Alarm 1-Taste or Alarm 2-Taste briefly to toggle the alarm on or off. The alarm icon on the display will indicate its status.
4.3 Schlummerfunktion
- Wenn ein Alarm ertönt, drücken Sie die Taste Brightness/Snooze Button (light bulb icon) to activate snooze. The alarm will temporarily stop and sound again after approximately 9 minutes.
- To turn off the alarm completely, press any other button on the rear panel.
4.4 Bluetooth-Lautsprecherbetrieb
- Paarung: Drücken Sie lange die Bluetooth/Play/Pause Button (music note icon) until the display shows "BT" and starts flashing, indicating pairing mode.
- On your mobile device, enable Bluetooth and search for "Karlsson Vogue". Select it to connect.
- Once connected, the "BT" indicator will stop flashing. You can now play audio through the alarm clock's speaker.
- Wiedergabe: Drücken Sie die Bluetooth/Play/Pause Button briefly to play or pause music.
- Volume control is managed via your connected mobile device.
4.5 Wireless Induction Charging
The top surface of the alarm clock features a wireless charging pad compatible with Qi-enabled devices.
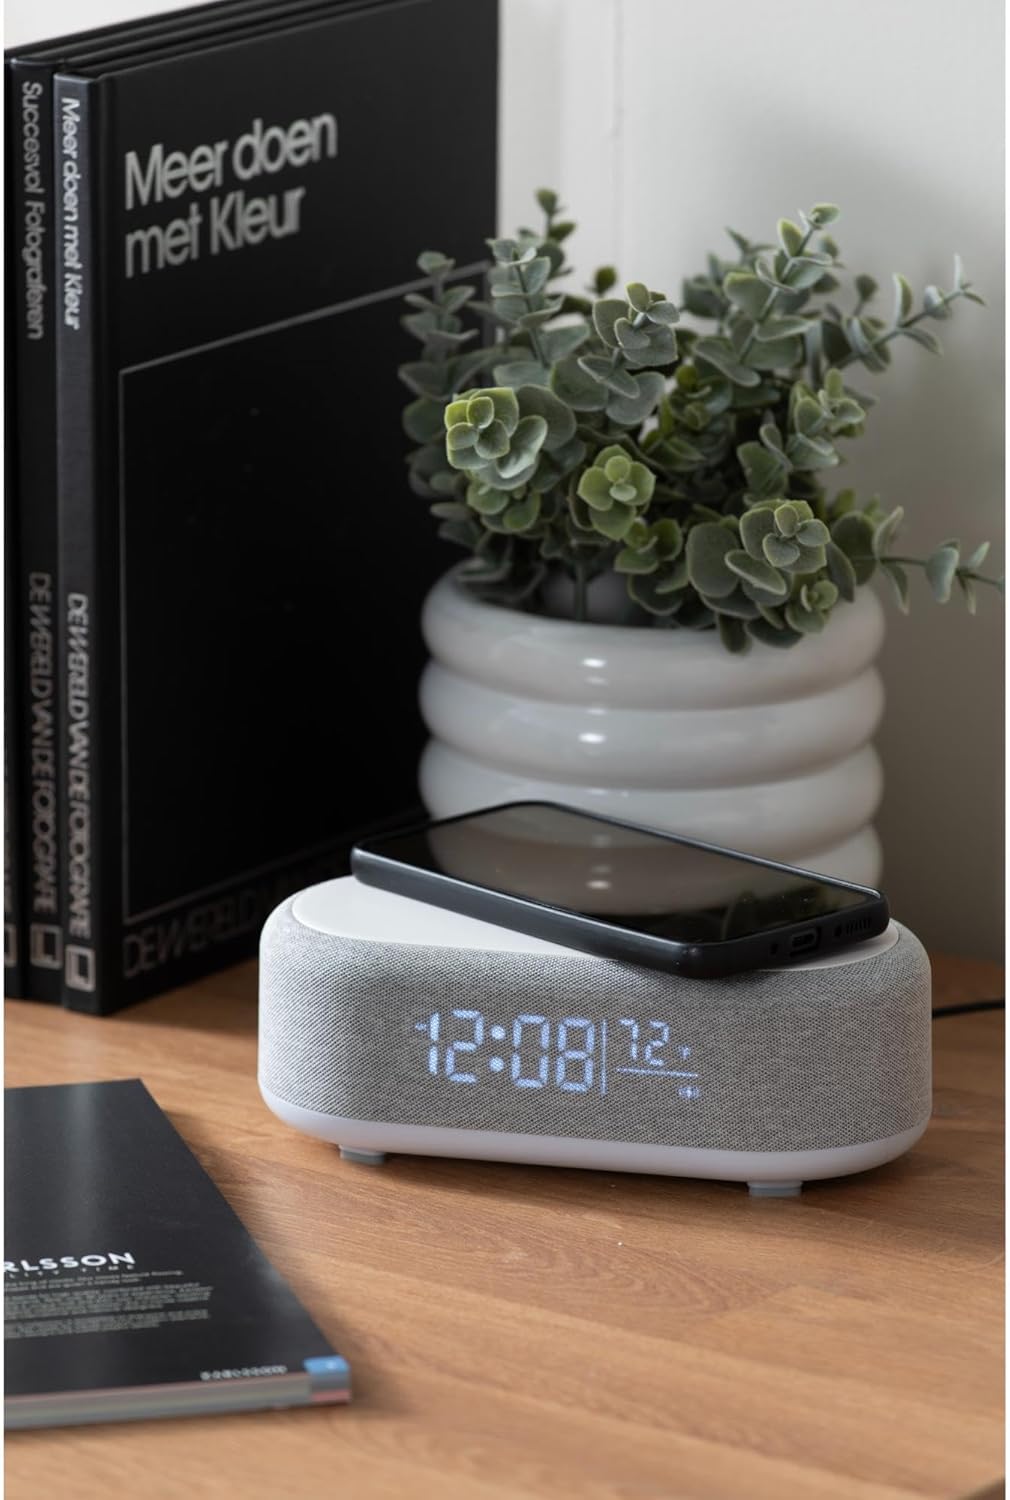
Figure 4.1: A smartphone placed on the wireless charging pad of the alarm clock.
- Place your Qi-compatible smartphone or other device directly onto the center of the top charging pad.
- Ensure the device is properly aligned. A charging indicator (usually on your phone screen) will confirm charging has begun.
- Nehmen Sie Ihr Gerät heraus, sobald es vollständig aufgeladen ist.
4.6 Anpassung der Anzeigehelligkeit
- Drücken Sie die Brightness/Snooze Button (light bulb icon) repeatedly to cycle through different brightness levels for the display.
5. Wartung
5.1 Reinigung
- Vor der Reinigung den Netzadapter abziehen.
- Wischen Sie die Oberfläche des Weckers mit einem weichen, trockenen oder leicht feuchten Tuch ab.amp Tuch.
- Verwenden Sie keine Scheuermittel, Lösungsmittel oder starke Chemikalien, da diese die Oberfläche beschädigen können.
5.2 Speicherung
- If storing the device for an extended period, disconnect it from power.
- An einem kühlen, trockenen Ort ohne direkte Sonneneinstrahlung und extreme Temperaturen lagern.
6. Fehlerbehebung
| Problem | Mögliche Ursache | Lösung |
|---|---|---|
| Gerät lässt sich nicht einschalten. | Kein Stromanschluss oder defekter Adapter. | Ensure the USB-C cable is securely connected and the adapter is plugged into a working outlet. Try a different outlet. |
| Bluetooth-Verbindung wird nicht hergestellt. | Device not in pairing mode; already connected to another device; mobile device Bluetooth off. | Long press the Bluetooth button to enter pairing mode. Ensure no other device is connected. Turn off and on Bluetooth on your mobile device. |
| Kabelloses Laden funktioniert nicht. | Phone not Qi-compatible; phone not aligned; phone case too thick. | Ensure your device supports Qi wireless charging. Re-position the device on the center of the pad. Remove thick phone cases. |
| Alarm ertönt nicht. | Alarm deactivated; volume too low (for Bluetooth alarm). | Check if the alarm icon is displayed. Ensure the alarm time is set correctly. If using Bluetooth audio for alarm, ensure phone volume is adequate. |
7. Spezifikationen
| Besonderheit | Detail |
|---|---|
| Marke | Karlsson |
| Modellnummer | KA6033GY |
| Farbe | Grau |
| Material | Kunststoff (ABS) |
| Abmessungen (L x B x H) | 19.8 x 9.8 x 7 cm (7.8 x 3.86 x 2.76 Zoll) |
| Gewicht | 0.46 kg |
| Leistungsaufnahme | USB (Adapter included) |
| Kabelloses Laden | Induction (Qi-compatible) |
| Konnektivität | Bluetooth |
8. Garantie und Support
For warranty information and customer support, please refer to the documentation provided with your purchase or contact your retailer. You may also visit the official Karlsson webWebsite für weitere Unterstützung.
WebWebsite: Karlsson Official Store