
1. Einleitung
This manual provides detailed instructions for the installation, operation, and maintenance of your GIGABYTE B550M DS3H AC R2 motherboard. This micro-ATX motherboard is designed to support AMD Ryzen 5000, 4000, and 3000 series CPUs on the AM4 socket, offering a robust platform for various computing needs. Please read this manual thoroughly before beginning installation to ensure proper setup and functionality.
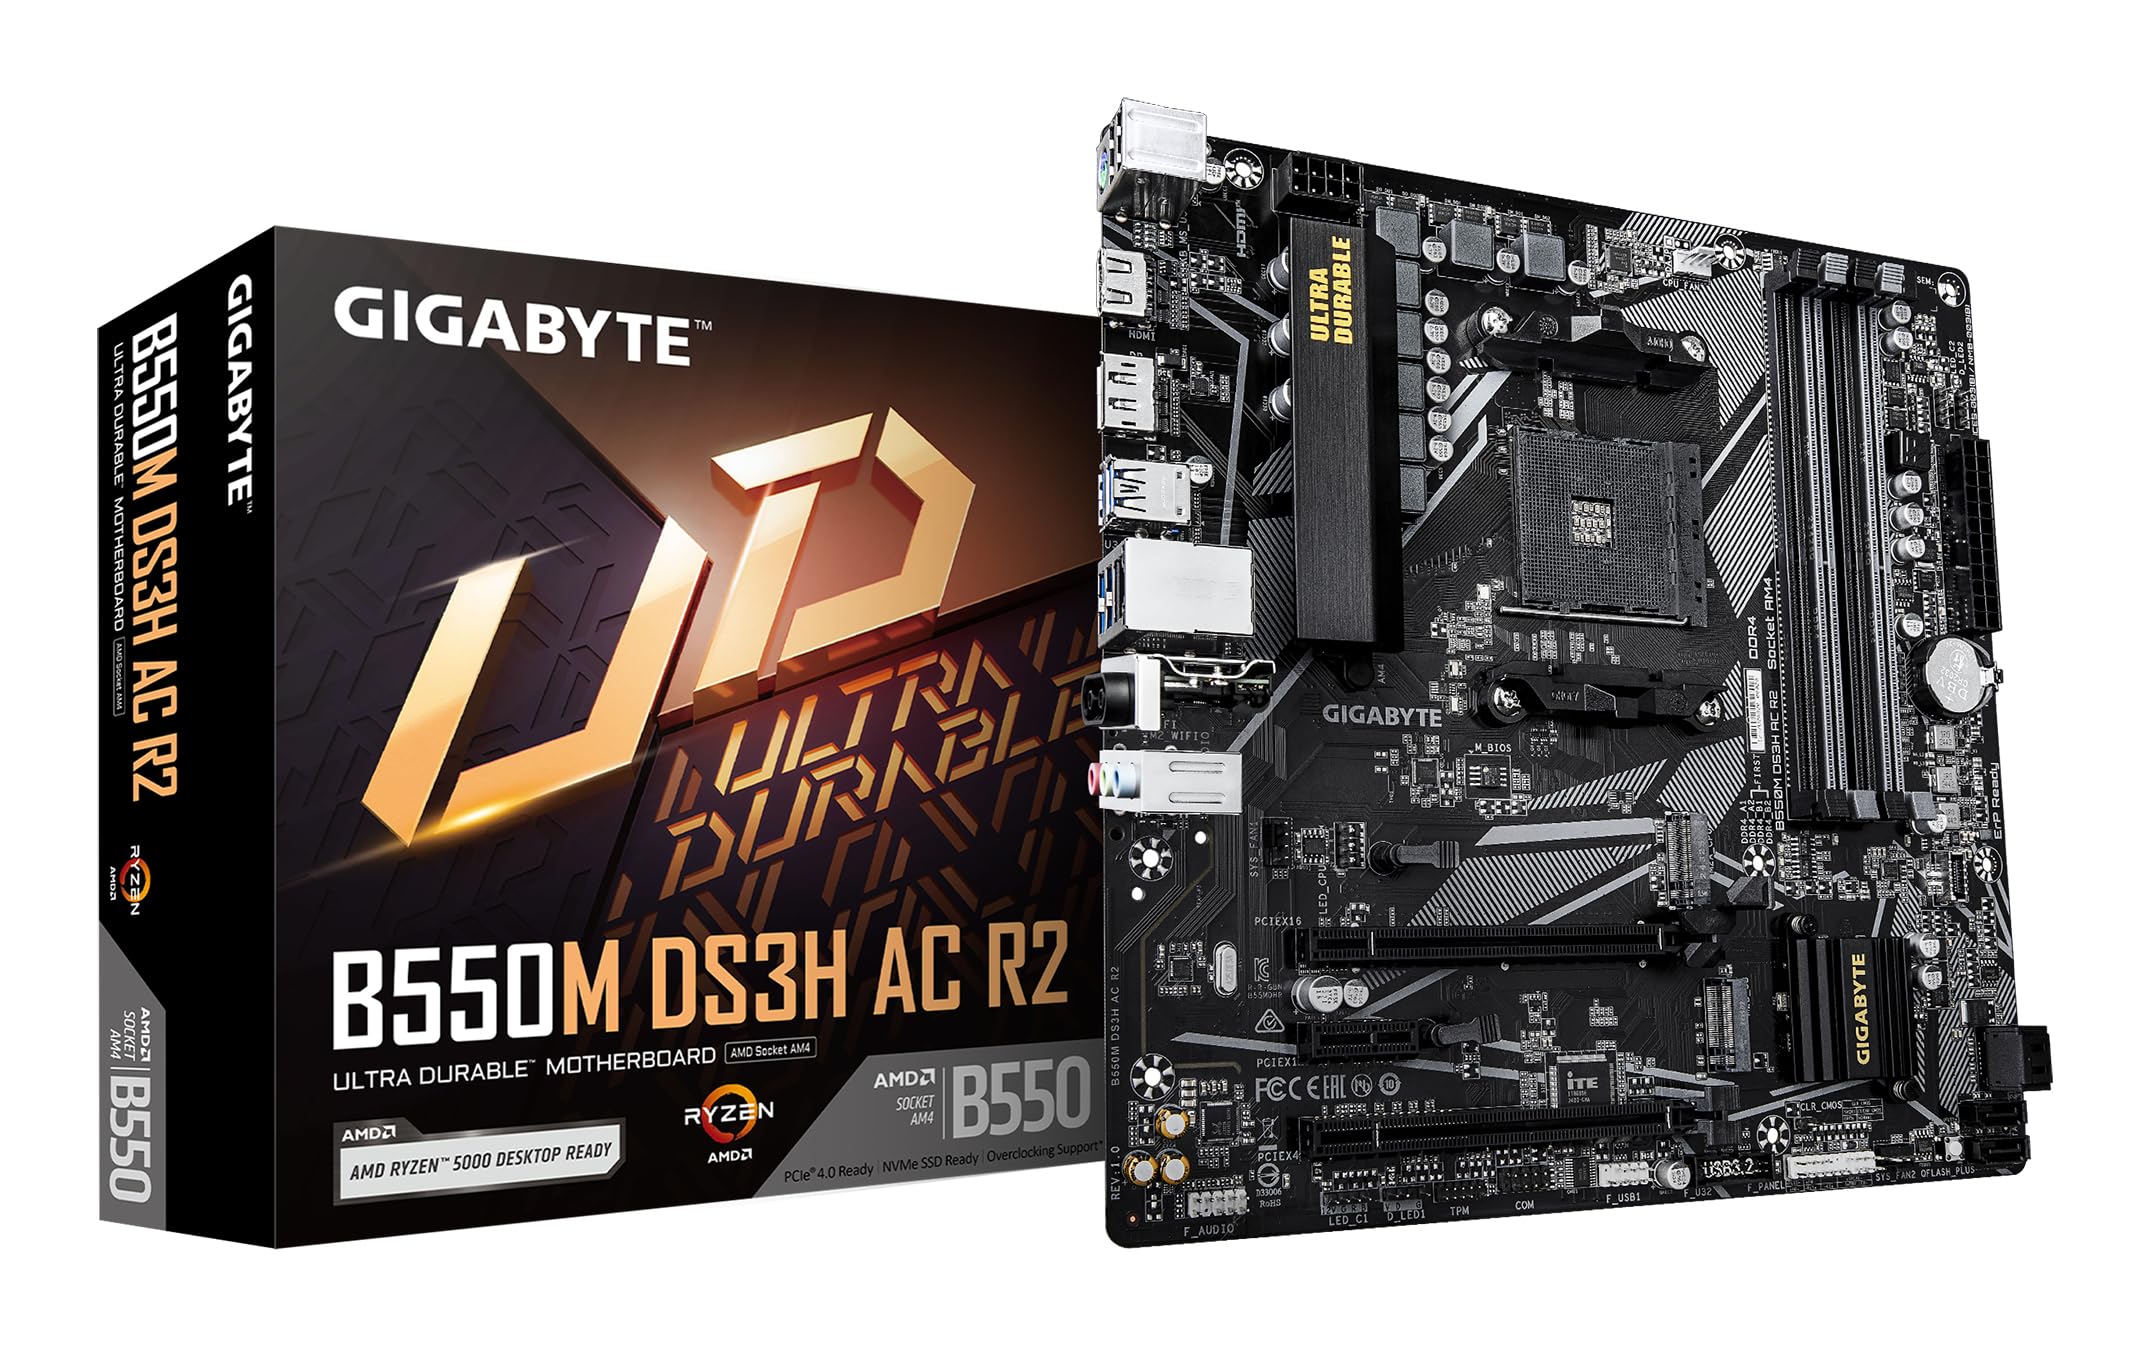
Abbildung 1.1: Draufsicht view of the GIGABYTE B550M DS3H AC R2 Motherboard, showcasing its layout including the CPU socket, DIMM slots, and various connectors.
2. Hauptmerkmale
- AMD B550-Chipsatz: Supports AMD Ryzen 5000, 4000, and 3000 series CPUs with AM4 socket.
- High-Speed DDR4 Memory: Dual-channel support for up to 4733MHz (O.C.) across 4 DIMM slots.
- Advanced Storage Options: Includes one PCIe 4.0 M.2 slot and one PCIe 3.0 M.2 slot, alongside PCIe slots for graphics and expansion.
- Integrierte Konnektivität: Features Wi-Fi 5, Bluetooth 5.0, and 1GbE LAN for reliable network connections.
- Flexible Display Outputs: Equipped with HDMI and DisplayPort for multi-monitor configurations.
- Intelligentes Kühlsystem: Smart Fan 6 with multiple temperature sensors ensures efficient thermal management.
- Q-Flash Plus: Allows BIOS updates without the need for CPU, memory, or graphics card installation.
3. Einrichtung und Installation
3.1 CPU-Installation
- Stellen Sie sicher, dass sich der Hebel des CPU-Sockels in der offenen Position befindet.
- Carefully align the triangular mark on the AMD Ryzen CPU with the mark on the AM4 socket.
- Setzen Sie die CPU vorsichtig in den Sockel ein, ohne sie mit Gewalt einzusetzen.
- Senken Sie den Hebel, um die CPU zu sichern.
- Installieren Sie den CPU-Kühler gemäß den Anweisungen des Herstellers.
3.2 Installation des Arbeitsspeichers (RAM)
- Öffnen Sie die Klemmen an beiden Enden der DIMM-Steckplätze.
- Richten Sie die Kerbe am DDR4-Speichermodul an der entsprechenden Aussparung im DIMM-Steckplatz aus.
- Insert the memory module firmly until the clips snap into place. For dual-channel operation, refer to the motherboard manual for recommended slot configurations.
3.3 Installation des Speichergeräts
This motherboard supports both M.2 NVMe SSDs and SATA drives.
- M.2-SSD: Locate the M.2 slots (one PCIe 4.0, one PCIe 3.0). Insert the M.2 SSD at an angle and secure it with the provided screw.
- SATA-Laufwerke: Verbinden Sie die SATA-Datenkabel Ihrer SSDs/HDDs mit den SATA-Anschlüssen auf dem Mainboard. Verbinden Sie die Stromkabel Ihres Netzteils mit den Laufwerken.
3.4 Installation der Erweiterungskarte
Install your graphics card or other PCIe expansion cards into the appropriate PCIe slots. Ensure they are seated firmly and secured with the case screw.
3.5 Stromanschlüsse
- Verbinden Sie den 24-poligen ATX-Hauptstromanschluss Ihres Netzteils mit dem Motherboard.
- Verbinden Sie den 8-poligen ATX 12V CPU-Stromanschluss mit dem Motherboard.
3.6 Rückseitiges I/O-Panel (oben)view

Figure 3.1: The rear I/O panel of the GIGABYTE B550M DS3H AC R2 motherboard, showing various ports including USB, HDMI, DisplayPort, LAN, and audio jacks.
The rear I/O panel provides connectivity for external devices. It includes USB 2.0, USB 3.2 Gen 1, HDMI, DisplayPort, 1GbE LAN, Wi-Fi antenna connectors, and audio jacks. Refer to the detailed diagram in the physical manual for specific port identification.
4. Bedienungsanleitung
4.1 BIOS-Setup
The BIOS (Basic Input/Output System) is firmware that initializes hardware during the booting process. To enter BIOS Setup, press the DEL key during the Power-On Self-Test (POST). Here you can configure system settings, boot order, and monitor hardware status.
4.2 Q-Flash Plus
Mit Q-Flash Plus können Sie das BIOS aktualisieren, ohne CPU, Arbeitsspeicher oder Grafikkarte einzubauen. Laden Sie einfach das neueste BIOS herunter. file von GIGABYTE website, rename it to GIGABYTE.bin, save it to a USB flash drive, and insert it into the designated Q-Flash Plus USB port. Press the Q-Flash Plus button to initiate the update.
4.3 Treiberinstallation
After installing your operating system, install the necessary drivers for the motherboard chipset, audio, LAN, Wi-Fi, and other integrated components. These drivers are typically provided on a support DVD or can be downloaded from the official GIGABYTE webWebsite.
5. Wartung
5.1 Reinigung
Reinigen Sie das Innere Ihres Computers regelmäßig, um Staubansammlungen zu vermeiden, die zu Überhitzung und Leistungseinbußen führen können. Verwenden Sie Druckluft, um Staub von den Komponenten, insbesondere von Kühlkörpern und Lüftern, zu entfernen. Stellen Sie sicher, dass das System ausgeschaltet und vom Stromnetz getrennt ist, bevor Sie mit der Reinigung beginnen.
5.2 BIOS-Updates
Überprüfen Sie regelmäßig den GIGABYTE website for BIOS updates. Updates can improve system stability, add support for new hardware, or fix known issues. Follow the instructions provided by GIGABYTE carefully when performing a BIOS update.
5.3 Intelligenter Ventilator 6
Utilize the Smart Fan 6 utility in the BIOS or GIGABYTE's software to monitor system temperatures and adjust fan speeds. Proper fan configuration helps maintain optimal operating temperatures and extends component lifespan.
6. Fehlerbehebung
- System startet nicht: Check all power connections (24-pin ATX, 8-pin CPU), ensure RAM modules are properly seated, and verify the CPU is correctly installed. Try clearing the CMOS.
- Keine Anzeigeausgabe: Confirm the graphics card is fully seated in its PCIe slot and connected to power (if required). Ensure your monitor cable is connected to the graphics card, not the motherboard's integrated graphics ports (unless using an APU).
- Periphere Probleme: If USB devices or other peripherals are not working, ensure drivers are installed and check BIOS settings for port enablement.
- Systeminstabilität/Abstürze: This can be caused by outdated drivers, overheating, or faulty hardware. Update drivers, monitor temperatures, and test components individually if possible.
- BIOS-Update fehlgeschlagen: If a BIOS update fails, use the Q-Flash Plus feature to recover the BIOS.
7. Spezifikationen
| Besonderheit | Spezifikation |
|---|---|
| Marke | GIGABYTE |
| Modellname | B550M DS3H AC R2 |
| CPU-Sockel | Sockel AM4 |
| Kompatible Prozessoren | AMD Ryzen 3000-Serie, AMD Ryzen 4000-Serie, AMD Ryzen 5000-Serie |
| Chipsatztyp | AMD B550 |
| RAM-Speichertechnologie | DDR4 |
| Speichertaktfrequenz | Bis zu 4733 MHz (OC) |
| Verfügbare Speichersteckplätze | 4 |
| Maximale Größe des RAM-Speichers | 128 GB |
| Grafikkartenschnittstelle | PCI Express 4.0 |
| Total PCIe Ports | 1 (PCIe 4.0 x16 for GPU) + other PCIe slots |
| M.2-Steckplätze | 1x PCIe 4.0 M.2, 1x PCIe 3.0 M.2 |
| Total SATA Ports | 4 |
| Kabellose Konnektivität | Wi-Fi 5, Bluetooth 5.0 |
| LAN | 1-GbE-LAN |
| Anzahl USB-Anschlüsse | 6 (Rear I/O) + Internal Headers |
| Anzeigeausgänge | 1x HDMI, 1x DisplayPort |
| Formfaktor | Micro ATX |
| Artikelabmessungen L x B x H | 24.4L x 24.4B x 3.5H Zentimeter |
| Artikelgewicht | 980 Gramm |
8. Garantieinformationen
The GIGABYTE B550M DS3H AC R2 motherboard comes with a 3-YEAR Manufacturer Warranty. Please retain your proof of purchase for warranty claims. For detailed terms and conditions, refer to the official GIGABYTE warranty policy available on their webWebsite.
9. Unterstützung und Kontakt
Technischen Support, Treiber-Downloads, BIOS-Updates und weitere Produktinformationen finden Sie auf der offiziellen GIGABYTE-Website. website. You can also contact GIGABYTE customer service for assistance.
Kontaktdaten des Herstellers:
GIGABYTE Technology (India) Pvt. Ltd.
Unit No. 807 & 808, 8th Floor, Naman Midtown B-Wing,
Elphinstone Road, Mumbai – 400013, India
For the most up-to-date contact details and support resources, please refer to the GIGABYTE official webWebsite: www.gigabyte.com