
1. Einleitung
Thank you for choosing the Gevi Electric Burr Coffee Grinder. This manual provides essential information for the safe and efficient operation, maintenance, and troubleshooting of your new appliance. Please read it thoroughly before first use and keep it for future reference.
2. Wichtige Sicherheitshinweise
- Lesen Sie vor der Verwendung des Geräts alle Anweisungen.
- Tauchen Sie das Gerät, das Kabel oder den Stecker nicht in Wasser oder andere Flüssigkeiten.
- Ziehen Sie den Stecker aus der Steckdose, wenn Sie das Gerät nicht verwenden, bevor Sie Teile anbringen oder abnehmen und bevor Sie es reinigen.
- Vermeiden Sie den Kontakt mit beweglichen Teilen.
- Betreiben Sie kein Gerät mit beschädigtem Kabel oder Stecker oder nachdem das Gerät nicht richtig funktioniert oder fallen gelassen oder in irgendeiner Weise beschädigt wurde.
- Die Verwendung von Zubehör, das vom Hersteller nicht empfohlen oder verkauft wird, kann zu Bränden, Stromschlägen oder Verletzungen führen.
- Nicht im Freien verwenden.
- Lassen Sie das Kabel nicht über die Tisch- oder Thekenkante hängen oder heiße Oberflächen berühren.
- Überprüfen Sie den Bohnenbehälter vor der Verwendung auf das Vorhandensein von Fremdkörpern.
- Dieses Gerät ist nur für den Hausgebrauch bestimmt.
3. Produktüberschreitungview
The Gevi Electric Burr Coffee Grinder is designed for precision grinding, offering 35 settings for various brewing methods. It features a digital display for easy control and an anti-static design for mess-free operation.

Figure 1: Gevi Electric Burr Coffee Grinder with its main components visible.
Komponenten:
- Bean Hopper (8.5 oz capacity)
- Oberer Grat
- Grinds Container (4.6 oz capacity)
- Digital Control Panel (Cup Selection, Time Selection, Start/Stop)
- Portafilter Cradle (compatible with 51mm and 58mm portafilters)
- Reinigungsbürste
- Kaffeelöffel
4. Einrichtung
- Den Grinder auspacken: Entfernen Sie sorgfältig sämtliches Verpackungsmaterial und vergewissern Sie sich, dass alle Komponenten vorhanden sind.
- Saubere Komponenten: Wash the bean hopper, grinds container, and lids with warm, soapy water. Rinse thoroughly and dry completely before assembly.
- Bean Hopper installieren: Place the bean hopper onto the top of the grinder base. Rotate it clockwise until it locks securely into place.
- Kaffeebohnen hinzufügen: Fill the bean hopper with your desired amount of whole coffee beans. Do not overfill.
- Sicherer Deckel: Place the bean hopper lid firmly on top of the bean hopper.

Figure 2: Filling the bean hopper with coffee beans.
5. Bedienung
5.1 Auswahl der Mahlgradeinstellungen
The Gevi grinder offers 35 precise grind settings, allowing you to customize your coffee for various brewing methods. Rotate the bean hopper to adjust the grind size:
- Settings 1-10 (Espresso): For very fine grounds suitable for espresso machines.
- Settings 11-25 (Drip/Pour Over): For medium grounds ideal for drip coffee makers and pour-over brewing.
- Settings 26-35 (French Press): For coarse grounds best for French press and cold brew methods.

Figure 3: Grind setting dial on the bean hopper.
Video 1: Demonstrating the Gevi Integrated Burr Coffee Grinder with its 35 grind settings.
5.2 Digitales Bedienfeld
The digital display and control buttons allow for precise control over the grinding process.
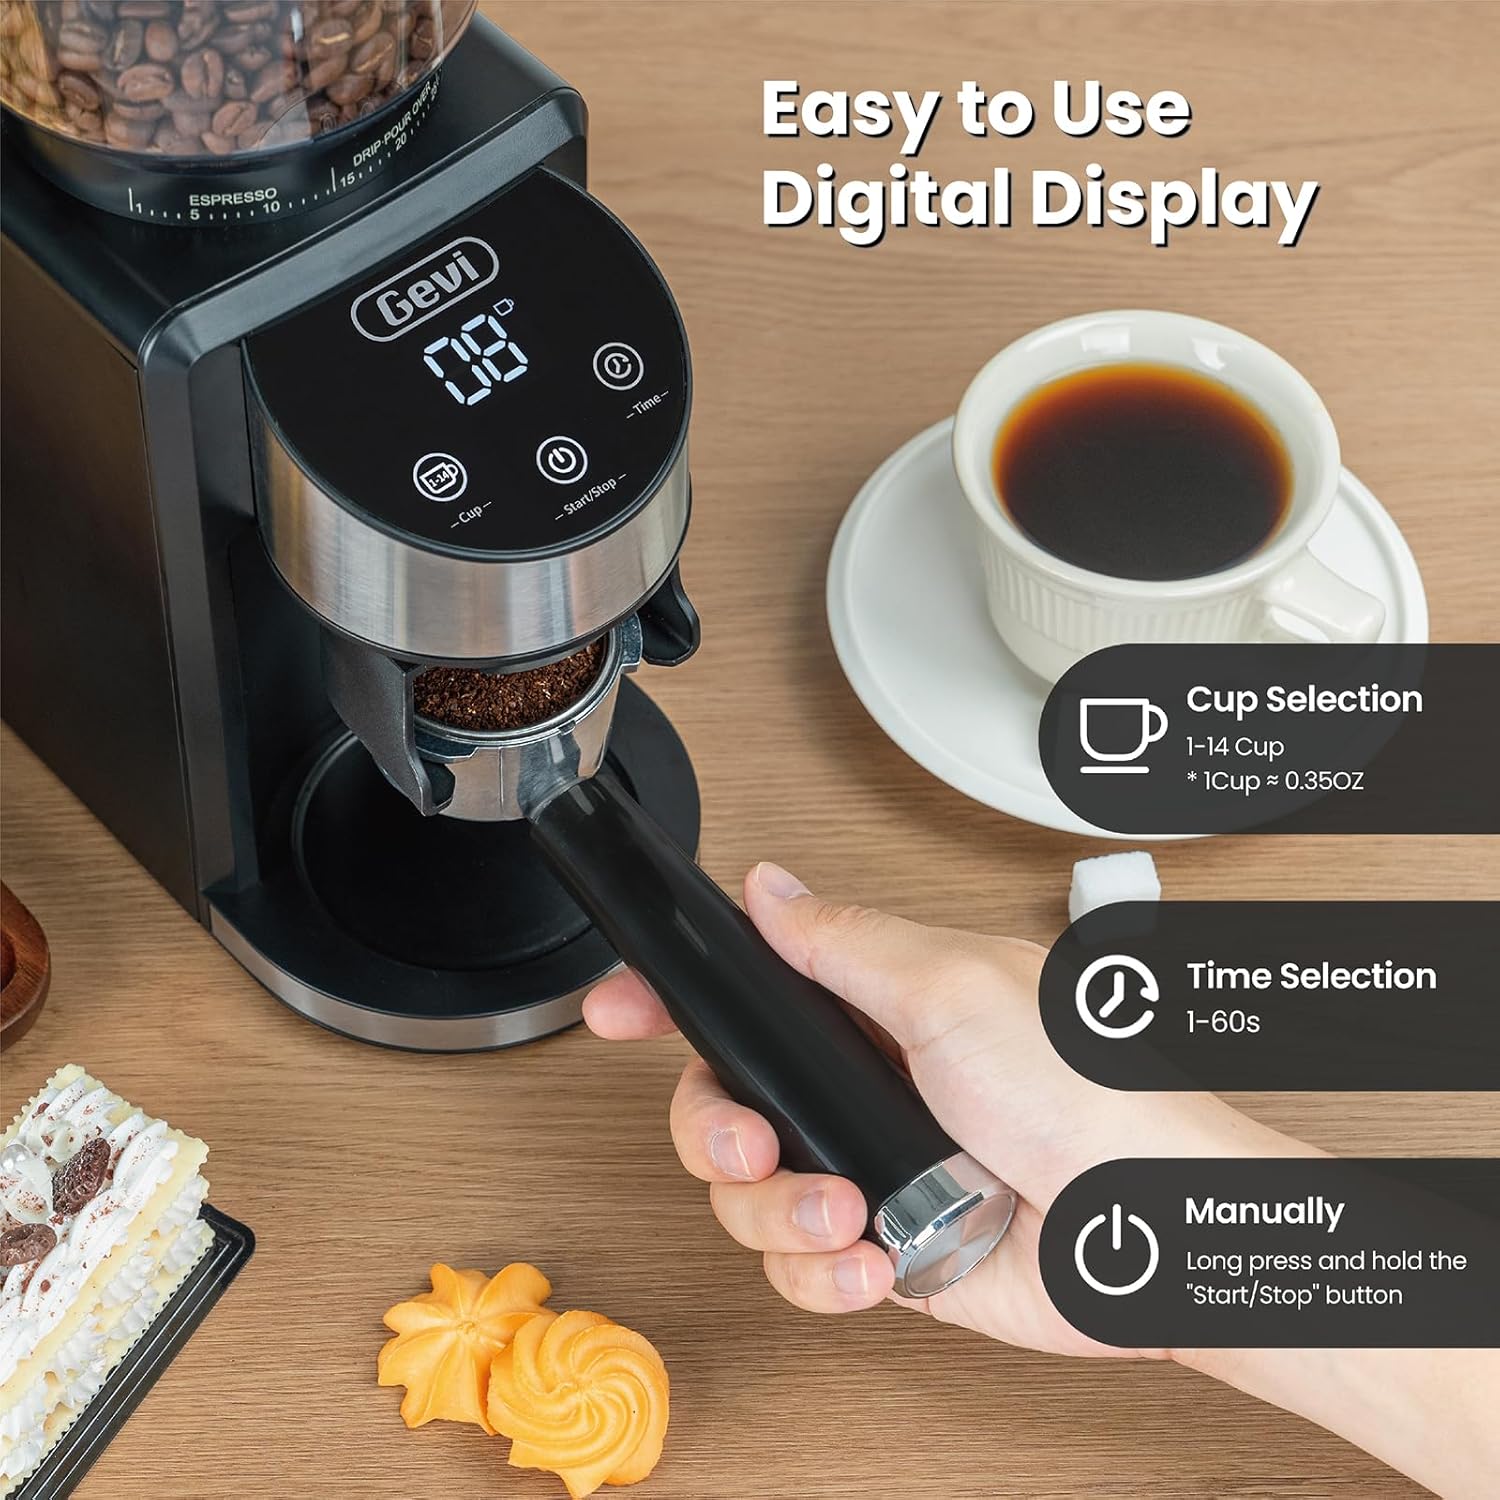
Figure 4: Digital control panel for cup and time selection.
- Cup Selection (1-14 cups): Press the 'Cup' button to select the desired number of cups. The grinder will automatically grind the appropriate amount of coffee.
- Time Selection (1-60 seconds): Press the 'Time' button to set the grinding duration in seconds. This allows for precise control over the amount of coffee ground.
- Start/Stopp: Press the 'Start/Stop' button to begin or end the grinding process. You can also long-press this button for manual grinding.
5.3 Using the Portafilter Cradle
The grinder includes a portafilter cradle for direct grinding into your espresso machine's portafilter.

Figure 5: Portafilter cradle for direct grinding.
- Select the appropriate portafilter cradle (51mm or 58mm) for your portafilter.
- Setzen Sie Ihren Siebträger in die Halterung ein.
- Place the portafilter with cradle under the grinding chute.
- Select your desired grind setting and cup/time, then press Start/Stop to begin grinding.
6. Wartung
Regular cleaning ensures optimal performance and extends the life of your grinder. The anti-static design helps minimize mess.
6.1 Tägliche Reinigung
- Den Schleifer vom Stromnetz trennen: Always ensure the grinder is unplugged before cleaning.
- Bohnenbehälter entfernen: Rotate the bean hopper counter-clockwise until it stops, then lift it off. Empty any remaining beans into an airtight container to preserve freshness.
- Oberen Grat entfernen: Lift the upper conical burr straight out from the grinding chamber.
- Grate reinigen: Verwenden Sie die mitgelieferte Reinigungsbürste, um den Kaffeesatz sowohl vom oberen als auch vom unteren Mahlwerk zu entfernen.
- Clean Grinds Container: Empty and wash the grinds container and its lid with warm, soapy water. Rinse and dry thoroughly.
- Außen abwischen: Wischen Sie die Außenseite der Mühle mit Ad abamp Tuch. Keine Scheuermittel verwenden.
- Zusammenbauen: Once all parts are dry, reassemble the grinder by reversing the removal steps.

Figure 6: Detachable upper burr for easy cleaning.

Figure 7: Anti-static design for a cleaner grinding experience.
6.2 Cleaning Clogged Coffee Grounds
If you experience clogging, particularly with oily or dark roast beans, follow these steps:
Video 2: Instructions on how to clean clogged coffee grounds from the Gevi Coffee Grinder.
- Den Schleifer vom Stromnetz trennen: Vom Strom trennen.
- Remove Bean Hopper and Upper Burr: Follow steps from Daily Cleaning.
- Clear Lower Burr: Use the cleaning brush to carefully dislodge any compacted coffee grounds around the lower burr.
- Tap the Grinder: Gently tap the back side of the grinder to help dislodge any remaining grounds from the chute into the grinds container.
- Zusammenbau und Test: Reassemble the grinder and run a small amount of beans through it to ensure proper function.
7. Fehlerbehebung
If you encounter issues with your Gevi Electric Burr Coffee Grinder, refer to the following common problems and solutions:
- Schleifmaschine schaltet sich nicht ein:
- Stellen Sie sicher, dass das Netzkabel fest an eine funktionierende Steckdose angeschlossen ist.
- Check that the bean hopper is correctly installed and locked into place. The grinder has a safety mechanism that prevents operation if the hopper is not secured.
- Verify that the lid on the bean hopper is properly closed.
- No coffee grinding or inconsistent grind:
- Check if the bean hopper is empty.
- Inspect the burrs for any blockages or foreign objects. Clean the burrs as described in the Maintenance section.
- Ensure the grind setting is appropriate for the type of beans and desired fineness. Very fine settings with oily beans can sometimes cause clogging.
- Die Schleifmaschine stoppt während des Betriebs:
- The grinder may have an overheating protection feature. Allow it to cool down for a period before attempting to use it again.
- Check for clogs in the grinding chamber or chute.
- Excessive static or mess:
- While the grinder has an anti-static design, some static can still occur depending on environmental conditions and bean type. Ensure the grinds container is fully inserted.
- Lightly misting beans with water before grinding can help reduce static.
8. Spezifikationen
| Besonderheit | Spezifikation |
|---|---|
| Marke | gewi |
| Modell | B0F31Z2HT7 |
| Farbe | Schwarz |
| Material | Kunststoff, Edelstahl |
| Artikelgewicht | 5.92 Pfund |
| Abmessungen (L x B x H) | 7.8 Zoll L x 4.72 Zoll B x 11.85 Zoll H |
| Kapazität des Bohnenbehälters | 8.5 Unzen (ca. 240 g) |
| Grinds Container Capacity | Ca. 130g |
| Mahleinstellungen | 35 (Espresso, Drip, French Press) |
| Tassenauswahl | 1-14 Tassen |
| Zeitauswahl | 1-60 Sekunden |
| Wastage | 200 Watt |
| Bandtage | 120 Volt |
| UPC | 767791886878 |
9. Garantie und Support
Gevi is committed to delivering high-quality products. For warranty information, technical support, or any inquiries regarding your Gevi Electric Burr Coffee Grinder, please refer to the warranty card included with your product or contact Gevi customer service directly. Keep your purchase receipt as proof of purchase.