
1. Einleitung
Vielen Dank für Ihren Einkauf.asing the VILTROX DC-A1 Camera Field Monitor. This 7-inch full HD touchscreen monitor is designed to enhance your video production workflow with its high brightness, versatile monitoring functions, and robust connectivity. This manual provides detailed instructions for proper setup, operation, and maintenance of your device.
2. Sicherheitshinweise
- Setzen Sie den Monitor weder Regen noch Feuchtigkeit aus, um Stromschläge oder Brände zu vermeiden.
- Do not disassemble the product. If repairs are needed, contact authorized service personnel.
- Avoid strong impacts or vibrations, which may damage internal components.
- Halten Sie den Monitor von starken Magnetfeldern fern.
- Verwenden Sie ausschließlich die dafür vorgesehenen Netzteile und Batterien.
- Reinigen Sie den Bildschirm mit einem weichen, trockenen Tuch. Vermeiden Sie die Verwendung aggressiver Chemikalien.
3. Packungsinhalt
Bitte überprüfen Sie, ob alle unten aufgeführten Artikel in Ihrem Paket enthalten sind:
- 1x VILTROX DC-A1 Camera Field Monitor
- 1x NP-F550 Battery
- 1x Sonnenschutzhaube
- 1x VL-550 Blitzschuhadapter
- 1x Standard-HDMI-Kabel
- 1x Mini-HDMI-Kabel
- 1x USB Type-C Kabel
- 1x Tragetasche
- 1x Custom Screen Protectors
- 1x Benutzerhandbuch
- 1x Verpackungsbox

Image: All components included in the VILTROX DC-A1 Camera Field Monitor package.
4. Produktüberschreitungview
4.1. Hauptmerkmale
- 7-Zoll-Full-HD-IPS-Touchscreen: 1920x1080 resolution, 170° wide viewing angle, 1000:1 contrast ratio, SRGB/REC-709 color calibration.
- 2800 Nits Ultra-Brightness: Gewährleistet klare Sicht auch bei direkter Sonneneinstrahlung.
- 4K HDMI Loop In & Out: Supports up to 4K 60Hz signals for simultaneous monitoring.
- Professional Monitoring Functions: Includes Parade waveform, Oscillogram (RGB/YUV/Y), vector graph, brightness histogram, auxiliary focus, audio column, image flip, false color, and more.
- Unterstützung für benutzerdefinierte 3D-LUTs: Import 3D LUTs via USB-A for creative color effects and monitoring with camera Log modes.
- Intuitive Touch Control & Customizable Shortcut Keys: Easy menu navigation and quick access to frequently used functions (F1-F4).
- Mehrere Stromversorgungsoptionen: Compatible with NP-F series batteries, DC IN (10-18V/2A), and Type-C (≥9V/3A).
- Quick-Released Sunshade Hood: Detachable design for improved outdoor viewing.
- Intelligente Lüfter: Efficient heat dissipation for extended operation.
4.2. Komponentenidentifikation

Image: Detailed diagram of the VILTROX DC-A1 monitor showing all ports, buttons, and features.
- Zurück/Menü-Taste
- Shortcut Key (F1-F4)
- Anzeigebildschirm
- Lüfterabluftöffnung
- USB Interface (USB-A)
- Netzschalter
- Signalanzeige
- Knob Key
- 1/4 Schraubenloch
- HDMI-Eingang
- HDMI-Ausgang
- 1/4 Schraubenloch
- Kopfhöreranschluss (3.5 mm)
- Typ-C-Anschluss
- DC Port (DC IN)
- Akku-Entriegelungstaste
- Batteriefach
- Kühllufteinlass
5. Einrichtung
5.1. Anschließen des Monitors
Use the included VL-550 Cold Shoe Adapter to mount the monitor onto your camera's hot shoe or a compatible rig. Securely tighten the adapter to prevent accidental detachment.

Image: The VILTROX DC-A1 monitor attached to a camera via the cold shoe adapter.
5.2. Den Monitor mit Strom versorgen
The DC-A1 offers multiple power options:
- NP-F-Serie Batterie: Insert a charged NP-F series battery (e.g., NP-F550, NP-F750, NP-F970) into the battery slot on the back of the monitor. Ensure it clicks into place. To remove, press the battery release button.
- DC IN: Connect a compatible DC power adapter (10-18V/2A) to the DC IN port.
- Typ-C: Connect a Type-C power source (≥9V/3A) to the Type-C port.
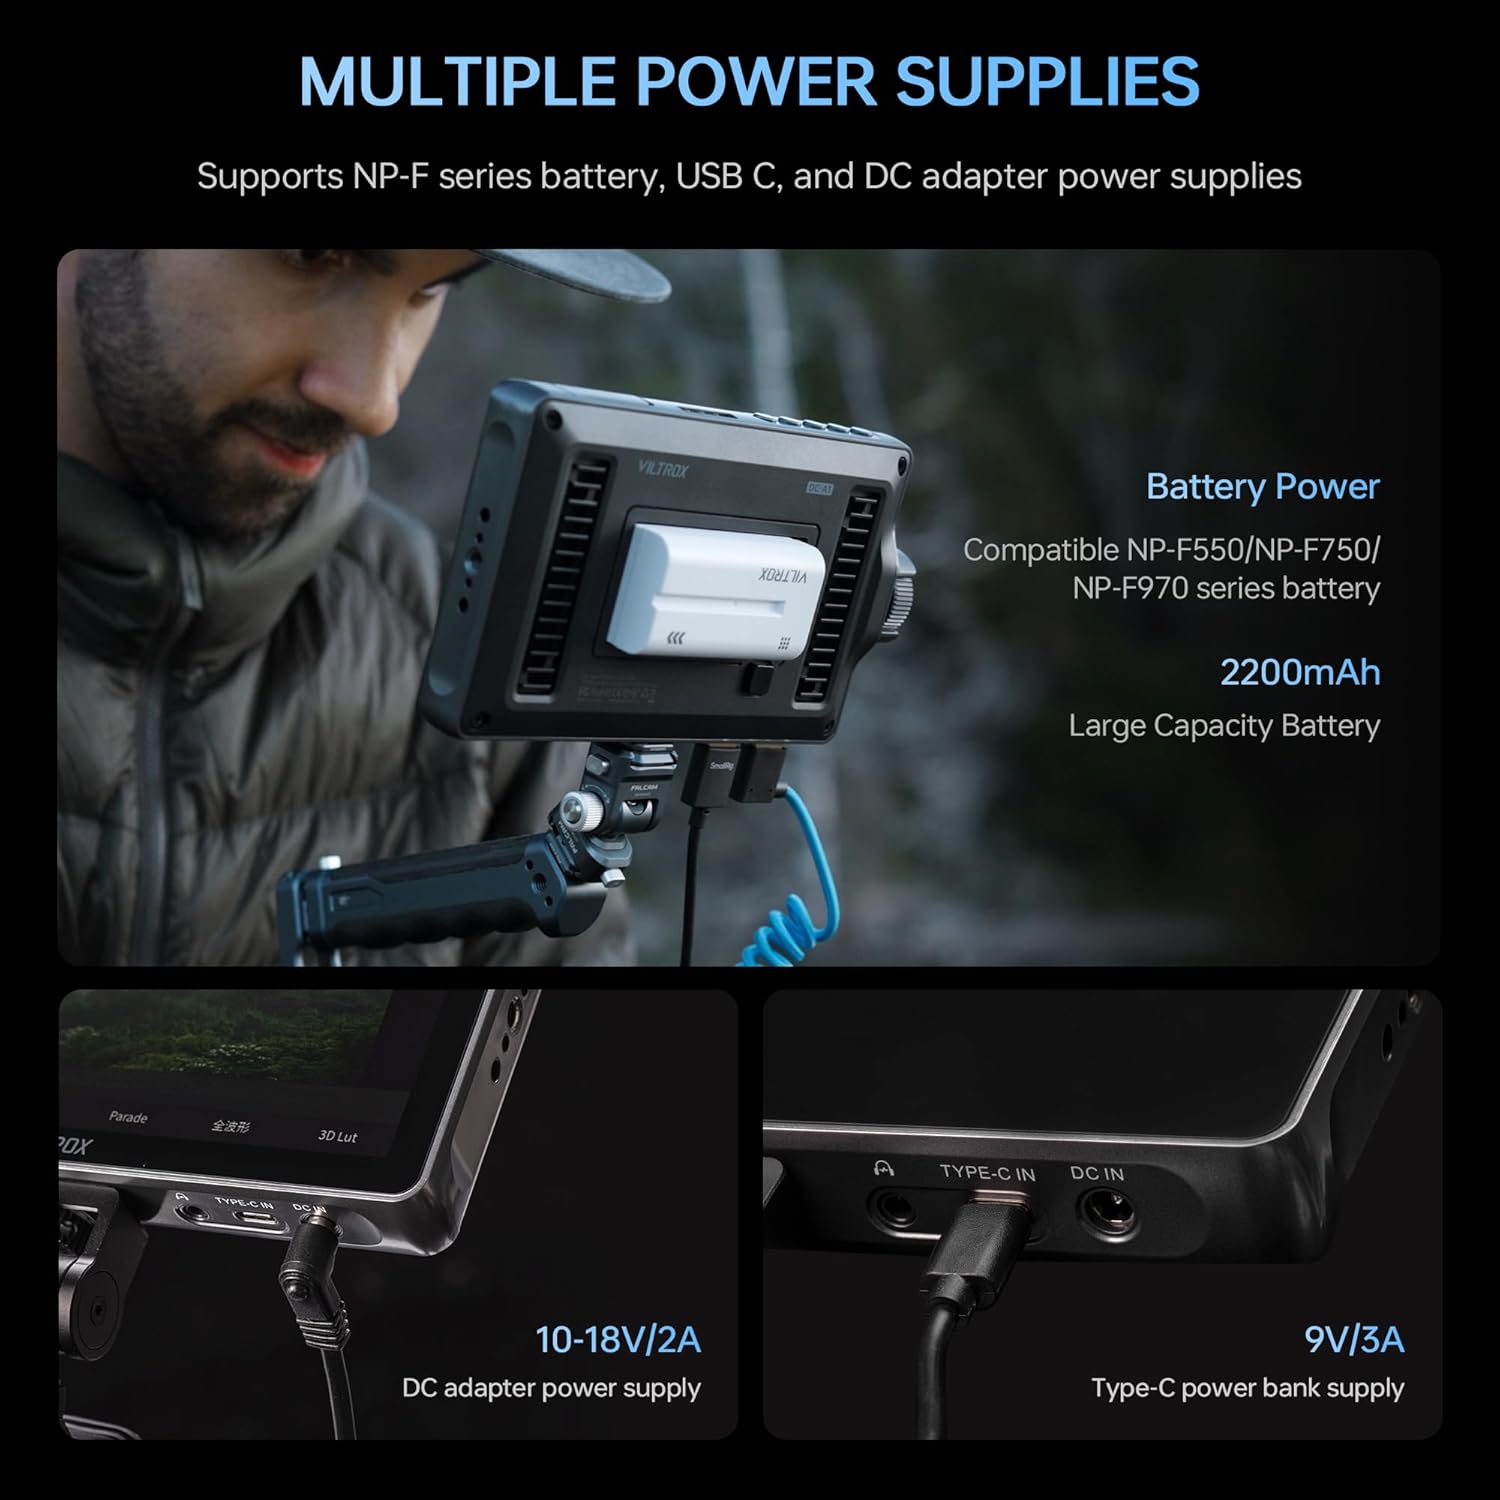
Image: The VILTROX DC-A1 monitor showing the battery slot, DC IN, and Type-C power ports.
5.3. HDMI anschließen
Connect your camera's HDMI output to the monitor's HDMI IN port using the provided HDMI or Mini HDMI cable. If you need to loop the signal to another monitor, connect a second HDMI cable from the monitor's HDMI-Ausgang Hafen.

Image: The VILTROX DC-A1 monitor connected to a camera via HDMI, demonstrating the loop-out functionality.
5.4. Attaching the Sunshade Hood
For outdoor shooting, attach the sunshade hood to the monitor to reduce glare and improve screen visibility. The hood is designed for quick attachment and removal.

Image: The VILTROX DC-A1 monitor with the sunshade hood attached, enhancing outdoor viewing.
6. Bedienungsanleitung
6.1. Ein-/Ausschalten
Halten Sie die Netzschalter (6) to turn the monitor on or off. The signal indicator (7) will illuminate when the monitor is powered on.
6.2. Basic Touch Control
The DC-A1 features an intuitive touchscreen interface. Tap or swipe gestures can be used to navigate menus and adjust settings. Double-tap the screen to quickly access the main menu.

Image: A hand interacting with the VILTROX DC-A1 touchscreen to adjust settings.
6.3. Using the Knob Key and Shortcut Buttons
Der Knob Key (8) can be rotated to adjust values and pressed to confirm selections. The four customizable Tastenkombinationen (2) (F1-F4) allow for quick access to your preferred monitoring functions. These can be configured in the system settings.
6.4. Professional Monitoring Functions
Access various professional tools through the menu:
- Waveform/Oscillogram: Provides detailed exposure and color information.
- Vektorgraph: Zeigt Farbsättigung und Farbton an.
- Helligkeitshistogramm: Shows the distribution of brightness levels.
- Hilfsfokus (Peaking): Hebt die wichtigsten Fokusbereiche für präzises Fokussieren hervor.
- Falsche Farbe: Helps evaluate exposure levels by displaying different colors for different luminance values.
- Bild Flip: Adjusts image orientation for various mounting setups.
- Audio-Kolumne: Monitors audio input levels.

Image: The VILTROX DC-A1 monitor displaying various monitoring functions like waveform, vector scope, and histogram.
6.5. 3D LUT Application
To import custom 3D LUTs:
- Speichern Sie Ihre .cube-LUT files auf ein USB-Laufwerk.
- Connect the USB drive to the monitor's USB-Schnittstelle (5).
- Navigate to the 3D LUT menu option and select "Import".
- Choose the desired LUT file from the USB drive to load it onto the monitor.
Once imported, you can apply these LUTs to preview different color grades or convert Log footage zu Rec.709 für genaue Überwachung.

Image: The VILTROX DC-A1 monitor with a USB drive connected, demonstrating the 3D LUT import process.
7. Wartung
- Reinigung: Use a soft, lint-free cloth to clean the monitor screen and body. For stubborn smudges, slightly dampen the cloth with water or a screen-safe cleaning solution. Avoid abrasive materials or solvents.
- Lagerung: When not in use, store the monitor in its carry case in a cool, dry place away from direct sunlight and extreme temperatures.
- Batteriepflege: If using NP-F batteries, ensure they are charged regularly and stored properly to prolong their lifespan. Remove batteries if the monitor will not be used for an extended period.
- Firmware-Updates: Check the VILTROX official website periodically for firmware updates. Updates can be installed via the USB-A port.
8. Fehlerbehebung
| Problem | Mögliche Ursache | Lösung |
|---|---|---|
| Der Monitor lässt sich nicht einschalten. | Battery is low or not inserted correctly; power cable is loose or faulty. | Ensure battery is charged and properly seated. Check power cable connections or try a different power source. |
| Kein Videosignal. | HDMI cable is loose or faulty; camera output settings are incorrect; monitor input is not selected. | Verify HDMI cable connection. Check camera's HDMI output settings. Ensure the correct input source is selected on the monitor. |
| Der Bildschirm ist zu dunkel/zu hell. | Brightness settings are incorrect. | Adjust brightness settings via the touchscreen menu or knob. |
| Der Touchscreen reagiert nicht. | Vorübergehender Softwarefehler; Störung durch Displayschutzfolie. | Restart the monitor. Ensure screen protector is applied correctly or remove it to test. |
9. Spezifikationen
| Besonderheit | Detail |
|---|---|
| Modellname | DC-A1 |
| Bildschirmgröße | 7 Zoll |
| Auflösung | 1920x1080 (Full HD) |
| Helligkeit | 2800 Nits (cd/m²) |
| Kontrastverhältnis | 1000:1 |
| Viewing-Winkel | 170° (IPS) |
| HDMI-Eingang/Ausgang | HDMI 2.0 (Supports up to 4K 60Hz) |
| Audioausgang | 3.5-mm-Kopfhörerbuchse |
| Leistungsaufnahme | NP-F Battery, DC IN (10-18V/2A), Type-C (≥9V/3A) |
| Abmessungen (T x B x H) | 1.12"T x 7.4"B x 4.3"H |
| Artikelgewicht | 12.2 Unzen (ca. 346 g) |
| Kompatible Geräte | DSLR Kameras |
10. Garantie und Support
The VILTROX DC-A1 Camera Field Monitor comes with a 1 Jahr Herstellergarantie ab Kaufdatum. Diese Garantie deckt Material- und Verarbeitungsfehler bei normalem Gebrauch ab.
Von der Garantie ausgeschlossen sind:
- Schäden, die durch Missbrauch, Unfall, Modifikation oder nicht autorisierte Reparatur verursacht wurden.
- Normale Abnutzung.
- Damage from external causes such as drops, liquid exposure, or power surges.
For warranty claims, technical support, or service inquiries, please contact VILTROX customer support through their official website or the retailer where you purchased the product. Please have your proof of purchase and product model number (DC-A1) ready.
11. Produktvideos
VILTROX DC-A1 7" Camera DSLR Field Monitor Overview
Video: Ein überview of the VILTROX DC-A1 7-inch Camera DSLR Field Monitor, showcasing its features and use cases. This video highlights the monitor's design, connectivity, and various functions in a practical setting.
VILTROX DC-A1 2800Nits Camera Field Monitor Features
Video: A detailed look at the VILTROX DC-A1 2800Nits Camera Field Monitor, focusing on its high brightness, touch controls, 4K HDMI capabilities, and professional monitoring tools like 3D LUTs and waveforms.