E-ACE DMMRUTXB
E-ACE 4.3-Inch Dual Lens Car DVR Rearview Spiegel Dashcam Benutzerhandbuch
Model: DMMRUTXB
1. Produktüberschreitungview
The E-ACE 4.3-inch Dual Lens Car DVR Rearview Mirror Dash Cam is designed to enhance driving safety by providing comprehensive video recording of your journeys. This device integrates a front-facing camera and supports an optional rear-facing camera, offering a wide field of view and continuous recording capabilities. Its sleek design replaces your existing rearview mirror, providing a discreet and integrated solution for vehicle surveillance.
Key features include a 4.3-inch high-definition display, dual-lens recording, night vision, loop recording, and a G-sensor for automatic incident detection.

Image: The E-ACE rearview mirror dash cam displaying both front and rear camera feeds on its integrated screen.
2. Packungsinhalt
Bitte prüfen Sie das Paket auf folgende Artikel:
- E-ACE Rearview Spiegel-Dashcam-Einheit
- Autoladegerät
- Fixed Bandages (for mounting)
- Bedienungsanleitung
- Kartenleser
- Optional: Hinten View Camera + Cable (6M or 10M, depending on variant)
- Optional: Buck Line (for parking monitoring power)
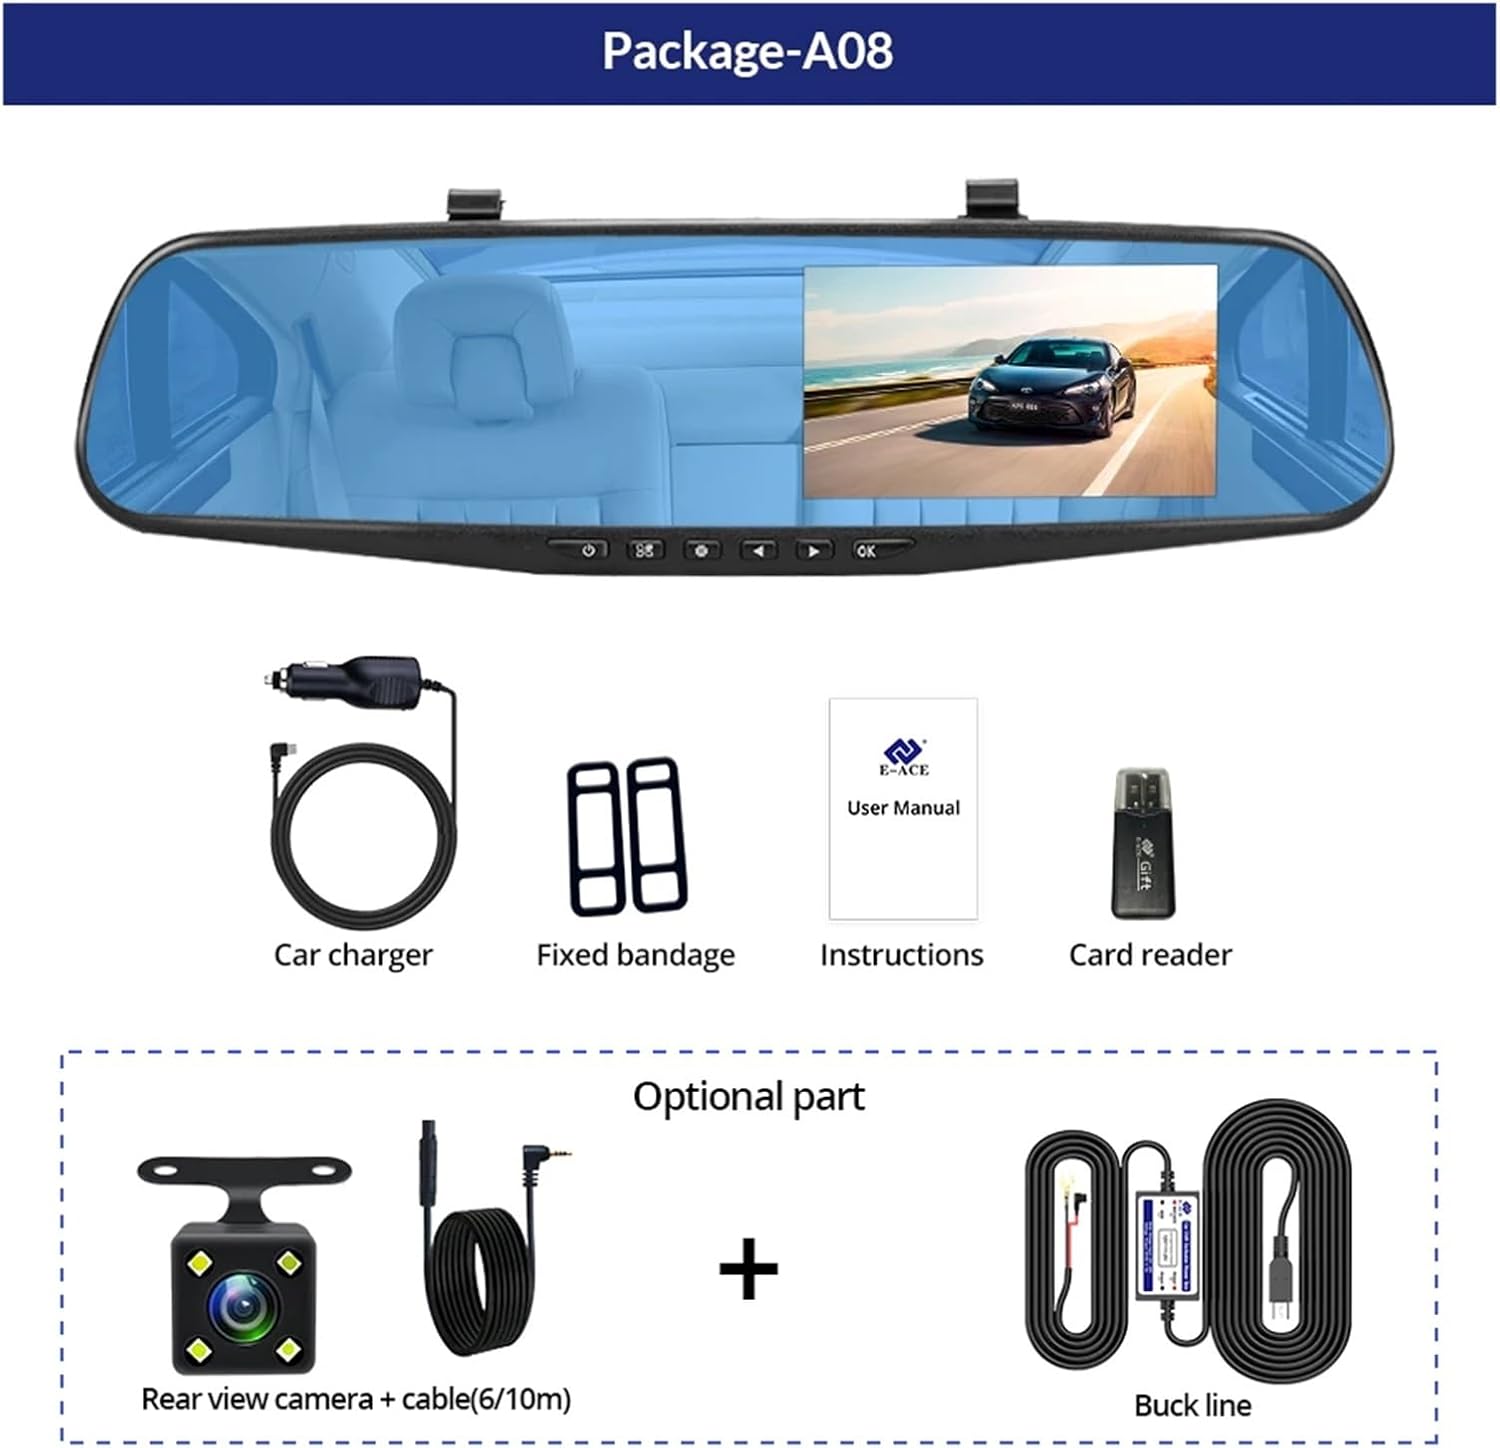
Image: A visual representation of the items included in the E-ACE dash cam package, showing the main unit and accessories.
3. Produktmerkmale
- 4.3-inch High-Definition Display: Provides clear visibility for real-time monitoring and playback.
- Doppellinsen-Design: Captures both front and rear footage simultaneously for comprehensive coverage.
- Built-in Night Vision Technology: Ensures clear recordings in low-light conditions.
- Benutzerfreundliche Installation: Sleek rearview mirror design integrates seamlessly into your vehicle.
- Loop-Aufnahme: Überschreibt automatisch die ältesten Lebensmittel.tage, wenn die Speicherkarte voll ist, um eine kontinuierliche Aufnahme zu gewährleisten.
- G-Sensor Feature: Detects sudden movements or impacts and automatically locks the current video file um ein Überschreiben zu verhindern.
- Parküberwachung: Records video when motion or impact is detected while the vehicle is parked (requires buck line connection).
- 170-Grad-Weitwinkel: Bietet ein breites view der vor uns liegenden Straße.
- Umgekehrtes Bild: Zeigt das Bild der Rückkamera an view mit Parkhinweisen beim Rückwärtsfahren.

Image: An illustration highlighting the various functional features of the E-ACE dash cam.
4. Komponentenidentifikation
Familiarize yourself with the various parts and controls of your E-ACE dash cam:

Image: A detailed diagram identifying the buttons, ports, and features on the E-ACE dash cam unit.
- EIN/AUS-Taste: Schaltet das Gerät ein oder aus.
- Menü-Schaltfläche: Greift auf Einstellungen und Optionen zu.
- Modus-Taste: Switches between video recording, photo, and playback modes.
- AUF-Taste: Navigates up in menus or adjusts settings.
- Abwärtstaste: Navigates down in menus or adjusts settings.
- OK-Taste: Bestätigt die Auswahl oder startet/stoppt die Aufnahme.
- TF-Karten-Slot: Insert your MicroSD (TF) card here.
- AV-IN-Anschluss: Verbindet die Rückkamera.
- USB-Anschluss: Zur Stromversorgung und Datenübertragung.
- Reset-Taste: Resets the device to factory settings (use a thin pin).
- Mikrofon: Records audio inside the vehicle.
5. Einrichtung und Installation
5.1 Einsetzen der Speicherkarte
Before installation, insert a high-speed MicroSD (TF) card (Class 10 or higher, up to 64GB recommended) into the TF Card Slot (7) with the contacts facing the screen. Ensure the card is inserted correctly until it clicks into place.
5.2 Montage der Dashcam
- Attach the fixed bandages to the back of the dash cam unit.
- Securely strap the dash cam over your vehicle's existing rearview mirror using the fixed bandages. Ensure it is centered and stable.
5.3 Stromversorgung anschließen
- Connect the car charger to the USB Port (9) on the dash cam.
- Stecken Sie das andere Ende des Autoladegeräts in die Zigarettenanzünderbuchse Ihres Fahrzeugs.
- Verlegen Sie das Stromkabel ordentlich entlang der Windschutzscheibenverkleidung, um Ihre Sicht nicht zu behindern. view.
5.4 Einbau der Rückfahrkamera (optional)
- Connect the rear camera cable to the AV-IN Port (8) on the dash cam.
- Route the rear camera cable from the dash cam to the rear of your vehicle. This typically involves tucking the cable under the headliner and along the side pillars.
- Mount the rear camera on the rear windshield or near the license plate using its adhesive or screws. Ensure it has a clear view der Straße dahinter.
- If using the reverse image function, connect the red wire from the rear camera cable to your vehicle's reverse light power supply.
6. Bedienungsanleitung
6.1 Ein-/Ausschalten
- Automatisch: The dash cam will automatically power on and start recording when your vehicle's ignition is turned on (if connected to a switched power source).
- Manual: Press and hold the ON/OFF Button (1) to manually power the device on or off.
6.2 Grundlegende Bedienung
- Modi wechseln: Press the Mode Button (3) to cycle between Video Recording, Photo, and Playback modes.
- Zugriffsmenü: In any mode, press the Menu Button (2) to enter the settings menu. Use the UP (4) and Down (5) buttons to navigate, and OK (6) to select.
- Aufnahme starten/stoppen: In Video Recording mode, press the OK Button (6) to manually start or stop recording.
6.3 Anzeigemodi
While recording, you can typically switch between different display views by pressing the UP or Down buttons:
- Nur Frontkamera
- Rear Camera Only
- Picture-in-Picture (Front main, Rear sub-window)
- Picture-in-Picture (Rear main, Front sub-window)
6.4 Loop-Aufnahme
Set the loop recording duration (e.g., 1, 3, or 5 minutes) in the settings menu. When the memory card is full, the oldest unlocked fileDie vorhandenen Aufnahmen werden durch neue überschrieben.
6.5 G-Sensor
The G-sensor automatically detects collisions or sudden braking. When triggered, it locks the current video file, preventing it from being overwritten by loop recording. Adjust sensitivity in the settings.
6.6 Parküberwachung (optional)
If the buck line is installed, the dash cam can monitor your vehicle while parked. When motion or impact is detected, it will automatically record a short video. Enable this feature in the settings.
6.7 Datums- und Uhrzeiteinstellung
It is important to set the correct date and time in the system settings for accurate timestamps auf Ihren Aufnahmen.
7. Wartung
- Reinigung: Reinigen Sie Linse und Bildschirm mit einem weichen, trockenen Tuch. Vermeiden Sie Scheuermittel und Lösungsmittel.
- Speicherkarte: Format the MicroSD card regularly (e.g., once a month) within the dash cam's settings to maintain optimal performance and prevent data corruption. Back up important files vor der Formatierung.
- Temperatur: Avoid exposing the device to extreme temperatures, as this can affect battery life and component integrity.
- Firmware-Updates: Überprüfen Sie die Angaben des Herstellers webDie Website wird regelmäßig auf Firmware-Updates überprüft, die die Leistung verbessern oder neue Funktionen hinzufügen können.
8. Fehlerbehebung
| Problem | Mögliche Ursache | Lösung |
|---|---|---|
| Die Dashcam lässt sich nicht einschalten. | Keine Stromversorgung; defektes Ladegerät; lose Verbindung. | Check car charger connection and vehicle's cigarette lighter. Try a different USB cable/charger. |
| Die Aufnahme stoppt automatisch. | Memory card full; slow memory card; G-sensor sensitivity too high. | Format the memory card. Use a Class 10 or higher MicroSD card. Lower G-sensor sensitivity in settings. |
| Video footage ist verschwommen. | Schutzfolie auf der Linse; verschmutzte Linse; falsche Fokussierung. | Remove any protective film. Clean the lens with a soft cloth. |
| Die Rückkamera zeigt kein Bild an. | Wackelkontakt; defektes Kabel/Kamera. | Check the AV-IN connection. Ensure the rear camera is properly installed. |
| Das Gerät friert ein oder stürzt ab. | Software issue; memory card error. | Press the Reset Button (10) with a thin pin. Format the memory card. |
9. Spezifikationen
- Modellname: DMMRUTXB
- Anzeige: 4.3 Zoll
- Kamera: Dual Lens (Front & Rear support)
- Videoauflösung: FHD 1920x1080P (Front)
- Merkmale: Loop Recording, G-Sensor, Night Vision, Parking Monitoring, 170-degree wide angle
- Lagerung: Supports MicroSD (TF) card, Class 10 or higher (up to 64GB)
- Konnektivität: USB, AV-IN (for rear camera)
- Artikelgewicht: Ungefähr 1.76 Unzen (50 Gramm)
- Paketabmessungen: Ungefähr 0.39 x 0.39 x 0.39 Zoll
- Hersteller: DMMRUTXB
10. Garantie und Support
For warranty information and technical support, please refer to the documentation provided with your purchase or contact the retailer/manufacturer directly. Keep your purchase receipt as proof of purchase.
Ask a question about this manual
Ask about setup, troubleshooting, compatibility, parts, safety, or missing instructions. Manuals+ will review the question and use this page’s manual context to help answer it.