
1. Einleitung
The Jauarta MY8236B is a compact and reliable digital multimeter designed for accurate electrical measurements. It features a clear 4000-count display and a new generation layout for enhanced usability. This instrument is suitable for various applications including power electronic circuit measurement, new energy equipment testing, power system strength testing, automotive circuit maintenance, and educational purposes.
Wichtiger Sicherheitshinweis: Always keep the inside of the meter clean and dry to prevent electric shock or damage to the meter. Read all safety warnings and operating instructions before using this instrument.
2. Produktmerkmale
- Klare Anzeige: Features a new display and function layout for improved readability.
- 4000 Counts Reading: Provides industrial-grade readings up to 4000 counts for precise measurements.
- Breite Anwendung: Versatile for power electronics, new energy, automotive, and educational testing.
- Genau und zuverlässig: Designed for high reliability in electronic parameter detection.
- Langlebige Konstruktion: Made from excellent ABS material, offering impact and scratch resistance.
3. Packungsinhalt
Bitte überprüfen Sie den Packungsinhalt nach Erhalt:
- 1 x Jauarta MY8236B Digital Multimeter
- 2 x Multimeter Test Leads (Red and Black)
- 1 x Benutzerhandbuch
4. Einrichtung
4.1 Einlegen der Batterie
The Jauarta MY8236B multimeter requires two 1.5V AAA batteries (not included) for operation.
- Suchen Sie die Abdeckung des Batteriefachs auf der Rückseite des Multimeters.
- Verwenden Sie einen Schraubendreher, um die Schraube(n) zu lösen, mit der/denen die Batterieabdeckung befestigt ist/sind.
- Remove the cover and insert two 1.5V AAA batteries, observing the correct polarity (+ and -) as indicated inside the compartment.
- Bringen Sie die Batterieabdeckung wieder an und ziehen Sie die Schraube(n) fest.
4.2 Anschließen der Testleitungen
Für genaue und sichere Messungen ist der korrekte Anschluss der Messleitungen unerlässlich.

Image: Close-up of the multimeter's input jacks. The black COM jack, the red VΩmA jack, and the red 10A jack are visible.
- Stecken Sie die schwarze Messleitung in den COM (Gemeinsame) Buchse.
- Für die meisten Bändetage, resistance, and small current measurements (up to 400mA), insert the red test lead into the VΩmA Jack.
- Für Hochstrommessungen (bis zu 10 A) führen Sie die rote Messleitung in den/die/das ein. 10 A jack. Ensure the rotary switch is set to the appropriate 10A range.

Image: The Jauarta MY8236B Digital Multimeter shown with its red and black test leads properly connected to the input jacks.
5. Bedienungsanleitung
5.1 Ein-/Ausschalten und Funktionsauswahl
To power on the multimeter, rotate the central rotary switch from the 'OFF' position to the desired measurement function. To power off, rotate the switch back to 'OFF'.
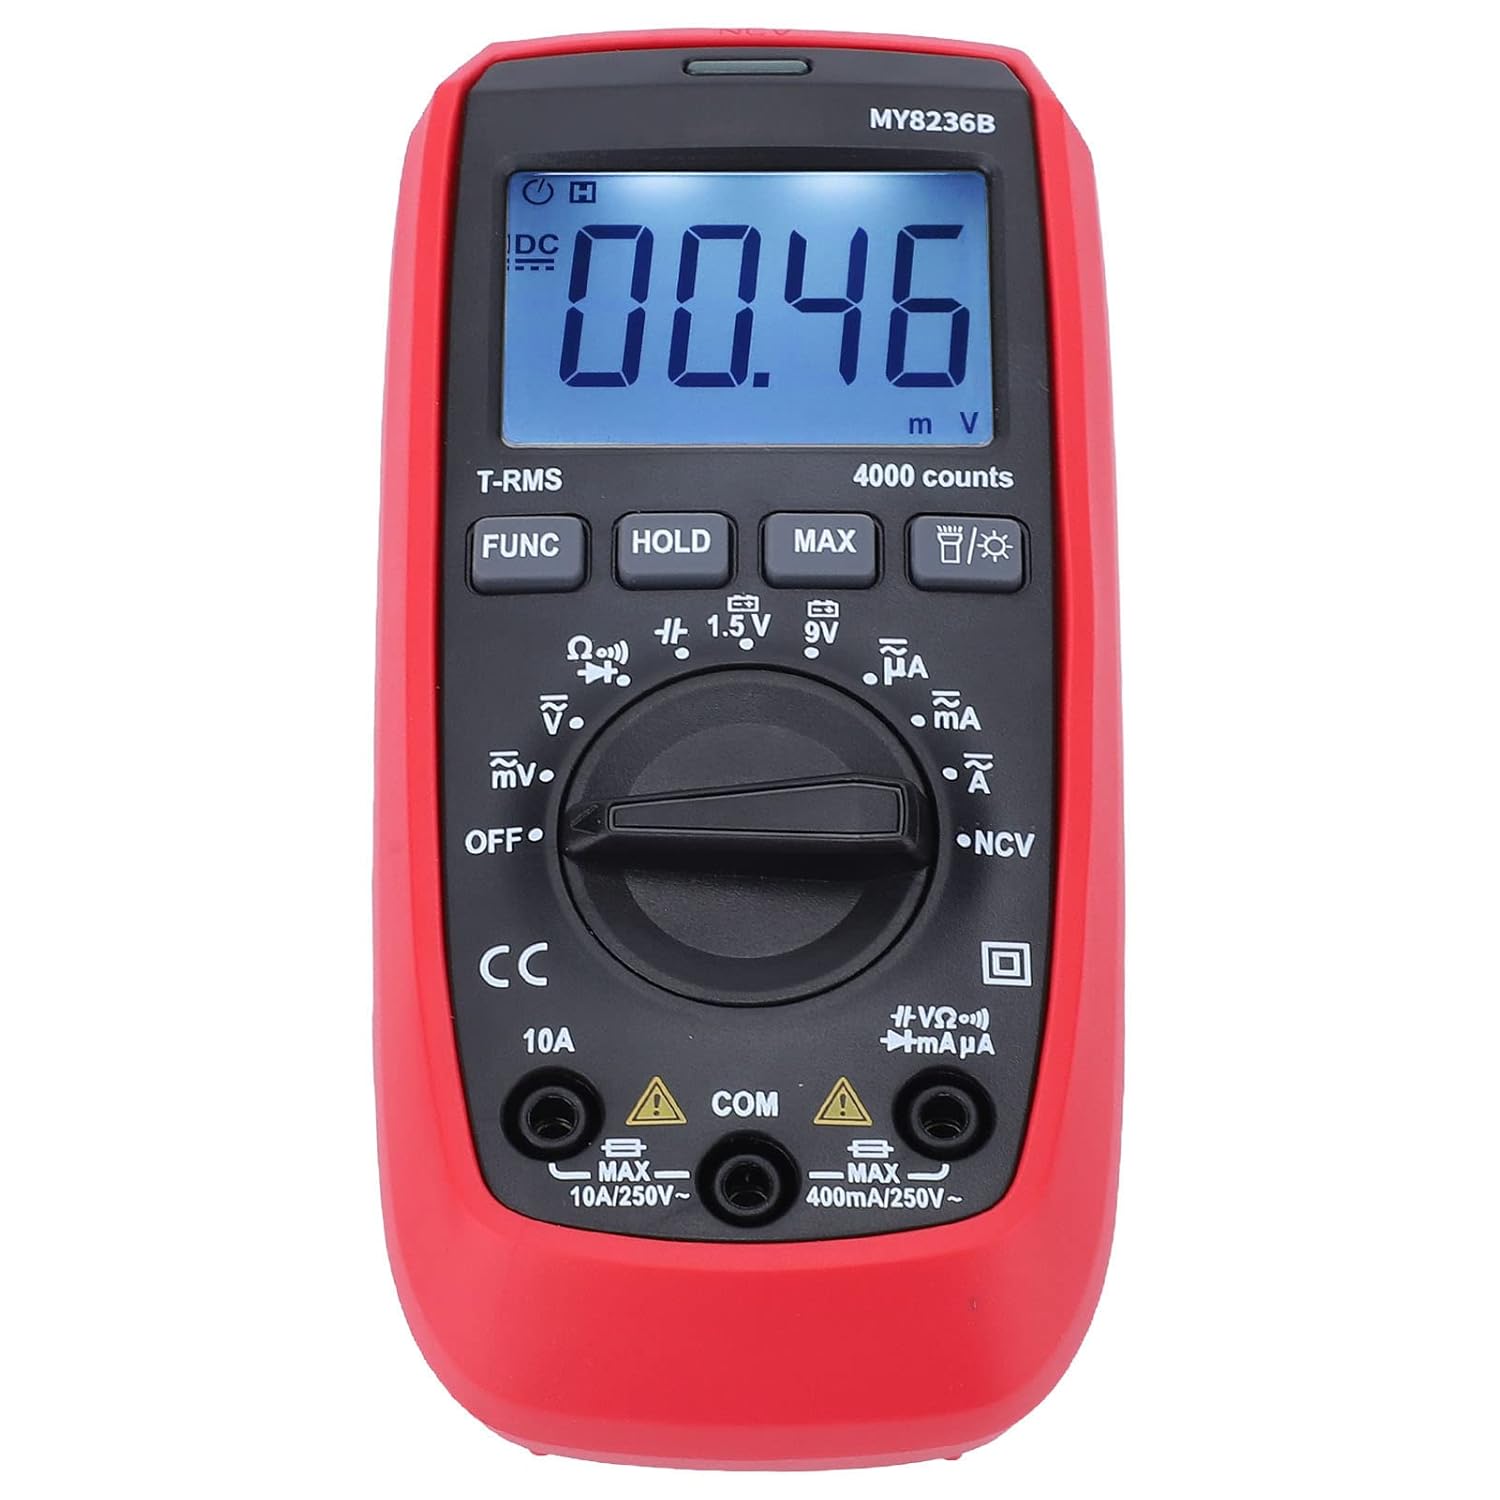
Bild: Vorderseite view of the Jauarta MY8236B Digital Multimeter, highlighting the central rotary switch for function selection and the digital display.
5.2 Messen der Gleichspannungtage (V–)
- Set the rotary switch to the 'V–' range. Select an appropriate range (e.g., 4V, 40V, 400V) higher than the expected voltage. Wenn der VoltagDa e unbekannt ist, beginnen Sie mit dem höchsten Bereich und verringern Sie ihn nach Bedarf.
- Verbinden Sie die rote Prüfleitung mit dem Pluspol (+) des Stromkreises und die schwarze Prüfleitung mit dem Minuspol (-).
- Lesen Sie den Bandtage-Wert auf dem Display.
5.3 Messen der Wechselspannungtage (V∼)
- Set the rotary switch to the 'V∼' range. Select an appropriate range higher than the expected voltage.
- Schließen Sie die Messleitungen an die Wechselstromspannung an.tagDie Quelle.
- Lesen Sie den Bandtage-Wert auf dem Display.
5.4 Messung des Gleichstroms (A–)
Vorsicht: Schließen Sie das Multimeter niemals parallel zu einem Spannungsregler an.tage source when measuring current. Always connect it in series with the load. Ensure the correct input jack (VΩmA or 10A) is used.
- Schalten Sie die Stromzufuhr zum Stromkreis aus.
- Break the circuit at the point where current is to be measured.
- Set the rotary switch to the 'A–' range (e.g., µA, mA, or 10A).
- Connect the red test lead to the appropriate current input jack (VΩmA for up to 400mA, 10A for up to 10A).
- Schließen Sie das Multimeter in Reihe mit dem Stromkreis an.
- Die Stromversorgung des Stromkreises wird wiederhergestellt und der aktuelle Wert abgelesen.
5.5 Measuring AC Current (A∼)
Follow the same safety precautions and connection method as for DC current, but set the rotary switch to the 'A∼' range.
5.6 Widerstandsmessung (Ω)
Vorsicht: Ensure the circuit is de-energized before measuring resistance. Do not measure resistance on a live circuit.
- Turn off power to the circuit or component.
- Set the rotary switch to the 'Ω' range.
- Schließen Sie die Messleitungen an das zu messende Bauteil oder den zu messenden Stromkreis an.
- Lesen Sie den Widerstandswert auf dem Display ab.
5.7 Sonderfunktionen
- FUNC-Taste: Used to switch between different functions within a single rotary switch position (e.g., AC/DC, Diode/Continuity).
- Halte den Knopf: Friert den aktuellen Messwert auf dem Display ein. Zum Entsperren erneut drücken.
- MAX-Taste: Zeigt den maximal gemessenen Wert an.
- Taste für Hintergrundbeleuchtung: Activates or deactivates the display backlight for better visibility in low-light conditions.
6. Wartung
6.1 Reinigung
To maintain accuracy and prevent damage, keep the multimeter clean and dry. Wipe the case with a damp cloth and mild detergent. Do not use abrasives or solvents. Ensure no moisture enters the meter.
6.2 Batteriewechsel
When the battery indicator appears on the display, replace the batteries promptly to ensure accurate readings. Refer to Section 4.1 for battery installation instructions.
6.3 Speicherung
If the multimeter is not used for an extended period, remove the batteries to prevent leakage and damage. Store the instrument in a cool, dry place away from direct sunlight and extreme temperatures.
7. Fehlerbehebung
- Kein Bildschirm: Check if the batteries are correctly installed and have sufficient charge. Replace batteries if necessary. Ensure the rotary switch is not in the 'OFF' position.
- Falsche Messwerte: Verify that the test leads are properly connected to the correct input jacks and that the rotary switch is set to the appropriate function and range. Ensure the circuit is de-energized for resistance measurements.
- No Reading for Current: Check if the fuse is blown. If measuring high current, ensure the red lead is in the 10A jack.
- Anzeige zeigt „OL“ (Überlastung): The measured value exceeds the selected range. Switch to a higher range or ensure the input is within the meter's maximum specifications.
8. Spezifikationen
| Parameter | Reichweite |
|---|---|
| DC-Voltage | 400 mV, 4 V, 40 V, 400 V, 600 V |
| AC-Lautstärketage | 400 mV, 4 V, 40 V, 400 V, 600 V |
| Gleichstrom | 400µA, 4000µA, 40mA, 400mA, 10A |
| Wechselstrom | 400µA, 4000µA, 40mA, 400mA, 10A |
| Widerstand | 400Ω, 4kΩ, 40kΩ, 400kΩ, 4MΩ, 40MΩ |
| Anzahl anzeigen | 4000 Zählwerte |
| Akku-Typ | 2 x 1.5 V AAA-Batterie |
| Material | ABS |
| Artikelgewicht | 323 g |
| Flurstücksabmessungen | 16 x 11 x 5 cm |
9. Sicherheitshinweise
- Always inspect the multimeter and test leads for any damage before use. Do not use if damaged.
- Nicht anwenden voltage or current that exceeds the maximum rated input for any range.
- Seien Sie vorsichtig beim Arbeiten mit VolumentagEs liegt über 30 V AC RMS, 42 V Spitze oder 60 V DC. Diese SpannungentagEs besteht die Gefahr eines Stromschlags.
- Vor dem Ändern von Funktionen oder Messbereichen müssen die Messleitungen immer vom Stromkreis getrennt werden.
- Das Messgerät darf nicht in explosionsgefährdeten Bereichen (Gase, Dämpfe, Staub) betrieben werden.
- Ensure your hands are dry when operating the meter.
10. Garantie und Support
For warranty information or technical support, please refer to the documentation provided with your purchase or contact Jauarta customer service through your retailer. Keep your purchase receipt as proof of purchase.