
BSIDE DC AC Clamp Meter
BSIDE DC AC Clamp Bedienungsanleitung des Messgeräts
Model: DC AC Clamp Meter
Einführung
Thank you for choosing the BSIDE DC AC Clamp Meter. This open-jaw 600A smart TRMS color LCD rechargeable digital multimeter is designed for precise and safe electrical measurements. It combines the functions of a clamp meter and a multimeter, allowing for versatile use in various applications, including automotive maintenance and electrician work. This manual provides detailed instructions for the safe and effective operation, maintenance, and troubleshooting of your device.
Sicherheitshinweise
Beachten Sie beim Umgang mit elektrischen Prüfgeräten stets die Sicherheitsvorkehrungen. Andernfalls kann es zu Verletzungen oder Schäden am Messgerät oder dem zu prüfenden Gerät kommen.
- Die für jeden Messbereich angegebenen maximalen Eingangswerte dürfen nicht überschritten werden.
- Vor Gebrauch sicherstellen, dass die Messleitungen ordnungsgemäß angeschlossen und in gutem Zustand sind.
- Verwenden Sie das Messgerät nicht, wenn es beschädigt erscheint oder nicht ordnungsgemäß funktioniert.
- Beim Arbeiten an unter Spannung stehenden Stromkreisen ist äußerste Vorsicht geboten.
- Vor Widerstands-, Kapazitäts- oder Diodenmessungen muss immer die Stromzufuhr zum Stromkreis unterbrochen werden.
- Keep hands and fingers away from the open jaw when measuring current.
Produkt überview
The BSIDE DC AC Clamp Meter features an open-jaw design for easy measurement in tight spaces. Its 2.8-inch color display enhances readability, even in challenging lighting conditions. The device is designed for single-hand operation with an all-button interface.

Abbildung 1: Überview of the BSIDE DC AC Clamp Messgerät und sein Zubehör.
Hauptmerkmale:
- Open Jaw Design: Facilitates current measurement in confined areas like inverters or intensive lines.
- 600A DC AC Amp Messung: Capable of measuring both DC and AC currents up to 600A.
- Smart-Modus: Erkennt und misst automatisch die AC/DC-Lautstärke.tage, resistance, and continuity with optimal resolution.
- All Button Design: Enables quick and convenient function switching for single-hand operation.
- Farbanzeige: A 2.8-inch color screen provides clear and easy-to-read measurements.
- Mehrzeilige Anzeige: Shows up to 5 test results simultaneously, including voltage, frequency, and MAX/MIN/AVG values.
- Professioneller Voltage Detector (V-Alert): Integrated non-contact voltage testing with selectable low/high sensitivity modes.
- Wiederaufladbarer Akku: Equipped with a built-in rechargeable Li-ion battery and charging cable.
- Taschenlampe: Integrated LED flashlight for illumination in dark work environments.
Aufstellen
Laden des Akkus:
The meter comes with a built-in rechargeable 3.7V 1200mA Li-ion battery. Before first use, or when the low battery indicator appears, charge the device using the provided charging cable.
- Connect the small end of the charging cable to the charging port on the meter.
- Verbinden Sie das USB-Ende des Ladekabels mit einem Standard-USB-Netzteil (nicht im Lieferumfang enthalten) oder einem USB-Anschluss Ihres Computers.
- The battery indicator on the display will show charging status. Charge until the indicator shows a full charge.

Figure 2: Charging the rechargeable Li-ion battery.
Testleitungen verbinden:
Für Messungen, die Messleitungen (Volt) erforderntage, resistance, capacitance, diode, continuity), connect them as follows:
- Stecken Sie die rote Messleitung in die EINGANG Terminal.
- Stecken Sie die schwarze Messleitung in den COM Terminal.
Bedienungsanleitung
The BSIDE Clamp Meter features an intuitive all-button design. Press the power button (⏻) to turn the device on or off. Use the function buttons to select the desired measurement mode.
1. Smart Mode (Auto):
When powered on, the meter defaults to Smart Mode (AUTO). In this mode, the meter automatically identifies and measures AC/DC voltage, resistance, and continuity, providing the best resolution.
- Connect test leads to the circuit. The meter will automatically display the measurement type and value.
2. Wechsel-/Gleichstrommessung (Clamp Kiefer):
Use the open jaw to measure AC or DC current up to 600A without breaking the circuit.
- Drücken Sie die A~ button to select AC current measurement or A− button for DC current measurement.
- Öffne dieamp Kiefer durch Drücken des Hebels.
- Enclose a single conductor (not a cable with multiple conductors) within the jaw.
- Den Hebel loslassen, um die Klemme sicher um den Leiter zu schließen.
- Lesen Sie den aktuellen Wert auf dem Display ab.

Figure 3: Measuring AC current in an automotive application.

Figure 4: Measuring AC current in an electrician maintenance scenario.
3. AC/DC-Voltage-Messung:
Zur Messung der Lautstärketage, ensure the test leads are connected correctly.
- Drücken Sie die V~ button for AC voltage oder V− button for DC voltage.
- Schließen Sie die Messleitungen parallel an den Stromkreis oder das Bauteil an, das Sie messen möchten.
- Lesen Sie den Bandtage-Wert auf dem Display.

Abbildung 5: Messung der Gleichspannungtage auf einer Batterie.
4. Widerstandsmessung:
Always ensure the circuit is de-energized before measuring resistance.
- Drücken Sie die Ω button to select resistance measurement.
- Verbinden Sie die Testleitungen an der Komponente.
- Lesen Sie den Widerstandswert auf dem Display ab.
5. Capacitance, Diode, Duty Cycle, Frequency, Continuity, V-Alert, Live Check:
These functions are accessible via dedicated buttons or by cycling through modes using the function buttons.
- Kapazität: Drücken Sie die µF button. Connect leads across the capacitor (ensure it's discharged).
- Diode: Drücken Sie die →|− button. Connect leads across the diode. Measures diodes within 3.0V.
- Arbeitszyklus: Drücken Sie die % button. Connect leads to the signal source.
- Frequenz: Drücken Sie die Hz button. Connect leads to the signal source.
- Kontinuität: Drücken Sie die 🔊 button. A beeper sounds if resistance is less than 50Ω.
- V-Alert (Non-Contact Voltage Erkennung): This function allows for voltage Detektion ohne direkten Kontakt.

Figure 6: V-Alert function in use near circuit breakers.
- Prüfung stromführender Leitungen: Use this function to identify live wires.
6. Taschenlampe:
The meter includes a built-in flashlight for illuminating dark work areas.
- Drücken Sie die Taschenlampentaste (💡) um die Taschenlampe ein- oder auszuschalten.

Figure 7: Bright LED flashlight for improved visibility.
Wartung
Reinigung:
Wischen Sie die Oberfläche des Zählers ab.asing mit Adamp cloth and mild detergent. Do not use abrasives or solvents. Ensure the meter is off and disconnected from any power source before cleaning.
Lagerung:
When not in use, store the meter in its carrying case in a cool, dry place, away from direct sunlight and extreme temperatures. If storing for extended periods, ensure the battery is partially charged to prolong its lifespan.
Batteriepflege:
The built-in Li-ion battery should be charged regularly, even if the meter is not frequently used, to maintain battery health. Avoid fully discharging the battery for prolonged periods.
Fehlerbehebung
If you encounter issues with your BSIDE Clamp Zähler, beachten Sie die folgenden häufigen Probleme und Lösungen:
| Problem | Mögliche Ursache | Lösung |
|---|---|---|
| Das Messgerät lässt sich nicht einschalten. | Batterie ist vollständig entladen. | Laden Sie den Akku mit dem mitgelieferten USB-Kabel auf. |
| Ungenaue Messwerte. | Incorrect measurement mode selected; Test leads not properly connected; External interference. | Ensure correct mode is selected. Check lead connections. Move away from strong electromagnetic fields. |
| Continuity beeper does not sound. | Resistance is above 50Ω; Continuity mode not selected. | Verify resistance is below 50Ω. Select continuity mode. |
| Im Display wird „OL“ (Überlastung) angezeigt. | Der Eingabewert überschreitet den ausgewählten Bereich. | Switch to a higher range if available, or ensure the measurement is within the meter's capabilities. |
Technische Daten
| Parameter | Wert |
|---|---|
| Anzeige | 6000 counts, 2.8 inch color display |
| Gleichstrom | 1-600A (0.1A ±(2.5%+5)) |
| Wechselstrom | 1-600A (40-999 Hz) (0.1A ±(2.5%+5)) |
| DC-Voltage | 60mV/600mV (0.01mV/0.1mV ±(1%+3)); 6V/60V (0.001V/0.01V ±(0.8%+3)); 600V/610V (0.1V/1V ±(1%+5)) |
| AC-Lautstärketage | 60mV/600mV (0.01mV/0.1mV ±(1.2%+3)); 6V/60V (0.001V/0.01V ±(1%+3)); 600V/610V (0.1V/1V ±(1.2%+5)) |
| Widerstand | 0.1Ω-60MΩ (various ranges and accuracies) |
| Kapazität | 0.01µF-60mF (various ranges and accuracies) |
| Frequenz | 1Hz-9.999MHz (various ranges and accuracies, 900mVrms-20Vrms) |
| Arbeitszyklus | 10%-95% (0.1% ±3%) |
| Diodentest | Measures diodes within 3.0V |
| Kontinuität | Beeper sounds when resistance < 50Ω |
| V-Alarm | Low or high sensitivity mode |
| Prüfung auf stromführende Leitungen | Ja |
| Leistung | Rechargeable 3.7V 1200mA battery (built-in) |
| Maße | 222.4 x 43.6 x 30 mm (8.74 x 1.69 x 1.18 Zoll) |
| Gewicht | 146.5 g (5.15 Unzen) |
Packungsinhalt
Folgende Artikel sind in Ihrem Paket enthalten:
- 1 x DC AC Clamp Meter
- 1 x Messleitungen (rot und schwarz)
- 1 x Ladekabel (USB)
- 1 x Tragetasche
- 1 x Battery (built-in)
- 1 x Benutzerhandbuch (dieses Dokument)
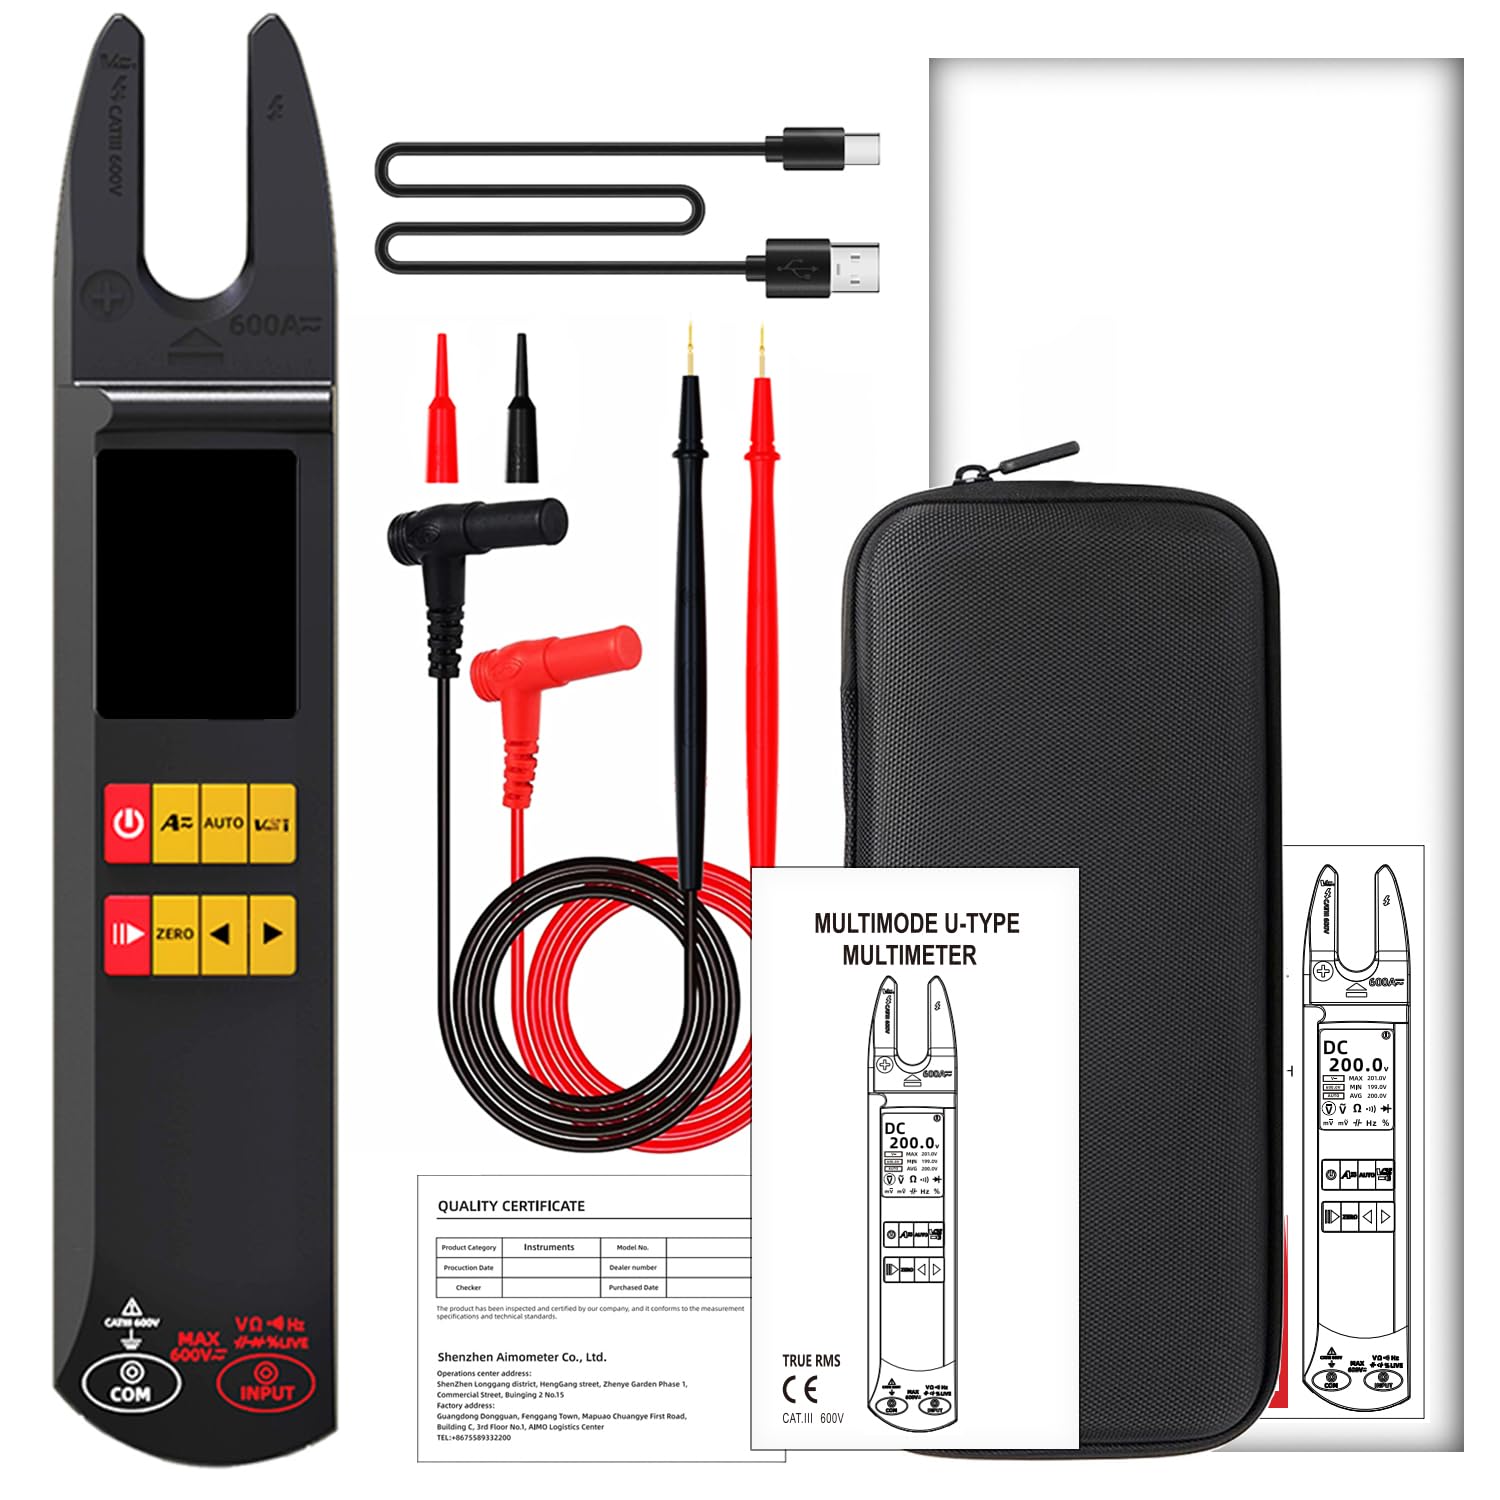
Abbildung 8: Im Produktpaket enthaltener Inhalt.
Garantie und Support
BSIDE products are manufactured to high-quality standards. For warranty information or technical support, please contact the manufacturer or your point of purchase. Keep your purchase receipt as proof of purchase for warranty claims.
Manufacturer: BSIDE
For further assistance, please visit the official BSIDE webWebsite oder wenden Sie sich an den Kundendienst.
Ask a question about this manual
Ask about setup, troubleshooting, compatibility, parts, safety, or missing instructions. Manuals+ will review the question and use this page’s manual context to help answer it.