
ClokoWe HY300PRO+
CLOKOWE Mini-Projektor Benutzerhandbuch
Model: HY300PRO+
Einführung
This manual provides detailed instructions for the safe and efficient operation of your CLOKOWE Mini Projector. Please read this manual thoroughly before using the product and retain it for future reference. The CLOKOWE Mini Projector is a portable device designed for versatile projection, featuring built-in streaming apps, Wi-Fi 6, Bluetooth 5.2, 180° rotation, and automatic keystone correction.

Image: The CLOKOWE Mini Projector, a compact white cylindrical device with a lens, shown projecting content onto a curved screen displaying various streaming app logos and a movie scene.
Lieferumfang
Prüfen Sie beim Auspacken, ob alle Artikel vorhanden sind:
- CLOKOWE Mini Projector (Model: HY300PRO+)
- Netzkabel
- HDMI-Kabel
- Fernbedienung
- Benutzerhandbuch (dieses Dokument)
Produkteigenschaften
The CLOKOWE Mini Projector offers a range of features for enhanced viewErfahrungen:
- Integrierte Streaming-Apps: Access platforms like YouTube, Disney+, and more directly via Wi-Fi.
- Vielseitige Konnektivität: Supports wireless mirroring (iPhone, Android, tablet, laptop) and wired connections (HDMI, USB).
- Um 180° drehbare Projektion: The projector body can rotate 180° for flexible projection angles, including ceiling projection.
- Automatische Trapezkorrektur: Ensures aligned visuals automatically.
- Manueller Fokus: Allows for fine-tuning image clarity.
- Wi-Fi 6 & Bluetooth 5.2: Provides fast, stable wireless streaming and audio pairing with external speakers.
- Ultra-portables Design: Compact size (3.73 × 3.73 × 6.17 inches) and lightweight (0.77 lb).
- High Clarity Display: 8000 Lux brightness, supports 1080P display, with a 0.9:1 short throw ratio.
- Anpassbare Hintergrundbilder: Upload personal background images via USB.
- Automatischer Abschalttimer: Set a timer for controlled usage.

Image: A visual representation of the projector's built-in app store, showing various streaming service icons like Netflix, YouTube, Spotify, and Prime Video on a projected screen.

Image: A family watching a movie projected onto the ceiling of a bedroom, demonstrating the 180° rotation feature for ceiling projection.
Installationshandbuch
1. Initial Placement and Power
- Stellen Sie den Projektor auf eine stabile, ebene Fläche.
- Schließen Sie das Netzkabel an den Projektor und anschließend an eine Steckdose an.
- Drücken Sie den Netzschalter am Projektor oder an der Fernbedienung, um ihn einzuschalten.
2. Adjusting Projection Angle (180° Rotation)
The projector features a 180° rotatable body, allowing projection onto walls, screens, or ceilings without needing a tripod.
- Gently rotate the projector body to achieve the desired projection angle.
- Ensure the lens is facing the intended projection surface.
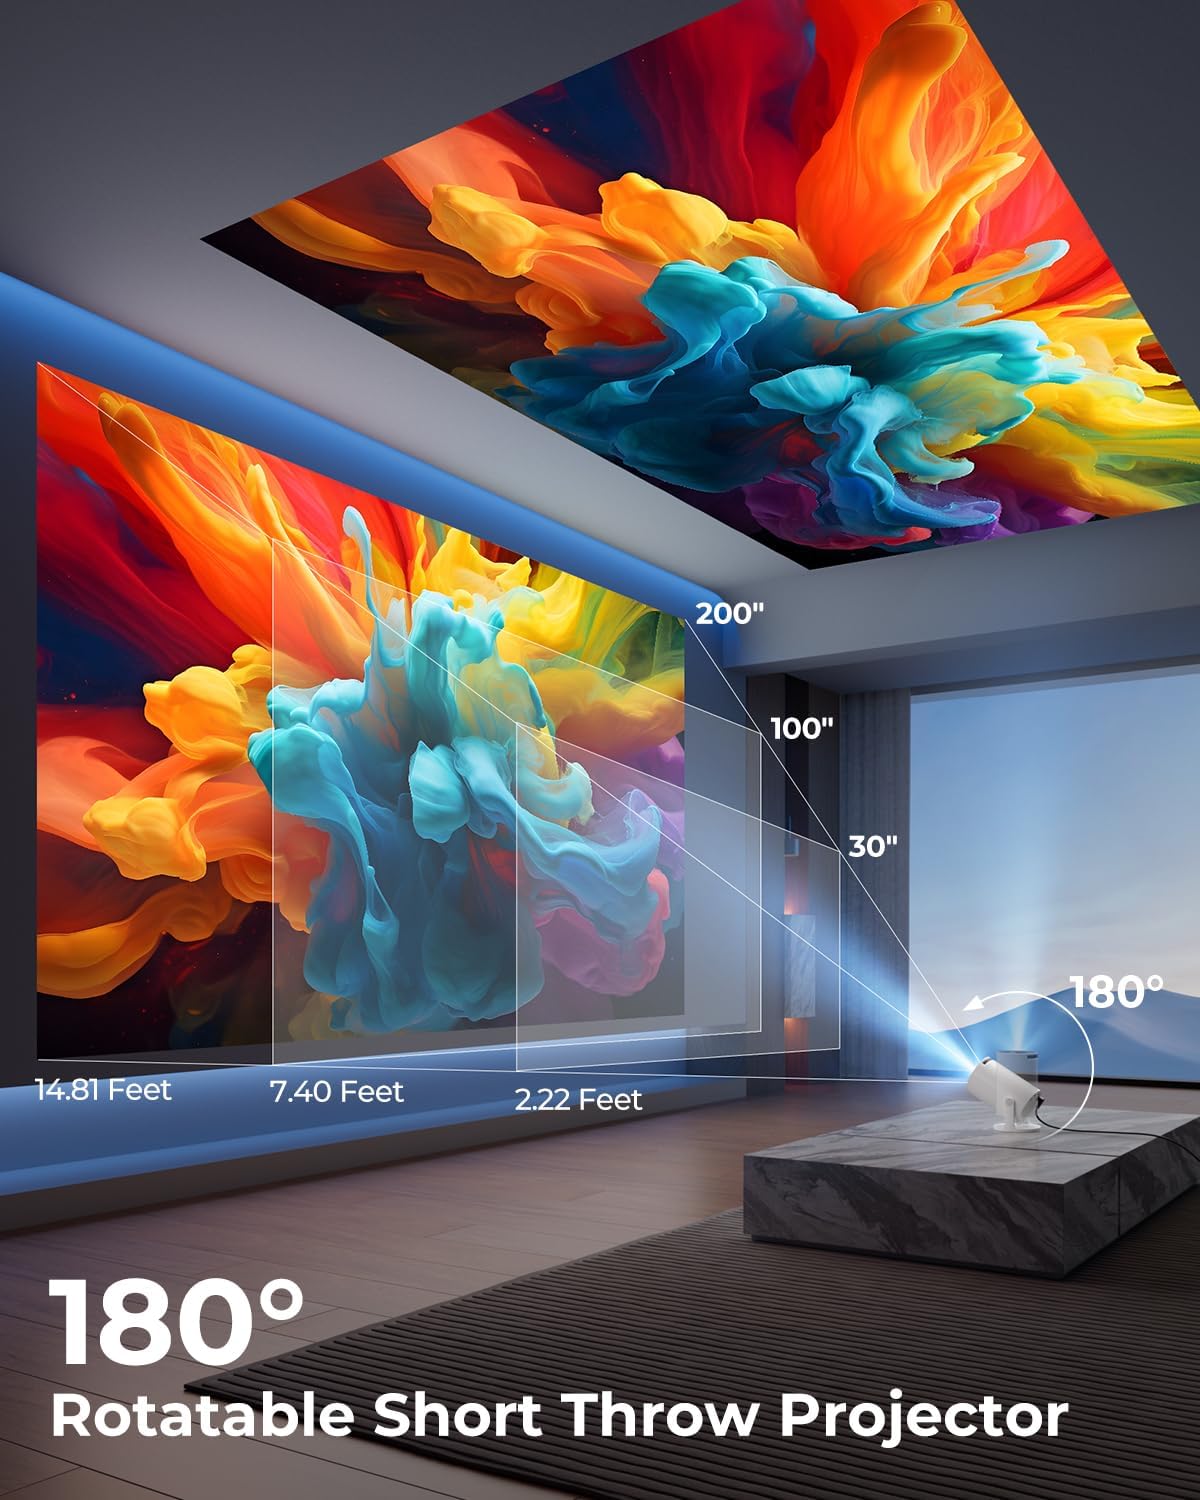
Image: A diagram illustrating the 180° rotation capability of the projector and various projection distances (30", 100", 200") with corresponding throw distances in feet.
3. Fokus- und Trapezkorrektur
- Automatische Trapezkorrektur: The projector will automatically adjust the image to be rectangular. If further adjustment is needed, navigate to the settings menu.
- Manueller Fokus: Rotate the focus ring around the lens until the image appears sharp and clear.

Image: A projected image on a wall demonstrating automatic keystone correction and manual focus adjustments, with icons for ±45° Auto Keystone, Manual Focus, and 50%-100% Zoom.
4. Netzwerk- und Bluetooth-Verbindung
- Wi-Fi-Verbindung:
- Navigieren Sie im Projektor zum Menü „Einstellungen“.
- Wählen Sie „Netzwerk“ oder „WLAN-Einstellungen“.
- Choose your Wi-Fi network from the list and enter the password. The projector supports Wi-Fi 6 (2.4G and 5G).
- Bluetooth Verbindung:
- Gehen Sie zu „Einstellungen“ und wählen Sie „Bluetooth“.
- Aktivieren Sie Bluetooth und suchen Sie nach verfügbaren Geräten.
- Wählen Sie Ihren Bluetooth-Lautsprecher oder Ihre Kopfhörer aus der Liste aus, um sie zu koppeln.

Image: A projected image showing Wi-Fi 6 and Bluetooth 5.2 connectivity, with a smartphone mirroring content to the projector and a soundbar connected via Bluetooth.
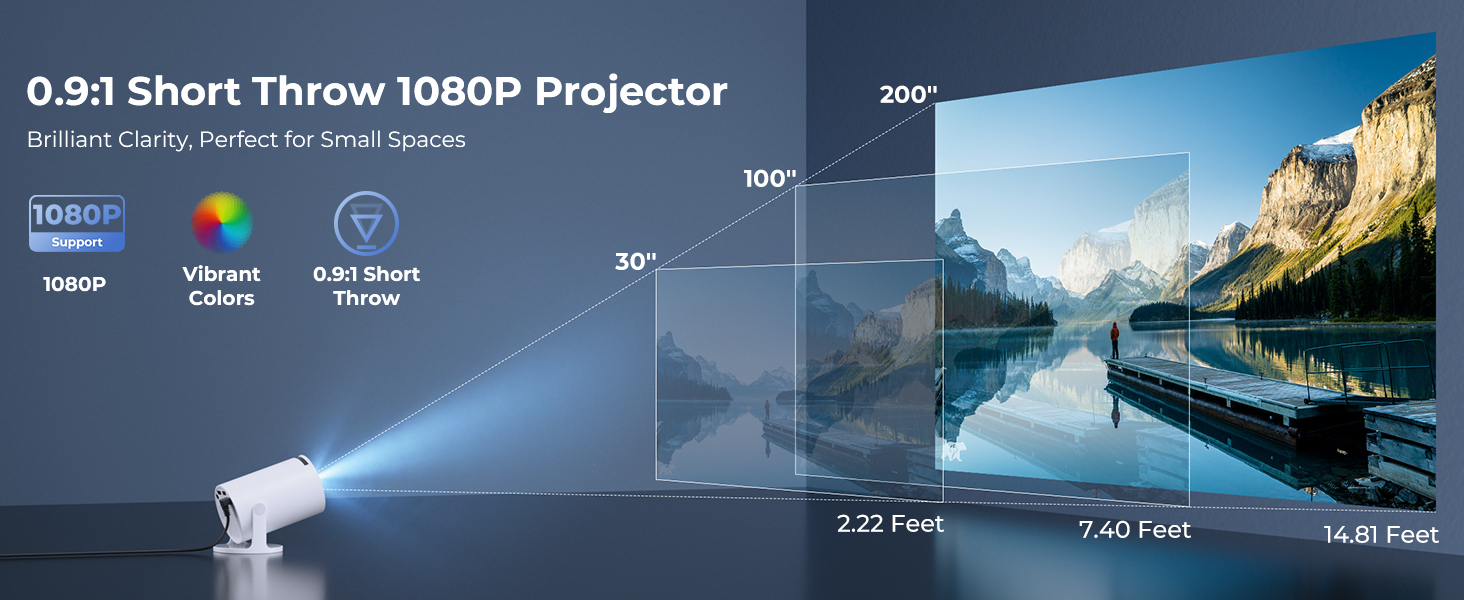
Image: A visual demonstrating Bluetooth 5.2 audio connection, showing the projector wirelessly paired with headphones and a portable speaker.
Bedienungsanleitung
1. Navigieren auf der Benutzeroberfläche
- Use the provided remote control to navigate through menus and select options.
- Basic navigation buttons are also available on the projector unit.
2. Verwendung integrierter Apps
- Once connected to Wi-Fi, access the main interface to find pre-installed streaming applications.
- Select an app (e.g., YouTube, Disney+) and log in with your credentials to start streaming.
3. Bildschirmspiegelung
The projector supports wireless mirroring from compatible smartphones, tablets, and laptops.
- Stellen Sie sicher, dass Ihr Gerät und der Projektor mit demselben WLAN-Netzwerk verbunden sind.
- Wählen Sie im Menü des Projektors die Option „Bildschirmspiegelung“ oder „Drahtlose Anzeige“.
- On your mobile device, activate its screen mirroring feature (e.g., AirPlay for iOS, Smart View (für Android) und wählen Sie den Projektor aus der Liste der verfügbaren Geräte aus.
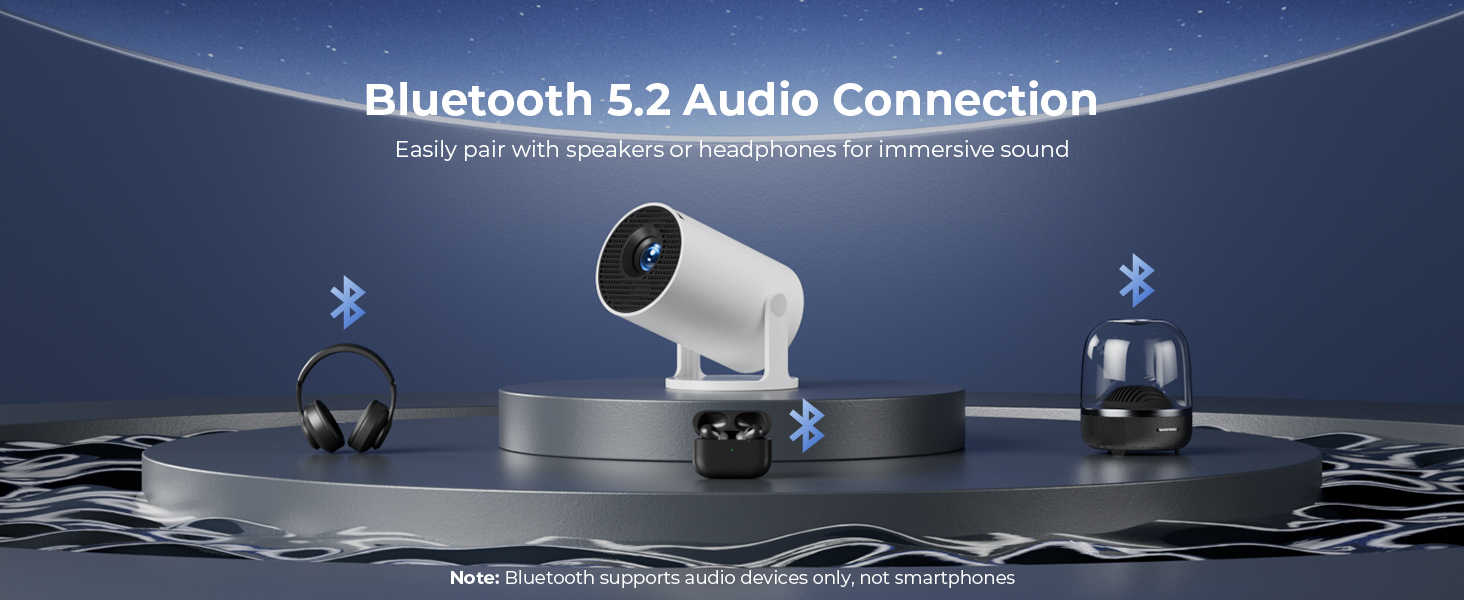
Image: A diagram illustrating Dual-Band Wi-Fi 6 connection for faster, smoother screen mirroring from various devices like smartphones, tablets, and laptops to the projector.
4. Wired Connections (HDMI/USB)
- Connect devices like game consoles, TV sticks, or computers using the HDMI port.
- Verwenden Sie den USB-Anschluss zum Abspielen von Medien files directly from a USB drive or to upload custom wallpapers.
- To select the input source, press the "Source" button on the remote control and choose HDMI or USB.
Bild: Eine Nahaufnahme view of the projector's rear panel, highlighting the HDMI, USB, and power ports, along with an ON/OFF switch and manual focus ring.
5. Custom Wallpapers and Timer
- Custom Wallpapers: Insert a USB drive containing your desired background images. Navigate to the settings to select and apply them.
- Automatischer Abschalttimer: Access the system settings to set a timer for the projector to automatically power off after a specified duration.
Wartung
- Reinigung der Linse: Verwenden Sie ein weiches, fusselfreies Tuch, das speziell für optische Linsen entwickelt wurde. Verwenden Sie keine Scheuermittel oder Lösungsmittel.
- Reinigung der Außenseite: Wischen Sie das Gehäuse des Projektors mit einem weichen, trockenen Tuch ab. Hartnäckige Flecken können Sie mit einem leichten Tuch entfernen.ampspülen Sie das Tuch mit Wasser aus.
- Belüftung: Um eine Überhitzung zu vermeiden, stellen Sie sicher, dass die Lüftungsöffnungen des Projektors nicht blockiert sind.
- Lagerung: Wenn Sie den Projektor längere Zeit nicht verwenden, lagern Sie ihn an einem kühlen, trockenen Ort, geschützt vor direkter Sonneneinstrahlung und extremen Temperaturen.
Fehlerbehebung
| Problem | Mögliche Ursache | Lösung |
|---|---|---|
| Kein Bild oder unscharfes Bild | Incorrect focus; lens cap on; input source not selected; projector too far/close. | Adjust manual focus; remove lens cap; select correct input source; adjust projection distance. |
| Das Bild ist trapezförmig oder verzerrt. | Projektor nicht senkrecht zur Leinwand. | Utilize automatic keystone correction or manually adjust in settings. Ensure projector is on a level surface. |
| Kein Ton oder geringe Lautstärke | Volume too low; external audio device not connected/paired; projector's internal speaker off. | Increase volume on projector/source device; ensure Bluetooth speaker is paired; check audio settings. |
| Fernbedienung reagiert nicht | Batteries low/dead; obstruction between remote and projector; remote sensor blocked. | Replace batteries; ensure clear line of sight to projector's IR sensor. |
| Probleme mit der Wi-Fi-Verbindung | Falsches Passwort; außerhalb der Reichweite; Netzwerkstörungen. | Re-enter password; move projector closer to router; restart router and projector. |
Technische Daten
| Besonderheit | Detail |
|---|---|
| Modellnummer | HY300PRO+ |
| Marke | ClokoWe |
| Technische Daten | 3.73 x 6.17 x 3.73 Zoll |
| Artikelgewicht | 1.61 Pfund (0.73 kg) |
| Bildschirmauflösung | 1280 x 720 (Unterstützt 1080p) |
| Helligkeit | 8000 Lux |
| Konnektivitätstechnologie | Bluetooth 5.2, HDMI, USB, Wi-Fi 6 (2.4G & 5G) |
| Besondere Merkmale | Built-in Apps, Digital Keystone Correction, Short Throw (0.9:1), 50%-100% Zoom, 180° Rotatable Projection, Mini Portable Design |
| Empfohlene Verwendung | Heimkino, Gaming, Business, Bildung |
Garantie und Support
The CLOKOWE Mini Projector includes 2-years factory support. For technical assistance, troubleshooting, or warranty claims, please contact ClokoWe customer support through the retailer where the product was purchased or visit the official ClokoWe webWebsite für Kontaktinformationen.
Bitte bewahren Sie Ihren Kaufbeleg zur Überprüfung der Garantie auf.
Ask a question about this manual
Ask about setup, troubleshooting, compatibility, parts, safety, or missing instructions. Manuals+ will review the question and use this page’s manual context to help answer it.