Einführung
Vielen Dank für Ihren Einkauf.asing the AXNEN Q19 Cell Phone Stabilizer. This device is designed to enhance your mobile photography and videography experience by providing stability, AI tracking, and versatile shooting modes. Please read this manual carefully before using the product to ensure proper operation and to maximize its features.
Produkt überview
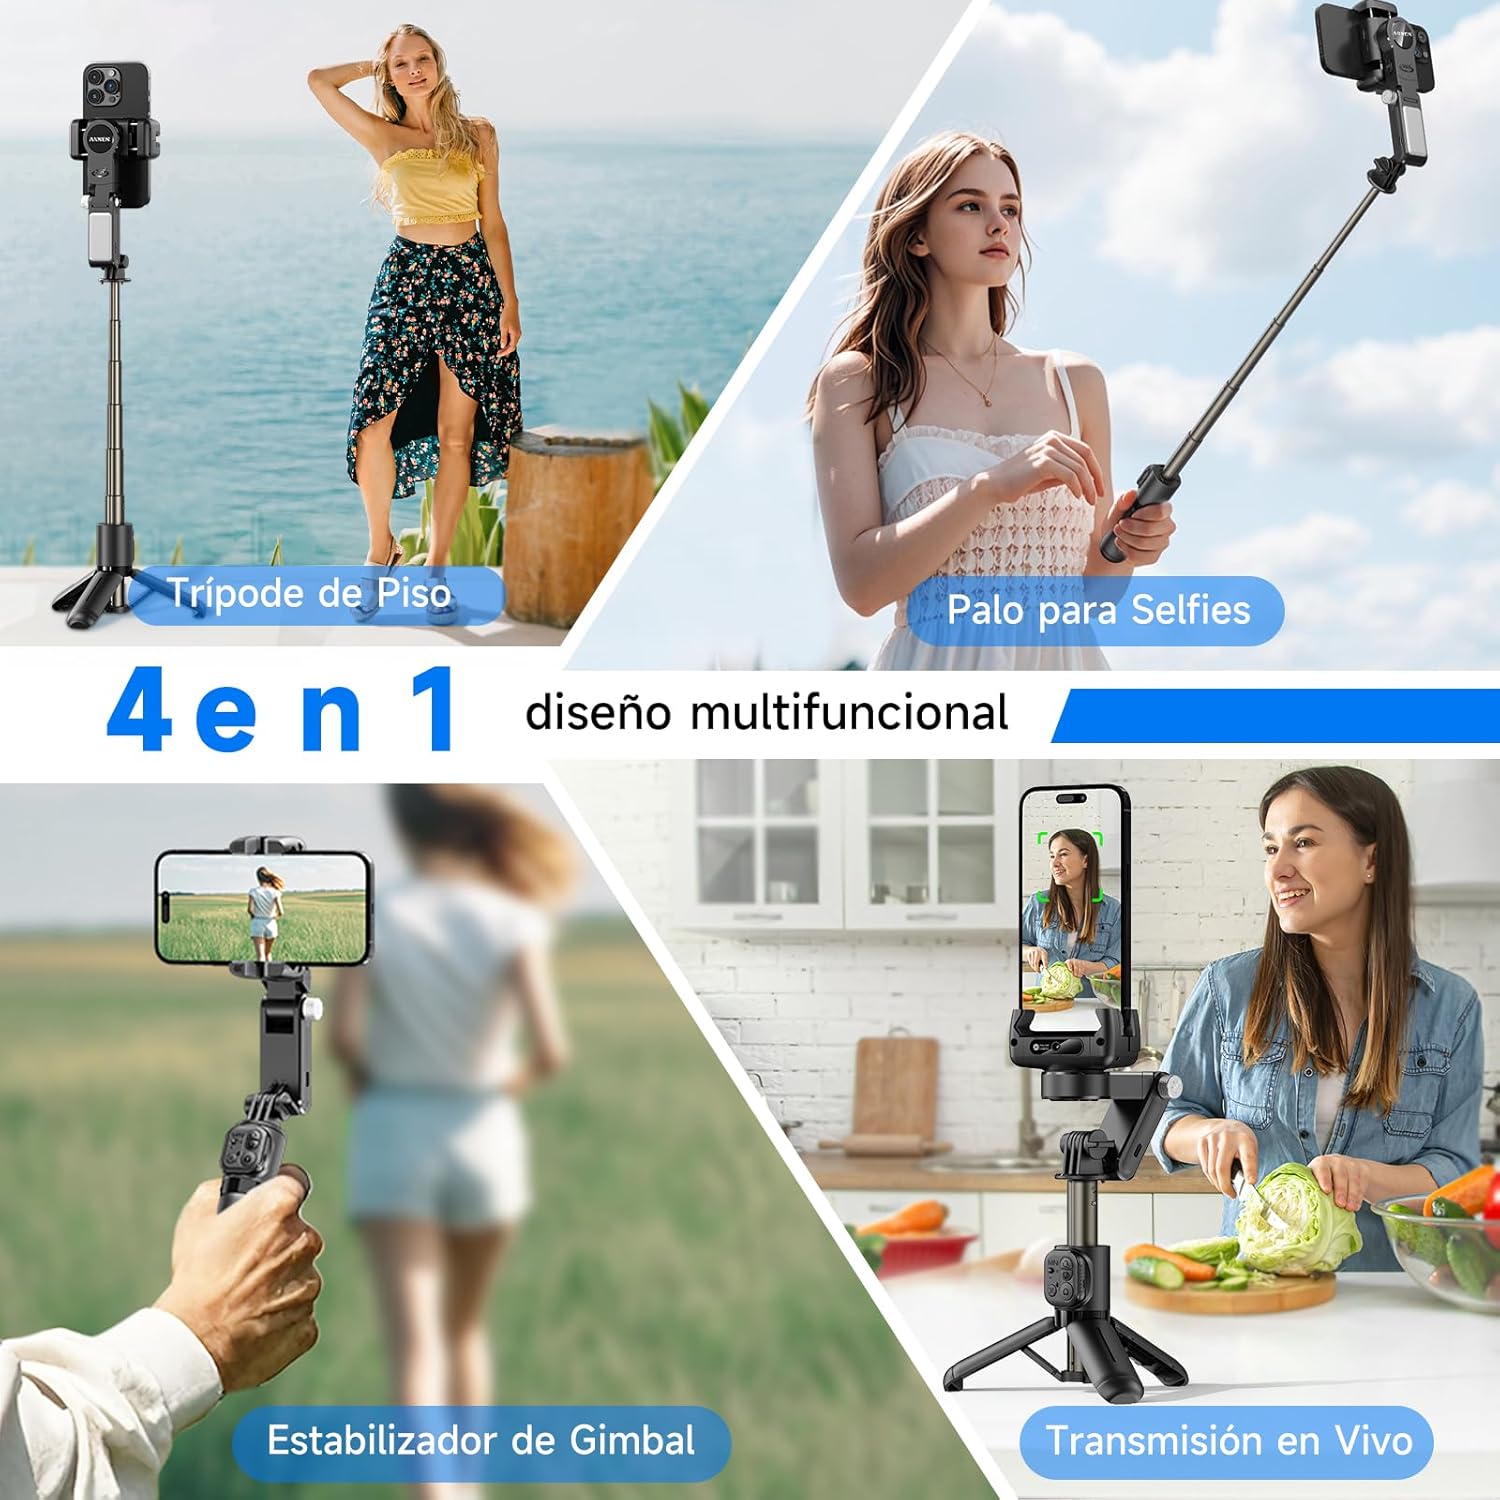
The AXNEN Q19 is a 4-in-1 multifunctional device that combines a universal stabilizer, extendable pole, table tripod, and 260-degree tracking mode. It features 2-axis stabilization, intelligent AI tracking, and a detachable wireless remote control.
Hauptmerkmale:
- 2-Axis Stabilization for smooth footage.
- Intelligent AI Tracking with gesture control.
- 360° Rotation for flexible shooting angles.
- Integrated Selfie Stick and Tripod functionality.
- Detachable Bluetooth Remote Control.
- Built-in Fill Light with 3 color temperatures and 9 brightness levels.
- App connectivity for advanced features like facial filters, dynamic zoom, and time-lapse.
Aufstellen
1. Auspacken und Aufladen
- Entnehmen Sie vorsichtig alle Komponenten aus der Verpackung.
- Before first use, fully charge the stabilizer using the provided USB cable. The charging indicator will show the charging status.
2. Ihr Telefon befestigen
- Verlängern Sie die Telefonklemmeamp and securely place your smartphone in the holder. Ensure the phone is centered to achieve optimal balance.
- The device supports both horizontal and vertical phone orientations.
3. Bluetooth-Kopplung
- Power on the stabilizer by pressing and holding the power button.
- Aktivieren Sie Bluetooth auf Ihrem Smartphone.
- Suchen nach available devices and select "AXNEN Q19" (or similar name) to pair. The indicator light on the stabilizer will confirm successful pairing.
4. App-Installation
- Download the "Gimbal Show" app from the App Store (for iPhone) or Google Play Store (for Android).
- Installieren Sie die App und erteilen Sie die erforderlichen Berechtigungen für den vollen Funktionsumfang.

Bedienungsanleitung
1. Ein-/Ausschalten
- Einschalten: Halten Sie die Einschalttaste 3 Sekunden lang gedrückt.
- Ausschalten: Halten Sie die Einschalttaste 3 Sekunden lang gedrückt.
2. Stabilizer Modes
The Q19 offers various stabilization and shooting modes:
- 2-Achsen-Stabilisierung: Provides smooth, stable footage by counteracting unwanted movements.
- SpinShot Mode: Double-click or long-press the designated button for a dynamic spinning effect.
- POV-Modus: Captures a first-person perspective.
- Horizontal and Vertical Shooting: Einfacher Wechsel zwischen Quer- und Hochformat.

3. AI Tracking Mode
The built-in AI recognition camera allows for intelligent face and body tracking.
- Desktop Tracking: Place the stabilizer on a flat surface.
- Portable Tracking: Hold the stabilizer while moving.
- Tracking starten: Make an "OK" gesture with your hand.
- Tracking stoppen: Make a "Plam" (open palm) gesture with your hand.

4. Fernbedienung
The detachable wireless remote control connects via Bluetooth and allows you to control the stabilizer from a distance.
- Pair the remote control with your phone via Bluetooth (refer to Bluetooth Pairing in Setup).
- Use the buttons on the remote to trigger photos, start/stop video recording, and control other functions as specified in the app.

5. Fill Light Operation
The integrated fill light provides adjustable illumination for various lighting conditions.
- Press the fill light button to cycle through 3 color temperatures: Warm (3000K), Natural (4500K), and Cold (6000K).
- Long-press the button to adjust between 9 brightness levels for each color temperature.

6. Daily Use Scenarios
The Q19 is adaptable for various daily shooting needs:
- Aufnahme aus niedriger Perspektive: Capture unique perspectives from a low vantage Punkt.
- 360° Rotational Shot: Create panoramic or dynamic rotating videos.
- Daily Vlog: Record your daily activities with stable footage.
- Sports Shot: Capture action shots with reduced blur.

Wartung
1. Reinigung
- Wischen Sie das Gerät mit einem weichen, trockenen Tuch ab.
- Verwenden Sie keine aggressiven Chemikalien oder scheuernden Materialien.
2. Speicherung
- Store the stabilizer in a cool, dry place away from direct sunlight and extreme temperatures.
- Stellen Sie sicher, dass das Gerät vor der Lagerung ausgeschaltet ist.
3. Batteriepflege
- Um die Batterieleistung zu erhalten, laden Sie sie regelmäßig auf, auch wenn sie nicht verwendet wird.
- Vermeiden Sie häufiges vollständiges Entladen des Akkus.
Fehlerbehebung
Häufige Probleme und Lösungen:
- Gerät lässt sich nicht einschalten: Stellen Sie sicher, dass der Akku geladen ist. Schließen Sie das Gerät an eine Stromquelle an und versuchen Sie es erneut.
- Bluetooth-Verbindungsprobleme: Ensure Bluetooth is enabled on your phone and the stabilizer. Try unpairing and re-pairing the device. Restart both the phone and the stabilizer.
- Instabiles Footage: Ensure your phone is properly balanced in the clampPrüfen Sie, ob die Bewegung des Gimbals durch Hindernisse beeinträchtigt wird.
- KI-Tracking funktioniert nicht: Ensure sufficient lighting and clear visibility of the subject. Make sure the correct gestures are used.
- App reagiert nicht: Close and restart the "Gimbal Show" app. Check for app updates in your phone's app store.
- Fernbedienung funktioniert nicht: Check the remote control's battery. Ensure it is properly paired via Bluetooth.
If you encounter persistent issues, please refer to the manufacturer's website for further support or contact customer service.
Technische Daten
| Besonderheit | Detail |
|---|---|
| Marke | AXNEN |
| Modellnummer | Frage 19 |
| Artikelgewicht | 260 g |
| Verpackungsabmessungen | 18.8 x 8 x 7.4 cm |
| Gefaltete Größe | 18 cm (L) x 5 cm (W) x <5 cm (H) |
| Kompatible Geräte | Cellphone (Android and iPhone) |
| Im Lieferumfang enthaltene Komponenten | C22/Q19 (Stabilizer unit) |
| Farbe | Schwarz |
Garantie und Support
Specific warranty information for the AXNEN Q19 Cell Phone Stabilizer is not provided in this manual. Please refer to the product packaging, the official AXNEN website, or your retailer for detailed warranty terms and conditions.
For technical support, troubleshooting assistance beyond this manual, or inquiries about replacement parts, please contact AXNEN customer service through their official channels.