1. Einleitung
This manual provides comprehensive instructions for the installation, operation, and maintenance of the EARU Electric 3-Phase Voltage and Overcurrent Protector, Model EARU-1008. This device is designed to safeguard 3-phase electrical systems by continuously monitoring voltage and current, offering protection against over-voltage, unter-voltage, overcurrent, and phase failure. It is suitable for industrial and commercial applications requiring reliable electrical monitoring and protection.
2. Sicherheitshinweise
WARNUNG: Stromschlaggefahr. Installation und Wartung dürfen nur von qualifiziertem Fachpersonal durchgeführt werden.
- Vor der Installation oder Wartung des Geräts muss immer die Stromzufuhr unterbrochen werden.
- Sorgen Sie für eine ordnungsgemäße Erdung, um Stromschläge zu vermeiden.
- Prüfen Sie, ob alle Drahtverbindungen sicher und gemäß dem Schaltplan korrekt sind.
- Das Gerät darf nicht bedient werden, wenn es beschädigt erscheint.
- Halten Sie alle örtlichen und nationalen Elektrovorschriften ein.
3. Produktüberschreitungview
3.1. Hauptmerkmale
- Real-time 3-Phase Monitoring: Zeigt die aktuelle Lautstärke antage (L1, L2, L3) and current (L1, L2, L3) values.
- Umfassender Schutz: Safeguards against over-voltage, unter-voltage, overcurrent, and phase failure.
- Einstellbare Parameter: User-configurable settings for protection thresholds and recovery delays.
- Automatic Phase Failure Reset: Detects and automatically resets after phase anomalies.
- High-Visibility LED Display: Bright red LED for clear readings in various lighting conditions.
- DIN-Schienenmontage: Easy integration into standard electrical panels.
- Clear Terminal Labeling: Simplified installation with clearly marked input and output terminals.
3.2. Komponenten und Anzeige
The device features a clear LED display and intuitive control buttons for configuration. The display shows real-time voltage and current for each phase, along with indicators for protection status.
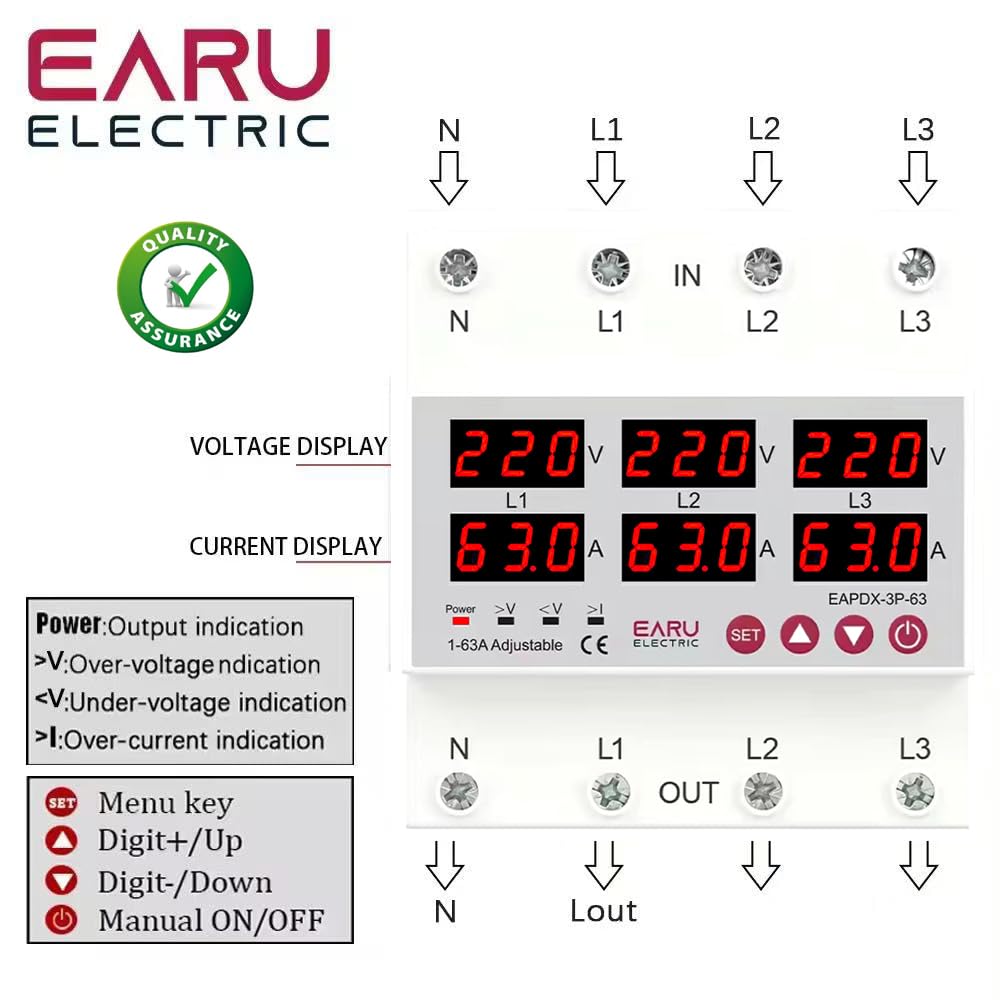
Bild 3.2.1: Front view of the EARU Electric Voltage Protector, showing the LED display for L1, L2, L3 voltage and current, along with control buttons (SET, Up, Down, Power) and protection indicators. Terminal labels for N, L1, L2, L3 (IN and OUT) are also visible.

Bild 3.2.2: Eine Perspektive view highlighting the product features and the input/output terminals (N, L1, L2, L3) at the top and bottom of the device. This image emphasizes the physical layout and connection points.
4. Einrichtung und Installation
4.1. Montage
The EARU-1008 is designed for DIN rail mounting. Securely attach the device to a standard 35mm DIN rail within an electrical enclosure.
4.2. Kabelverbindungen
Refer to the wiring diagram below for correct connections. Ensure all connections are tight and properly insulated.
- Connect the incoming neutral (N) and phase lines (L1, L2, L3) to the 'IN' terminals.
- Connect the outgoing neutral (N) and phase lines (L1, L2, L3) to the 'OUT' terminals.
- Überprüfen Sie alle Verbindungen noch einmal, bevor Sie das Gerät mit Strom versorgen.

Bild 4.2.1: Detailed wiring diagram for the EARU Electric Voltage Protector, showing connections for N, L1, L2, L3 for both input and output. The diagram illustrates how to integrate the protector into a 3-phase electrical system.
5. Bedienungsanleitung
5.1. Erste Inbetriebnahme
Once wired, apply power to the device. The LED display will illuminate, showing the real-time voltage und Stromstärke für jede Phase.
5.2. Anzeigeanzeigen
- V: Bandtage Anzeige.
- A: Aktuelle Anzeige.
- Leistung: Output indication.
- >V: Überlautstärketage-Anzeige.
- <V: Untervolumentage-Anzeige.
- >ICH: Over-current indication.
5.3. Parameter festlegen
Use the 'SET' button to enter the configuration menu and the 'Up' and 'Down' keys to adjust values. Press 'SET' again to confirm and move to the next parameter. Hold 'SET' for 3 seconds to enter settings mode.

Bild 5.3.1: A detailed guide to setting various protection parameters on the EARU Electric Voltage Protector. This includes overvoltage, Untervoltage, overcurrent, and recovery delay settings, with default values and adjustment ranges.
Zu den wichtigsten einstellbaren Parametern gehören:
- Übervolumentage Schutzeinstellung: Range 230-300V (Default 270V).
- Übervolumentage Protection Recover Setting: Range 225-295V (Default 265V).
- Übervolumentage Recovery Delay: Range 1-500s (Default 30s).
- Übervolumentage Trip Delay: Range 0.1-30s (Default 1.0s).
- Untervoltage Schutzeinstellung: Range 140-210V (Default 170V).
- Untervoltage Protection Recover Setting: Range 145-215V (Default 175V).
- Untervoltage Trip Delay: Range 0.1-30s (Default 1.0s).
- Überstromschutzeinstellung: Range 1-63A (Default 30A).
- Overcurrent Trip Delay: Range 0.1-30s (Default 1.0s).
- Bandtage & Current Manual Error Calibration: Adjust for accuracy, range -9.5% to +9.5% (Default 0%).
- Power-on Delay Setting: Adjustable Range: 1-500S (Default: 10s).
5.4. Manual ON/OFF
The power button allows for manual switching of the device output.
6. Wartung
The EARU-1008 is designed for minimal maintenance. However, periodic checks are recommended:
- Halten Sie das Gerät sauber und frei von Staub und Schmutz.
- Überprüfen Sie die Kabelverbindungen regelmäßig auf festen Sitz und Anzeichen von Verschleiß.
- Sorgen Sie für ausreichende Belüftung rund um das Gerät, um eine Überhitzung zu vermeiden.
7. Fehlerbehebung
Falls das Gerät nicht wie erwartet funktioniert, beachten Sie Folgendes:
- Kein Display/Keine Stromversorgung: Check the main power supply and all wiring connections.
- Schutzauslösung: Identify the active protection indicator (>V, <V, >I). Check the corresponding voltage or current levels. The device will automatically reset once conditions return to normal, based on configured recovery delays.
- Phase Failure: The device automatically detects and responds to phase failures, initiating a cut-off and auto-reset once the phase is restored.
- Falsche Messwerte: If readings appear inaccurate, consider performing a manual error calibration as described in Section 5.3.
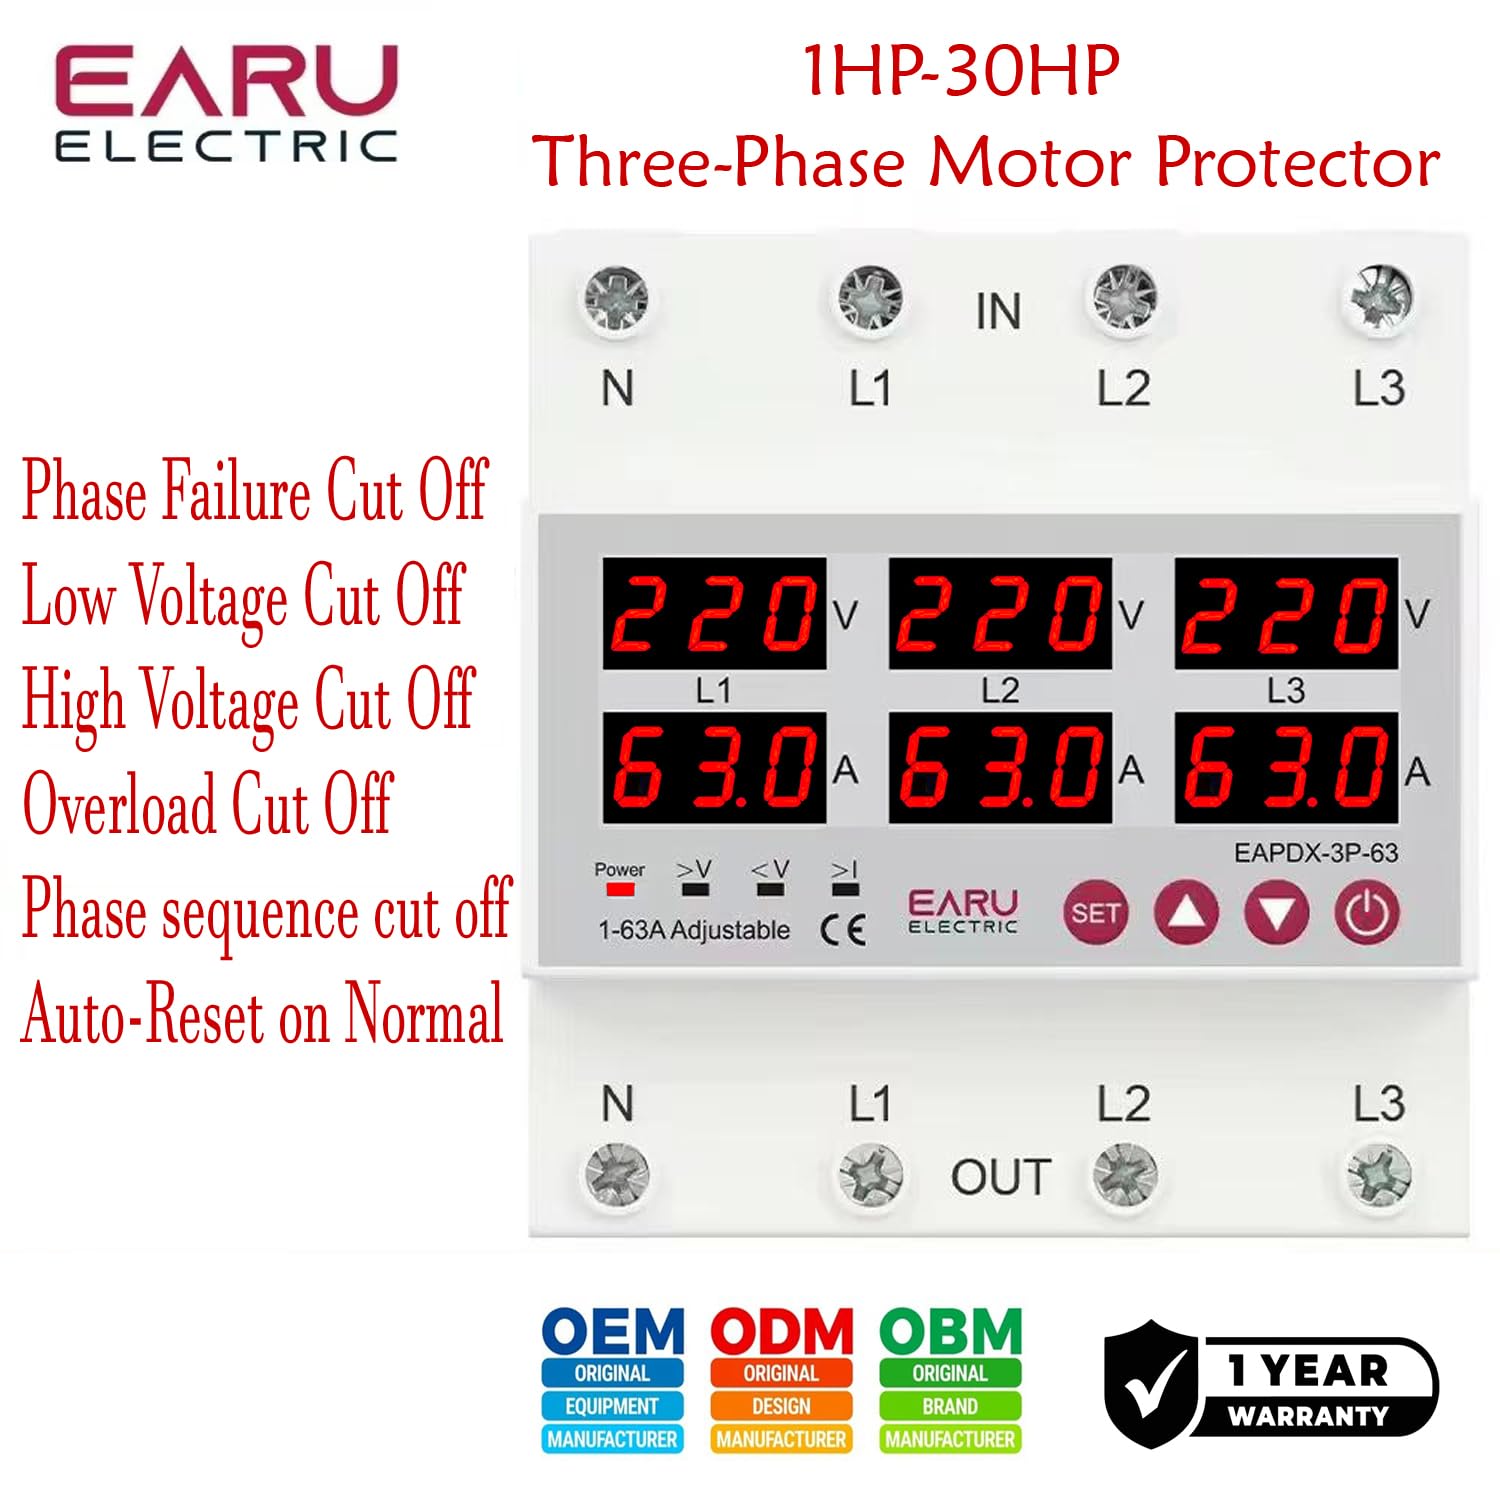
Bild 7.1: This image highlights the various protection features of the EARU Electric Voltage Protector, including phase failure cut-off, low voltage cut-off, high voltage cut-off, overload cut-off, phase sequence cut-off, and auto-reset on normal conditions. These are key aspects for troubleshooting protection trips.
8. Spezifikationen
| Parameter | Wert |
|---|---|
| Marke | EARU |
| Modell | EARU-1008 |
| Nennversorgungsvoltage | AC 3*220V (N-L1/L2/L3) / 440V |
| Nennfrequenz | 50/60 Hz |
| Over Current Protection Setting Range | 1-63A (Default 30A) |
| Über Voltage Protection Setting Range | 230-300V (Default 270V) |
| Unter Voltage Protection Setting Range | 140-210V (Default 170V) |
| Technische Daten | 20 x 10 x 20 cm |
| Artikelgewicht | 450 g |
| Montagetyp | DIN-Schiene |

Bild 8.1: This image provides a visual representation of the EARU Electric Voltage Protector's dimensions and a table of key technical specifications, including voltage, frequency, and protection ranges.
9. Garantie und Support
9.1. Gewährleistung
The EARU Electric Voltage Protector (Model EARU-1008) comes with a 1 Jahr Herstellergarantie Die Garantie deckt ab Kaufdatum Material- und Verarbeitungsfehler bei normalem Gebrauch ab. Bitte bewahren Sie Ihren Kaufbeleg für Garantieansprüche auf.
9.2. Kundendienst
For technical assistance, troubleshooting, or warranty inquiries, please contact EARU customer support through your retailer or the official EARU website. Provide your model number (EARU-1008) and a detailed description of the issue for efficient service.


