
1. Einrichtung
Follow these steps to prepare your Gevi Professional Barista Coffee Machine for first use.
1.1 Auspacken und Prüfen
Carefully remove all components from the packaging. Inspect the machine for any signs of damage during transit. Retain packaging for future transport or service needs. Ensure all accessories listed in the packing list are present.
1.2 Platzierung
Place the coffee machine on a stable, level, and heat-resistant surface. Ensure there is adequate space around the machine for ventilation, especially at the back and sides. Keep it away from direct sunlight, heat sources, and areas with high humidity. The power outlet should be easily accessible.
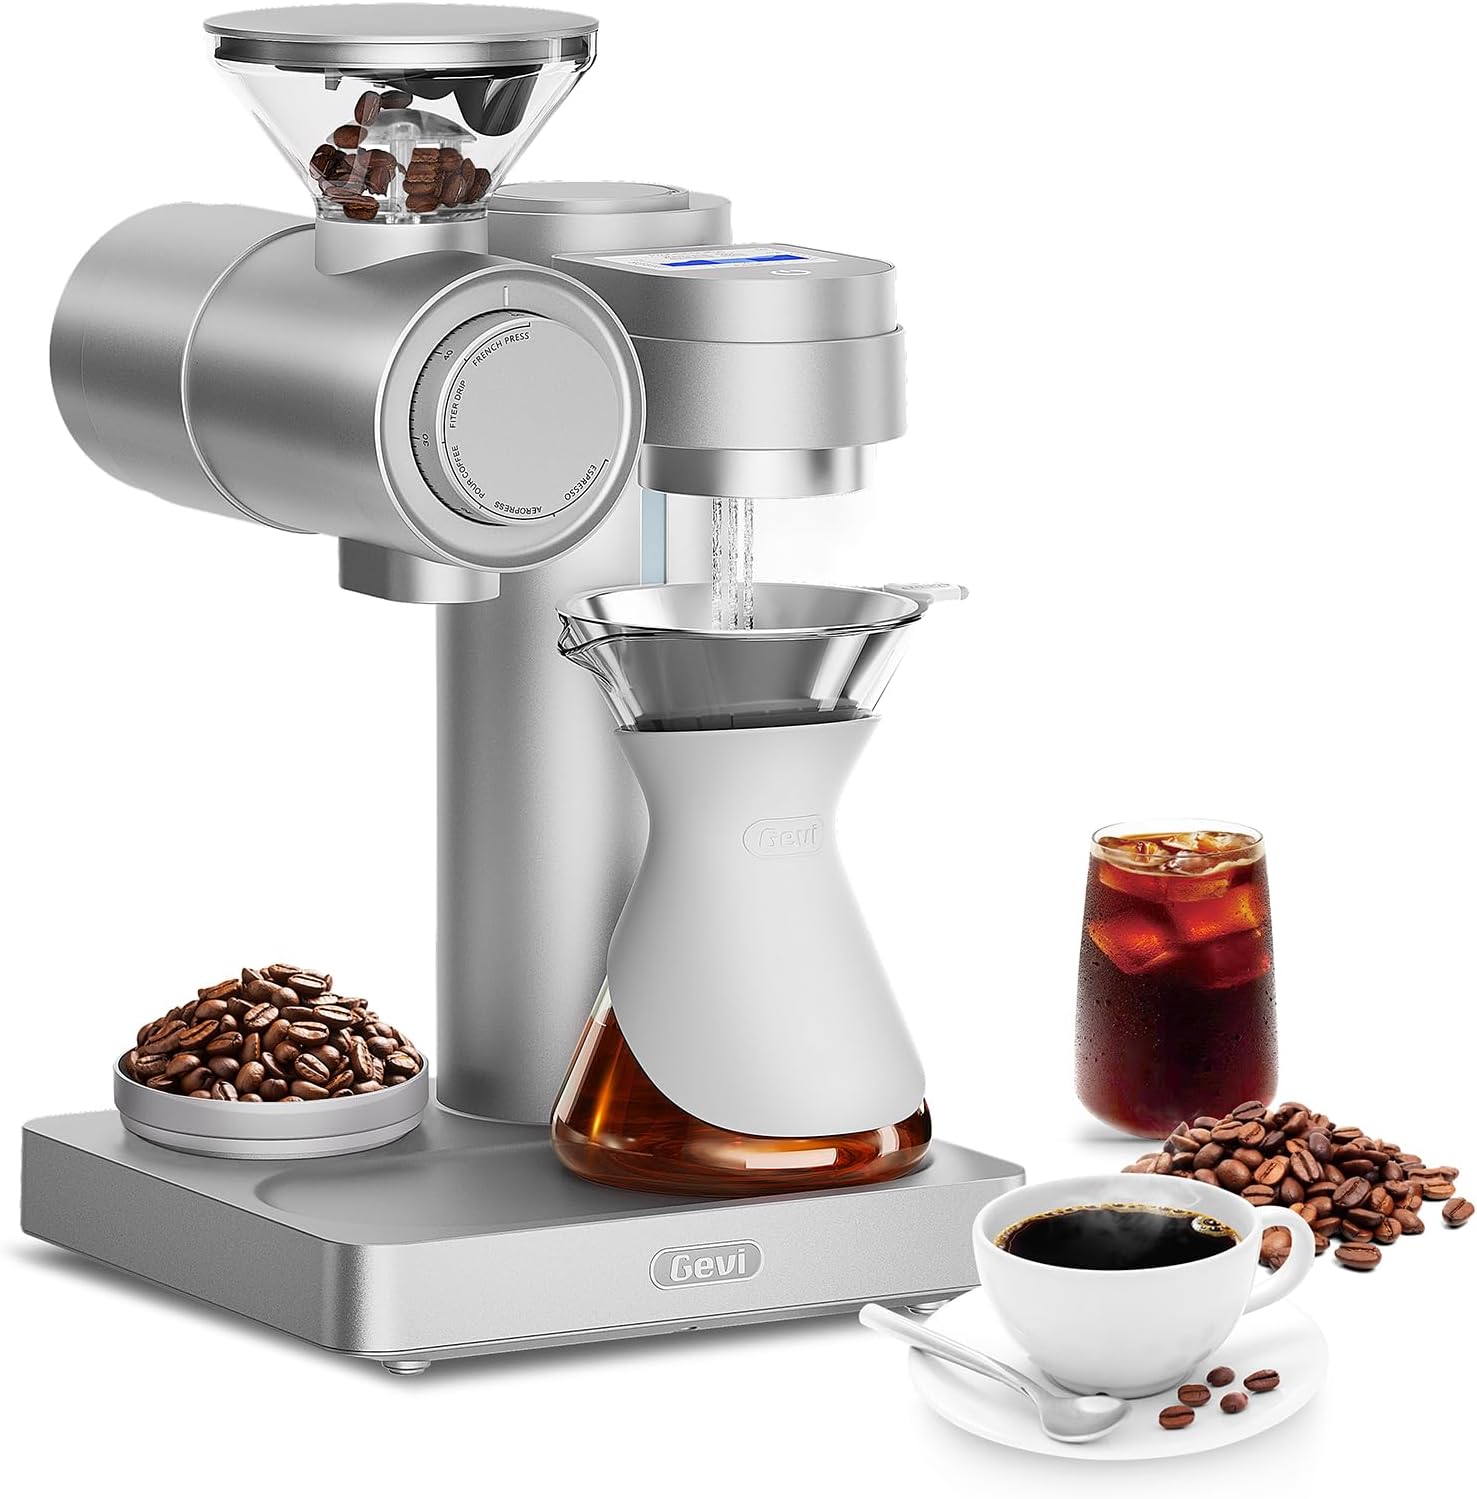
Abbildung 1: The Gevi Professional Barista Coffee Machine. This image displays the front view of the machine, highlighting the control panel, portafilter, and steam wand. The water tank is typically located at the back or side.
1.3 Vorbereitung des Wassertanks
- Entfernen Sie den Wassertank von der Rückseite der Maschine.
- Spülen Sie den Wassertank gründlich mit klarem Wasser aus.
- Fill the water tank with fresh, cold, filtered water up to the MAX line indicated. Do not overfill.
- Securely place the water tank back into its position on the machine.
1.4 Initial Cleaning Cycle
Before brewing coffee, perform an initial cleaning cycle to flush out any manufacturing residues.
- Stellen Sie sicher, dass der Wassertank gefüllt ist.
- Stellen Sie einen großen Behälter unter die Brühgruppe und die Dampflanze.
- Power on the machine. Allow it to heat up until the indicator light signals readiness.
- Run a cycle of hot water through the brew group without coffee.
- Open the steam valve to dispense hot water through the steam wand for 30-60 seconds.
- Wiederholen Sie diesen Vorgang 2-3 mal.
2. Bedienungsanleitung
This section details the steps for brewing espresso and steaming milk with your Gevi coffee machine.
2.1 Ein-/Ausschalten
Drücken Sie die Leistung button located on the front panel. The machine will begin to heat up. Wait for the indicator light to turn solid, signifying it has reached the optimal brewing temperature.
2.2 Coffee Preparation (Espresso)
- Schleifen: Verwenden Sie frisch geröstete Kaffeebohnen und mahlen Sie diese fein, bis eine für Espresso geeignete Konsistenz erreicht ist.
- Dosierung: Fill the portafilter basket with the appropriate amount of ground coffee (e.g., 7-8g for a single shot, 14-16g for a double shot).
- Tamping: Einsatz beiamper to press the coffee grounds firmly and evenly into the portafilter basket. Ensure the surface is level.
- Locking Portafilter: Setzen Sie den Siebträger in die Brühgruppe ein und drehen Sie ihn fest nach rechts, bis er sicher einrastet.
2.3 Espresso zubereiten
- Stellen Sie Ihre Espressotasse(n) auf die Abtropfschale direkt unter die Ausläufe des Siebträgers.
- Drücken Sie die Einzelschuss or Doppelschuss button. The machine will begin pre-infusion, followed by brewing.
- The brewing process will stop automatically. For manual control, press the button again to stop.
- Remove the portafilter, discard the spent coffee grounds (puck), and rinse the portafilter.
2.4 Aufschäumen von Milch
- Ensure the machine is at steaming temperature (steam indicator light solid).
- Fill a stainless steel milk pitcher with cold milk, typically to just below the spout.
- Tauchen Sie die Spitze der Dampfdüse knapp unter die Oberfläche der Milch.
- Drehen Sie den Dampfreglerknopf to activate steam.
- Lower the pitcher slightly to introduce air for frothing, then submerge the tip deeper to heat the milk.
- Continue until the milk reaches the desired temperature (around 140-150°F / 60-65°C) and texture.
- Turn off the steam control knob. Immediately wipe the steam wand with a damp Tuch, um zu verhindern, dass Milchreste eintrocknen.
2.5 Heißwasserausgabe
Zum Zapfen von heißem Wasser für Tee oder Americano:
- Stellen Sie eine Tasse unter die Dampfdüse.
- Drehen Sie den Dampfreglerknopf to the hot water position (if available, otherwise use the steam function briefly).
- Die gewünschte Menge heißes Wasser entnehmen.
- Close the knob.
3. Wartung
Regular cleaning and maintenance ensure optimal performance and longevity of your Gevi coffee machine.
3.1 Tägliche Reinigung
- Siebträger und Filterkörbe: Nach jedem Gebrauch den Siebträger entnehmen, den Kaffeesatz entsorgen und Siebträger und Filterkorb unter heißem Wasser ausspülen.
- Dampfdüse: Wischen Sie die Dampfdüse unmittelbar nach dem Aufschäumen von Milch mit einem feuchten Tuch ab.amp Mit einem Tuch durchspülen. Etwas Dampf ablassen, um eventuelle Milchreste im Inneren zu entfernen.
- Tropfschale: Empty and rinse the drip tray daily or when the indicator floats.
- Exterieur: Wischen Sie das Äußere der Maschine mit einem weichen, damp Tuch. Keine Scheuermittel verwenden.
3.2 Wöchentliche Reinigung
- Wassertank: Remove, wash with mild detergent, rinse thoroughly, and refill with fresh water.
- Brauereigruppe: Use a brew group brush to clean any coffee grounds from the shower screen and gasket. Perform a backflush if your machine supports it (refer to specific instructions for backflushing).
3.3 Entkalkung
Descaling removes mineral buildup from the machine's internal components, which can affect performance and taste. The frequency depends on water hardness and usage, typically every 2-3 months.
- Leeren Sie den Wassertank und füllen Sie ihn mit einer Entkalkungslösung, die gemäß den Anweisungen des Entkalkerherstellers gemischt wurde.
- Stellen Sie einen großen Behälter unter die Brühgruppe und die Dampflanze.
- Run the descaling solution through the brew group and steam wand until the tank is empty.
- Spülen Sie den Wassertank gründlich aus und füllen Sie ihn mit frischem Wasser auf.
- Spülen Sie die Maschine mehrmals mit frischem Wasser durch, um eventuell verbliebene Entkalkungslösung auszuspülen.
Vorsicht: Only use descaling solutions specifically designed for coffee machines. Do not use vinegar, as it can damage internal components.
4. Fehlerbehebung
In diesem Abschnitt finden Sie Lösungen für häufig auftretende Probleme.
| Problem | Mögliche Ursache | Lösung |
|---|---|---|
| Das Gerät lässt sich nicht einschalten. | Nicht angeschlossen; Problem mit der Steckdose; Hauptschalter ausgeschaltet. | Check power cord connection; test outlet with another appliance; ensure main power switch is on. |
| No water dispensing from brew group. | Water tank empty or not seated correctly; pump airlock; machine not primed. | Fill water tank and ensure it's seated; run hot water through steam wand to prime pump; descale if necessary. |
| Der Espresso brüht zu langsam oder gar nicht. | Kaffee zu fein gemahlen; Kaffee tamped too hard; brew group clogged; machine needs descaling. | Verwenden Sie einen gröberen Mahlgrad; reduzieren Sie tamping pressure; clean brew group; descale the machine. |
| Der Espresso brüht zu schnell, der Kaffee ist zu schwach. | Kaffee zu grob gemahlen; zu wenig Kaffee; Kaffee zuamped zu leicht. | Use a finer grind; increase coffee dose; tamp fester. |
| Aus der Dampflanze kommt kein Dampf. | Machine not at steaming temperature; steam wand clogged; water tank empty. | Wait for steam indicator light; clean steam wand tip with a pin; fill water tank. |
If the problem persists after attempting these solutions, please contact Gevi Customer Support.
5. Spezifikationen
Key technical specifications for the Gevi Professional Barista Coffee Machine Model GESCMA705-U.
- Modellnummer: GESCMA705-U
- Produktabmessungen: 10 x 10.3 x 17 Zoll (Länge x Breite x Höhe)
- Artikelgewicht: 23 Pfund
- UPC: 767791888858
- Leistung/Voltage: Refer to the product label on the machine for specific electrical requirements.
6. Garantie und Support
Gevi provides a limited warranty for this product. Please register your product to activate your warranty and receive important updates.
6.1 Eingeschränkte Garantie
This Gevi Professional Barista Coffee Machine (Model GESCMA705-U) is covered by a manufacturer's limited warranty against defects in materials and workmanship for a period of one (1) year from the original date of purchase. This warranty does not cover damage caused by misuse, neglect, accident, alteration, or unauthorized repair. Proof of purchase is required for warranty claims.
6.2 Kundendienst
For technical assistance, warranty claims, or general inquiries, please contact Gevi Customer Support:
- WebWebsite: www.gevi.com (Please visit our website for FAQs, product registration, and support resources.)
- E-Mail: support@gevi.com
- Telefon: 1-800-XXX-XXXX (Availability may vary by region. Please check the website for local contact numbers.)
When contacting support, please have your product model number (GESCMA705-U) and proof of purchase readily available.