
1. Einleitung
This manual provides detailed instructions for the setup, operation, and maintenance of your SMSL AS400 Power Amplifier DAC Kopfhörer Amp. Please read this manual thoroughly before using the product to ensure proper function and longevity.
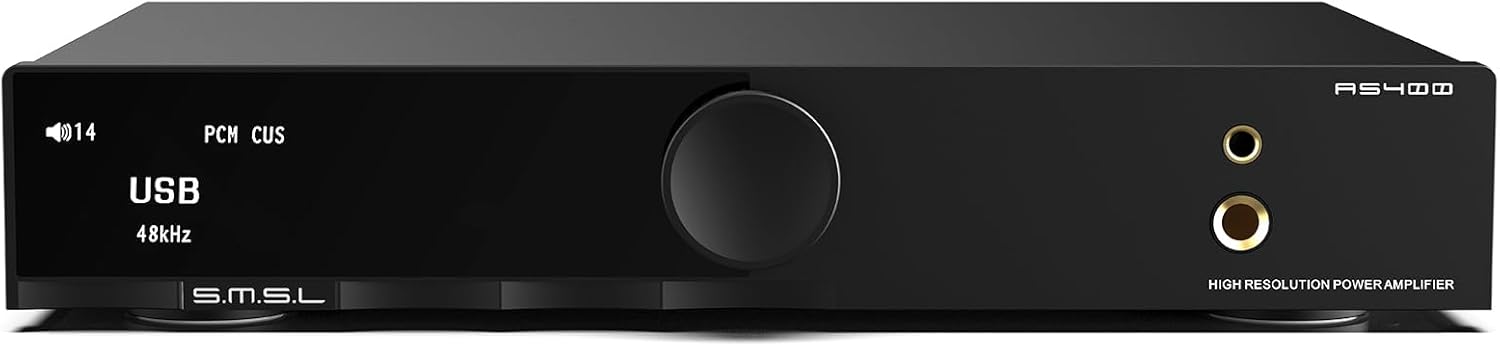
Abbildung 1: Vorderseite view of the SMSL AS400 unit.
2. Produktmerkmale
- Leistungsstarke Ausgabe: Integrates Cirrus Logic CS43131 DAC, Infineon MA5332MS digital amplifier, and XMOS XU-316. Supports PCM up to 32-bit/768kHz and DSD up to DSD256. Delivers 165W x 165W output (4Ω) with 0.003% THD+N distortion.
- 2.1 Subwoofer System: Features a dedicated subwoofer output for easy integration into a 2.1 channel audio system, providing enhanced bass.
- HDMI ARC TV Connection: Equipped with an HDMI (ARC) port for direct connection to compatible TVs, enabling synchronized audio and video.
- MM Phono-VorstufeampReiniger: Built-in low-noise MM phono stage for turntables, ensuring high-quality vinyl playback.
- Audio-Anpassung: Offers 8 EQ settings (Direct, Tone, SDB, Bass, Super Bass, Rock, Soft, Clear) and 5 digital filters (Fast, Phase Compensation, Slow and Low Latency, Slow and Phase Compensation, Non-OversampLing).
- Umfassende Konnektivität: Multiple input options including HDMI (ARC), Bluetooth, USB, Optical, Coaxial, Phono, and I2S. Features 4.4mm and 6.35mm headphone outputs.

Abbildung 2: Überview of SMSL AS400 key features.
3. Packungsinhalt
Überprüfen Sie, ob alle Artikel im Paket vorhanden sind:
- SMSL AS400-Einheit
- Netzkabel
- USB-Kabel
- HDMI-Kabel
- Bluetooth-Antenne
- Fernbedienung
- Benutzerhandbuch (dieses Dokument)
- Servicekarte
4. Produktüberschreitungview
4.1 Frontplatte
Figure 3: Front panel layout.
- Bildschirm: Zeigt den aktuellen Eingang s an.ample rate, volume, and menu options.
- Funktionsknopf: Press to enter the menu, hold to exit the menu, rotate to change values or volume.
- 4.4mm Kopfhörerbuchse: Symmetrischer Kopfhörerausgang.
- 6.35 mm Kopfhörerausgang: Standard-Kopfhörerausgang.
4.2 Rückseite

Figure 4: Rear panel layout with input/output labels.
- PHONO Input (L/R): For connecting turntables with MM cartridges. Includes a grounding terminal.
- AUX-Eingang (L/R): Standard analog RCA input.
- SW OUT (Subwoofer Output): Zum Anschluss eines aktiven Subwoofers.
- KOAXIAL-Eingang: Digitaler koaxialer Audioeingang.
- HDMI (ARC) Eingang: For connecting to a TV's Audio Return Channel port.
- USB Eingang: Zum Anschluss an einen Computer oder eine andere USB-Audioquelle.
- OPTISCHER Eingang: Digitaler optischer Audioeingang.
- Bluetooth-Antenne: Für drahtlosen Bluetooth-Audioempfang.
- SPEAKERS OUT (L/R): Lautsprecheranschlüsse für passive Lautsprecher.
- Wechselstromeingang: Zum Anschluss des Netzkabels.
5. Einrichtung
5.1 Anschließen von Lautsprechern
- Ensure the AS400 is powered off.
- Verbinden Sie Ihre passiven Lautsprecher mit dem LAUTSPRECHER AUS terminals on the rear panel. Ensure correct polarity (+ to + and - to -) for both left and right channels.
5.2 Kopfhörer anschließen
- Schließen Sie Ihre Kopfhörer entweder an den/die/das an 4.4-mm-Kopfhörerbuchse oder die 6.35-mm-Kopfhörerausgang auf der Frontplatte.
5.3 Anschließen von Audioquellen
Connect your desired audio sources to the corresponding input ports on the rear panel:
- USB: Verbinden Sie das Gerät mit dem Computer mithilfe des mitgelieferten USB-Kabels.
- Bluetooth: Attach the Bluetooth antenna. Select Bluetooth input on the device and pair with your source device.
- Optisch/Koaxial: Connect digital audio sources like CD players or media streamers.
- RCA (AUX): Connect analog audio sources like CD players or other audio devices.
- Phono: Connect a turntable with an MM cartridge. Ensure the turntable's ground wire is connected to the AS400's grounding terminal.
- HDMI (ARC): Connect to your TV's HDMI ARC port using a compatible HDMI cable.
5.3.1 HDMI ARC Connection Details

Figure 5: HDMI ARC connection setup.
To connect an ARC compatible TV:
- Connect an HDMI cable (19-pin, with HDMI logo indicating ARC compatibility) from your TV's HDMI (ARC) port to the AS400's HDMI (ARC) input.
- Ensure the TV's HDMI IN port is labeled "ARC" or "eARC/ARC". If the port does not support ARC, this function cannot be used.
- You may need to adjust TV settings for ARC. Refer to your TV's user manual.
- This product supports digital audio input via HDMI ARC, not video input.
- If your TV does not support ARC, connect the TV's audio output (Optical, Coaxial, or AUX) to the corresponding input on the AS400.
- Due to ARC input protocol, the AS400's volume cannot be adjusted by the TV remote, nor does it support synchronous power on/off.
- When using HDMI ARC, confirm the TV's audio output format is PCM.
Video 1: Demonstration of HDMI ARC connection to a TV.
6. Bedienungsanleitung
6.1 Grundlegende Bedienung
- Ein-/Ausschalten: Use the power switch on the rear panel or the remote control.
- Lautstärkeregelung: Drehen Sie den Funktionsknopf an der Vorderseite oder verwenden Sie die Lautstärketasten auf der Fernbedienung.
- Eingangsauswahl: Press the function knob to enter the menu, then rotate to select 'Input'. Alternatively, use the input selection buttons on the remote.
6.2 Menünavigation
The function knob is used for menu navigation:
- Drücken: Rufen Sie das Menü auf oder bestätigen Sie eine Auswahl.
- Halten: Beendet das aktuelle Menü.
- Drehen: Blättern Sie durch die Menüoptionen oder passen Sie die Werte an.
6.3 EQ- und Filtereinstellungen

Figure 6: Menu options for EQ and tone control.
Access the 'SETUP MENU' by pressing the function knob. Navigate to 'EQ', 'Treble', 'Bass', or 'Filter' to customize your audio experience:
- EQ-Modi: Select from Direct, Tone, SDB, Bass, Super Bass, Rock, Soft, and Clear.
- Filter: Choose from Fast, Phase Compensation, Slow and Low Latency, Slow and Phase Compensation, and Non-OversampLeng.
6.4 MQA-Wiedergabe

Figure 7: MQA and MQA-CD support.
The AS400 supports full MQA and MQA-CD decoding, allowing for native playback of MQA streams/files and MQA-CDs. Connect your MQA-enabled source via USB, Optical, or Coaxial inputs for high-resolution audio.
Video 2: Endeview of the SMSL AS400's features and functionality.
7. Spezifikationen

Abbildung 8: Detaillierte Produktspezifikationen.
| Besonderheit | Spezifikation |
|---|---|
| Eingang | RCA / BT / USB / Optisch / Koaxial / Phono / I2S |
| Klirrfaktor | 0.003 % |
| Output Power (RMS) STEREO | 4Ω: 165W x 2, 8Ω: 85W x 2 |
| Input Sensitivity/Input Impedance | 280 mV/22 kΩ |
| USB-Kompatibilität | Windows 7/8/8.1/10/11, Mac OSX, Linux |
| Bittiefe | USB: 1bit, 16-32bit; Optical/Coaxial: 1bit, 16-32bit |
| SNR | 107 dB |
| Kanaltrennung | 98 dB |
| USB-Übertragung | Asynchrone Übertragung |
| Energieaufnahme | 40 W (Normale Lautstärke) |
| MQA-Decoder | USB / Optisch / Koaxial |
| MQA-CD-Decoder | Optisch / Koaxial |
| Sampling-Rate | PCM: 44.1-768kHz (USB), 44.1-192kHz (Optical/Coaxial); DSD: 2.8224-11.2896MHz (USB), DSD64(DoP) (Optical/Coaxial) |
| Größe (BxHxT) | 210.4 x 46 x 254 mm |
| Artikelgewicht | 1.568kg / 3.46lbs |
| Material | Aluminiumlegierung |
| Bandtage | 220 Volt |
8. Fehlerbehebung
8.1 HDMI ARC Function
- Q1: The ARC input is connected to the TV, but the TV does not recognize the device or there is no sound.
A1: The ARC input needs to be connected to the HDMI ARC interface of the TV. The output mode of the TV should be set to "ARC/ARC+TV speakers". - Q2: Can the TV remote control adjust the volume of this product?
A2: Nicht unterstützt. - Q3: Will the product synchronize on/off after turning on/off the TV?
A3: Not supported. When using HDMI ARC input, this product needs to be restarted when the TV is turned off and then turned on again. - Q4: What should I do if there is no sound after connecting the TV to the product?
A4: When using this product, please confirm that the audio output format of the TV is PCM. - Q5: Does it support connecting to a TV set-top box?
A5: Nicht unterstützt.
8.2 Allgemeine Fehlerbehebung
- Kein Strom: Ensure the AC power cable is securely connected to both the AS400 and a working power outlet. Check the power switch on the rear panel.
- Kein Ton aus Lautsprechern/Kopfhörern: Verify the correct input source is selected. Check all cable connections. Ensure volume is not muted or set too low. Confirm speakers/headphones are properly connected.
- Verzerrter Klang: Check cable connections for looseness or damage. Ensure the audio source is not overdriving the input. Try a different audio source or cable.
- Probleme mit der Bluetooth-Verbindung: Ensure the Bluetooth antenna is attached. Confirm the AS400 is in Bluetooth pairing mode and your device's Bluetooth is enabled and searching. Try unpairing and re-pairing the device.
9. Wartung
- Reinigung: Use a soft, dry cloth to clean the unit. Avoid using liquid cleaners or solvents.
- Platzierung: Place the unit on a stable, level surface with adequate ventilation. Avoid direct sunlight, heat sources, and excessive moisture.
- Leistung: Trennen Sie das Netzkabel von der Steckdose, wenn das Gerät längere Zeit nicht benutzt wird.
10. Garantie und Support
For warranty information and technical support, please refer to the service card included in your package or contact the manufacturer directly. Keep your purchase receipt as proof of purchase for warranty claims.