
MOBAPAD Huben2 H6
MOBAPAD Huben2 Wireless Switch Controller Pro Bedienungsanleitung
Model: Huben2 H6 | Brand: MOBAPAD
1. Einleitung
This manual provides detailed instructions for the setup, operation, and maintenance of your MOBAPAD Huben2 Wireless Switch Controller Pro. Please read this manual thoroughly before using the product to ensure optimal performance and longevity.
2. Sicherheitshinweise
- Halten Sie den Controller von Wasser und anderen Flüssigkeiten fern.
- Setzen Sie den Controller keinen extremen Temperaturen aus.
- Vermeiden Sie es, den Controller fallen zu lassen oder starken Stößen auszusetzen.
- Do not attempt to disassemble or repair the controller yourself. Contact customer support for assistance.
- Verwenden Sie zum Aufladen ausschließlich das mitgelieferte Ladekabel oder ein zertifiziertes USB-C-Kabel.
3. Packungsinhalt
Überprüfen Sie, ob alle Artikel in Ihrem Paket vorhanden sind:
- MOBAPAD Huben2 Wireless Controller Pro
- USB-C-Ladekabel
- Wireless Dongle (2.4G)
- PU Travel Case
- Replaceable D-pad (Cross/Circle)
- Bedienungsanleitung (dieses Dokument)
4. Controller-Layout
Familiarize yourself with the buttons and features of your Huben2 controller.

Abbildung 4.1: Vorderseite view of the MOBAPAD Huben2 Wireless Controller Pro. Shows the joysticks, face buttons (A, B, X, Y), D-pad, and central function buttons.
- Linker/Rechter Analogstick: Capacitive joysticks with 4,096-step precision.
- A/B/X/Y-Tasten: Omron mechanical face buttons.
- D-Pad: Replaceable cross or circle D-pad.
- L1/R1 (Schulterknöpfe): Standard shoulder buttons.
- L2/R2 (Trigger): Dual-mode triggers (Hall Effect and Microswitch).
- Tasten M1/M2/M3/M4: Four programmable back buttons.
- Home "Button: Powers on/off and returns to system home screen.
- Screenshot-Schaltfläche: Erstellt Screenshots.
- Plus-/Minus-Tasten: Standard system menu buttons.
- Turbo-Taste: Aktiviert/deaktiviert die Turbofunktion.
- USB-C-Anschluss: Zum Laden und für kabelgebundene Verbindungen.

Abbildung 4.2: Rückseite view showing the four programmable M1, M2, M3, M4 back buttons.
5. Einrichtung
5.1 Laden des Controllers
Before first use, fully charge the controller. Connect the provided USB-C cable to the controller's USB-C port and the other end to a USB power source (e.g., console, PC, or USB wall adapter). The charging indicator will show the charging status.
- A full charge provides approximately 15 hours of gameplay.

Figure 5.1: The controller features a 1000mAh battery for extended gameplay.
5.2 Verbindungsmodi
The Huben2 controller supports three connection methods:

Figure 5.2: The controller supports 2.4G wireless, Bluetooth, and wired connections across various platforms.
- 2.4G Wireless (via Dongle):
- Compatible with Windows PC, Steam, and Android TV.
- Insert the 2.4G wireless dongle into a USB port on your device.
- Schalten Sie den Controller ein. Er sollte sich automatisch mit dem Dongle verbinden.
- Bluetooth-Drahtlos:
- Compatible with Nintendo Switch, Nintendo Switch 2, Android, and iOS devices.
- Gehen Sie auf Ihrem Gerät zu den Bluetooth-Einstellungen und aktivieren Sie Bluetooth.
- On the controller, press and hold the Bluetooth pairing button (refer to controller layout for exact location) until the indicator lights flash rapidly.
- Select "MOBAPAD Huben2" from the list of available devices on your system to pair.
- For Nintendo Switch, the controller can wake the console from sleep mode after initial pairing and firmware update via the Mobapad app.
- Kabelverbindung:
- Compatible with Windows PC and Android TV.
- Connect the controller to your device using the USB-C cable. The controller will be recognized automatically.
6. Bedienungsanleitung
6.1 Ein-/Ausschalten
- Einschalten: Drücken Sie die Home-Taste.
- Ausschalten: Press and hold the Home button for 3-5 seconds. The controller will also power off automatically after a period of inactivity.
6.2 Duale Auslösemodi
The L2 and R2 triggers feature dual modes for different gaming experiences:

Figure 6.1: Visual representation of the 2mm Microswitch Trigger and 10mm Hall Linear Trigger modes.
- Microswitch Trigger (2mm): Provides a short, tactile click for rapid input, ideal for FPS games.
- Hall Effect Linear Trigger (10mm): Offers analog input with a longer travel distance, suitable for racing or simulation games.
- Umschalten der Modi: Use the physical switches located near the L2/R2 triggers to toggle between modes.
6.3 Customizable Features (Back Buttons, Macros, App Support)
The Huben2 controller offers extensive customization options:
- Programmable Back Buttons (M1-M4): Assign single button presses or complex macros to the four back buttons using the dedicated Mobapad PC/mobile application.
- Rapid-Fire Turbo Mode: Activate turbo functionality for any button. Refer to the Mobapad app or controller manual for specific button combinations to enable/disable.
- Mobapad App: Download the official Mobapad application for Windows or mobile devices to:
- Adjust joystick dead zones and response curves.
- Vibrationsintensität anpassen.
- Makros erstellen und verwalten.
- Firmware des Controllers aktualisieren.
6.4 HD Rumble and ALPS Linear Motors
The controller features dual ALPS linear motors for precise HD Rumble feedback, reacting to in-game sound and motion with 0ms startup time.
6.5 6-Achsen-Bewegungssteuerung
The integrated 6-axis motion sensor provides precise motion control for compatible games.

Figure 6.2: The controller's internal 6-axis sensing motors enable precise motion control.
6.6 Replaceable D-pad and Faceplate
The controller allows for customization of the D-pad and faceplate.
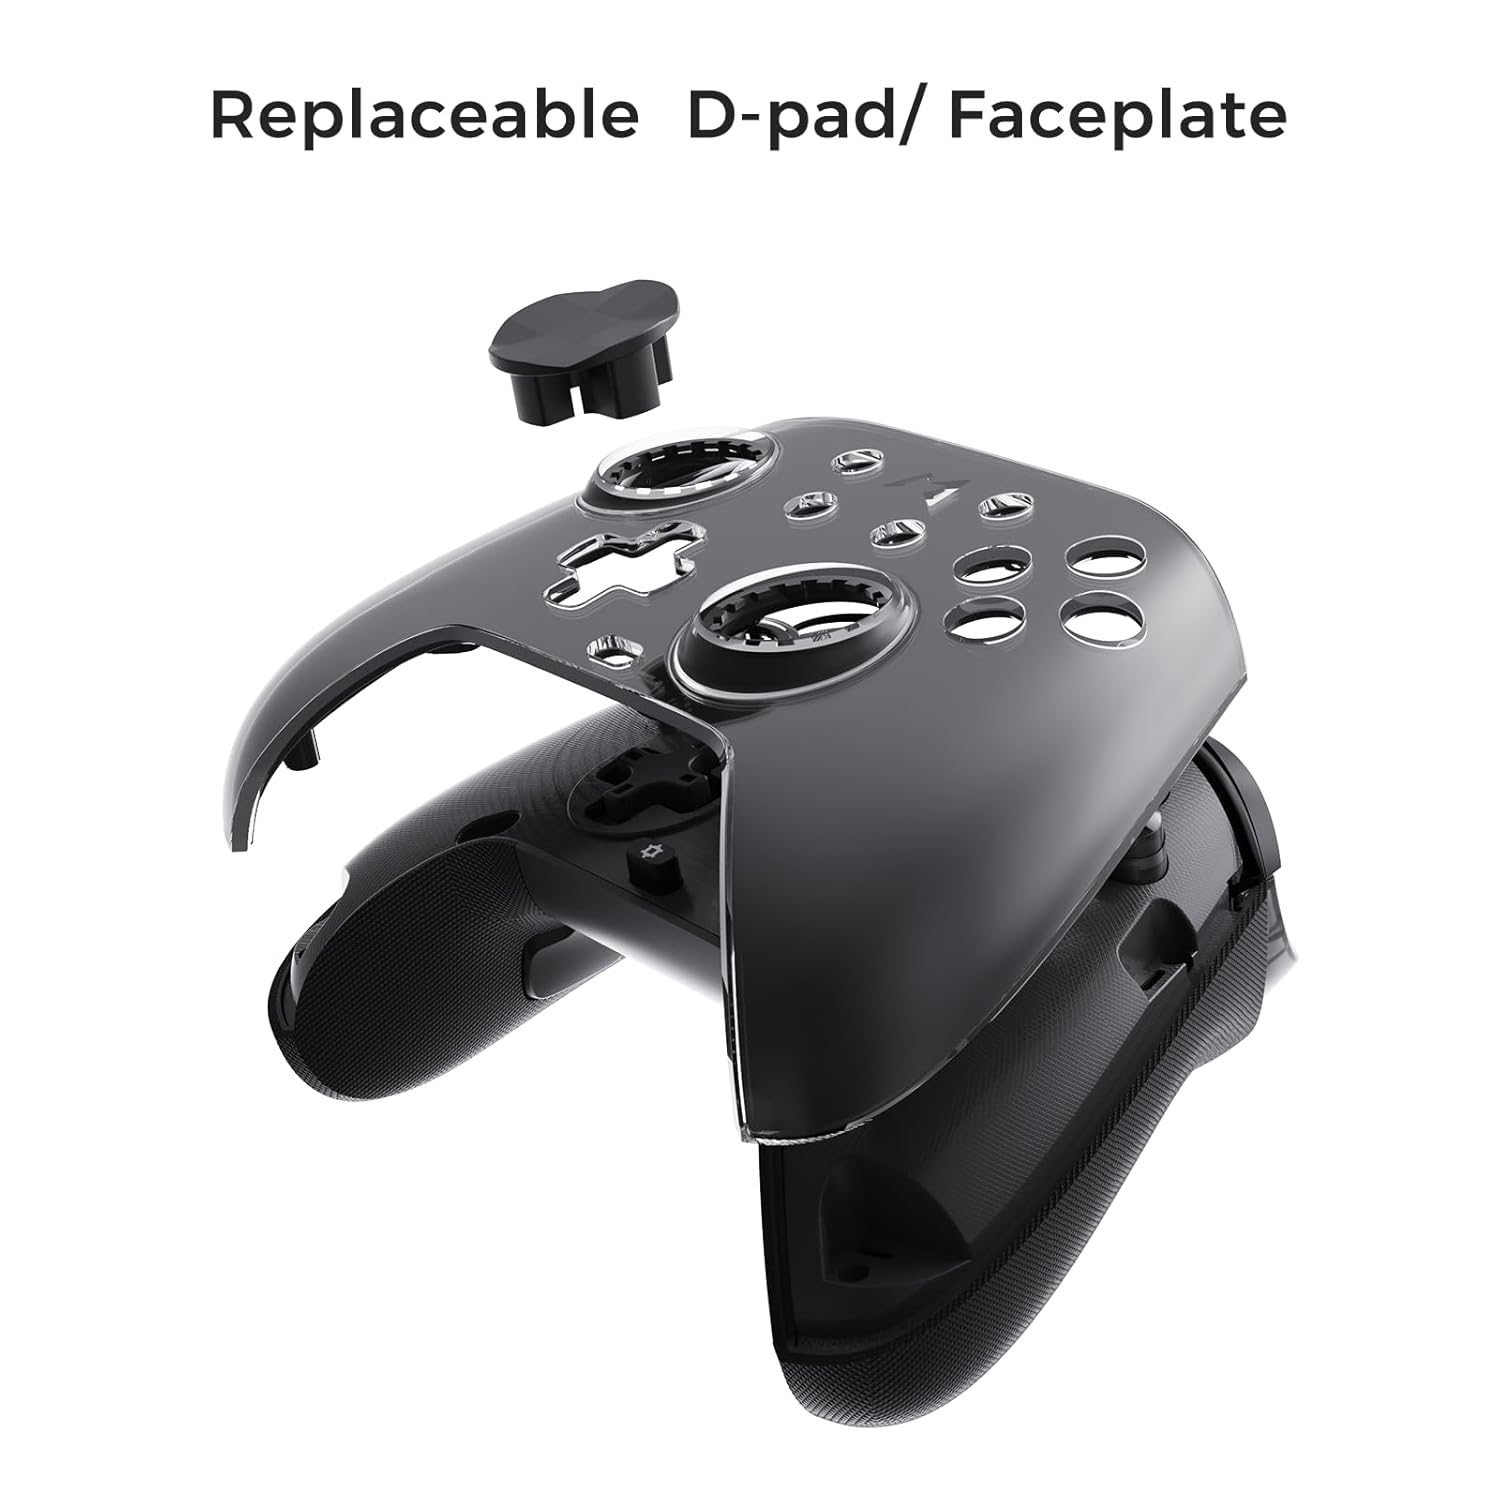
Figure 6.3: The D-pad and faceplate can be replaced for customization or preference.
- To replace the D-pad, gently remove the magnetic faceplate and then lift out the D-pad. Insert the desired D-pad (cross or circle) and reattach the faceplate.
7. Wartung
- Reinigung: Reinigen Sie den Controller mit einem weichen, trockenen Tuch. Bei hartnäckigem Schmutz leicht andrücken.ampBefeuchten Sie das Tuch mit Wasser. Verwenden Sie keine scharfen Chemikalien oder Scheuermittel.
- Lagerung: Store the controller in a cool, dry place, away from direct sunlight and extreme temperatures. When not in use for extended periods, store it in the provided PU travel case.
- Batteriepflege: Um die Batterielebensdauer zu verlängern, vermeiden Sie häufiges vollständiges Entladen des Controllers. Laden Sie ihn regelmäßig auf, auch wenn er nicht ständig in Gebrauch ist.
8. Fehlerbehebung
| Problem | Mögliche Ursache | Lösung |
|---|---|---|
| Der Controller lässt sich nicht einschalten. | Schwache Batterie. | Laden Sie den Controller mindestens 30 Minuten lang auf. |
| Der Controller verbindet sich nicht drahtlos. | Not in pairing mode; out of range; interference; incorrect mode selected. | Ensure controller is in pairing mode. Move closer to the device. Check for other wireless devices causing interference. Verify correct connection mode (2.4G or Bluetooth). |
| Eingabeverzögerung oder Verbindungsabbrüche. | Wireless interference; low battery; outdated firmware. | Reduce distance to device. Charge controller. Update firmware via Mobapad app. Try wired connection. |
| Knöpfe oder Joysticks reagieren nicht. | Software glitch; physical obstruction; calibration issue. | Restart the controller and the connected device. Check for physical debris. Calibrate joysticks via Mobapad app. |
| HD-Vibration funktioniert nicht. | Feature disabled in game/system settings; low battery. | Ensure rumble is enabled in game and system settings. Charge controller. |
If you encounter issues not listed here, please refer to the official MOBAPAD support webWebsite oder wenden Sie sich an den Kundendienst.
9. Spezifikationen
| Besonderheit | Detail |
|---|---|
| Modellnummer | Mobapad Huben2 H6 |
| Konnektivität | 2.4-GHz-Funkverbindung, Bluetooth, Kabelgebunden (USB-C) |
| Kompatibilität | Nintendo Switch, Nintendo Switch 2, Windows, Steam, Android, iOS |
| Joysticks | Capacitive, 4,096-step precision, 1000Hz polling rate |
| Auslöser | Dual Mode: 2mm Omron Microswitch, 10mm Hall Effect Linear |
| Schaltflächen | Omron Mechanical Face Buttons, Programmable Back Buttons (M1-M4) |
| Vibration | Dual ALPS Linear Motors (HD Rumble) |
| Bewegungssteuerung | 6-Achsen-Gyroskop |
| Batteriekapazität | 1000mAh Lithium-Ionen |
| Akkulaufzeit | Bis zu 15 Stunden (ungefähr) |
| Maße | 6.3 x 4.13 x 2.76 Zoll |
| Gewicht | 1.87 Pfund |
10. Garantie und Support
MOBAPAD products are designed and manufactured to the highest quality standards. For warranty information, technical support, or customer service inquiries, please visit the official MOBAPAD website or contact their authorized support channels. Please retain your proof of purchase for warranty claims.
WebWebsite: Visit the MOBAPAD Store on Amazon
Ask a question about this manual
Ask about setup, troubleshooting, compatibility, parts, safety, or missing instructions. Manuals+ will review the question and use this page’s manual context to help answer it.