1. Einleitung
The NGTeco NG-MB1 4-in-1 APP-Based Time Clock is a versatile attendance management system designed for small businesses. It offers multiple verification methods including facial recognition, fingerprint scanning, RFID card, and PIN entry to accurately track employee work hours. This manual provides detailed instructions for setting up, operating, maintaining, and troubleshooting your device.
2. Sicherheitshinweise
- Ensure the device is installed indoors and away from direct sunlight, heat sources, and moisture.
- Verwenden Sie ausschließlich das mitgelieferte Netzteil, um Schäden zu vermeiden.
- Versuchen Sie nicht, das Gerät selbst zu zerlegen oder zu reparieren. Wenden Sie sich an den Kundendienst, um Hilfe zu erhalten.
- Halten Sie das Gerät sauber und frei von Staub und Schmutz.
3. Packungsinhalt
Überprüfen Sie, ob alle Artikel im Paket vorhanden sind:
- NGTeco NG-MB1 Time Clock Unit
- Netzteil
- Wandhalterung
- Montagezubehör (Schrauben, Dübel)
- RFID-Karten (mehrere)
- USB Drive (for data transfer)
- Kurzanleitung
- Contact Information Card
4. Produktüberschreitungview
The NGTeco NG-MB1 Time Clock features a compact design with multiple input options for employee verification.
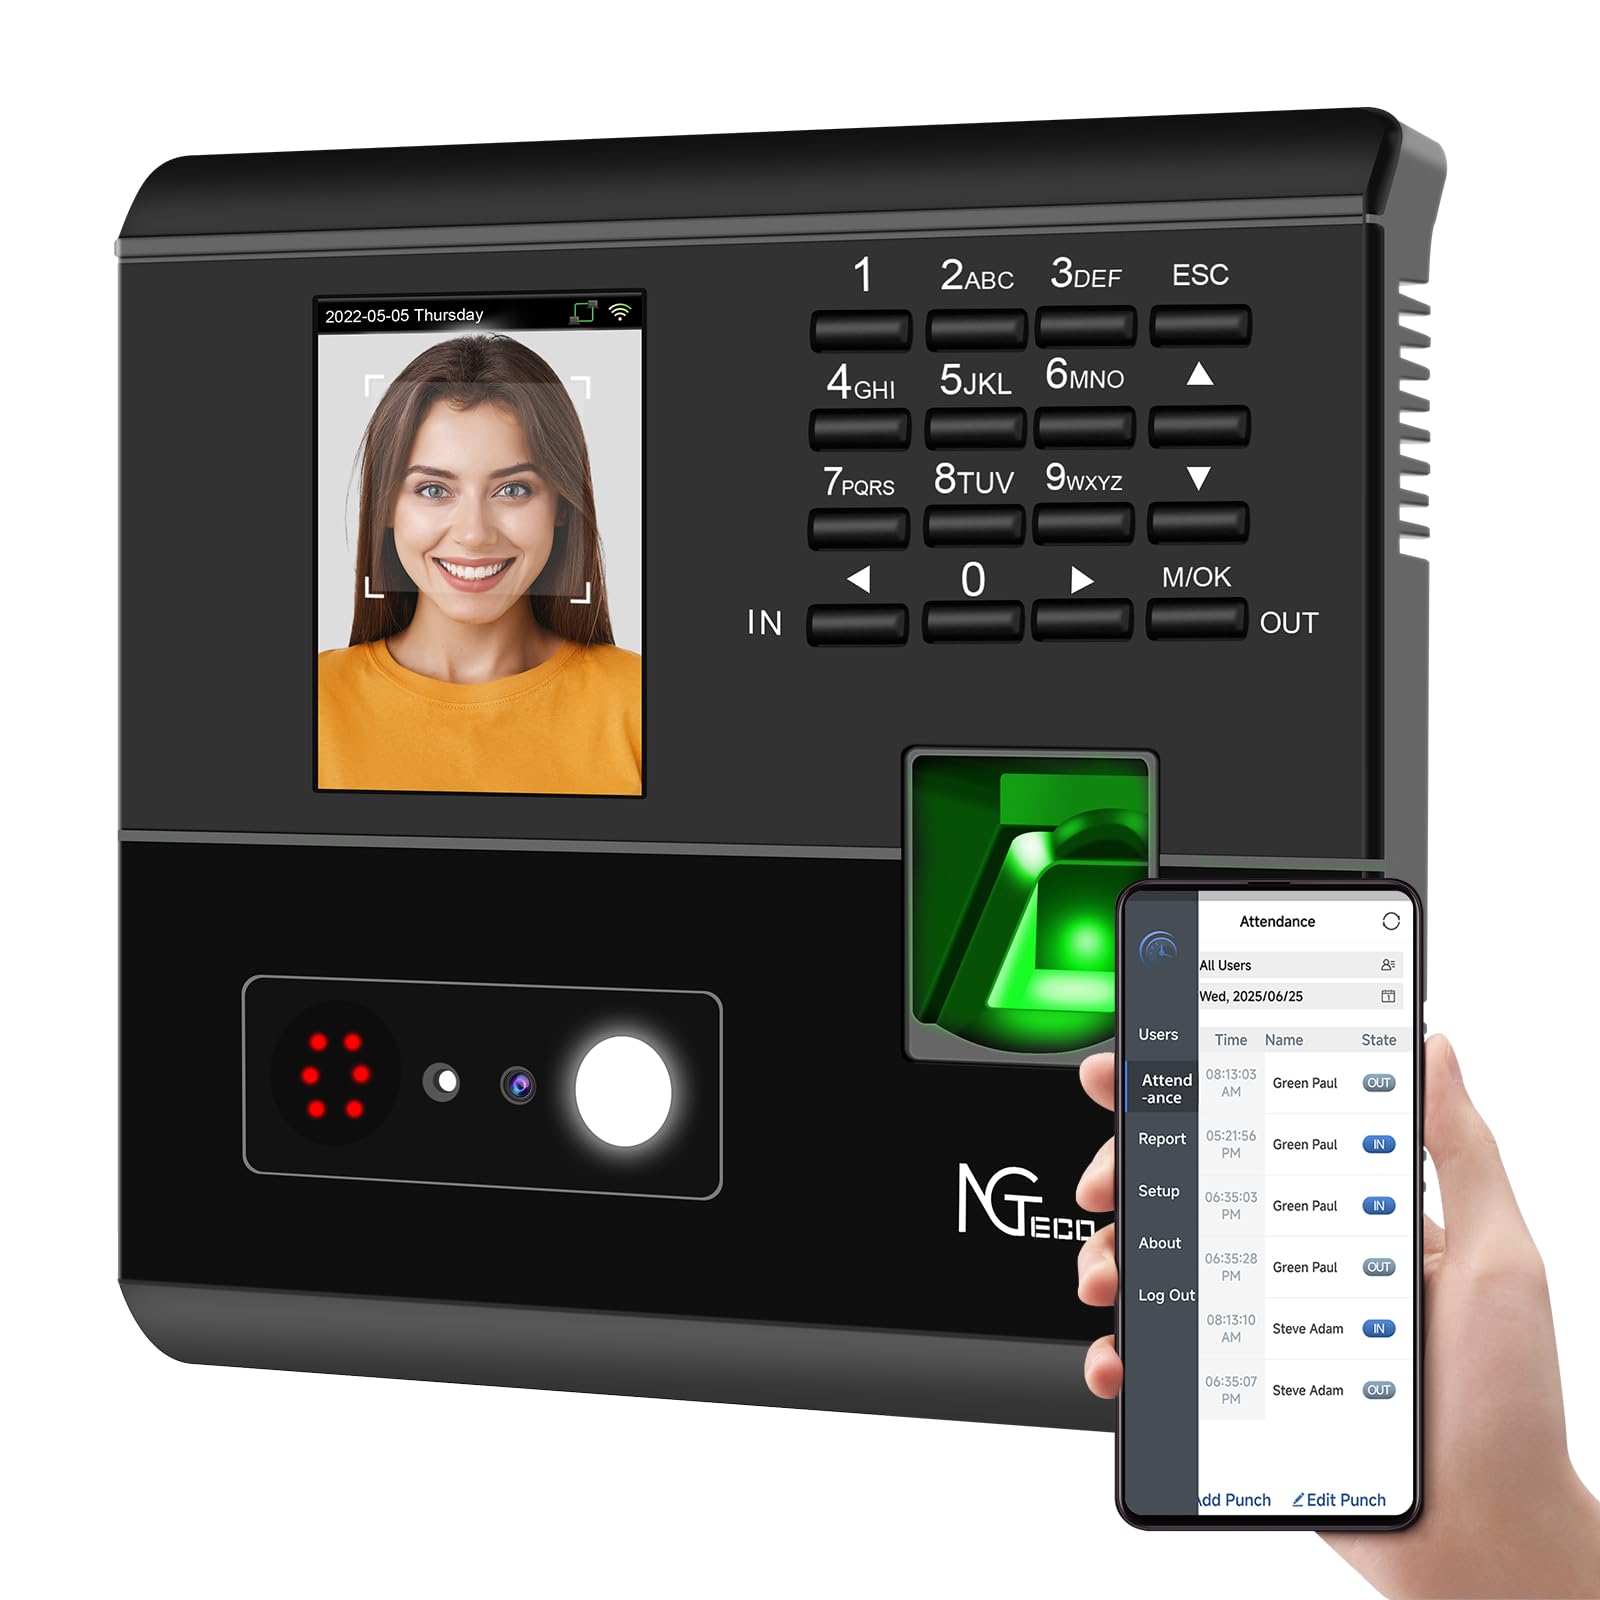
Abbildung 1: Front view of the NGTeco NG-MB1 Time Clock highlighting its four verification methods: Face Scan, Fingerprint, RFID Card, and Password.
Merkmale der Frontplatte:
- Bildschirm: Shows time, date, user information, and menu options.
- Tastenfeld: Numeric keys for PIN entry and navigation.
- Fingerabdruckleser: For biometric fingerprint verification.
- Face Recognition Camera: For facial recognition verification.
- RFID/Card Reading Area: For scanning RFID cards.
Side and Back Panel Features:

Abbildung 2: Hinteren view of the NGTeco NG-MB1 Time Clock, illustrating the power input, Ethernet port, and USB port for connectivity and data transfer.
- USB-Anschluss: For direct data transfer using a USB drive.
- Stromanschluss: Wird an das mitgelieferte Netzteil angeschlossen.
- Ethernet Anschluss: Für kabelgebundene Netzwerkverbindung.
5. Einrichtung
5.1 Geräteinstallation
- Choose a suitable indoor location for mounting the time clock, ensuring it is at an appropriate height for all users.
- Verwenden Sie die mitgelieferte Montagevorlage, um die Bohrlöcher an der Wand zu markieren.
- Secure the wall mounting bracket using the supplied screws and anchors.
- Connect the power adapter and, if desired, an Ethernet cable to the device.
- Attach the time clock unit to the mounted bracket.
5.2 App-Download
Laden Sie die NGTeco Time App from your mobile device's app store (Apple App Store for iOS or Google Play Store for Android). This app is essential for managing users, attendance records, and generating reports.
Video 1: This video demonstrates the two methods for registering employee information on the NGTeco Time Clock, including using the device directly and through the NGTeco Time App.
5.3 Wi-Fi-Verbindung
So verbinden Sie Ihr Gerät mit einem WLAN-Netzwerk:
- On the device, navigate to the [Comm] Speisekarte.
- Wählen [Drahtloses Netzwerk].
- Wählen Sie das gewünschte WLAN-Netzwerk aus der Liste aus.
- Geben Sie das WLAN-Passwort über die Tastatur ein und bestätigen Sie es.
- The device will attempt to connect to the network. A successful connection will be indicated on the screen.
Video 2: This video provides a step-by-step guide on how to configure the Wi-Fi settings on your NGTeco Time Clock device.
6. Bedienungsanleitung
6.1 Benutzer hinzufügen
Employees can be added directly on the device or through the NGTeco Time App.
Adding Users via Device:
- Halten Sie die M/OK Taste, um auf das Hauptmenü zuzugreifen.
- Navigieren Sie zu [Benutzer] und wählen Sie [Benutzer hinzufügen].
- Geben Sie den Benutzer-ID, Vorname, Nachnameund stellen Sie die Benutzerrolle (e.g., Employee, Admin).
- Wählen Sie ein Überprüfungsmodus (Password, Fingerprint, Card, or Face).
- Follow the on-screen prompts to enroll the chosen verification method(s).
Adding Users via NGTeco Time App:
- Open the NGTeco Time App on your smartphone.
- Navigieren Sie zum Benutzer section and tap Benutzer hinzufügen.
- Enter the employee's details including Vorname, Nachname, STIFT, Und Erlaubnis Ebene.
- Save and sync the data with the device.

Abbildung 3: The NGTeco Time App interface for effortless management, including adding users, setting up work hour tracking, and automatic punch detection.
6.2 Enrolling Biometrics and Cards
Registrierung für Fingerabdrücke:
For optimal fingerprint recognition:
- Always use clean fingers and avoid angled or tilted finger positions during enrollment.
- Place your finger belly completely in the middle of the reader.
- Do not slide the finger while enrolling. Apply some pressure for 1 second until the result is shown.
- If a finger is dry, gently breathe on it to moisten it before scanning.

Abbildung 4: Visual representation of the high-precision fingerprint module, emphasizing reliable, fast, and secure access.
Gesichtserkennung:
Follow the on-screen instructions to position your face correctly in front of the camera for enrollment.
RFID Card Enrollment:
When prompted, hold the RFID card near the designated reading area on the device until it is successfully registered.
6.3 Ein- und Ausstempeln
The NGTeco NG-MB1 supports automatic detection for clocking in and out, eliminating the need to press specific 'IN' or 'OUT' keys. Simply present your chosen verification method (face, fingerprint, RFID card, or enter your PIN) to the device.
Video 3: This video demonstrates the four recognition methods (Face, Fingerprint, RFID, PIN) for clocking in on the NGTeco Time Clock.
6.4 Managing Attendance Records
Attendance records can be modified directly on the device or through the NGTeco Time App.
Adding/Editing Missing Punches:
- Über das Gerät: Access the menu, navigate to [Time Data], Dann [Add Missing Punch]. Select the user, date, time, and punch state (Check In/Check Out).
- Per App: In the NGTeco Time App, go to the Teilnahme section. You can add a new punch or edit an existing one by selecting the user, date, time, and punch state.

Abbildung 5: The NGTeco Time App's punch record correction feature, allowing easy fixes for errors or missing punches.
Video 4: This video illustrates how to modify attendance records directly on the NGTeco Time Clock device and through the mobile application.
6.5 Erstellen von Berichten
The NGTeco Time Clock supports various payroll cycles and offers multiple ways to download attendance reports.

Abbildung 6: The NGTeco Time Clock supports various payroll cycles, including Monthly, Semi-Monthly, Bi-Weekly, and Weekly, for flexible attendance management.
Report Download Options:
- App Email Download: Use the NGTeco Time App to email detailed reports directly to your inbox.
- USB Drive Download: Insert the provided USB drive into the device's USB port to download attendance data.

Abbildung 7: Illustration of the two convenient methods for downloading attendance reports: directly to a USB drive or via email through the NGTeco Time App.
7. Wartung
- Reinigung: Regularly wipe the device's screen, keypad, and fingerprint sensor with a soft, dry cloth. Avoid using abrasive cleaners or liquids.
- Software-Updates: Check the NGTeco Time App or website for any available firmware or software updates to ensure optimal performance and security.
- Datensicherung: Periodically back up your attendance data using the USB drive or through the app to prevent data loss.
8. Fehlerbehebung
- Gerät lässt sich nicht einschalten: Stellen Sie sicher, dass das Netzteil sowohl mit dem Gerät als auch mit einer funktionierenden Steckdose fest verbunden ist.
- Probleme mit der Wi-Fi-Konnektivität: Verify your Wi-Fi password and ensure the device is within range of your router. Restarting the device or router may help.
- Fingerprint/Face Recognition Failure: Ensure the sensor/camera is clean. For fingerprints, ensure fingers are clean and placed correctly with adequate pressure. Re-enrollment may be necessary if issues persist.
- App-Synchronisierungsprobleme: Check your device's internet connection and ensure the time clock is connected to the same Wi-Fi network as your phone.
- Missing Punches: Refer to Section 6.4 for instructions on adding or editing missing punches.
For further assistance, consult the Quick Start Guide or contact NGTeco customer support.
9. Spezifikationen
| Besonderheit | Detail |
|---|---|
| Marke | Ngteco. |
| Modellnummer | NG-MB1 |
| Farbe | Schwarz |
| Anzeigetyp | Digitales |
| Besonderheit | Face/Fingerprint/Card/PIN |
| Technische Daten | 5 Zoll B x 4 Zoll H |
| Stromquelle | Kabelgebundene Elektrik |
| Konnektivitätstechnologie | W-lan |
| Artikelgewicht | 0.79 Kilogramm |
| Materialtyp | Hochwertiger ABS-Kunststoff |
10. Garantie und Support
- Garantie: The NGTeco NG-MB1 comes with a 1-year manufacturer's warranty.
- Technische Unterstützung: Enjoy free lifetime technical support from NGTeco's U.S.-based service team. Support is available Monday to Friday, 6 AM to 6 PM EST.
- For support, refer to the contact information provided in your Quick Start Guide or visit the official NGTeco webWebsite.