
Comfort Direct CDTR214D
Comfort Direct Bradbury Ceiling Fan Remote Control User Manual
Model: CDTR214D | Brand: Comfort Direct
Einführung
This manual provides comprehensive instructions for the setup, operation, and maintenance of your Comfort Direct Bradbury Ceiling Fan Remote Control (Model CDTR214D). Please read this manual thoroughly before use to ensure proper functionality and safety. This remote is designed for use with specific Harbor Breeze Bradbury Ceiling Fan models, including BRD48MBK6LR, BRD48BNK6LR, BRD48OSB6LR, BRD48MWW6LR, BRD60MBK6LR, BRD60BNK6LRS, and BRD60OSB6LR.
Sicherheitshinweise
Always ensure the power to the ceiling fan is turned off at the circuit breaker before performing any installation or maintenance. Do not expose the remote control to water or excessive moisture. Keep batteries out of reach of children. Dispose of used batteries responsibly.
Packungsinhalt
- 1 x Comfort Direct Bradbury Ceiling Fan Remote Control
- 1 x Wandhalterung
- 2 x Befestigungsschrauben

Image: The remote control, its wall mount holder, and two mounting screws, illustrating the complete package contents.
Technische Daten
| Modellnummer | CDTR214D |
| Technische Daten | 2 x 1 x 4 Zoll |
| Artikelgewicht | 6 Unzen |
| Batterieanforderung | 1 x 23A 12V battery (not included) |
| Besonderheit | Radiofrequency (RF) control |
| Kompatible Geräte | Harbor Breeze Bradbury Ceiling Fans (BRD48MBK6LR, BRD48BNK6LR, BRD48OSB6LR, BRD48MWW6LR, BRD60MBK6LR, BRD60BNK6LRS, BRD60OSB6LR) |
Aufstellen
1. Einlegen der Batterie
- Suchen Sie das Batteriefach auf der Rückseite der Fernbedienung.
- Schieben Sie die Batterieabdeckung nach unten, um sie zu öffnen.
- Legen Sie eine 23A 12V Batterie ein und achten Sie darauf, dass die Polarität (+/-) mit dem Diagramm im Batteriefach übereinstimmt.
- Schieben Sie die Batterieabdeckung wieder an ihren Platz, bis sie sicher einrastet.

Abbildung: Die Rückseite view of the remote control with the battery cover removed, revealing the battery compartment for a 23A 12V battery.
2. Pairing the Remote Control with Your Ceiling Fan
Wichtig: Only one remote can be programmed per fan. You cannot use two separate remotes to control the same fan.
- Stromzufuhr zum Ventilator ausschalten: Stellen Sie sicher, dass die Stromzufuhr zu Ihrem Deckenventilator am Wandschalter oder Sicherungsautomaten vollständig abgeschaltet ist.
- Schalten Sie den Ventilator wieder ein: Stellen Sie die Stromversorgung des Deckenventilators wieder her.
- Taste „0“ gedrückt halten: Within 30 seconds of restoring power, press and hold the "0" button on your remote control for 5 seconds. The fan light should blink or the fan should briefly turn on to indicate successful pairing.

Image: Visual guide for the remote pairing process, showing the three key steps.
3. Wandmontage
The included wall mount holder allows for convenient storage of your remote control.
- Wählen Sie einen geeigneten Platz an einer Wand, fernab von direkter Sonneneinstrahlung oder Wärmequellen.
- Use the two provided screws to securely attach the wall mount holder to the wall.
- Place the remote control into the holder for easy access.

Image: The remote control securely placed in its wall mount holder, demonstrating its convenient placement on a wall.
Bedienungsanleitung
Once paired, your remote control provides full control over your compatible ceiling fan and its light.
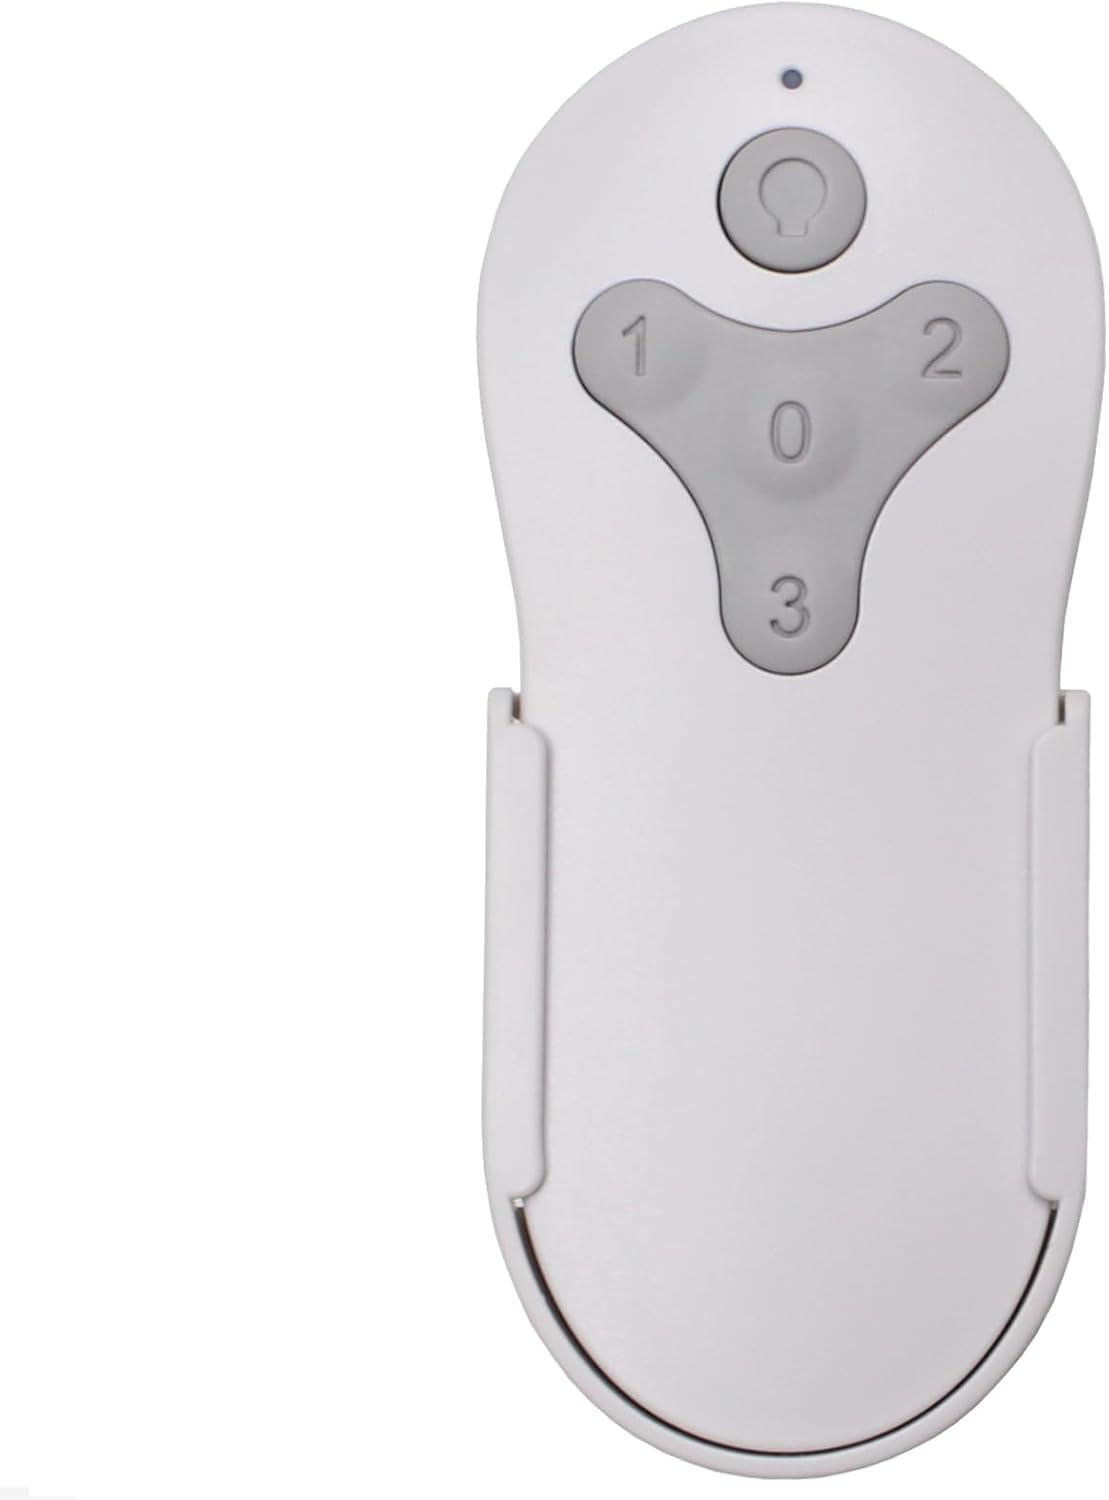
Bild: Vorderseite view of the remote control, showing the fan speed buttons (1, 2, 3, 0) and the light control button.
Lüfterdrehzahlregelung
- Drücken "1" for Low fan speed.
- Drücken "2" for Medium fan speed.
- Drücken "3" for High fan speed.
- Drücken "0" um den Lüfter auszuschalten.
Light Control with Dimming
- Drücken Sie die Lichttaste (usually depicted as a light bulb icon) to turn the fan light On or Off.
- To dim the light, press and hold the Lichttaste. Release the button when the desired brightness level is reached.
Wartung
Batteriewechsel
When the remote control's range decreases or it becomes unresponsive, it is likely time to replace the battery. Follow the battery installation steps outlined in the "Setup" section to replace the 23A 12V battery. Ensure proper disposal of the old battery according to local regulations.
Reinigung
Reinigen Sie die Fernbedienung mit einem weichen, trockenen Tuch. Verwenden Sie keine Scheuermittel oder Lösungsmittel, da diese die Oberfläche oder die internen Bauteile beschädigen können.
Fehlerbehebung
- Fernbedienung reagiert nicht:
- Prüfen Sie, ob die Batterie korrekt eingesetzt ist und ausreichend geladen ist. Tauschen Sie die Batterie gegebenenfalls aus.
- Ensure the remote is within range of the fan's receiver.
- Re-attempt the pairing process as described in the "Setup" section.
- Fan or light not responding after pairing:
- Verify that the power to the fan is on at the wall switch or circuit breaker.
- Confirm that the remote was successfully paired (fan light blink or brief fan operation). If not, repeat the pairing steps carefully.
- Ensure no other remote is attempting to control the same fan, as only one remote can be paired per fan.
Garantie
This Comfort Direct Bradbury Ceiling Fan Remote Control comes with a 1 Jahre Herstellergarantie from the date of purchase. This warranty covers defects in materials and workmanship under normal use. Please retain your proof of purchase for warranty claims. For warranty service, please contact Comfort Direct customer support.
Unterstützung
For further assistance, technical support, or inquiries regarding your Comfort Direct Bradbury Ceiling Fan Remote Control, please visit the Comfort Direct website or contact their customer service department. Contact information can typically be found on the product packaging or the official Comfort Direct webWebsite.
Ask a question about this manual
Ask about setup, troubleshooting, compatibility, parts, safety, or missing instructions. Manuals+ will review the question and use this page’s manual context to help answer it.