
Einführung
This manual provides detailed instructions for the installation, operation, and maintenance of your Reidsport Ceiling Fan Remote Control. Please read this manual thoroughly before use to ensure proper function and safety.
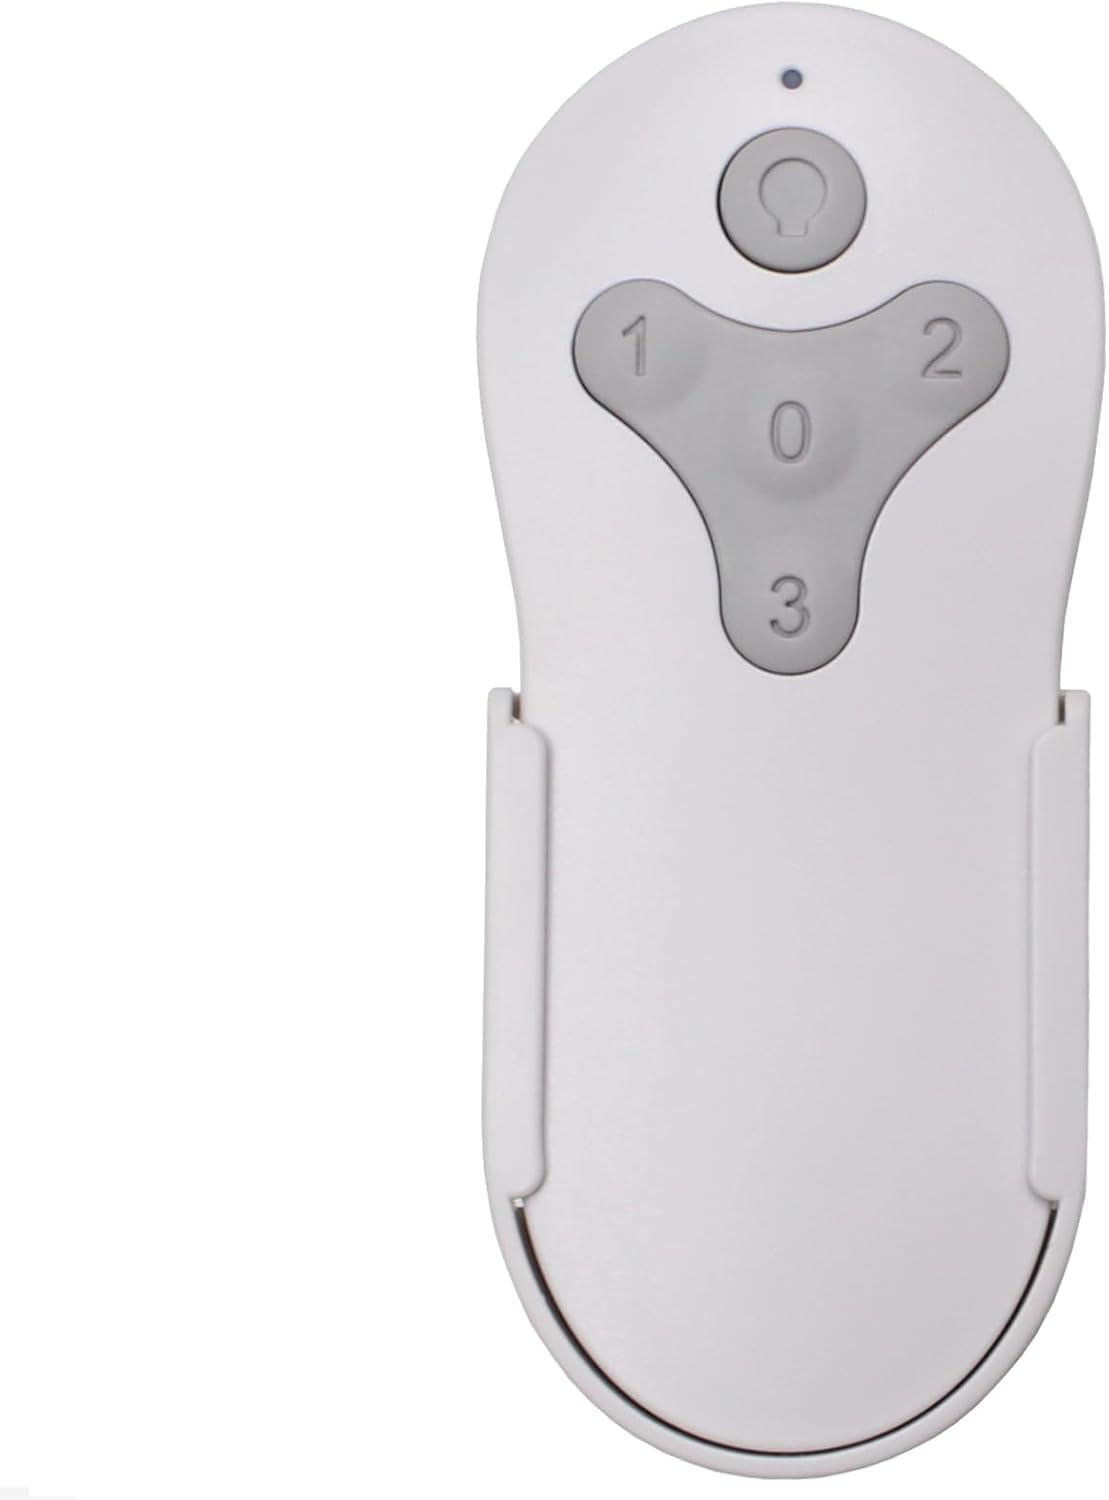
Bild: Vorderseite view of the Reidsport Ceiling Fan Remote Control, showing the power button and fan speed buttons (0, 1, 2, 3).
Sicherheitshinweise
Beachten Sie immer die folgenden Sicherheitsvorkehrungen:
- Ensure power is turned off at the circuit breaker before performing any installation or maintenance.
- Do not expose the remote control to water or excessive humidity.
- Use only the specified battery type (12V 23A).
- Bewahren Sie Batterien außerhalb der Reichweite von Kindern auf.
Packungsinhalt
Überprüfen Sie, ob alle Artikel im Paket vorhanden sind:
- Reidsport Ceiling Fan Remote Control
- Wandhalterung
- Befestigungsschrauben (2)

Image: The remote control, its wall mount holder, and two mounting screws, indicating the complete package contents.
Technische Daten
| Besonderheit | Detail |
|---|---|
| Modellnummer | CDTR214D |
| Technische Daten | 2 x 1 x 4 Zoll |
| Artikelgewicht | 6 Unzen |
| Akku-Typ | 1 x 12V 23A (not included) |
| Kompatible Geräte | Harbor Breeze Reidsport Ceiling Fans (RDS44MBK5LR, RDS44BNK5LR, RDS44MW5LR, RDS52MBK6LR, RDS52BNK6LR, RDS52MW6LR) |
| Besonderheit | Radiofrequency (RF) Control |
Einrichtung und Kopplung
1. Einlegen der Batterie
The remote control requires one 12V 23A battery (not included).
- Suchen Sie das Batteriefach auf der Rückseite der Fernbedienung.
- Schieben Sie die Batterieabdeckung nach unten, um sie zu öffnen.
- Insert one 12V 23A battery, ensuring the correct polarity (+ and -).
- Schieben Sie die Batterieabdeckung wieder an ihren Platz, bis sie sicher einrastet.

Bild: Rückseite view of the remote control with the battery compartment open, showing where to insert the 12V 23A battery.
2. Pairing with Ceiling Fan Receiver
Follow these steps to pair the remote control with your existing ceiling fan receiver:
- Stromzufuhr zum Ventilator ausschalten: Locate the circuit breaker or wall switch that controls power to your ceiling fan and turn it OFF. Ensure the fan is completely powered down.

Image: A hand turning off a wall light switch, illustrating the first step of cutting power to the fan.
- Schalten Sie den Ventilator wieder ein: After a few seconds, turn the power back ON to the ceiling fan.
- Taste „0“ gedrückt halten: Within 30 seconds of restoring power, press and hold the "0" key on the remote control for 5 seconds. The fan light should blink or the fan should respond, indicating successful pairing.

Image: A close-up of the remote control, with the "0" button highlighted, indicating the button to press for pairing.
If pairing is unsuccessful, repeat the steps. Ensure the remote control is within range of the fan receiver during the pairing process.

Image: The remote control securely placed in its wall mount holder, positioned on a wall near a ceiling fan, illustrating the ease of access after setup.
Bedienungsanleitung
The remote control provides comprehensive control over your ceiling fan's functions.
- Ein-/Ausschalter (oberer Knopf): Press to turn the fan light ON or OFF. Press and hold to dim the fan light.
- Lüftergeschwindigkeitstasten (1, 2, 3, 0):
- "1": Stellt die Lüftergeschwindigkeit auf niedrig.
- "2": Stellt die Lüftergeschwindigkeit auf Mittel ein.
- "3": Stellt die Lüftergeschwindigkeit auf Hoch.
- "0": Schaltet den Lüfter AUS.

Image: The remote control displayed alongside icons and text describing its functions: full speed control, light control, dimming, and compatibility with multiple fan models.
Wartung
Um eine optimale Leistung und Langlebigkeit Ihrer Fernbedienung zu gewährleisten:
- Reinigung: Reinigen Sie die Fernbedienung mit einem weichen, trockenen Tuch. Verwenden Sie keine Scheuermittel oder Lösungsmittel.
- Batteriewechsel: Replace the 12V 23A battery when the remote's range decreases or it becomes unresponsive. Dispose of old batteries according to local regulations.
- Lagerung: Store the remote control in a cool, dry place when not in use for extended periods.
Fehlerbehebung
| Problem | Mögliche Ursache | Lösung |
|---|---|---|
| Fernbedienung reagiert nicht. | Batterie defekt oder falsch eingebaut. | Replace the 12V 23A battery, ensuring correct polarity. |
| Remote control not pairing with fan. | Incorrect pairing procedure or power interruption. | Repeat the pairing steps carefully (Power Off, Power On, Hold "0" for 5 seconds). Ensure power is completely cycled. |
| Begrenzte Reichweite oder intermittierende Steuerung. | Niedriger Batteriestand oder Störungen. | Replace battery. Ensure no major obstructions between remote and fan receiver. |
| Fan light not dimming. | Fan receiver or light kit does not support dimming. | Verify your ceiling fan's specifications for dimming compatibility. |
Garantie und Support
Dieses Produkt wird mit einem 1 Jahre Herstellergarantie.
For technical support or warranty claims, please contact Comfort Direct customer service. Refer to your purchase documentation for contact details or visit the official Comfort Direct webWebsite.
Notiz: The warranty does not cover damage caused by improper installation, misuse, or unauthorized modifications.