1. Einleitung
Thank you for choosing the STRICH 37-Key Kids Mini Digital Piano Keyboard. This manual provides essential information for the safe and effective use of your new musical instrument. Please read it thoroughly before operation and retain it for future reference.

Figure 1.1: STRICH 37-Key Kids Mini Digital Piano Keyboard (Pink)
2. Sicherheitshinweise
- Beaufsichtigen Sie Kinder während des Gebrauchs stets.
- Keep the piano away from water and moisture.
- Setzen Sie es keinen extremen Temperaturen oder direkter Sonneneinstrahlung aus.
- Verwenden Sie ausschließlich das mitgelieferte Netzteil oder die empfohlenen Batterien.
- Vermeiden Sie es, das Instrument fallen zu lassen oder starken Stößen auszusetzen.
- Sorgen Sie für eine ausreichende Belüftung rund um das Gerät.
3. Packungsinhalt
Überprüfen Sie, ob alle Artikel im Paket vorhanden sind:
- STRICH 37-Key Mini Digital Piano Keyboard
- Netzteil (DC 6 V)
- Kid's Piano Course Music Book
- Key Stickers for learning
- Bedienungsanleitung

Figure 3.1: Included accessories with the STRICH piano.
4. Einrichtung
4.1 Powering the Piano
The piano can be powered by either the included DC 6V power adapter or 4 AA batteries (not included).
4.1.1 Einlegen der Batterie
- Suchen Sie das Batteriefach an der Unterseite des Klaviers.
- Verwenden Sie einen Schraubendreher, um die Abdeckung des Batteriefachs zu öffnen.
- Legen Sie 4 AA-Batterien ein und achten Sie dabei auf die richtige Polarität (+/-).
- Bringen Sie die Abdeckung wieder an und befestigen Sie sie mit der Schraube.

Abbildung 4.1: Batteriefach für 4 AA-Batterien.
4.1.2 Netzteilanschluss
Insert the DC 6V power adapter into the 'DC: 6V' port on the rear panel of the piano, then plug the adapter into a standard wall outlet.
4.2 Applying Key Stickers
The included key stickers are designed to assist with learning. Refer to the 'Kid's Piano Course' music book for guidance on proper placement.

Figure 4.2: Key stickers applied to the piano keys.
4.3 Music Stand Placement
The detachable music stand can be inserted into the slot on the top panel of the piano to hold your music book or tablet.
5. Bedienungsanleitung
5.1 Ein-/Ausschalter und Lautstärkeregelung
Locate the 'VOL' knob on the rear panel. Turn the knob clockwise to power on the piano and increase the volume. Turn it counter-clockwise to decrease the volume and power off the piano.

Figure 5.1: Volume and power control knob.
5.2 Externe Geräte anschließen
The rear panel features various ports for enhanced functionality:
- MIDI Port: Connect to MIDI-compatible devices for advanced musical applications.
- USB-Anschluss: Connect to a computer or other USB devices.
- Telefonanschluss: Schließen Sie Kopfhörer für ungestörtes Üben an.
- INPUT Port: Connect external audio sources (e.g., MP3 player) to play along.
- SUSTAIN PEDAL Port: Connect an optional sustain pedal for extended note duration.

Abbildung 5.2: Anschlüsse auf der Rückseite.
5.3 Drahtlose Konnektivität
The piano supports wireless connection, allowing playback of songs and music from compatible mobile phones and tablets. Refer to your device's instructions for pairing with a Bluetooth audio device.
5.4 Learning with the Music Book and Stickers
The included 'Kid's Piano Course' music book provides simple tutorials and songs that correspond to the key stickers. Follow the color and shape codes to play basic melodies.
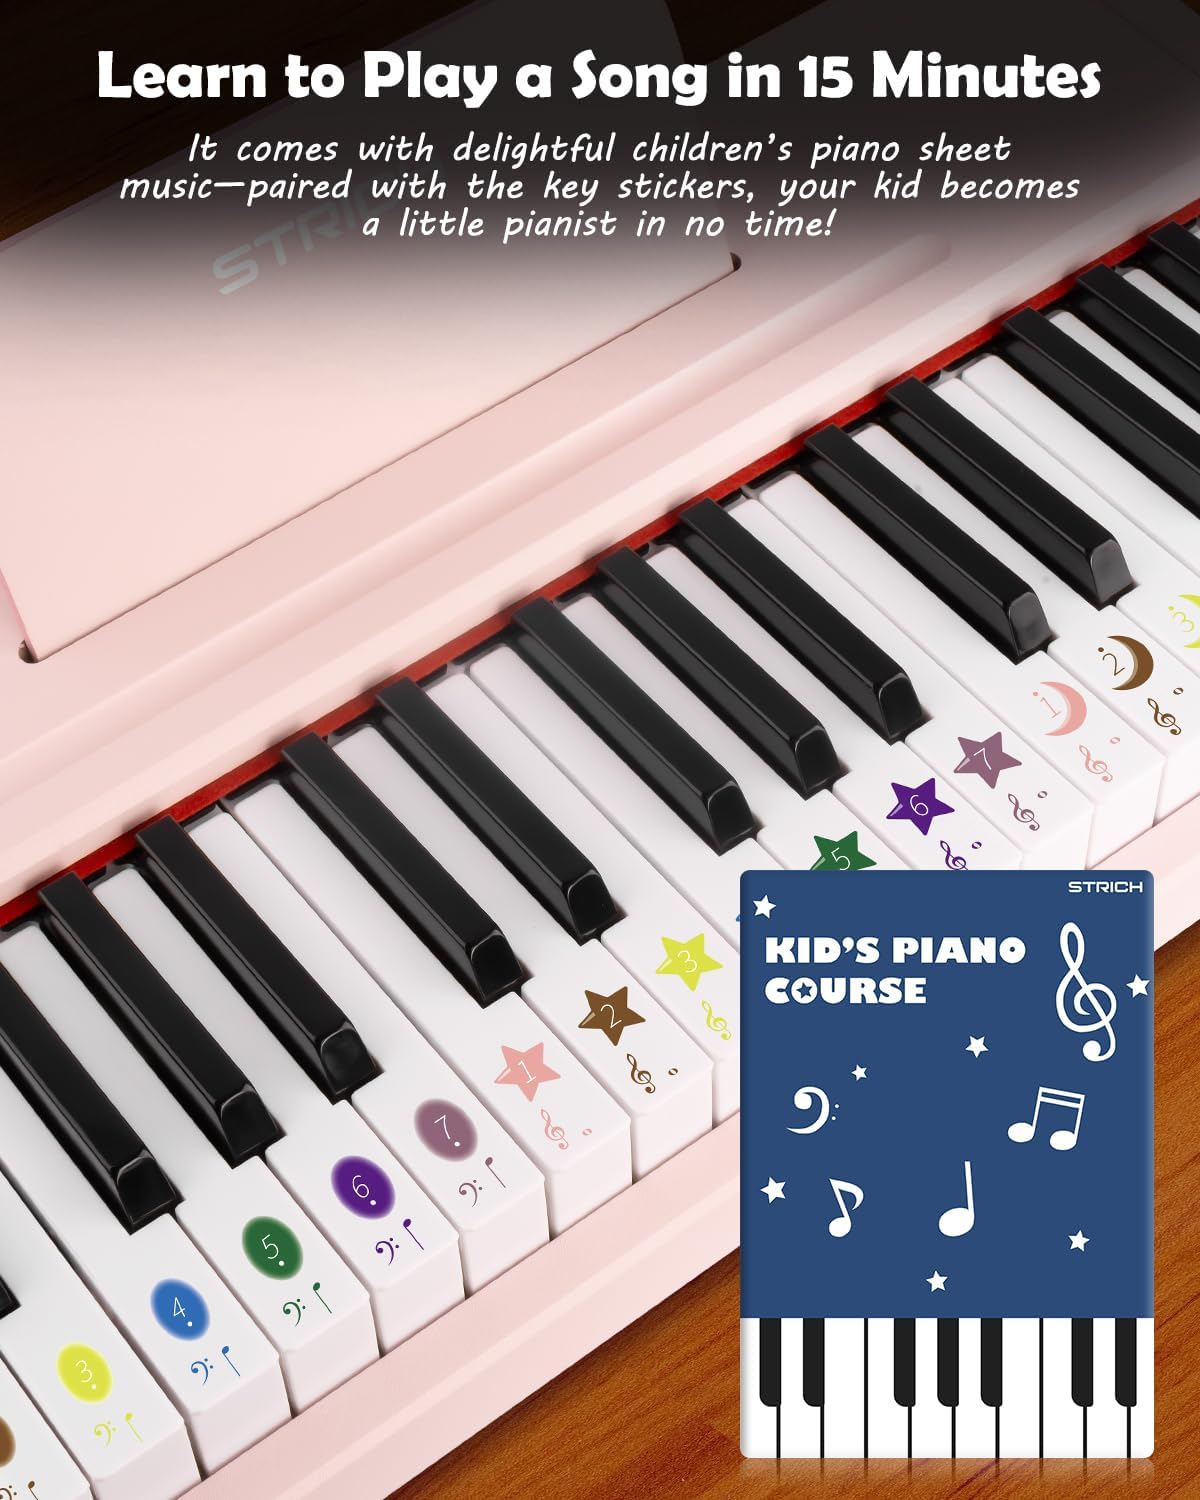
Figure 5.3: Learning to play using the music book and key stickers.
6. Wartung
- Clean the piano surface with a soft, dry cloth. Avoid abrasive cleaners or solvents.
- Wenn das Gerät längere Zeit nicht benutzt wird, sollten die Batterien entfernt werden, um ein Auslaufen zu verhindern.
- Store the piano in a cool, dry place, away from direct sunlight and extreme temperatures.
7. Fehlerbehebung
- Kein Ton: Ensure the piano is powered on and the volume is turned up. Check battery installation or power adapter connection. Verify external devices (headphones, speakers) are correctly connected and powered.
- Tasten reagieren nicht: Ensure the piano is powered on. If using batteries, check battery level.
- Probleme mit der drahtlosen Verbindung: Ensure the piano's wireless function is active and your external device's Bluetooth is enabled. Try re-pairing the devices.
8. Spezifikationen
| Besonderheit | Spezifikation |
|---|---|
| Modellnummer | SEK-37 |
| Technische Daten | 21.65 x 11.02 x 3.54 Zoll |
| Artikelgewicht | 9.9 Pfund |
| Schlüssel | 37 |
| Stromquelle | DC 6V Adapter or 4 AA Batteries |
| Empfohlenes Alter | 36 Monate – 8 Jahre |

Abbildung 8.1: Produktabmessungen.
9. Garantie und Support
For warranty information or technical support, please refer to the contact details provided with your purchase or visit the official STRICH webBewahren Sie Ihren Kaufbeleg für Garantieansprüche auf.