
1. Sicherheitshinweise
Please read all safety instructions carefully before installing and operating the AUTO-VOX Solar5 Wireless Backup Camera. Failure to follow these instructions may result in product damage, property damage, or personal injury.
- Installation: Ensure the camera and monitor are securely mounted to prevent detachment during vehicle operation. Do not obstruct the driver's view oder die Fahrzeugsteuerung beeinträchtigen.
- Energiequelle: Use only the provided power cable and connect to a compatible 12V vehicle power outlet.
- Wasserbeständigkeit: The camera is designed for outdoor use and is waterproof. However, avoid submerging the camera in water or exposing it to high-pressure water jets.
- Temperatur: Operate and store the device within the specified temperature range to prevent damage.
- Reinigung: Verwenden Sie ein weiches,amp Zum Reinigen ein Tuch verwenden. Scheuermittel und Lösungsmittel vermeiden.
- Haftungsausschluss: This device is an aid for safe driving and parking. It does not replace the driver's responsibility to operate the vehicle safely and observe surroundings.
2. Packungsinhalt
Überprüfen Sie, ob alle Artikel in Ihrem Paket vorhanden sind:
- AUTO-VOX Solar5 Wireless Backup Camera (with integrated solar panel)
- 7.2-Zoll-Funkmonitor
- Autoladegerät (zur Stromversorgung des Monitors)
- Montagehalterung für Monitor
- Magnetic Mounting Plate for Camera (for non-magnetic surfaces)
- Screws and Tools for Installation
- Bedienungsanleitung

Image: AUTO-VOX Solar5 Wireless Backup Camera and Monitor with accessories.
3. Produktüberschreitungview
3.1. Kamerakomponenten
- Kameraobjektiv: Captures the rear view.
- Solarmodul: Lädt den internen Akku.
- Antenne: Zur drahtlosen Signalübertragung.
- Ein-/Ausschalter/Anzeige: Turns the camera on/off and shows status.
- Magnetfuß: Ermöglicht eine einfache Befestigung an Metalloberflächen.
3.2. Monitorkomponenten
- Bildschirm: Shows the camera feed.
- Antennen: Zum Empfang drahtloser Signale.
- Bedientasten: Zur Menünavigation und Einstellungsanpassung.
- Leistungsaufnahme: Connects to the car charger.
- Montageschlitz: For attaching the monitor to its bracket.
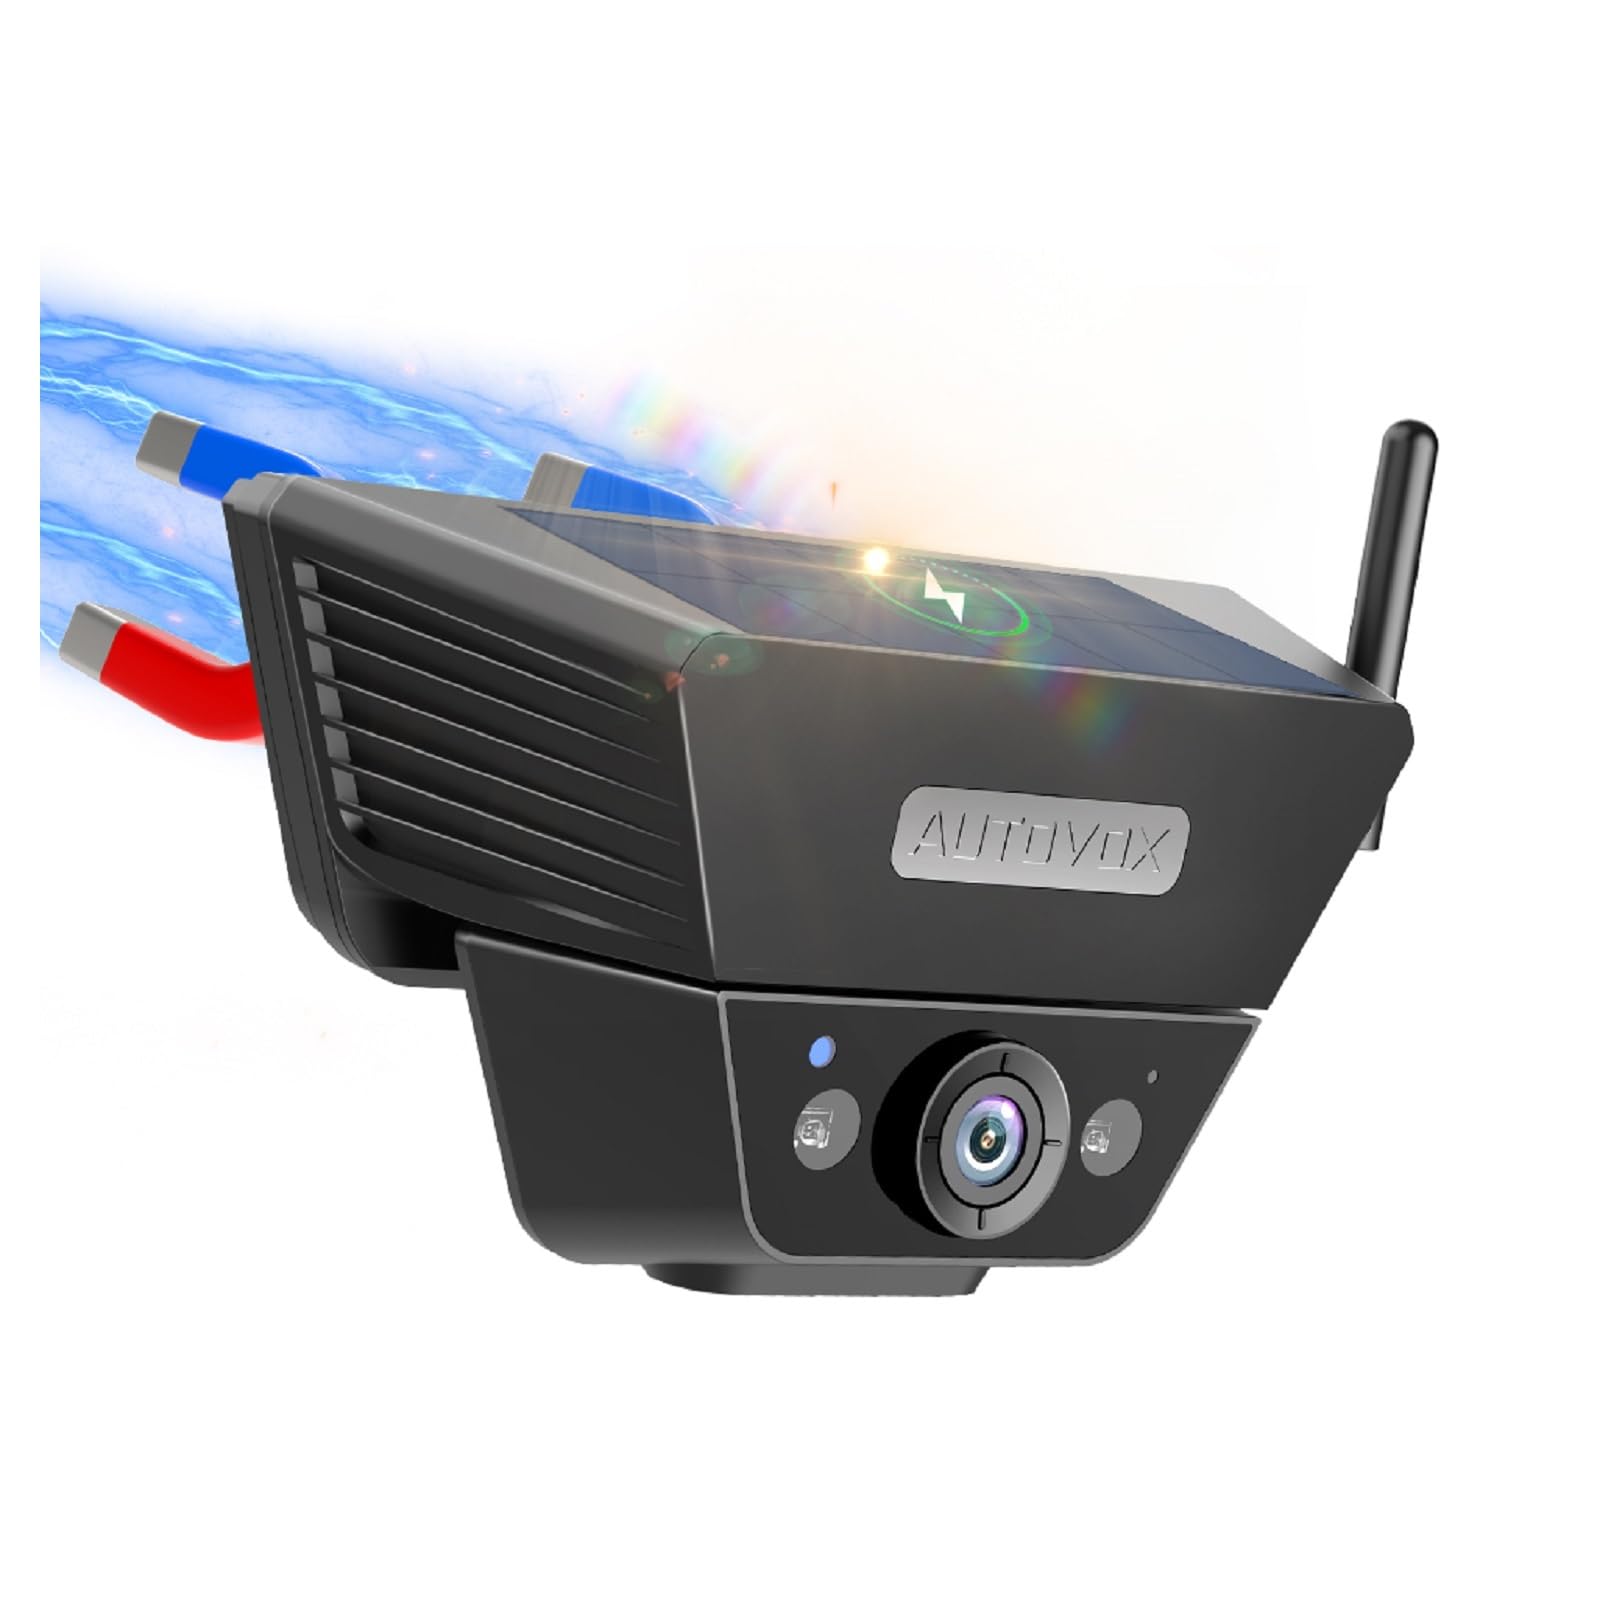
Image: The AUTO-VOX Solar5 wireless backup camera and its monitor, showcasing deren Design und Hauptmerkmale.
4. Installation
4.1. Kamerainstallation
The Solar5 camera features a strong magnetic base for easy attachment to metal surfaces on your vehicle, such as the license plate area or the rear of a trailer. If your desired mounting location is not magnetic, use the provided magnetic mounting plate and screws to create a secure attachment point.
- Ort wählen: Select a suitable location at the rear of your vehicle that provides a clear view and does not obstruct the license plate or other essential components.
- Magnethalterung: If the surface is metal, simply place the camera onto it. The strong magnet will hold it in place.
- Non-Magnetic Mount (Optional): If the surface is not magnetic, attach the magnetic mounting plate using the provided screws. Then, attach the camera to this plate.
- Winkel anpassen: Adjust the camera's angle to achieve the desired viewing-Perspektive.
- Kamera einschalten: Press and hold the power button on the camera for 3 seconds until the green indicator light illuminates.
Video: This video demonstrates the simple installation process of the AUTO-VOX Solar5 wireless backup camera, including magnetic attachment and angle adjustment.

Image: A blue car with the AUTO-VOX Solar5 camera mounted, illustrating its discreet and secure placement.
4.2. Monitorinstallation
The monitor can be easily mounted on your dashboard using the provided bracket.
- Halterung anbringen: Secure the mounting bracket to the back of the monitor.
- Ort wählen: Select a flat, stable surface on your dashboard that does not obstruct your view der Straße.
- Sicherer Monitor: Peel off the protective film from the adhesive base of the bracket and firmly press it onto the dashboard. Lock the monitor into position.
- Strom anschließen: Insert the car charger into your vehicle's 12V power outlet (cigarette lighter socket) and connect the other end to the monitor's power input.
- Einschaltmonitor: The monitor should automatically power on when the vehicle's ignition is turned on. If not, press the power button on the monitor.
Video: This video demonstrates the setup of the AUTO-VOX Solar5 monitor, including mounting on the dashboard and connecting to the car's power supply.
5. Bedienungsanleitung
5.1. Ein-/Ausschalten
- Kamera: Press and hold the power button for 3 seconds to turn on or off. The green light indicates it's on.
- Monitor: The monitor typically powers on automatically with the vehicle's ignition. Press the power button briefly to turn the screen on/off manually.
5.2. ViewKamerabild
- Once both the camera and monitor are powered on, the monitor will automatically display the live feed from the backup camera.
- When the vehicle is put into reverse gear, the monitor will prioritize the camera view.
5.3. Monitoreinstellungen
Use the buttons on the monitor to navigate the menu and adjust settings such as brightness, contrast, and parking guidelines.
- Menü-Schaltfläche: Öffnen Sie das Hauptmenü der Einstellungen.
- Auf/Ab-Tasten: Navigieren Sie durch die Menüoptionen oder passen Sie Werte an.
- OK/Auswahl-Taste: Auswahl bestätigen.
- Parkrichtlinien: Enable or disable parking lines, and adjust their position or width if supported by the model.
6. Wartung
- Kameraobjektiv: Regularly clean the camera lens with a soft, lint-free cloth to ensure a clear image. Avoid scratching the lens.
- Solarmodul: Keep the solar panel clean and free from dirt, dust, or snow to maximize charging efficiency.
- Bildschirm: Clean the monitor screen with a soft, dry cloth. Do not use harsh chemicals.
- Aufladen der Batterie: While the camera is solar-powered, occasional direct charging via USB may be necessary during prolonged periods of low sunlight or heavy use.
- Sichere Montage: Periodically check that both the camera and monitor are securely mounted and that all cables are properly connected.
7. Fehlerbehebung
| Problem | Mögliche Ursache | Lösung |
|---|---|---|
| Kein Bild auf dem Monitor | Camera or monitor not powered on; poor wireless connection; damaged cable. | Ensure both camera and monitor are powered on. Check all cable connections. Re-pair the camera and monitor if necessary (refer to pairing instructions in full manual). Move closer if range is an issue. |
| Das Bild ist unscharf oder verzerrt. | Dirty camera lens; condensation; interference. | Clean the camera lens. Allow time for condensation to clear. Check for sources of electromagnetic interference. |
| Der Akku der Kamera entlädt sich schnell | Insufficient sunlight for solar charging; frequent use in low-light conditions. | Ensure solar panel is clean and exposed to direct sunlight. Charge the camera directly via USB if needed. |
| Monitor schaltet sich nicht automatisch ein | Car charger not receiving power; faulty connection. | Check the vehicle's 12V power outlet. Ensure the car charger is fully inserted and functional. |
8. Spezifikationen
- Modell: Solar5
- Marke: AUTO-VOX
- Konnektivität: Kabellos
- Kamerafunktionen: Solar power, strong magnetic mount, night vision, waterproof
- Monitorgröße: 7.2 inches (display)
- Leistungsaufnahme: 12V (for monitor)
- Batterie: Rechargeable (for camera)
- Fachgebiet View: 180 Grad
- Nutzungsumgebung: Im Freien
- Enthaltene Komponenten: Backup camera cam7
9. Garantie und Support
The AUTO-VOX Solar5 Wireless Backup Camera comes with an 18 Monate Garantie Diese Garantie gilt ab Kaufdatum und deckt Herstellungsfehler sowie Funktionsstörungen bei normalem Gebrauch ab.
For technical support, warranty claims, or any questions regarding your product, please contact AUTO-VOX customer service:
- WebWebsite: www.auto-vox.com
- E-Mail: Beachten Sie die Angaben auf Ihrer Produktverpackung oder in der offiziellen AUTO-VOX-Anleitung. webDie aktuellste Support-E-Mail-Adresse finden Sie auf der entsprechenden Webseite.
Please have your purchase receipt and product model number (Solar5) ready when contacting support.

Image: An illustration representing customer support, encouraging users to reach out for assistance.