
1. Einleitung
Thank you for choosing the HOSTACK 71-inch Tall Pantry Cabinet. This manual provides detailed instructions for the safe assembly, operation, and maintenance of your new storage cabinet. Please read this manual thoroughly before beginning assembly and retain it for future reference.
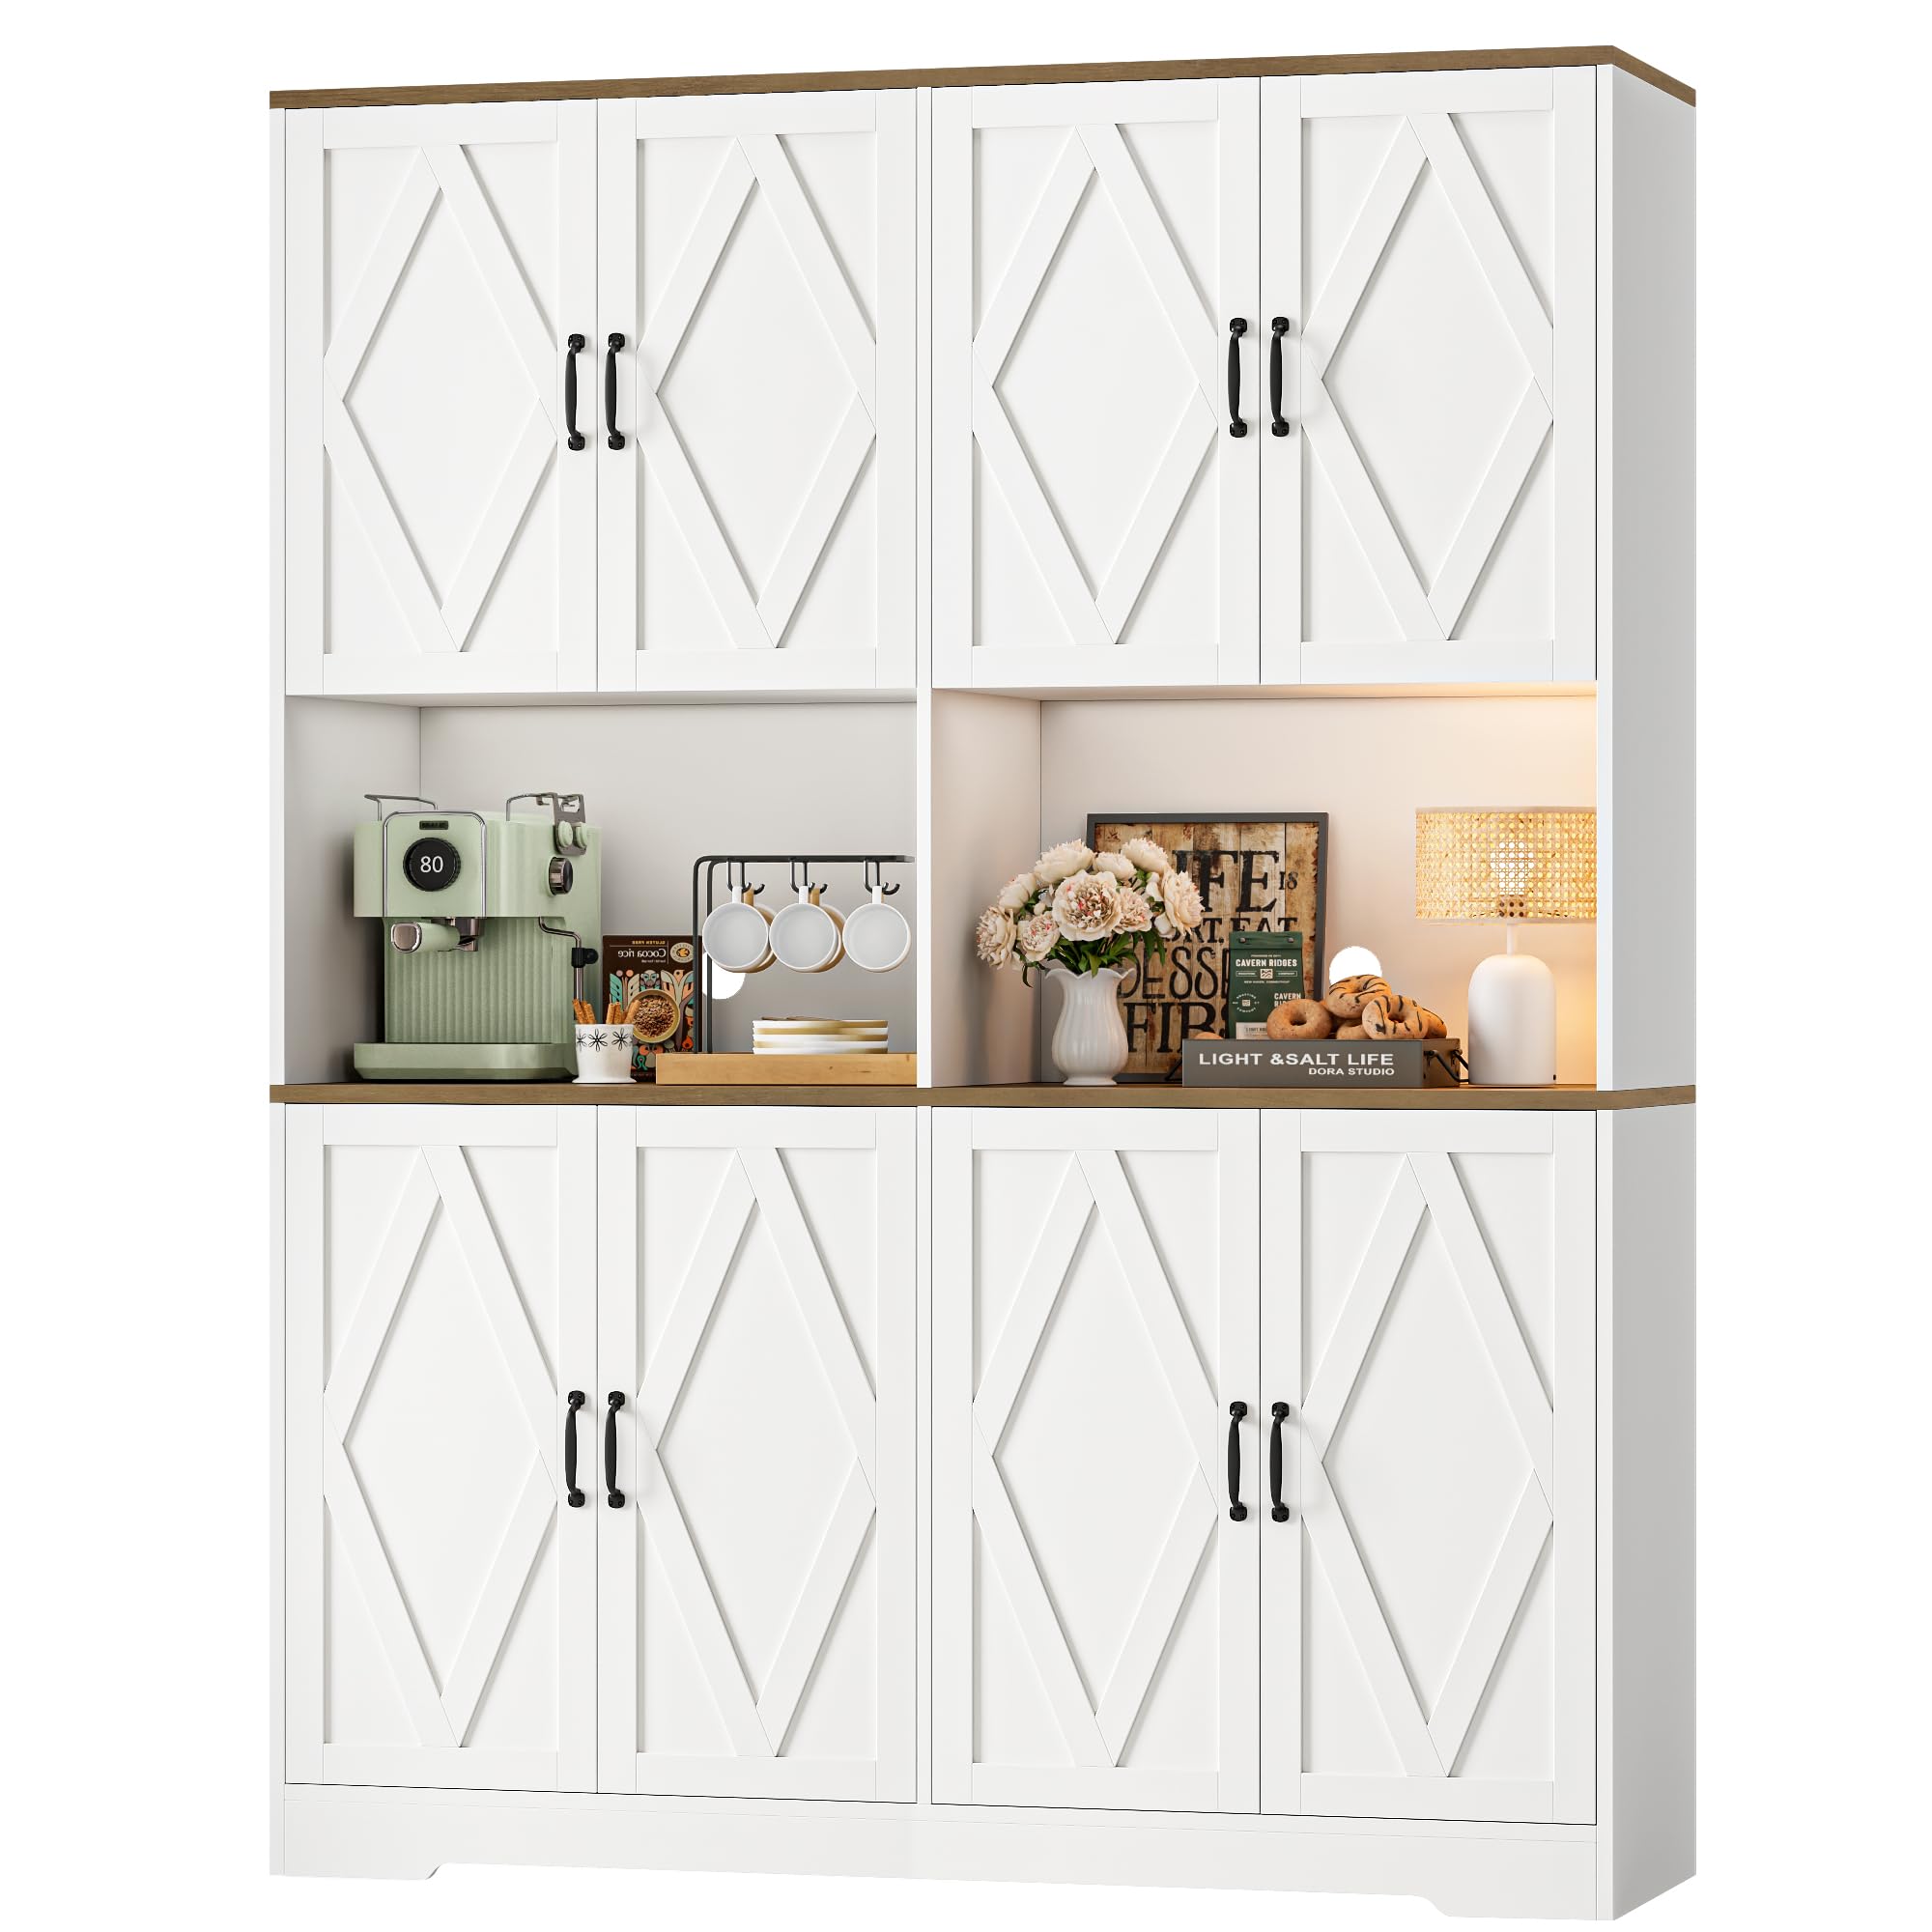
Image 1.1: The HOSTACK 71-inch Tall Pantry Cabinet, showcasing sein Design und seine Funktionalität im häuslichen Umfeld.
2. Sicherheitshinweise
Um eine sichere Verwendung dieses Produkts zu gewährleisten, beachten Sie bitte die folgenden Vorsichtsmaßnahmen:
- Um Kratzer zu vermeiden, montieren Sie den Schrank immer auf einer weichen, sauberen Oberfläche.
- Stellen Sie vor der Verwendung sicher, dass alle Teile sicher befestigt sind.
- This cabinet must be anchored to a wall using the provided anti-tipping device to prevent accidental tipping, especially in households with children or pets.
- Regale nicht überladen. Gewicht gleichmäßig verteilen.
- Halten Sie Kleinteile und Verpackungsmaterialien von Kindern fern.
3. Packungsinhalt
Your HOSTACK Pantry Cabinet will be delivered in two separate packages. Please ensure both packages have arrived before beginning assembly. Carefully unpack all components and verify against the parts list provided in your assembly guide. If any parts are missing or damaged, please contact customer support.

Image 3.1: The pantry cabinet is packaged in two boxes, which may arrive separately. A height reference is provided.
4. Montageanleitung
Assembly of the HOSTACK Pantry Cabinet requires attention to detail. Each step includes clear instructions, part numbers, and illustrations for easy understanding. Due to the product's size and weight, we strongly recommend that two adults work together during the setup process.
- Schritt 1: Auspacken und Teile identifizieren. Lay out all components on a soft, clean surface. Refer to the included parts list to ensure all pieces are present.
- Step 2: Assemble Base Structure. Follow the illustrated guide to connect the base panels and side frames.
- Step 3: Install Shelves and Dividers. Securely attach all internal shelves and dividers as indicated in the manual.
- Step 4: Attach Back Panels. Fasten the back panels to the assembled frame.
- Step 5: Mount Doors. Attach the doors using the provided buffer hinges. Adjust hinges for proper alignment.
- Schritt 6: Griffe montieren. Befestigen Sie die Griffe an den Türen.
- Step 7: Secure Anti-Tipping Device. Attach the anti-tipping device to the top rear of the cabinet and secure it to a wall stud. This step is crucial for safety.

Image 4.1: A visual representation of the recommended two-person assembly process for the cabinet.
5. Hauptmerkmale
- Ample Lagerung: Features 8 fully enclosed storage compartments with doors, providing organized space for various kitchen or dining essentials.
- Dual Countertops: Includes 2 separate countertops designed to accommodate appliances such as microwaves and coffee makers without interference.

Image 5.1: The interior layout of the cabinet, illustrating the 8 storage compartments and two independent countertops.
- Kabelmanagement: Equipped with cable management holes on the back panel of the countertop sections to keep appliance cords tidy and out of sight.

Image 5.2: Detail of the warm natural wood texture on the countertop and the integrated cable management holes.
- Scharniere mit Soft-Close-Funktion: All doors are fitted with buffer hinges that allow for slow and smooth closing, preventing slamming and reducing wear.
Video 5.1: Demonstration of the soft-close hinges on the cabinet doors, showing smooth and quiet operation.
- Langlebige Konstruktion: Constructed from high-quality engineered wood with a sturdy base and an anti-tipping device for enhanced stability and longevity.
- Bauernhaus-Design: Features intricate diamond patterns on the doors, adding a distinctive farmhouse aesthetic.

Abbildung 5.3: Eine detaillierte view of the diamond pattern design on the cabinet doors.
6. Verwendung und Platzierung
This versatile pantry cabinet is suitable for various rooms and purposes:
- Küche: Ideal for storing ingredients, small appliances, and cookware. The countertops provide convenient space for food preparation or appliance use.
- Esszimmer: Can serve as a buffet station, displaying dinnerware, glassware, or acting as a coffee bar.
- Wohnzimmer: Use for organizing snacks, entertainment essentials, or decorative items.

Image 6.1: The cabinet's versatility is demonstrated across various home settings, including kitchen, dining room, living room, and study.
7. Wartung
To maintain the appearance and longevity of your HOSTACK Pantry Cabinet:
- Wischen Sie Oberflächen mit einem weichen, damp Tuch. Scheuermittel vermeiden.
- Promptly clean up spills to prevent damage to the engineered wood.
- Vermeiden Sie es, heiße Gegenstände direkt auf die Oberfläche zu stellen; verwenden Sie Untersetzer oder Schutzmatten.
- Überprüfen Sie regelmäßig alle Befestigungselemente und ziehen Sie diese gegebenenfalls fest.
- Keep the cabinet away from direct sunlight and excessive moisture.
8. Fehlerbehebung
| Problem | Mögliche Ursache | Lösung |
|---|---|---|
| Fehlende oder beschädigte Teile | Transportschäden oder Verpackungsfehler. | Contact customer support with the part number/letter from the instruction manual. |
| Schrank ist instabil/wackelig | Fasteners not fully tightened; uneven floor; anti-tipping device not installed. | Ensure all screws are tight. Adjust leveling feet if applicable. Install the anti-tipping device securely to a wall stud. |
| Die Türen schließen nicht richtig. | Die Scharniere sind nicht richtig eingestellt. | Richten Sie die Türen mithilfe der Schrauben an den Scharnieren aus. Einzelheiten zur Scharniereinstellung finden Sie in der Montageanleitung. |
| Only one package received | Product ships in two separate packages. | Wait for the second package to arrive. Do not begin assembly until both packages are received. |
9. Produktspezifikationen
| Attribut | Detail |
|---|---|
| Marke | HOSTACK |
| Modellnummer | B0FHHRFQ3X |
| Gesamtabmessungen (T x B x H) | 15.8" x 55" x 71" |
| Material | Holzwerkstoff, Metall |
| Farbe | Weiß |
| Anzahl Türen | 8 |
| Anzahl der Einlegeböden | 8 |
| Montagetyp | Freestanding (with anti-tipping device) |
| Montage erforderlich | Yes (Two adults recommended) |
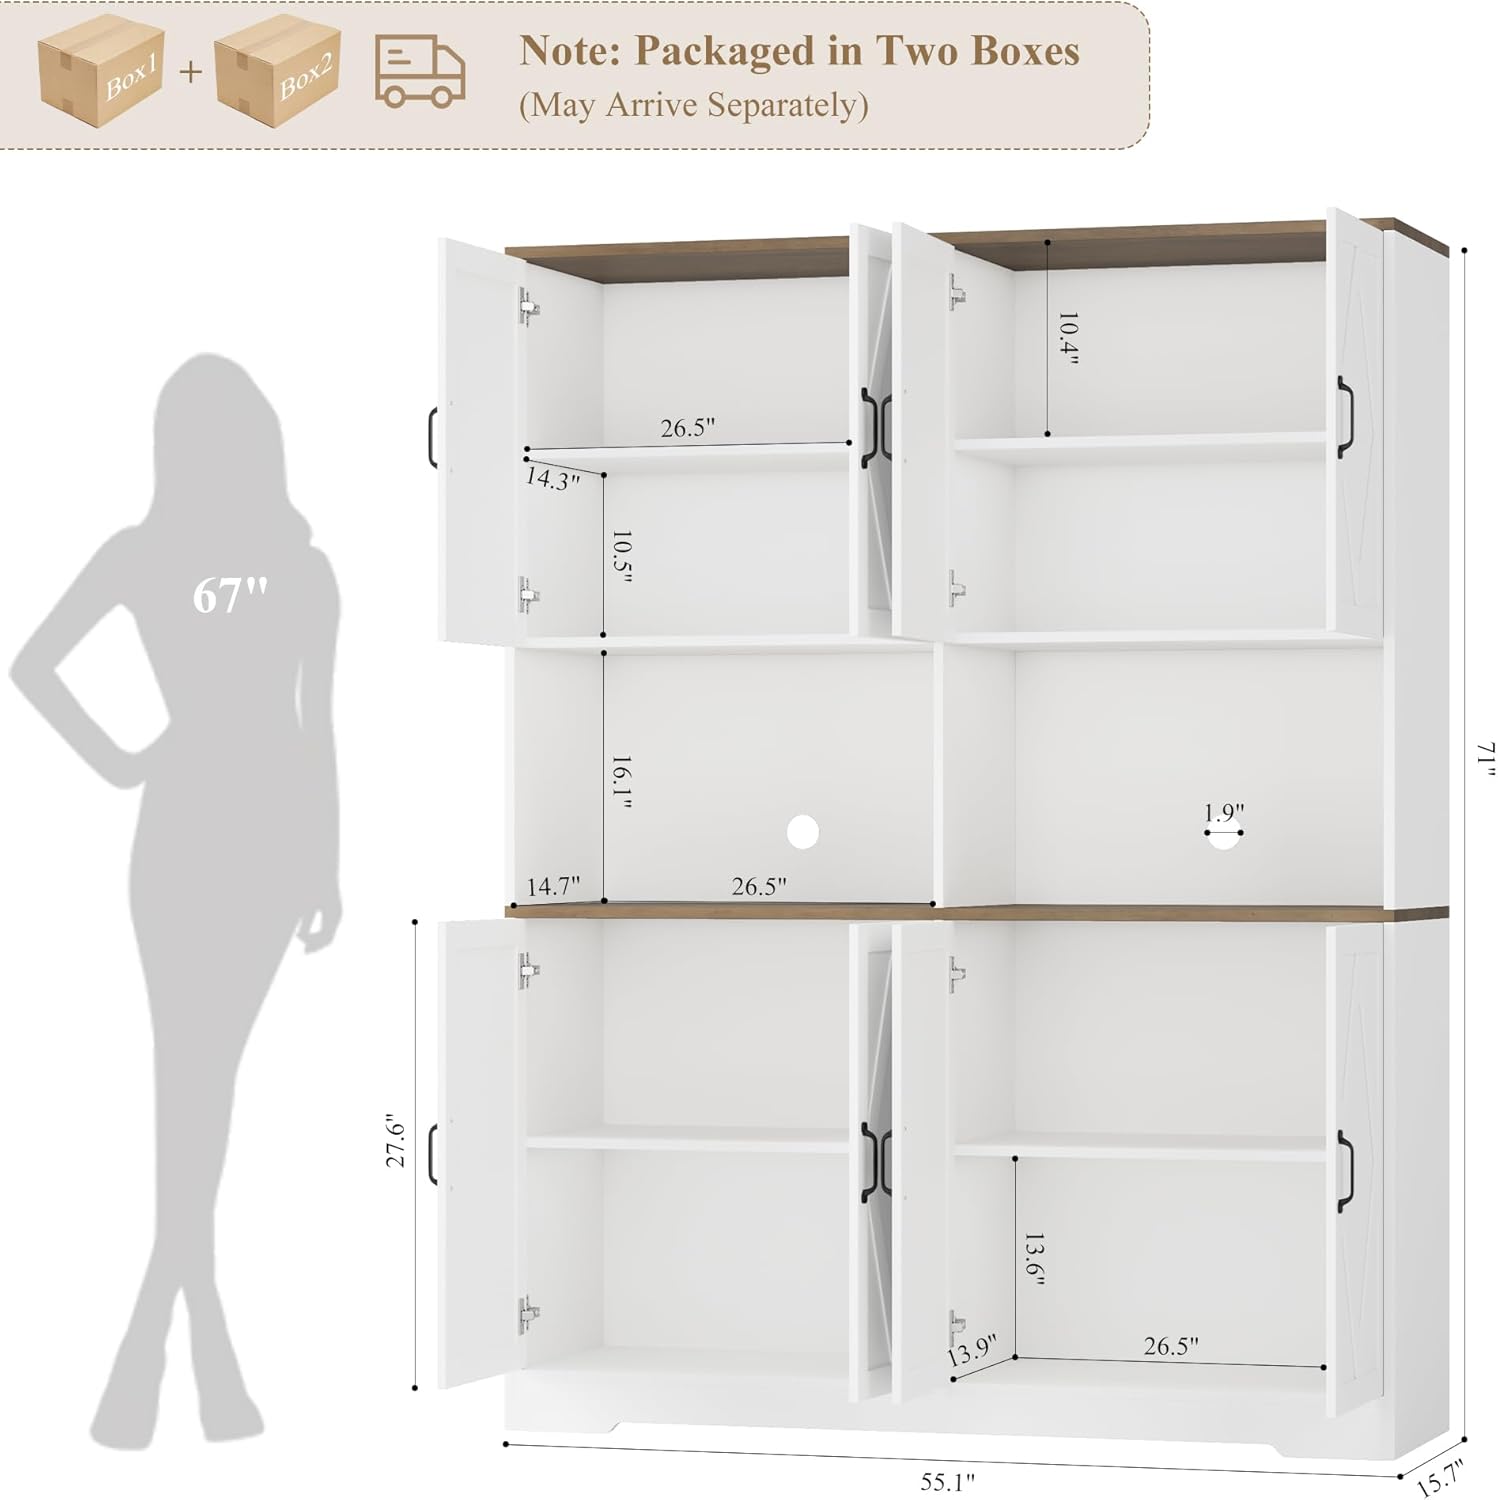
Image 9.1: Detailed dimensions of the HOSTACK Pantry Cabinet, illustrating the measurements of each section.
10. Garantie und Kundendienst
HOSTACK products are designed for quality and durability. For information regarding warranty coverage, please refer to the product's purchase documentation or contact our customer support team. If you have any questions, require assistance with assembly, or need to report missing/damaged parts, please contact us via the "Contact Seller" option on Amazon. Our support team is available to assist you.
Kontaktinformationen: Please use the "Contact Seller" feature on the Amazon product page for direct assistance.