1. Einleitung
This manual provides detailed instructions for the installation, operation, and maintenance of your KEPEAK 10-inch Mirror Dash Cam. Please read this manual thoroughly before using the product to ensure proper function and safety. Keep this manual for future reference.
2. Produktüberschreitungview
Packungsinhalt
- 10-inch Mirror Dash Cam (Front Camera Integrated)
- 1080P hinten View Kamera
- Rückkamerakabel (18 Fuß)
- Autoladegerät
- Mounting Straps/Rubber Clips
- 32GB-Speicherkarte
- Bedienungsanleitung
Hauptmerkmale
- Doppelkamerasystem: 4K Ultra HD front camera and IP68 waterproof 1080P rear camera.
- 10-Zoll-IPS-Touchscreen: Bietet ein breites Feld von view and intuitive control.
- Großer Dynamikbereich (WDR): Enhances video clarity in varying light conditions, especially at night.
- Smart Parking Assistance: Automatische Anzeige der Rückansicht view with parking assist lines when reversing.
- Loop-Aufnahme: Überschreibt automatisch die älteste Datei files wenn die Speicherkarte voll ist.
- G-Sensor: Detects collisions and locks video footage um ein Überschreiben zu verhindern.
- Parküberwachungsmodus: Records events when an impact is detected while parked (requires built-in battery power).
- 170°-Weitwinkelobjektiv: Erfasst ein breites Spektrum view der Straße.
- Speicherkartenunterstützung: Includes a 32GB card, supports up to 64GB.

Image: The KEPEAK 10-inch Mirror Dash Cam with its front camera, rear camera, 32GB memory card, car charger, and mounting straps.
3. Installationsanleitung
Follow these steps to properly install your dash cam system.
3.1 Montage der Spiegel-Dashcam
- Secure the mirror dash cam to your vehicle's original rearview mirror using the provided rubber clips/straps. Ensure it is firmly attached and does not obstruct your view.
- Adjust the angle of the front camera lens to capture the desired view der vor uns liegenden Straße.
3.2 Installation der Rückfahrkamera
- Montieren Sie die Rückfahrkamera am Heck Ihres Fahrzeugs, üblicherweise über dem Kennzeichen oder an der Heckscheibe. Stellen Sie sicher, dass sie eine klare Sicht hat. view and is securely fastened.
- Route the 18ft rear camera cable from the rear camera to the main mirror dash cam unit. It is recommended to route the cable along the vehicle's headliner and trim for a neat installation.
- Connect the rear camera cable to the designated port on the mirror dash cam.
3.3 Stromanschluss
- Insert the provided 32GB memory card into the dash cam's memory card slot.
- Schließen Sie das Autoladegerät an den Stromeingang der Dashcam an.
- Stecken Sie das Autoladegerät in die 12-V-Steckdose (Zigarettenanzünderbuchse) Ihres Fahrzeugs.
- Starten Sie Ihr Fahrzeug. Die Dashcam sollte sich automatisch einschalten und mit der Aufnahme beginnen.

Image: Visual guide for power wiring methods, including securing the dashcam, routing wires along the headliner, opening the A-pillar side panel, and plugging in the car charger.
4. Bedienungsanleitung
The KEPEAK Mirror Dash Cam features a user-friendly touch screen interface.
4.1 Grundfunktionen
- Ein-/Ausschalten: The device automatically powers on/off with your vehicle's ignition. You can also manually power it on/off by pressing and holding the power button.
- Aufnahme: Recording starts automatically when the device powers on. A red dot or similar indicator on the screen confirms recording is active.
- Umschalten Views: Slide your finger left or right across the touch screen to switch between front camera view, Rückkamera viewoder eine geteilte Bildschirmanzeige.
- Winkel einstellen: Slide your finger up or down on the screen to adjust the vertical viewing angle of the displayed camera.

Image: The 10-inch IPS touch screen displaying a vibrant interface, highlighting its responsive touch functionality.
4.2 Erweiterte Funktionen
- Einparkhilfe: When your vehicle is in reverse gear, the dash cam automatically displays the full-screen rear view with dynamic parking assist lines. You can manually adjust the display range (up/down) for optimal visibility.
- Loop-Aufnahme: The dash cam continuously records. When the memory card is full, it automatically overwrites the oldest unlocked files.
- G-Sensor (Kollisionserkennung): Im Falle eines plötzlichen Aufpralls oder einer Kollision erkennt der eingebaute G-Sensor das Ereignis automatisch und sperrt die aktuelle Videoaufnahme. filewodurch verhindert wird, dass es durch die Loop-Aufnahme überschrieben wird.
- Parküberwachungsmodus: When the engine is off, the dash cam uses its internal battery to enter standby monitoring. If an impact is detected, it will automatically turn on and record the event. A fully charged internal battery can provide up to 2 weeks of standby monitoring. For continuous 24/7 monitoring, hardwiring the dash cam to your car's battery is required (hardwire kit sold separately).

Image: The dash cam screen showing a full-screen rear view with green, yellow, and red parking assist lines, indicating safe reversing.

Image: An illustration depicting cars in a parking lot, with a lock icon indicating the G-Sensor's auto-lock function for collision events.
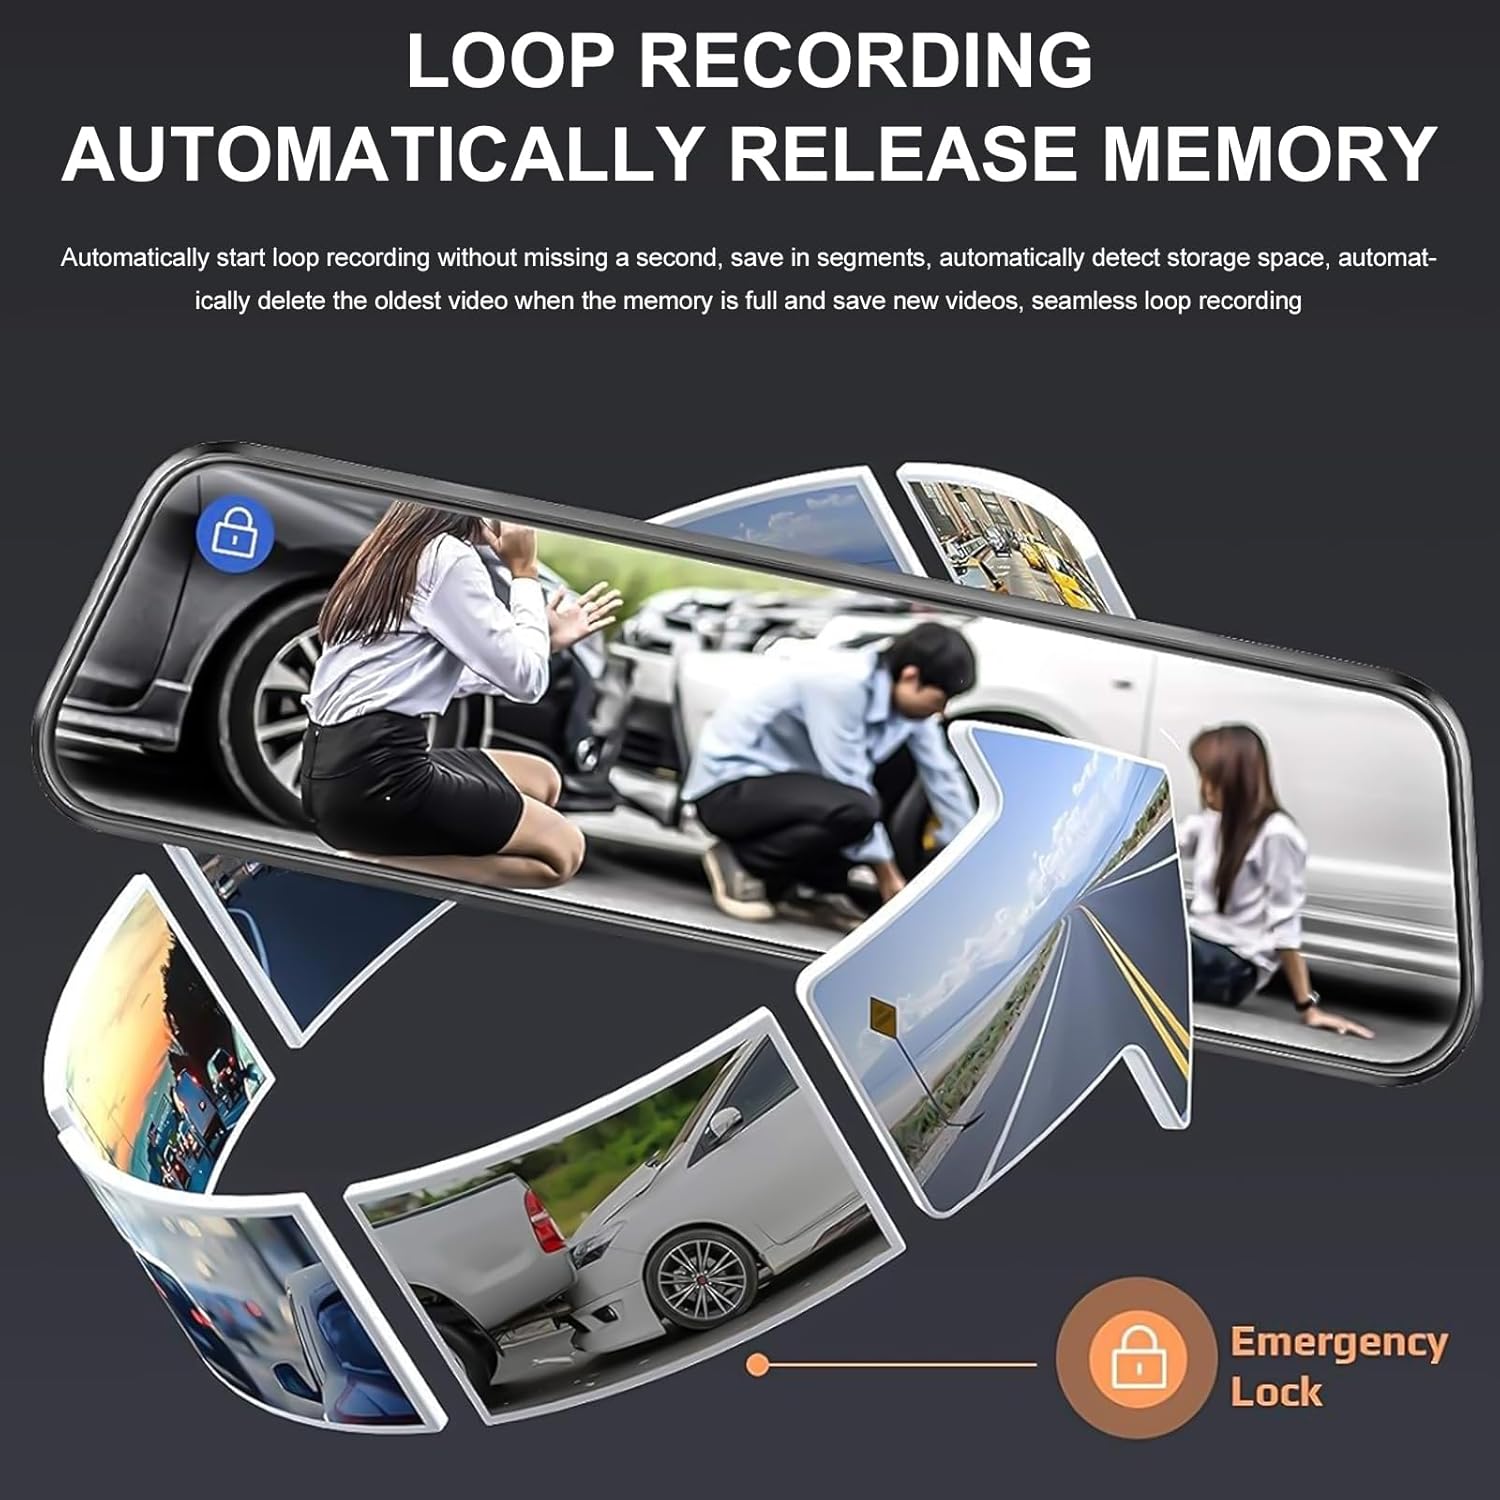
Image: A circular flow diagram illustrating loop recording, where new video segments replace older ones, with an emergency lock icon for protected footage.

Image: A car parked at night with a '24 HOUR' clock icon, symbolizing the 24-hour parking monitoring feature for vehicle protection.
5. Settings and Functions
Access the menu by tapping the screen. Here you can adjust various settings:
- Videoauflösung: Select desired resolution for front and rear cameras (e.g., 4K/1080P).
- Dauer der Loop-Aufnahme: Set the length of video segments (e.g., 1, 3, 5 minutes).
- G-Sensor-Empfindlichkeit: Adjust the sensitivity of the collision detection.
- Parkmonitor: Enable or disable parking surveillance mode.
- Belichtung: Adjust video brightness.
- Datum/Uhrzeit: Stellen Sie Datum und Uhrzeit richtig ein, um eine genaue Uhrzeit zu erhalten.amps auf Aufnahmen.
- Bildschirmschoner: Set the screen to turn off after a period of inactivity to avoid distraction.
- Sprache: Wählen Sie Ihre bevorzugte Sprache.
6. Wartung
- Reinigung: Use a soft, dry cloth to clean the dash cam screen and lenses. Avoid abrasive cleaners or solvents.
- Speicherkarte: Formatieren Sie die Speicherkarte regelmäßig (mindestens einmal im Monat), um optimale Leistung zu gewährleisten und Datenbeschädigung zu vermeiden. Sichern Sie alle wichtigen Daten.tage before formatting. Replace the memory card if it shows signs of degradation or errors.
- Temperatur: Vermeiden Sie es, die Dashcam über längere Zeiträume extremen Temperaturen auszusetzen, da dies die Akkulaufzeit und die Leistung des Geräts beeinträchtigen kann.
7. Fehlerbehebung
If you encounter issues with your dash cam, refer to the following common solutions:
| Problem | Mögliche Lösung |
|---|---|
| Die Dashcam lässt sich nicht einschalten. | Check if the car charger is properly connected to both the dash cam and the vehicle's 12V outlet. Ensure the vehicle's ignition is on. Test the charger in another port or with another device if possible. |
| Die Aufnahme stoppt oder friert ein. | Format the memory card. Ensure the memory card is a high-speed Class 10 or U3 card. Replace the memory card if issues persist. Check power connection stability. |
| Schlechte Videoqualität. | Clean the camera lenses. Ensure the protective film has been removed from the lenses. Check video resolution settings. Adjust WDR settings if applicable. |
| Die Rückkamera zeigt kein Bild an. | Prüfen Sie die Verbindung des Rückkamerakabels sowohl zur Rückkamera als auch zur Haupteinheit. Stellen Sie sicher, dass das Kabel nicht beschädigt ist. |
| Parking assist lines not appearing. | Ensure the rear camera is properly connected and the vehicle is in reverse gear. Check settings for parking assistance. |
| Parking surveillance not working. | Ensure the parking surveillance mode is enabled in settings. Check the dash cam's internal battery charge level. For 24/7 monitoring, hardwiring is required. |
8. Spezifikationen
- Marke: KE PEAK
- Modell: B0FHJS1HZS
- Bildschirmgröße: 10 Zoll
- Auflösung der Frontkamera: 4K Ultra HD
- Auflösung der Rückfahrkamera: 1080P Full HD
- Fachgebiet View: 170 Grad
- Besondere Merkmale: G-Sensor, Night Vision (WDR), Touch Screen, Loop Recording, Parking Assistance, Parking Surveillance
- Konnektivitätstechnologie: USB
- Speicherkartenunterstützung: Bis zu 64 GB (32 GB enthalten)
- Produktabmessungen: 8 x 5 x 4 Zoll
- Artikelgewicht: 1.7 Pfund
- Farbe: Schwarz
- Fahrzeugservicetyp: Auto, LKW
9. Garantie und Support
KEPEAK is committed to providing reliable products and customer satisfaction. If you encounter any issues with your mirror dash cam, our customer support team is available to provide fast and effective assistance within 24 hours.
Please contact us through the retailer's platform or refer to the contact information provided with your purchase for support.