
1. Einleitung
Thank you for choosing the XTUGA J02S Wireless In-Ear Monitor System. This system provides high-fidelity stereo audio monitoring with low latency, designed for musicians, singers, and performers on stage, in church, or for content creation. This manual will guide you through the setup, operation, and maintenance of your new wireless IEM system.
2. Packungsinhalt
Bitte kreuzen Sie das Kästchen für die folgenden Elemente an:
- 1 x XTUGA J02S Transmitter
- 1 x XTUGA J02S Receiver
- 1 x 3.5mm to 3.5mm Connecting Cable
- 1 x USB-C Ladekabel
- 1 x 6.35mm Audio Adapter Plug
- 1 x Benutzerhandbuch

3. Produktüberschreitungview
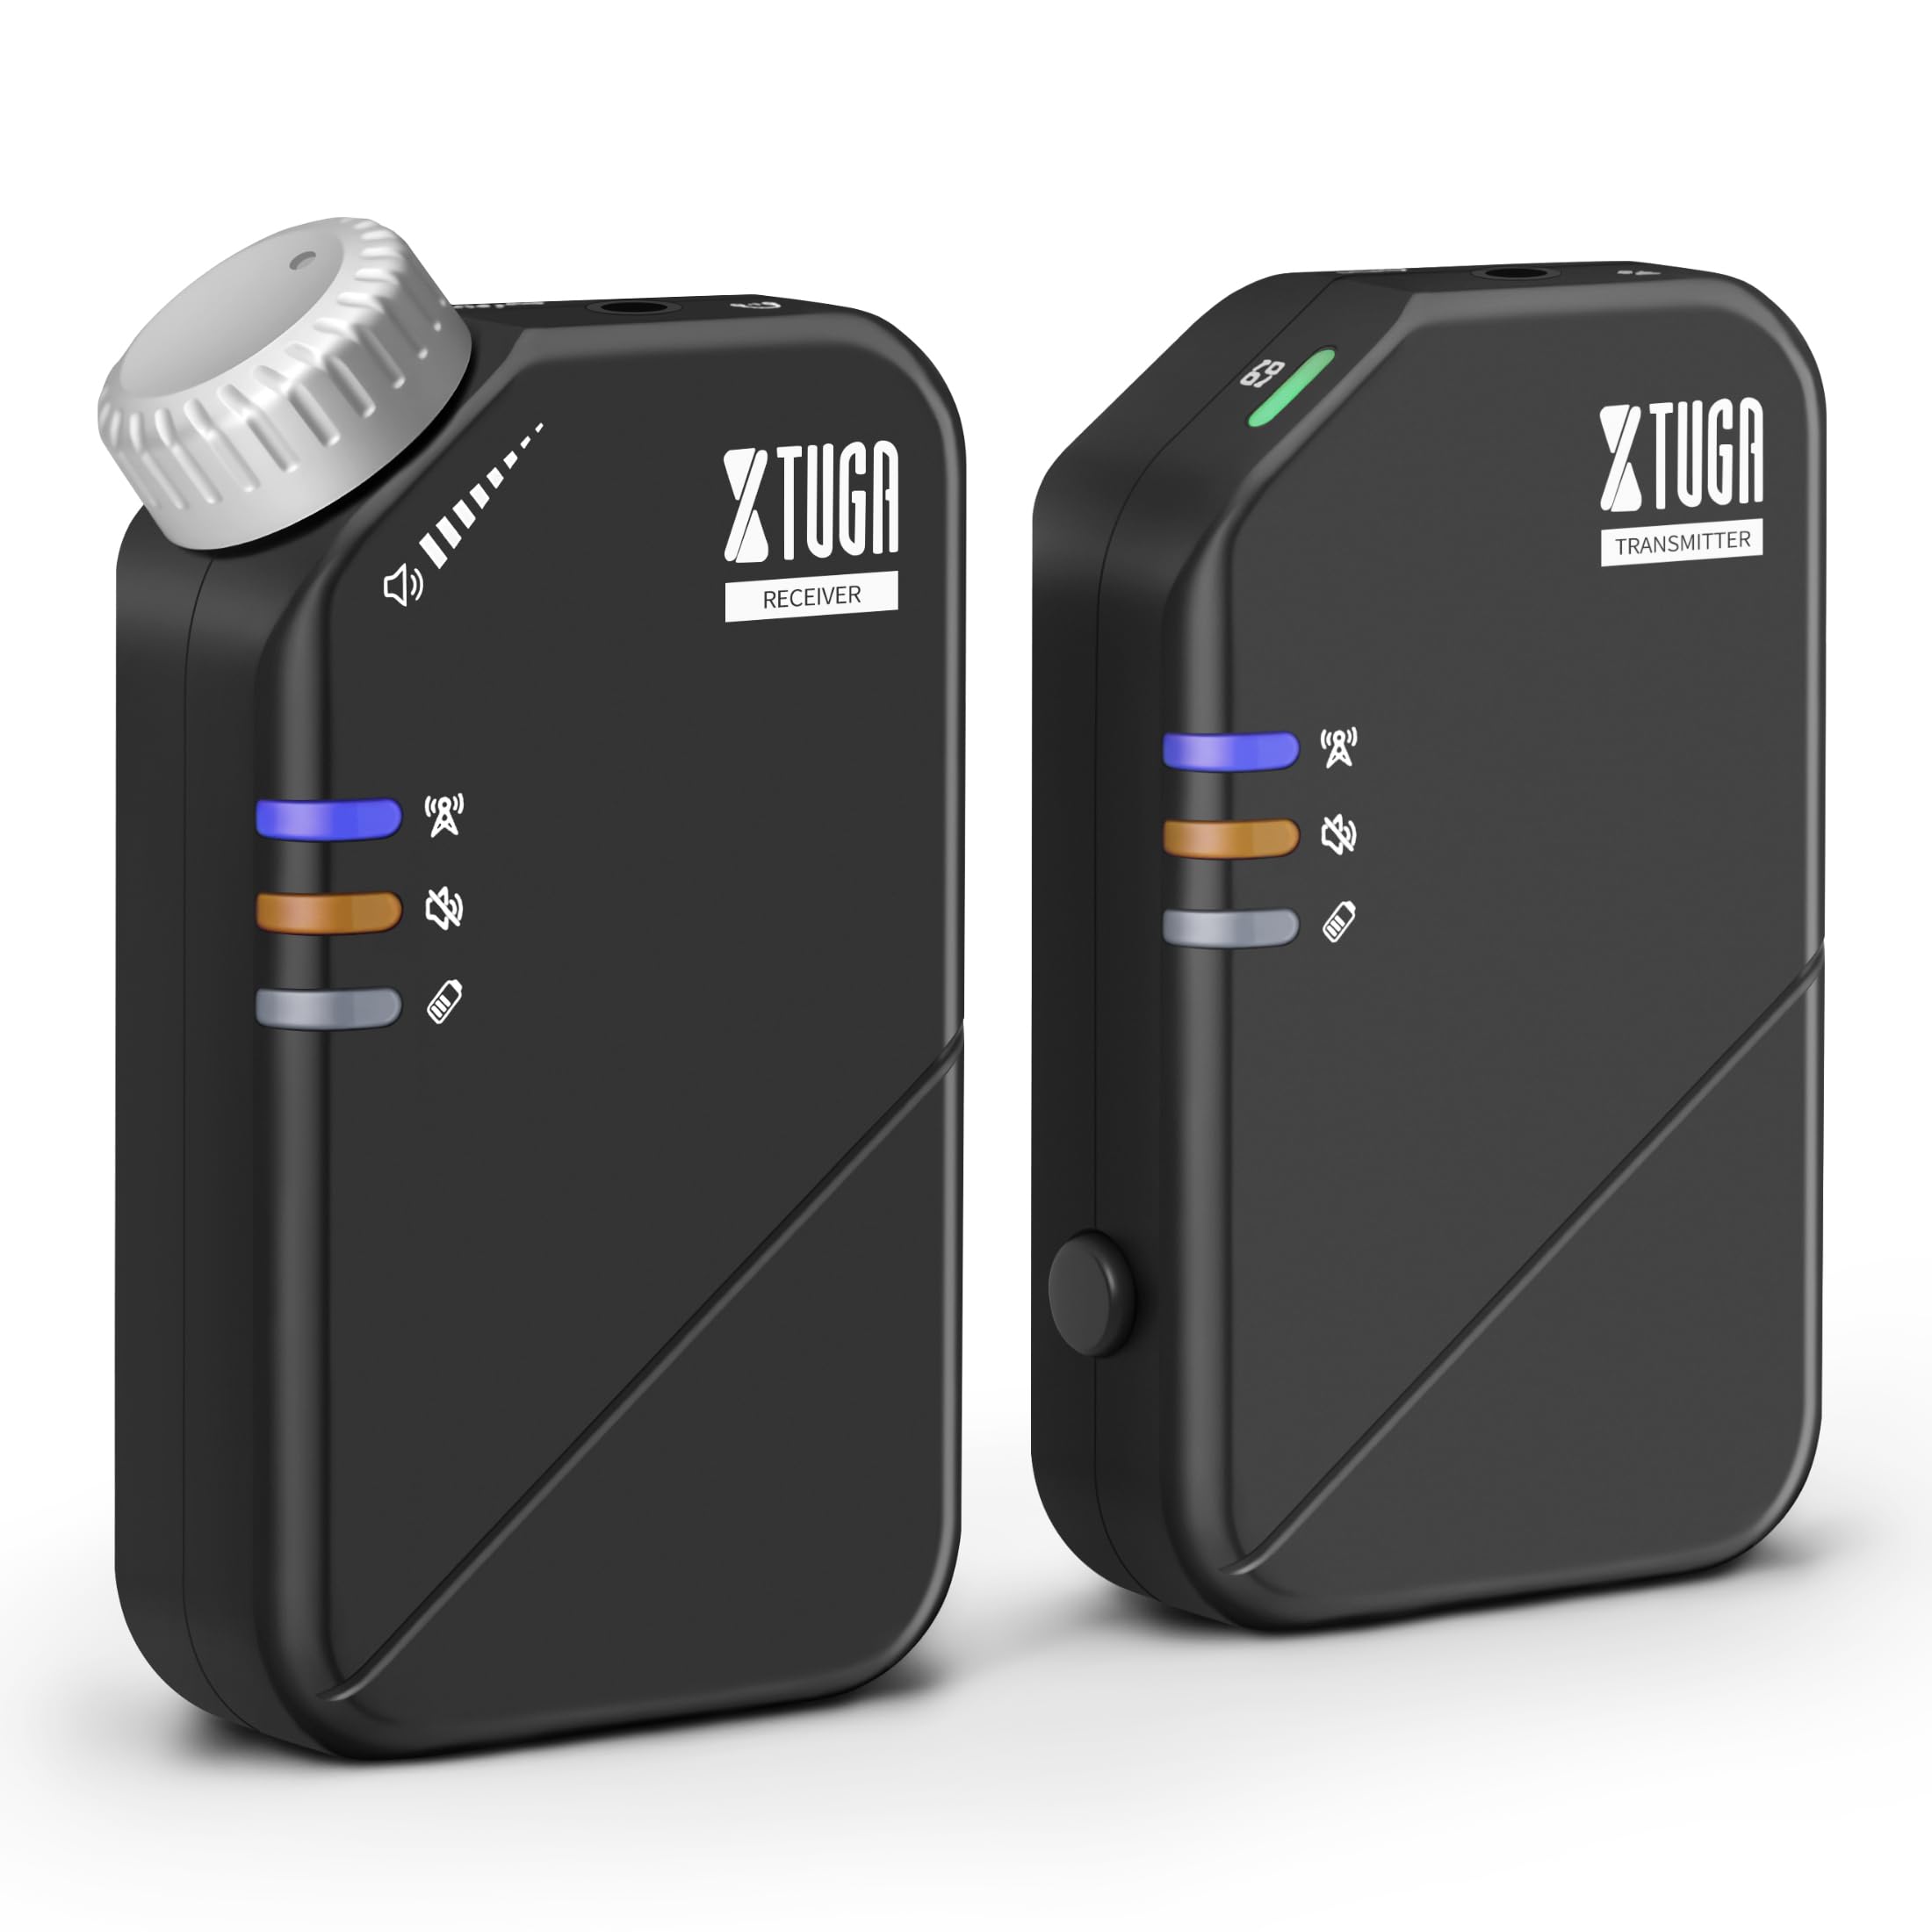
The XTUGA J02S system consists of a compact transmitter and receiver unit, designed for portability and ease of use. Both units feature durable ABS construction and integrated belt clips for convenient attachment during performances.
4. Einrichtung
4.1 Aufladen der Geräte
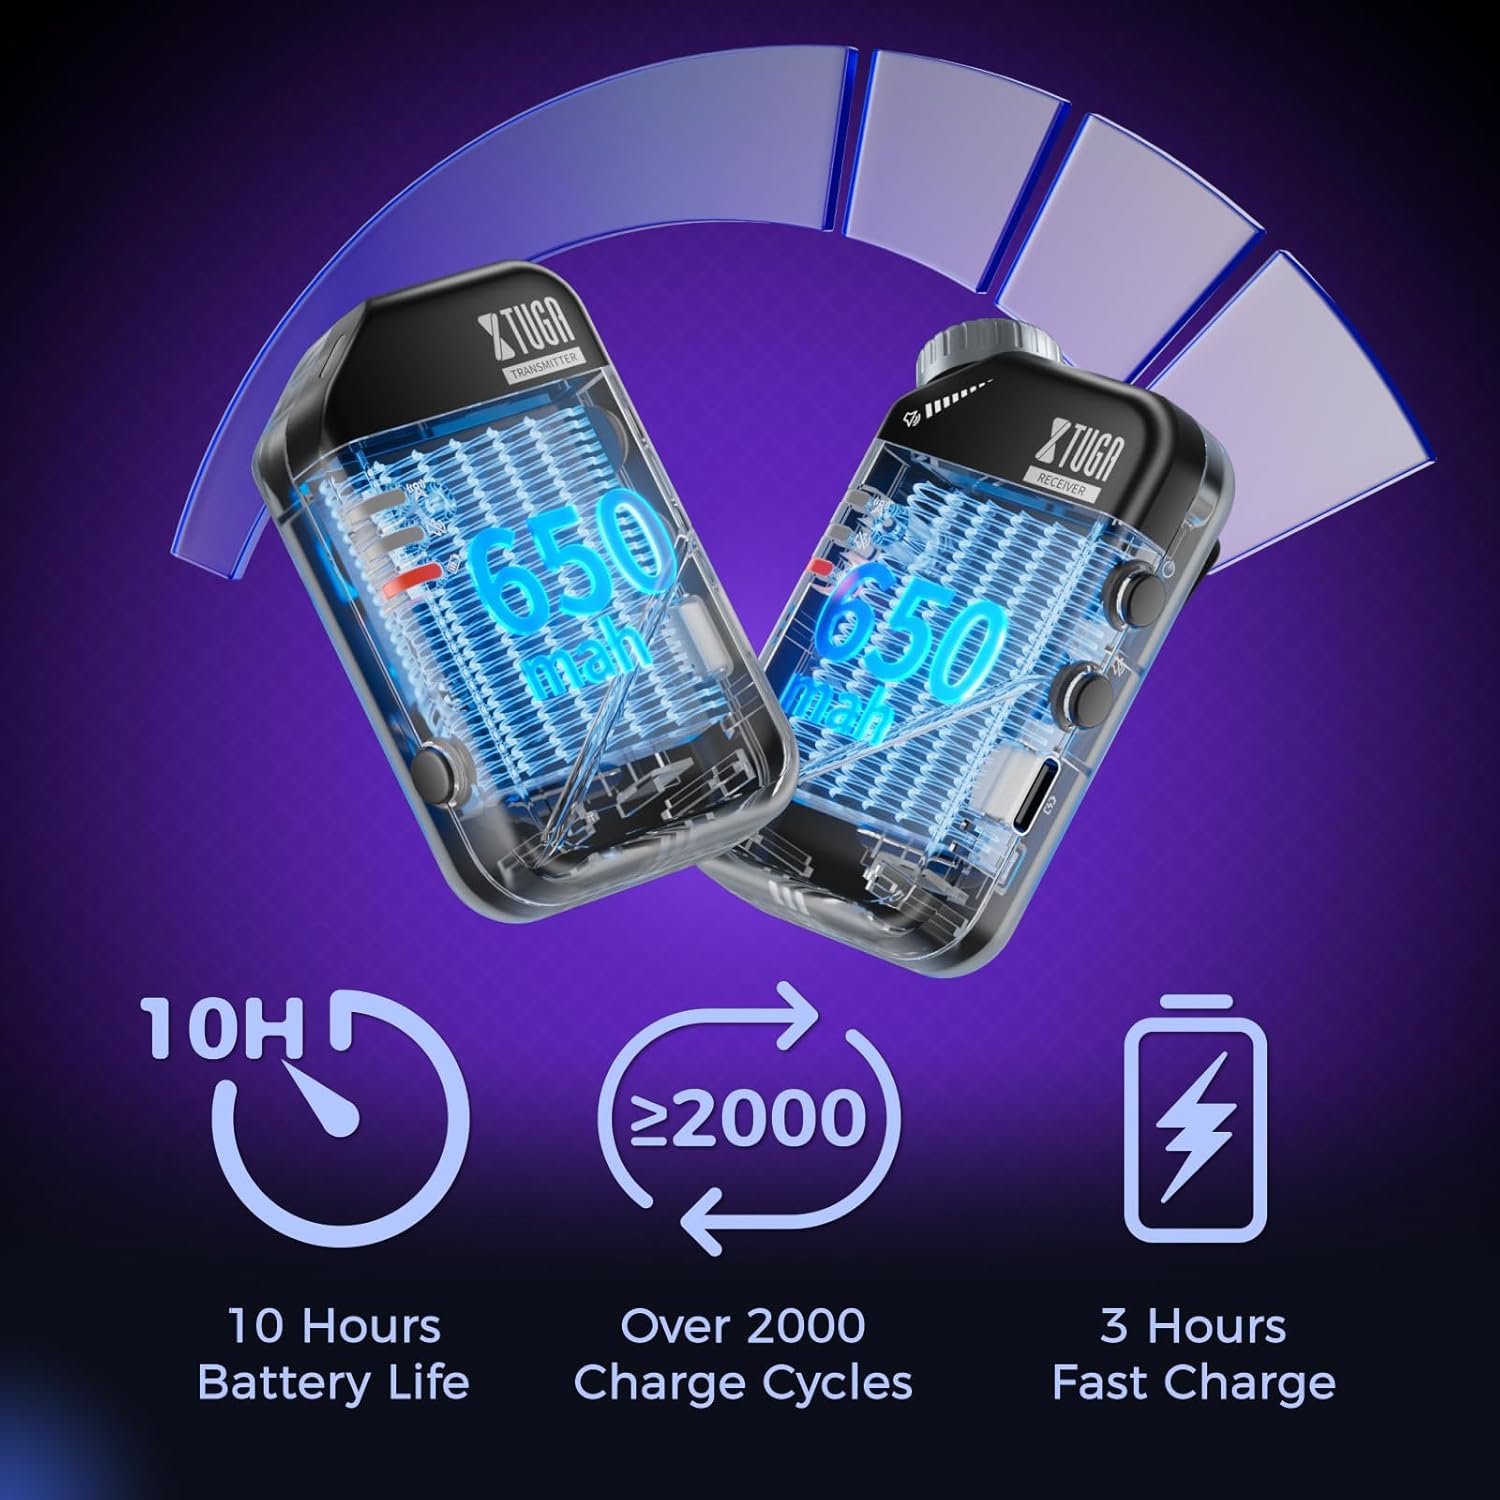
Before first use, fully charge both the transmitter and receiver using the provided USB-C charging cable. A red light will flash to indicate low battery and will turn solid red while charging, turning off when fully charged.
4.2 Anschließen des Senders
- Connect the 3.5mm connecting cable to the 'INPUT' jack on the transmitter.
- If your audio source has a 6.35mm output, use the provided 6.35mm adapter plug.
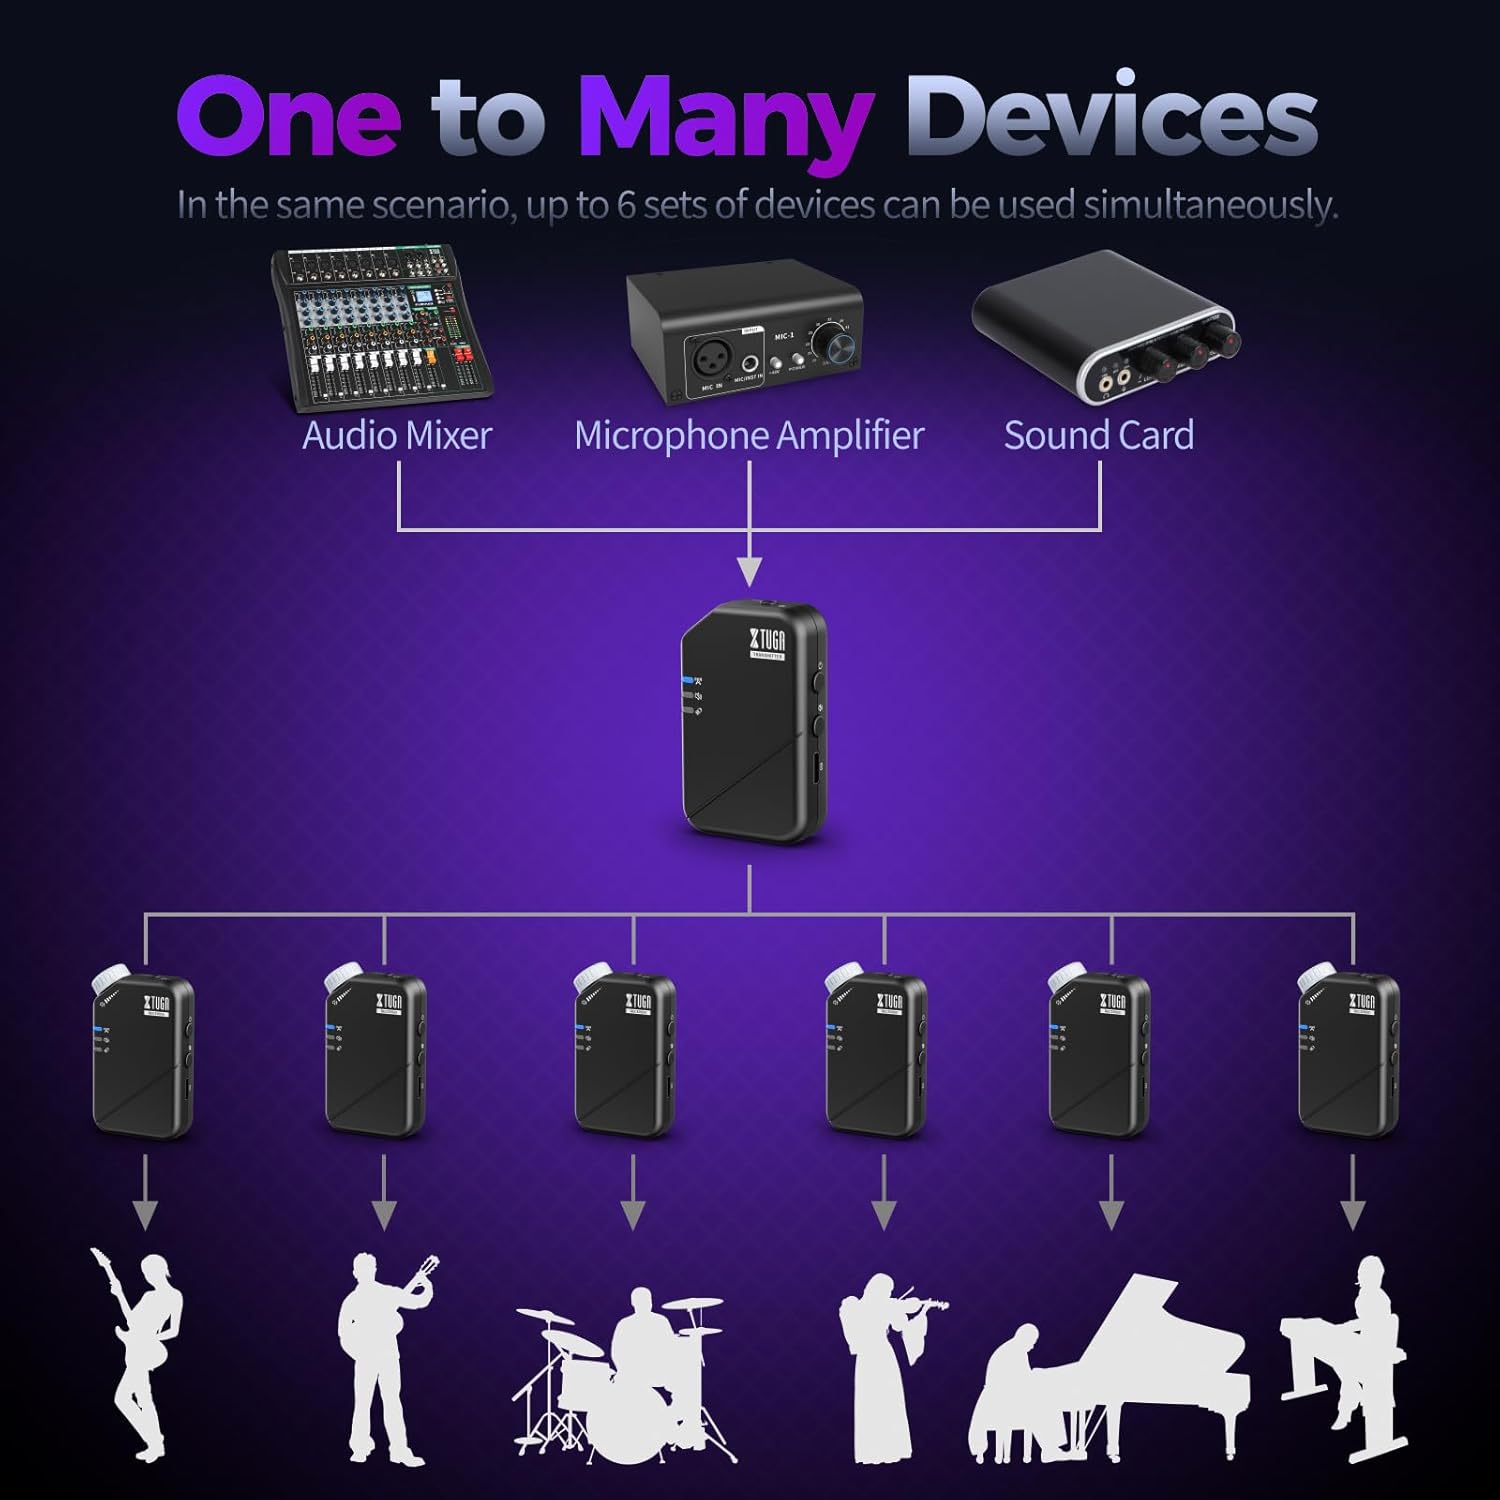
- Plug the other end of the connecting cable into your audio source (e.g., mixer, audio interface, phone, sound card).
4.3 Anschließen des Empfängers
- Plug your in-ear monitors or headphones into the 'OUTPUT' jack on the receiver.
- Clip the receiver to your belt or waistband for convenient monitoring.
4.4 Die Einheiten paaren
The units are typically pre-paired. If re-pairing is needed:
- Schalten Sie Sender und Empfänger ein.
- The blue indicator light will be solid when connected. A flashing blue light indicates no connection.
- If they do not connect automatically, refer to the detailed pairing instructions in the included user manual.
5. Bedienungsanleitung
5.1 Ein-/Ausschalten
Long press the power button on each unit to turn it on or off.
5.2 Mute-Funktion
Press the mute button on either the transmitter or receiver to mute the audio. A yellow light indicates the unit is muted.

5.3 Mono/Stereo Switching
The system supports both mono and stereo modes. Use the dedicated button on the transmitter to switch between modes. A green light indicates mono mode, while no light indicates stereo mode.
5.4 Lautstärkeregelung
Adjust the volume directly on the receiver unit using the tactile volume knob. This allows for precise, on-the-fly adjustments without needing to look at the unit.

6. Hauptmerkmale
- High-Fidelity-Sound: The 2.4GHz wireless system offers a low-noise design (SNR>100dB) and ultra-low latency (≤4.5ms mono, <12ms stereo) for clear audio.
- Erweiterte Funkreichweite: Enjoy freedom of movement with a wireless transmission range of up to 164ft (50m).
- Lange Akkulaufzeit: Each unit provides up to 10 hours of continuous use on a single 3-hour fast charge, with a lifespan of over 2000 charge cycles.
- One Transmitter to Many Receivers: A single transmitter can send signals to multiple receivers simultaneously (up to 6 pairs), ideal for band monitoring.


7. Spezifikationen
| Spezifikation | Wert |
|---|---|
| Modellname | J02S-JT |
| Konnektivitätstechnologie | Kabellos (2.4 GHz) |
| Frequenzbereich | 20-24 kHz |
| Sampling-Rate | 48 KHz/24 Bit |
| Low Latency (Mono) | ≤4.5ms |
| Low Latency (Stereo) | <12 ms |
| Drahtlose Reichweite | Bis zu 164 Fuß (50 m) |
| Akkulaufzeit | 10 Stunden |
| Ladezeit | 3 Stunden |
| Material | Acrylnitril-Butadien-Styrol (ABS) |
| Kopfhöreranschluss | 3.5mm (with 6.35mm adapter) |
| Kompatible Empfänger | Up to 6 pairs per transmitter |
| Artikelgewicht | 7 Unzen (0.2 kg) |
| Technische Daten | 6.89 x 4.72 x 1.97 Zoll |

8. Fehlerbehebung
8.1 Keine Audioausgabe
- Stellen Sie sicher, dass sowohl Sender als auch Empfänger eingeschaltet und vollständig aufgeladen sind.
- Check that the units are successfully paired (solid blue indicator light).
- Verify that your headphones/IEMs are correctly plugged into the receiver's 'OUTPUT' jack.
- Adjust the volume knob on the receiver.
- Confirm the audio source is active and connected correctly to the transmitter's 'INPUT'.
- Check if the mute function is active (yellow indicator light). Deactivate if necessary.
8.2 Intermittent Signal/Dropouts
- Ensure the transmitter and receiver are within the 164ft (50m) operating range.
- Minimize physical obstructions (walls, large metal objects) between the units.
- Avoid areas with high 2.4GHz wireless interference (e.g., multiple Wi-Fi routers, other wireless devices).
- Ensure units are fully charged to maintain optimal signal strength.
8.3 Latenzprobleme
- The system is designed for low latency. Ensure you are operating within optimal conditions (clear line of sight, minimal interference).
- Consider switching to mono mode if stereo latency is noticeable, as mono mode offers lower latency.
9. Wartung
- Reinigung: Reinigen Sie die Geräte mit einem weichen, trockenen Tuch. Vermeiden Sie flüssige Reiniger oder Lösungsmittel.
- Lagerung: Lagern Sie das System an einem kühlen, trockenen Ort, geschützt vor direkter Sonneneinstrahlung und extremen Temperaturen.
- Batteriepflege: For optimal battery longevity, avoid completely draining the battery frequently. Charge the units regularly, even if not in constant use.
- Handhabung: While durable, avoid dropping the units or subjecting them to harsh impacts to prevent damage to internal components.
10. Garantie und Support
XTUGA products are designed for reliability and performance. For warranty information, technical support, or service inquiries, please refer to the contact details provided in the original product packaging or visit the official XTUGA webBewahren Sie Ihren Kaufbeleg als Kaufnachweis für Garantieansprüche auf.