1. Einleitung
This manual provides essential information for the safe and effective operation of your Andeman Ep155 or Ep177 Car Jump Starter with Air Compressor. Please read this manual thoroughly before using the device and retain it for future reference. This device is designed to jump start 12V vehicles and, for the Ep177 model, also functions as a portable tire inflator and power bank.
2. Sicherheitshinweise
WARNING: Improper use can result in injury or damage to the device and vehicle. Always follow these safety guidelines.
- Außerhalb der Reichweite von Kindern aufbewahren.
- Tauchen Sie das Gerät nicht in Wasser.
- Nicht in explosiven Atmosphären betreiben, z. B. in Gegenwart von brennbaren Flüssigkeiten, Gasen oder Staub.
- Sorgen Sie während des Gebrauchs für ausreichende Belüftung.
- Do not disassemble the device. Contact qualified service personnel for repairs.
- Avoid direct exposure to sunlight or high temperatures.
- Verwenden Sie ausschließlich die bereitgestellten Smart-Funktionen.amps und Zubehör.
- Für eine optimale Leistung stellen Sie sicher, dass das Gerät vor der Verwendung vollständig aufgeladen ist.
- The device features 10 advanced safety protections, including Overload Protection, Sparks Protection, Reverse Charges Protection, Reverse Polarities Protection, Over Currents Protection, Low Temperature Protection, Over Charges Protection, and Short Circuits Protection.

3. Produktüberschreitungview und Komponenten
Your Andeman Car Jump Starter is a multi-functional device designed for emergency vehicle starting, and for the Ep177 model, also includes a portable air compressor and power bank capabilities.
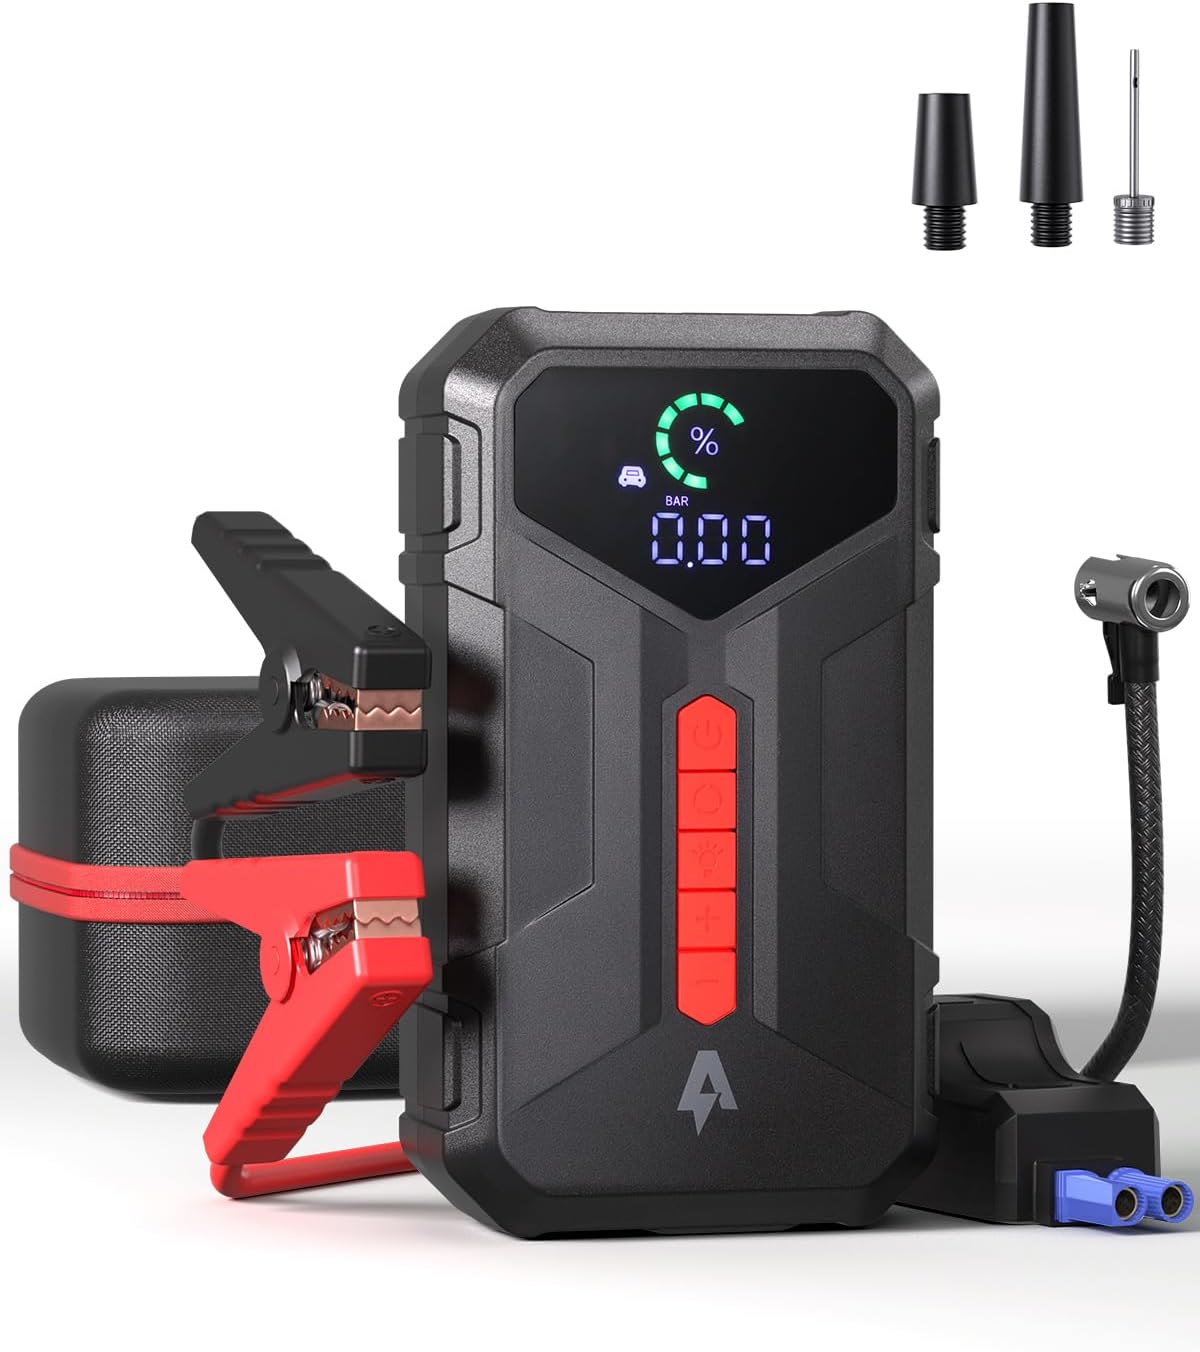

Packungsinhalt:
- Andeman Car Jump Starter (Ep155 or Ep177)
- Smart Battery Klamps
- USB-C-Ladekabel
- Inflation Nozzles (for Ep177 model)
- Bedienungsanleitung
4. Spezifikationen
| Besonderheit | Ep155 Model | Ep177 Model |
|---|---|---|
| Spitzenstrom | 3000 A | 4000 A |
| Batteriekapazität | 20000 mAh | 24000 mAh |
| Motorkompatibilität (Benzin) | Bis zu 9.0L | Bis zu 8.5L |
| Motorkompatibilität (Diesel) | Bis zu 7.0L | Bis zu 7.0L |
| Starts per Charge | Bis zu 80 Mal | Bis zu 70 Mal |
| Standby-Zeit | 24 Monate | 48 Monate |
| Air Compressor (PSI) | N / A | Up to 150PSI |
| Ladeeingang (Typ C) | 5V/3A, 9V/2A, 12V/1.5A | |
| USB-A-Ausgang | QC3.0 | |
| USB-B-Ausgang | 5 V/3 A | |
| DC-Ausgang | 15 V | |
| Vollständige Ladezeit | Ungefähr 1.8 Stunden | |
| LED-Taschenlampe | 240 Lumens, 36 hours battery life | |

5. Einrichten und Laden
5.1 Erstgebühr
Before first use, fully charge the jump starter. Connect the provided USB-C charging cable to the device's Type-C input port and a suitable USB power adapter (not included). The device supports bi-directional fast charging, achieving a full charge from 0% to 100% in approximately 1.8 hours.

5.2 Batteriestand prüfen
The device features a digital display or indicator lights to show the current battery level. Ensure the device has sufficient charge before attempting to jump start a vehicle or inflate tires.
6. Bedienungsanleitung
6.1 Starthilfe für Ihr Fahrzeug
- Stellen Sie sicher, dass der Starthilfe-Booster mindestens zu 50 % geladen ist.
- Schalten Sie die Zündung des Fahrzeugs und alle Zubehörteile aus.
- Verbinden Sie Rot (+) clamp an den Pluspol (+) der Fahrzeugbatterie.
- Verbinden Sie Schwarz (-) clamp an den Minuspol (-) der Fahrzeugbatterie oder an ein festes, unlackiertes Metallteil des Motorblocks.
- Stecken Sie den Smart-Cl einamp connector into the jump starter's port. The indicator light on the smart clamp should turn green, indicating a correct connection. If it's red or flashing, check connections and battery voltage.
- Start the vehicle. If it doesn't start immediately, wait 30 seconds before trying again. Do not crank for more than 3 seconds per attempt.
- Sobald das Fahrzeug startet, trennen Sie sofort die Smart-Cl-Verbindung.amp Anschluss vom Starthilfegerät.
- Entfernen Sie den schwarzen (-) Steckeramp zuerst, dann die rote (+) Clamp von der Fahrzeugbatterie.
6.2 Using the Air Compressor (Ep177 Model Only)
The Ep177 model features a built-in air compressor capable of delivering up to 150PSI.
- Connect the air hose to the tire valve stem. Ensure a secure connection to prevent air leakage.
- Power on the jump starter. The current tire pressure will be displayed.
- Stellen Sie mit den Tasten „+“ und „-“ den gewünschten Druck ein.
- Press the inflation button to start the compressor. The compressor will automatically stop once the preset pressure is reached.
- Den Luftschlauch vom Reifenventil abziehen.
Note: For continuous use, it is recommended to rest the compressor for 10 minutes after every 10 minutes of operation to prevent overheating. A full charge can inflate 195/60 R15 tires from 0 to full approximately 4-5 times.

6.3 Verwendung als Powerbank
The jump starter can also function as a portable power bank to charge electronic devices.
- Connect your device's charging cable to the appropriate output port on the jump starter (USB-A QC3.0, USB-B 5V/3A, or Type-C 5V/3A, 9V/2A, 12V/1.5A).
- Das Gerät beginnt automatisch mit dem Ladevorgang.
- The DC15V output port can power compatible devices like tire inflators (if not using the built-in one) or car refrigerators.

6.4 Verwendung der LED-Taschenlampe
The built-in 240 lumens LED flashlight offers multiple modes for various situations.
- Drücken Sie den Taschenlampenknopf einmal, um das Dauerlicht einzuschalten.
- Press again for SOS mode (flashing slowly).
- Press a third time for Strobe mode (flashing rapidly).
- Drücken Sie ein viertes Mal, um die Taschenlampe auszuschalten.
The flashlight provides up to 36 hours of battery life.

7. Wartung
7.1 Laden
To maintain optimal battery health, recharge the jump starter every 3-6 months, even if not in use. This prevents deep discharge and extends battery life.
7.2 Speicherung
- Bewahren Sie das Gerät an einem kühlen, trockenen Ort auf, schützen Sie es vor direkter Sonneneinstrahlung und extremen Temperaturen.
- Keep the device and accessories in the provided carrying case to protect them from damage.
7.3 Reinigung
Reinigen Sie das Gerät mit einem weichen, trockenen Tuch. Verwenden Sie keine scharfen Chemikalien oder Scheuermittel.
8. Fehlerbehebung
8.1 Fahrzeug startet nicht
- Batteriestand prüfen: Stellen Sie sicher, dass der Starthilfe-Booster ausreichend geladen ist.
- Anschlüsse prüfen: Überprüfen Sie, ob der Smart-Clamps sind sicher mit den richtigen Batteriepolen verbunden (rot an Plus, schwarz an Minus).
- Smart Klamp Indikator: If the indicator is red or flashing, refer to the smart clamp's instructions for error codes.
- Vehicle battery condition: If the vehicle battery is severely damaged or completely dead, the jump starter may not be able to start it.
8.2 Air Compressor Not Working (Ep177 Only)
- Batteriestand prüfen: Stellen Sie sicher, dass der Starthilfe-Booster ausreichend geladen ist.
- Schlauchanschluss: Verify the air hose is securely connected to both the device and the tire valve.
- Überhitzung: If the compressor has been running for an extended period, it may have overheated. Allow it to cool down for 10-15 minutes before attempting to use it again.
8.3 Gerät lädt nicht
- Kabel: Stellen Sie sicher, dass das USB-C-Ladekabel nicht beschädigt und ordnungsgemäß angeschlossen ist.
- Netzteil: Verify the USB power adapter is functional and provides adequate power output.
9. Garantie und Support
Your Andeman jump starter is UL Certified, ensuring it meets stringent safety standards. For warranty information, technical support, or service inquiries, please refer to the contact information provided with your purchase or visit the official Andeman webWebsite.
For further assistance, please contact Andeman customer support.