Devoko 8x6 FT
Devoko 8x6 FT Metall-Gartenschuppen Bedienungsanleitung
Model: 8x6 FT | Brand: Devoko
1. Einleitung
This manual provides detailed instructions for the assembly, operation, and maintenance of your Devoko 8x6 FT Outdoor Metal Storage Shed. Please read thoroughly before beginning assembly to ensure safe and correct installation and use. This storage shed is constructed from high-quality metal materials, designed for year-round outdoor use, offering a functional and durable storage solution for your backyard or patio.

Image 1.1: The Devoko 8x6 FT Outdoor Metal Storage Shed in a closed position, showcasing its brown panels and black roof.
2. Sicherheitshinweise
Ihre Sicherheit hat oberste Priorität. Bitte beachten Sie die folgenden Sicherheitsrichtlinien:
- Always read and follow all assembly instructions carefully before and during installation.
- Wear appropriate personal protective equipment, including gloves and eye protection, during assembly to prevent injury.
- Um Unfälle zu vermeiden, halten Sie Kinder und Haustiere vom Versammlungsbereich fern.
- Be cautious when handling heavy or sharp components during assembly. Metal edges can be sharp.
- Ensure the shed is assembled on a level and stable surface. If not on concrete, a self-built base is recommended.
- Use a lock to secure the shed when not in use to prevent unauthorized access and ensure contents are safe.
- This shed is designed to withstand wind and snow; however, ensure proper anchoring to the ground for maximum stability, especially in areas prone to severe weather.
- After assembly, place plastic protective caps over all exposed screw tips and corner edges to prevent injury.
3. Packungsinhalt
Before beginning assembly, carefully unpack all components and verify that all parts are present against the included parts list. If any parts are missing or damaged, please contact customer support immediately.
- 1x Devoko Outdoor Storage Shed (disassembled components)
- 1x Bedienungsanleitung (dieses Dokument)
- Hardware kit (screws, nuts, washers, protective caps)
Note: The shed is shipped in one box. Components are typically labeled for easier identification.
4. Für die Montage benötigte Werkzeuge
The following tools are recommended for efficient and safe assembly:
- Phillips Head Screwdriver (manual and/or electric with adjustable torque)
- Arbeitshandschuhe
- Schutzbrille
- Maßband
- Ebene
- Step Ladder (optional, for roof assembly)
- Pliers or Wrench (for tightening nuts, if applicable)
5. Aufbau- und Montageanleitung
Assembly typically requires two people. Carefully follow the step-by-step instructions provided in the separate assembly guide included with your package. The following points are crucial for successful assembly:
- Standortvorbereitung: Choose a level area for installation. The shed does not include a base; if you are not installing on a concrete slab, you will need to construct a suitable base yourself to ensure stability and proper alignment of components.
- Unboxing and Sorting: Remove all components from the box and lay them out. Organize hardware by type to streamline the assembly process.
- Grundrahmenmontage: Assemble the bottom frame first. Ensure it is perfectly square by measuring diagonals to confirm equal distances. Secure the bottom frame to your chosen base to maintain squareness during subsequent steps.
- Paneelbefestigung: Attach the wall panels according to the assembly guide. If screw holes do not align, re-check previous steps as a component may be installed backward. Do not force parts.
- Dachmontage: Carefully assemble the roof structure. The pitched roof design includes reinforcement steel bars and grooves to prevent water accumulation, enhancing wind and rain resistance.
- Türmontage: Install the single lockable door. Ensure it swings freely and the latch mechanism operates correctly.
- Letzter Schliff: After all panels and the roof are secured, install the plastic protective caps over all exposed screw tips and corner protection caps. This prevents injury and improves the shed's aesthetic.

Abbildung 5.1: Innenraum view of the shed demonstrating potential storage arrangements for garden tools and equipment.

Abbildung 5.2: Detailansicht view of safety and security features: screw protection caps, the lockable metal latch, and corner protection caps.
6. Bedienung
The Devoko 8x6 FT Outdoor Metal Storage Shed is designed for straightforward operation.
- Türmechanismus: The shed features a single hinged door. To open, disengage the lock (if applied) and pull the handle. To close, push the door firmly until it latches.
- Verriegelung: The door is equipped with a metal latch designed for a padlock (padlock not included). Always secure the shed with a padlock when not in use to protect your stored items.
- Belüftung: Integrated vents promote air circulation within the shed, helping to reduce condensation and maintain a suitable environment for stored items. Ensure these vents remain unobstructed.
- Speicherkapazität: The shed offers approximately 245 cubic feet of storage space. The roof has a weight capacity of 440 lbs, allowing for robust storage.
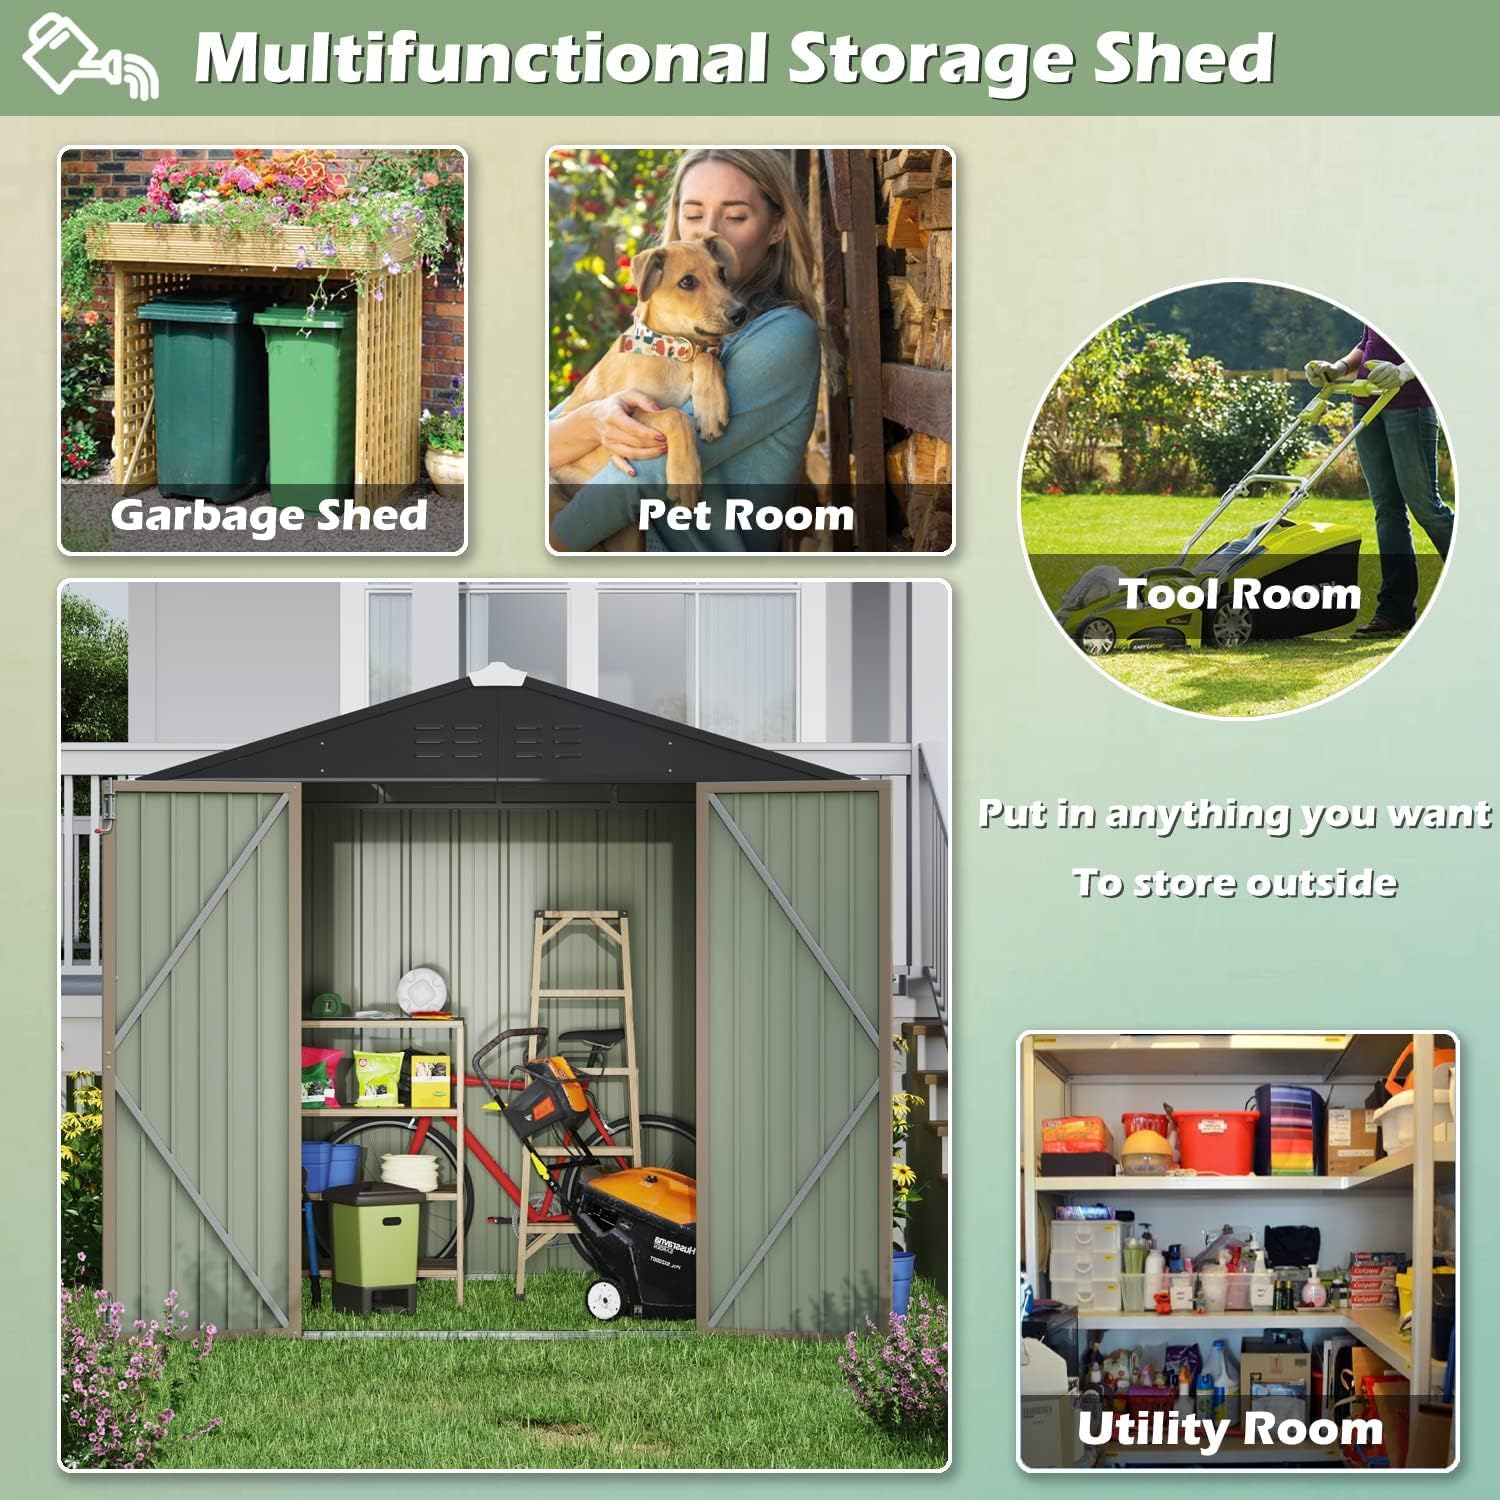
Abbildung 6.1: Beispielamples of the shed's versatile applications, including storage for tools, garbage, or as a utility space.
7. Wartung
Regular maintenance will extend the lifespan and appearance of your storage shed.
- Reinigung: Clean the exterior of the shed periodically with mild soap and water. Avoid abrasive cleaners or harsh chemicals that could damage the paint finish. Rinse thoroughly with clean water.
- Überprüfung der Befestigungselemente: Annually, inspect all screws, bolts, and fasteners to ensure they are tight. Re-tighten any loose hardware to maintain structural integrity.
- Rostschutz: The shed is constructed with electro-galvanized steel and features a paint treatment for anti-corrosion properties. However, promptly address any scratches or chips in the paint with touch-up paint to prevent rust formation.
- Drainage: Stellen Sie sicher, dass der Bereich um den Schuppen frei von Schutt ist, damit das Wasser vom Dach und vom Sockel ordnungsgemäß ablaufen kann.

Image 7.1: Detail of the shed's roof construction, highlighting its pitched design and reinforcement for weather resistance.
8. Fehlerbehebung
Hier finden Sie Lösungen für häufig auftretende Probleme:
- Fehlausgerichtete Löcher: If screw holes do not line up during assembly, it is likely that a panel or frame piece was installed incorrectly in a previous step. Carefully review the assembly guide and re-examine the orientation of the components. Disassemble the affected section and reassemble correctly.
- Abgenutzte Schrauben: Avoid over-tightening screws, especially if using an electric screwdriver. If a screw strips, replace it with a slightly larger screw of the same type, or use a suitable anchor if the material allows.
- Tür schließt nicht richtig: Check if the shed is on a level surface. An uneven base can cause the frame to twist, affecting door alignment. Adjust the base or shim as necessary. Also, ensure hinges are properly secured and not bent.
- Wasserleck: Verify that all roof panels are correctly overlapped and all screws are tightened. Ensure that the plastic washers under roof screws are properly seated. Applying a bead of outdoor-grade silicone sealant along roof seams can provide additional protection.
9. Spezifikationen
| Besonderheit | Detail |
|---|---|
| Marke | Devoko |
| Modell | 8x6 FT Outdoor Metal Storage Shed |
| Material | Electro-Galvanized Steel, Alloy Steel Frame |
| Farbe | Braun |
| Gesamtabmessungen (L x B x H) | 89.8 x 71.5 x 76.2 inches (approx. 8x6 FT) |
| Speicherkapazität | 245 Kubikfuß |
| Dachlastkapazität | 440 Pfund |
| Artikelgewicht | 137.7 Pfund |
| Wasserbeständigkeit | Wasserdicht |
| Türstil | Einfach klappbar, abschließbar |
| Montage erforderlich | Ja |

Image 9.1: Dimensional diagram of the Devoko storage shed, illustrating key measurements and capacities.
10. Garantie und Support
Devoko is committed to providing quality products. For any questions regarding product assembly, missing parts, or other concerns, please contact Devoko customer support through the Amazon message system. Please provide your order details and a clear description of the issue for prompt assistance.
For detailed tracking information or any product-related inquiries, please reach out to us via Amazon message.
Ask a question about this manual
Ask about setup, troubleshooting, compatibility, parts, safety, or missing instructions. Manuals+ will review the question and use this page’s manual context to help answer it.