
1. Einleitung
Thank you for choosing the Pisichen 24 inch Touch Screen Gaming Monitor. This manual provides essential information for setting up, operating, and maintaining your monitor. Please read it thoroughly before use to ensure optimal performance and safety.
This monitor features a 24-inch QHD (2560x1440P) display with a 165Hz refresh rate, 2ms response time, and 10-point projected capacitive touchscreen functionality. It supports FreeSync and HDR, offering a vibrant and responsive visual experience for both gaming and professional applications.

Image: The Pisichen 24-inch 2K 165Hz Touch Screen Monitor highlighting its key features like HDR, IPS Panel, and 10-point Touch.
2. Packungsinhalt
Bevor Sie mit der Einrichtung fortfahren, überprüfen Sie bitte, ob alle Komponenten im Paket enthalten sind:
- Pisichen 24 inch Touch Screen Monitor
- Monitorständer (Fuß und Hals)
- DP-Kabel
- HDMI-Kabel
- USB B Touch Cable
- USB-CC-Kabel
- Gleichstromadapter
- Benutzerhandbuch (dieses Dokument)
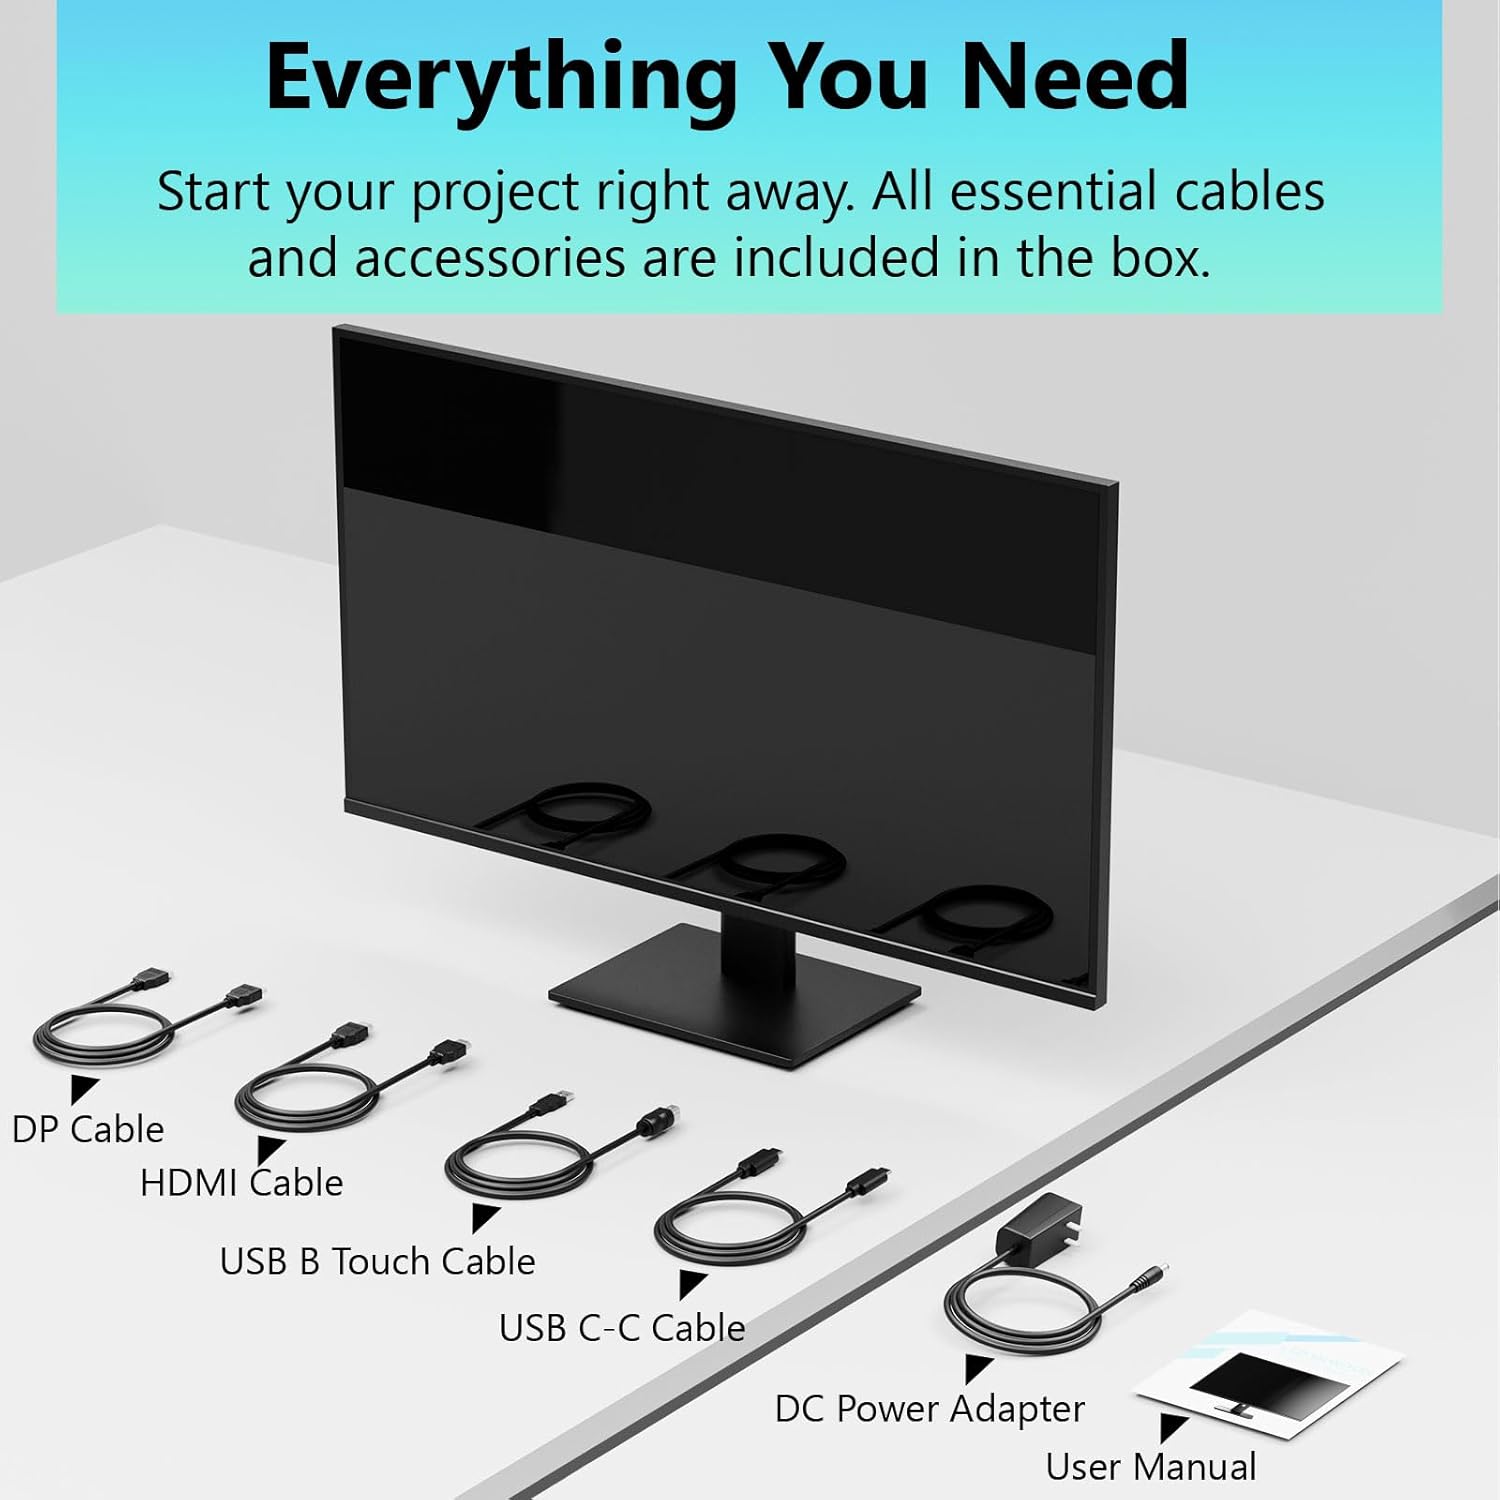
Image: All essential cables and accessories included in the box for the monitor setup.
3. Einrichtungsanweisungen
3.1 Montage des Ständers
- Nehmen Sie den Monitor vorsichtig aus der Verpackung und legen Sie ihn mit der Vorderseite nach unten auf eine weiche, saubere Oberfläche, um Kratzer zu vermeiden.
- Befestigen Sie den Stativhals an der Rückseite des Monitors.
- Befestigen Sie den Standfuß mit den mitgelieferten Schrauben am Standhals.
- Stellen Sie sicher, dass alle Verbindungen fest sitzen, bevor Sie den Monitor aufrecht hinstellen.
3.2 VESA-Halterung (optional)
This monitor supports VESA mounting. If you plan to use a VESA-compatible arm or wall mount, remove the stand and attach the VESA mount according to the mount's instructions. The VESA pattern is typically 75x75mm or 100x100mm (refer to specifications for exact details).
3.3 Mit einem Gerät verbinden
Der Monitor bietet vielfältige Anschlussmöglichkeiten:
- HDMI: Verbinden Sie ein Ende des HDMI-Kabels mit dem HDMI-Anschluss des Monitors und das andere Ende mit dem HDMI-Ausgang Ihres Computers.
- DisplayPort (DP): Connect one end of the DP cable to the monitor's DP port and the other end to your computer's DP output.
- USB Typ C: For compatible devices, connect the USB C-C cable to the monitor's USB Type-C port and your device's USB Type-C port. This single cable can transmit video, data, and power (charging).
- USB Type-B (for Touch Functionality): To enable the touch screen feature, connect the USB B Touch Cable from the monitor's USB Type-B port to an available USB Type-A port on your computer.

Image: The monitor's rear panel with various connectivity options, including HDMI, DisplayPort, and USB-C ports.
3.4 Stromanschluss
Connect the DC Power Adapter to the monitor's power input port, then plug the adapter into a power outlet.
3.5 Initial Power On and Touch Compatibility
Press the power button on the monitor. The display should light up. If no image appears, ensure all cables are securely connected and the correct input source is selected on the monitor (via the OSD menu).
For touch functionality, ensure the USB B Touch Cable is connected to your computer. Touch compatibility may vary by operating system and device. Most Windows PCs support multi-touch. For Mac devices, single-touch click is generally supported, but multi-touch may require specific drivers or configurations. Game consoles (PS3/4/5, Xbox, Steam Deck) and some other devices (Fire TV, Apple products like iPhone/iPad) typically do not support touch functionality.

Image: A compatibility chart illustrating which devices support multi-touch or single-touch, and which devices do not support touch functionality with the monitor.
4. Bedienungsanleitung
4.1 Ein-/Ausschalten
Drücken Sie den Netzschalter am Monitor, um ihn ein- oder auszuschalten. Die Betriebsanzeigeleuchte zeigt den Status des Monitors an.
4.2 Bildschirmmenü (OSD)
The OSD menu allows you to adjust various monitor settings. Use the control buttons (usually located on the back or bottom of the monitor) to navigate the menu. Common menu options include:
- Bildeinstellungen: Brightness, Contrast, Sharpness, Color Temperature, HDR mode.
- Bildschirmeinstellungen: Aspect Ratio, Input Source selection (HDMI, DP, USB-C).
- Spieleinstellungen: FreeSync, Response Time (Overdrive), Crosshair.
- Audioeinstellungen: Volume (if internal speakers or audio output are present).
- Systemeinstellungen: Sprache, OSD-Transparenz, Auf Werkseinstellungen zurücksetzen.
4.3 Touchscreen-Funktionalität
The monitor supports 10-point multi-touch, allowing for intuitive interaction directly on the screen. Ensure the USB B Touch Cable is connected to your computer for this feature to work.
- Einmaliges Tippen: Entspricht einem Linksklick.
- Tippen und Halten: Entspricht einem Rechtsklick.
- Pinch-to-Zoom: Verwenden Sie zwei Finger zum Vergrößern oder Verkleinern.
- Wischen: Navigate through content or scroll.

Image: A user interacting with the monitor's touch screen, highlighting its precision and responsiveness for creative tasks.
4.4 Ergonomische Anpassungen
The monitor stand allows for tilt adjustments to achieve the most comfortable viewing and touch angle. Gently adjust the screen to your preferred position.
4.5 Funktionen für die Augenpflege
The monitor includes advanced eye-comfort features such as Flicker-Free technology and Low Bluelight mode to reduce eye strain during prolonged use. These settings can typically be adjusted within the OSD menu.

Image: Visual representation of the monitor's advanced eye-comfort features, including Flicker-Free and Low Bluelight technologies.
5. Wartung
5.1 Reinigung des Monitors
- Vor der Reinigung den Monitor immer ausschalten und das Netzkabel abziehen.
- Benutzen Sie ein weiches, fusselfreies Tuch, dampMit Wasser oder einem milden, nicht scheuernden Bildschirmreiniger abspülen.
- Sprühen Sie den Reiniger nicht direkt auf den Bildschirm. Tragen Sie ihn zuerst auf ein Tuch auf.
- Vermeiden Sie die Verwendung von Benzol, Verdünner, ammoniakhaltigen Reinigern oder Scheuermitteln, da diese die Bildschirmoberfläche beschädigen können.
5.2 Speicherung
Bei längerer Lagerung des Monitors muss dieser ausgeschaltet, vom Stromnetz getrennt und an einem kühlen, trockenen Ort, geschützt vor direkter Sonneneinstrahlung und extremen Temperaturen, aufbewahrt werden. Verwenden Sie nach Möglichkeit die Originalverpackung für optimalen Schutz.
6. Fehlerbehebung
Sollten Sie Probleme mit Ihrem Monitor haben, beachten Sie bitte die folgenden gängigen Schritte zur Fehlerbehebung:
- Kein Strom: Vergewissern Sie sich, dass das Netzteil fest mit dem Monitor und einer funktionierenden Steckdose verbunden ist. Prüfen Sie, ob die Betriebsanzeige leuchtet.
- Kein Bild/Signal:
- Verify that the video cable (HDMI, DP, or USB-C) is securely connected to both the monitor and your computer.
- Stellen Sie sicher, dass im OSD-Menü des Monitors die richtige Eingangsquelle ausgewählt ist.
- Überprüfen Sie die Anzeigeeinstellungen Ihres Computers, um sicherzustellen, dass der Monitor erkannt und aktiviert ist.
- Berührungslose Funktionalität:
- Confirm the USB B Touch Cable is connected from the monitor to your computer.
- Check your computer's device manager to see if the touch screen driver is installed and functioning correctly.
- Refer to the "Initial Power On and Touch Compatibility" section for device-specific limitations.
- Flackerndes oder verzerrtes Bild:
- Prüfen Sie das Videokabel auf Beschädigungen oder lose Verbindungen.
- Versuchen Sie es mit einem anderen Videokabel oder -anschluss.
- Passen Sie die Bildwiederholfrequenz in den Anzeigeeinstellungen Ihres Computers an.
- Tote Pixel: Eine geringe Anzahl heller oder dunkler Pixel ist bei LCD/LED-Technologie üblich und gilt nicht als Defekt, solange sie die Herstellervorgaben nicht überschreitet.
Sollte das Problem nach Durchführung dieser Schritte weiterhin bestehen, wenden Sie sich bitte an den Kundendienst.
7. Spezifikationen
| Besonderheit | Spezifikation |
|---|---|
| Marke | Pisichen |
| Modellnummer | 24IN165HZ-QHD |
| Bildschirmgröße | 23.8 Zoll |
| Auflösung | QHD Wide 1440p (2560 x 1440) |
| Seitenverhältnis | 16:9 |
| Bildwiederholrate | 165 Hz |
| Ansprechzeit | 2 Millisekunden |
| Anzeigetyp | LED IPS |
| Helligkeit | 400 Candela (cd/m²) |
| Kontrastverhältnis | 3000:1 |
| Viewing-Winkel | 178 Grad |
| Farbumfang | 99 % |
| Picture Quality Enhancement | HDR |
| Adaptive Synchronisierung | FreeSync |
| Konnektivitätstechnologie | DisplayPort, HDMI, USB Type-C, USB Type-B |
| Zusätzliche Merkmale | Tilt Adjustment, 10-Point Touchscreen |
| Artikelabmessungen (T x B x H) | 0.75"T x 21.5"B x 12.7"H |
| Artikelgewicht | 5.38 Kilogramm |
| Farbe | Schwarz |
8. Garantieinformationen
This product comes with a 1-year limited warranty from the date of purchase. The warranty covers manufacturing defects and workmanship under normal use. It does not cover damage caused by misuse, accidents, unauthorized modifications, or external factors. Please retain your proof of purchase for warranty claims.
9. Kundendienst
For technical assistance, warranty claims, or further inquiries, please contact Pisichen customer support. You may find contact information on the official Pisichen webWebsite oder über Ihren Händler.
Weitere Ressourcen und Produktinformationen finden Sie unter Pisichen Store auf Amazon.