1. Einleitung
This manual provides detailed instructions for the proper use and maintenance of your BAOFENG UV-32 10W Ham Radio. The UV-32 is a multi-band two-way radio featuring 10W selectable power, GPS navigation, a 2.0-inch color display, and multiple programming options including wireless app connectivity. Please read this manual thoroughly before operating the device to ensure safe and efficient communication.
2. Sicherheitshinweise
Observe the following safety precautions to prevent injury or damage to the radio:
- Das Funkgerät darf nicht in explosionsgefährdeten Bereichen (z. B. brennbaren Gasen, Staubpartikeln, Metallpulvern) betrieben werden.
- Do not transmit without an antenna connected.
- Keep the antenna at least 2.5 cm (1 inch) away from your body when transmitting.
- Verwenden Sie ausschließlich von BAOFENG zugelassene Akkus und Ladegeräte. Nicht autorisiertes Zubehör kann Schäden oder Brände verursachen.
- Das Radio darf nicht auseinandergenommen oder verändert werden. Reparaturen dürfen nur von qualifizierten Technikern durchgeführt werden.
- Vermeiden Sie längere Einwirkung von direkter Sonneneinstrahlung oder extremen Temperaturen.
- Do not operate the radio while driving or performing other activities that require full attention.
3. Packungsinhalt
Überprüfen Sie, ob alle Artikel in Ihrem Paket vorhanden sind:
- 1 x BAOFENG UV-32 Funkgerät
- 1 x 2500 mAh Akku
- 1 x USB-C Charger
- 1 x Desktop Charger Base
- 1 x Standard UV Antenna
- 1 x Long Airband Antenna
- 1 x Headset
- 1 x Gürtelclip
- 1 x Radio Case Holder

Image: The BAOFENG UV-32 radio shown with its complete set of accessories, including the battery, charger, antennas, headset, belt clip, and case holder.
4. Produktüberschreitungview
Familiarize yourself with the main components of your UV-32 radio.

Bild: Vorderseite view of the BAOFENG UV-32 radio, highlighting the 2.0-inch color display, alphanumeric keypad, and function buttons.
Schlüsselkomponenten:
- Antennenanschluss: For attaching the standard UV or airband antenna.
- Ein/Aus-/Lautstärkeregler: Schaltet das Radio ein/aus und regelt die Lautstärke.
- Anzeige: 2.0-inch color screen showing frequency, channel, battery status, and other indicators.
- PTT-Taste: Sprechtaste zum Senden.
- Side Keys (P1, P2): Anpassbare Funktionstasten.
- Tastenfeld: Alphanumeric input for frequencies, channels, and menu navigation.
- USB-C-Ladeanschluss: Zum direkten Laden von Batterien.
- Zubehörbuchse: For connecting the headset or programming cable.
5. Einrichtung
5.1 Einlegen und Laden der Batterie
- Align the 2500mAh Li-ion battery with the grooves on the back of the radio.
- Schieben Sie die Batterie nach oben, bis sie einrastet.
- To charge, connect the USB-C charger directly to the battery's USB-C port or place the radio with the battery attached into the desktop charging base.
- The charging indicator on the desktop base will show red during charging and green when fully charged.

Image: A close-up of the 2500mAh Li-ion battery for the UV-32, highlighting its integrated USB-C charging port.
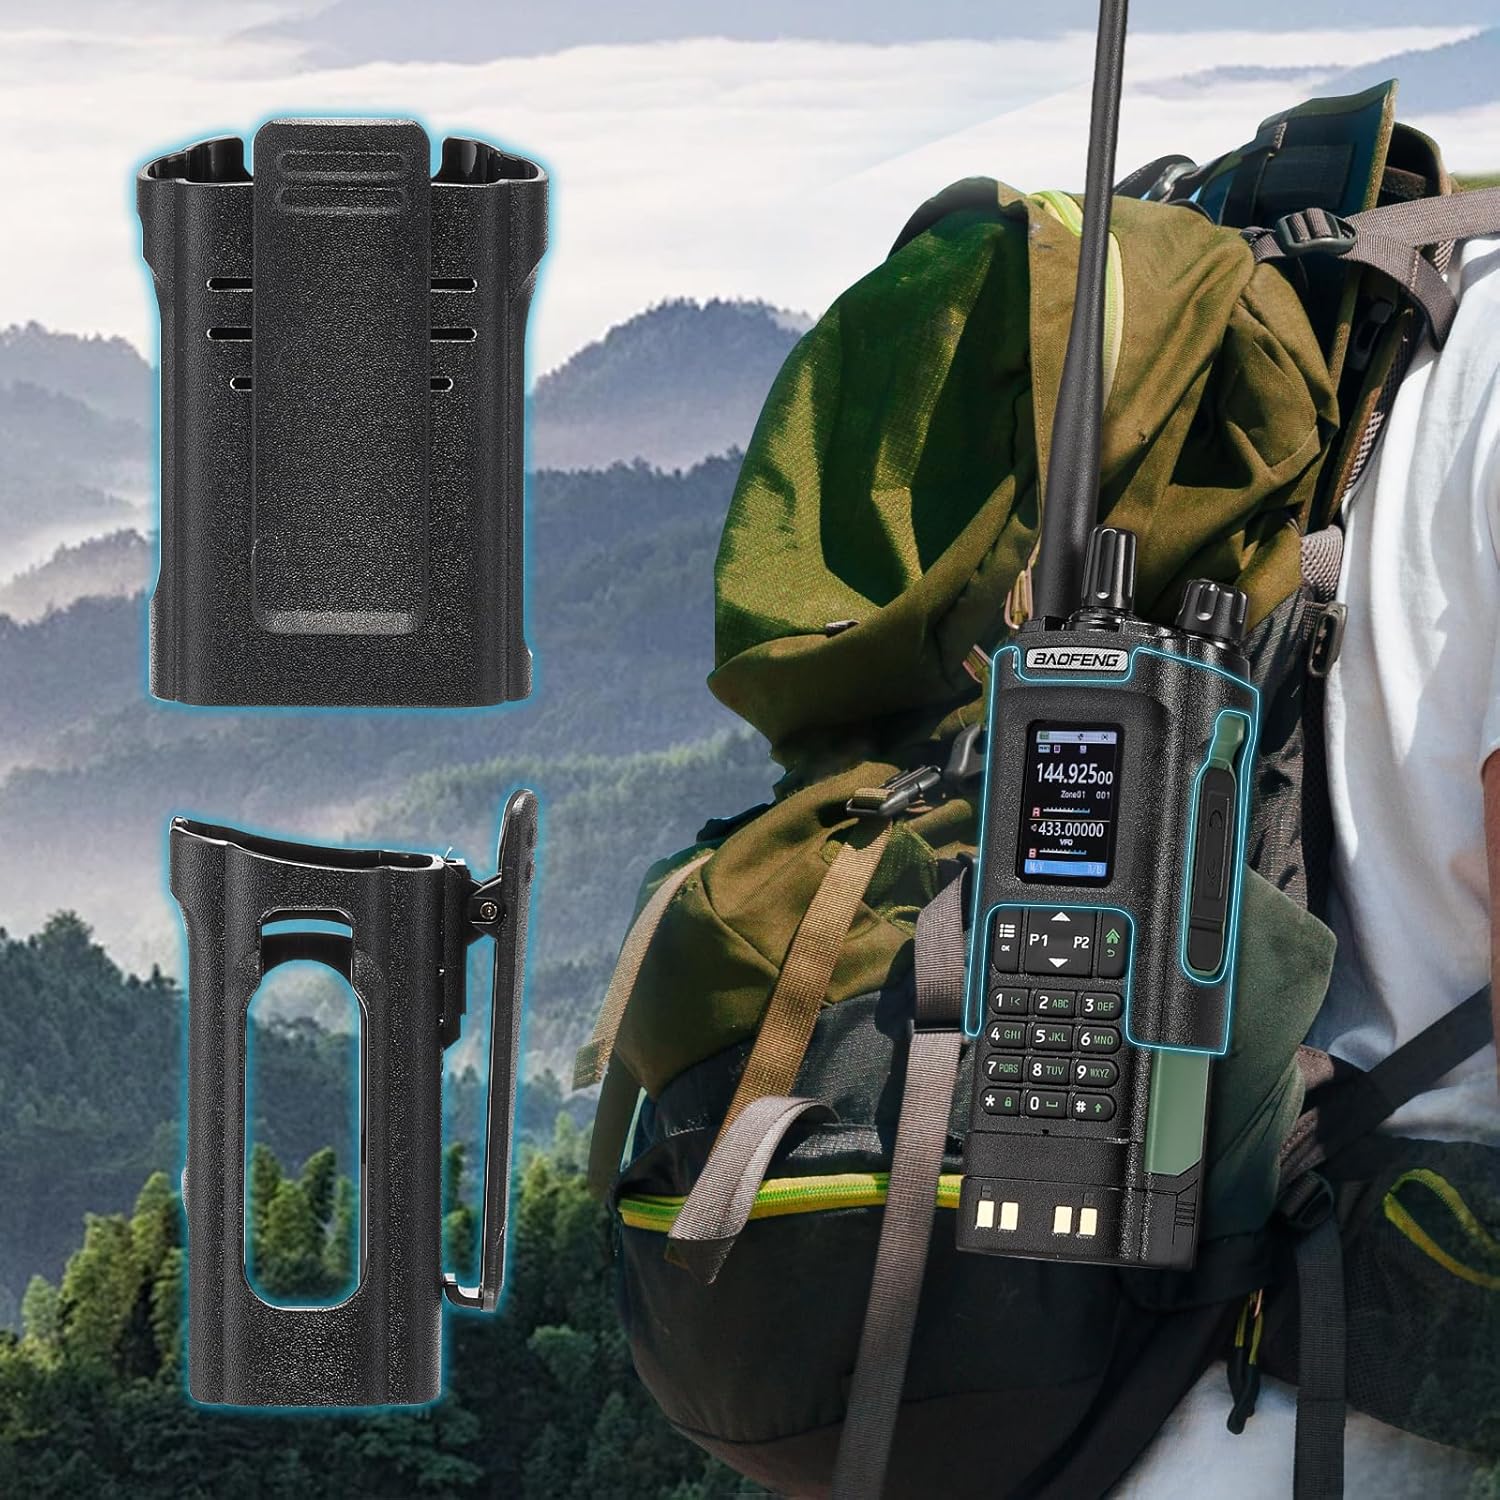
Image: The BAOFENG UV-32 radio demonstrating both direct USB-C charging and charging via its desktop cradle.
5.2 Antenneninstallation
- Select the appropriate antenna: the standard UV antenna for general VHF/UHF use or the long airband antenna for enhanced aviation signal reception.
- Schrauben Sie die gewählte Antenne im Uhrzeigersinn auf den Antennenanschluss oben am Radio, bis sie handfest sitzt. Nicht zu fest anziehen.

Image: The BAOFENG UV-32 radio illustrating the use of two different antennas: a standard antenna for UHF/VHF and a longer antenna specifically designed for airband reception.
5.3 Montage des Gürtelclips
- Richten Sie den Gürtelclip an den Schraubenlöchern auf der Rückseite des Funkgeräts aus.
- Befestigen Sie den Gürtelclip mit den mitgelieferten Schrauben.
- The radio case holder can be used to attach the radio to a backpack or belt for secure carrying.

Image: The BAOFENG UV-32 radio securely mounted to a backpack strap using its belt clip and an additional case holder, demonstrating portability.
6. Bedienung des Funkgeräts
6.1 Ein-/Ausschalten und Lautstärke
Drehen Sie den Ein-/Ausschalter/Lautstärkeregler im Uhrzeigersinn, um das Radio einzuschalten und die Lautstärke zu erhöhen. Drehen Sie ihn gegen den Uhrzeigersinn, um die Lautstärke zu verringern und das Radio auszuschalten.
6.2 Anzeige überview
The 2.0-inch color display provides essential information:
- Frequenz/Kanal: Displays the current operating frequency or channel number.
- Batteriestand: Zeigt die verbleibende Batterieladung an.
- Signalstärke: Shows the strength of received signals.
- Modusanzeigen: Icons for various functions like GPS, Bluetooth, power level, etc.

Image: A close-up of the BAOFENG UV-32's 2-inch color display, showing detailed frequency, channel, and status information.
6.3 Kanalmodus vs. Frequenzmodus
The radio operates in two primary modes:
- Frequenzmodus (VFO): Allows direct input of frequencies for scanning or temporary use.
- Kanalmodus (MR): Uses pre-programmed channels for quick access to stored frequencies.
Drücken Sie die SPEISEKARTE button and navigate to the mode setting to switch between VFO and MR modes.
6.4 Frequenzauswahl
- Tastenfeld: In Frequency Mode, directly enter the desired frequency using the numeric keypad.
- Quick Channel Knob: Rotate the top knob to quickly scroll through frequencies or channels.
- Pfeiltasten nach oben/unten: Use the arrow keys (P1/P2) to fine-tune frequencies or navigate channels.
6.5 Senden und Empfangen
- Ensure an antenna is properly connected.
- Wählen Sie die gewünschte Frequenz oder den gewünschten Kanal.
- Zum Senden die Taste gedrückt halten PTT Drücken Sie den Knopf an der Seite des Funkgeräts. Sprechen Sie deutlich in das Mikrofon.
- Lassen Sie den PTT Taste zum Beenden der Übertragung und Rückkehr in den Empfangsmodus.
- Leistungsstufen: The UV-32 offers High (H), Medium (M), and Low (L) power settings. Adjust this in the menu to balance range and battery life.
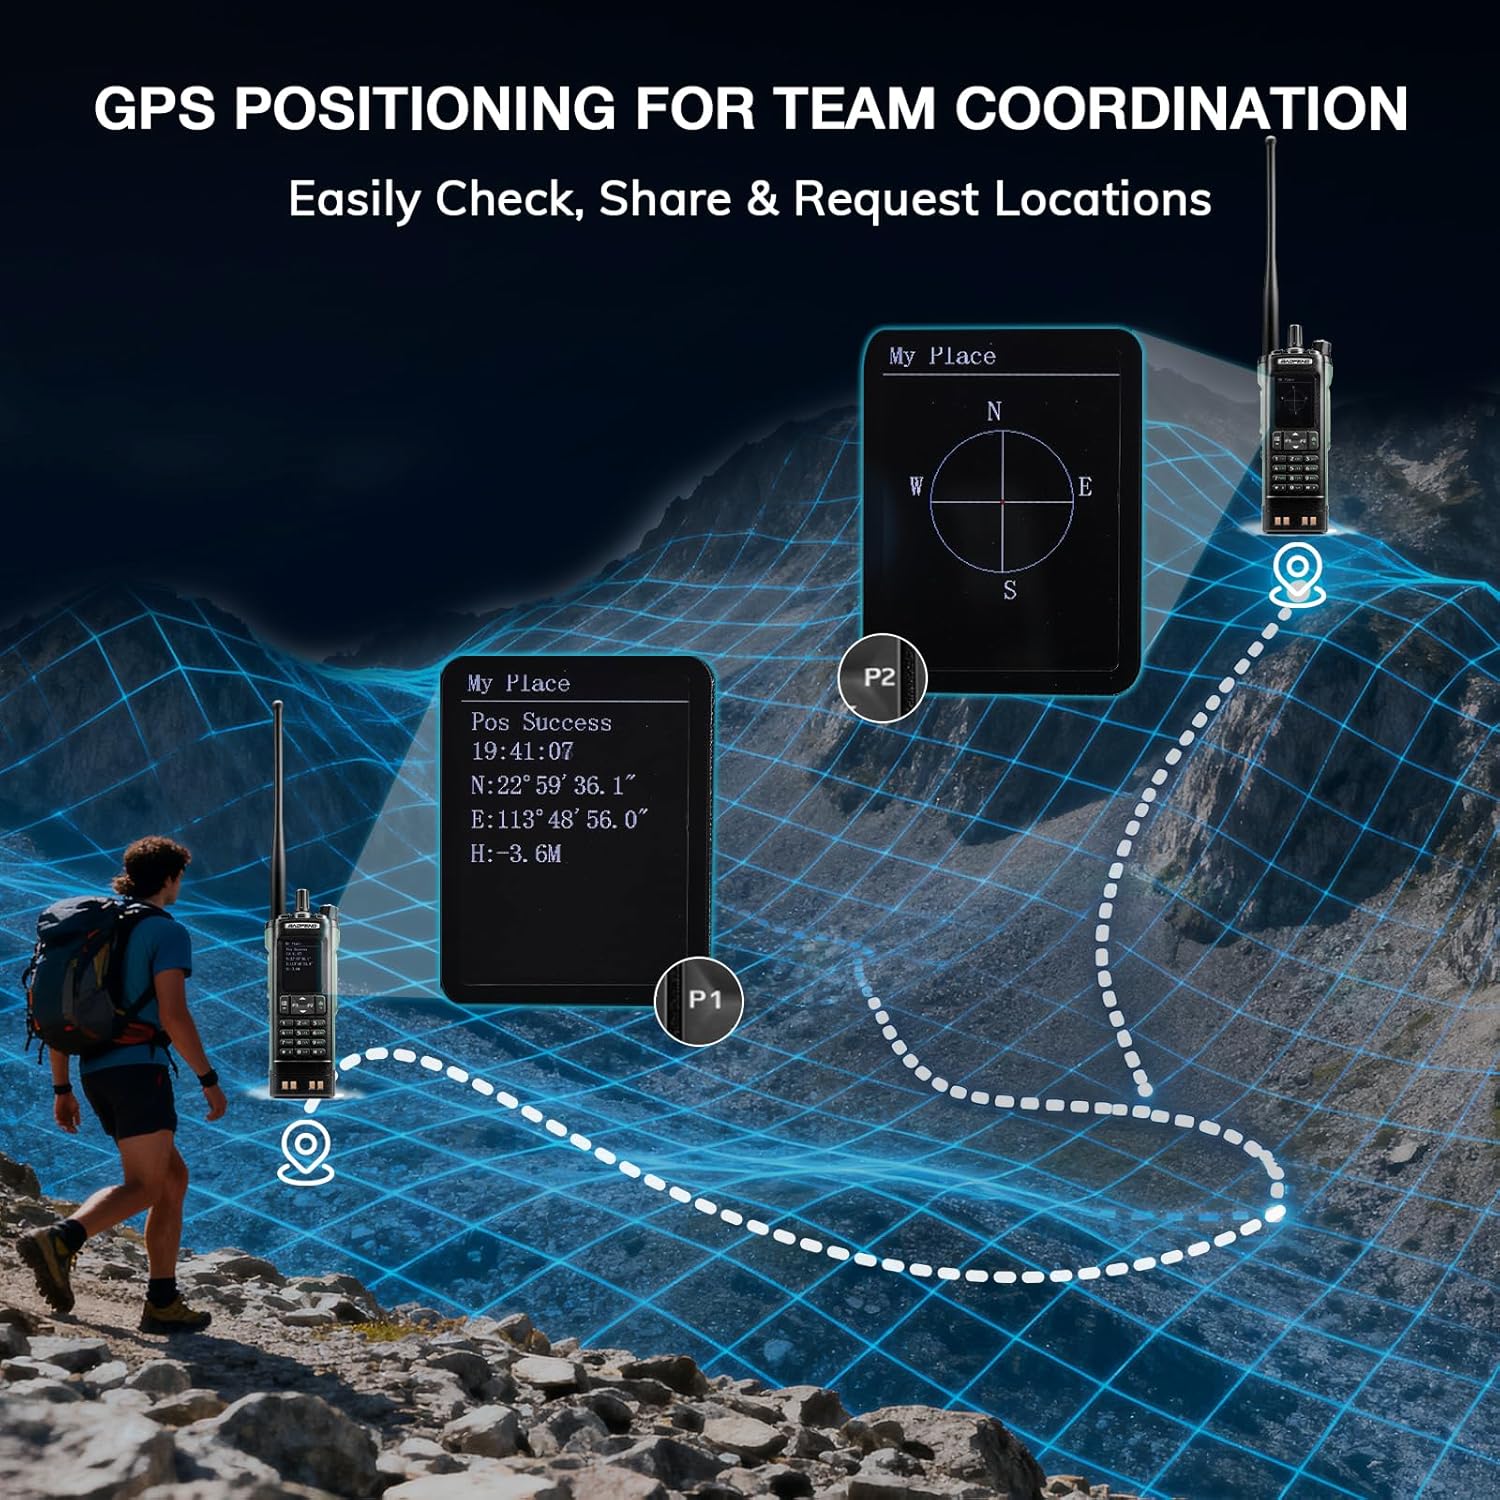
Image: The BAOFENG UV-32 radio's display showing different power output levels (High, Medium, Low) and an external SWR meter for measurement.
6.6 Programmieroptionen
The UV-32 offers several methods for programming frequencies and settings:
- Drahtlose App-Programmierung: Connect your radio to a smartphone (iOS/Android) via Bluetooth using the dedicated BT app for quick and wireless programming.
- CHIRP-Software: For advanced or bulk programming, use CHIRP software on a PC. Select "UV-17ProGPS" as the radio model in CHIRP.
- Tastaturprogrammierung: Basic programming can be done directly on the radio using the keypad and menu system.
- Frequenzkopie mit einem Tastendruck: This feature allows for easy cloning of frequencies from another radio. Refer to the radio's on-screen prompts or full manual for specific steps.

Image: An illustration depicting the various programming methods available for the BAOFENG UV-32, including mobile app (Bluetooth), CPS software, CHIRP software, and direct keypad input.

Image: Two BAOFENG radios illustrating the one-key frequency copy function, allowing for quick and easy channel cloning between devices.
6.7 GPS-Navigation
The integrated GPS module provides real-time location data:
- Access the GPS function through the radio's menu.
- View your current latitude, longitude, and altitude.
- The radio supports sharing your location or requesting coordinates from other team members for improved coordination.

Image: A visual representation of the BAOFENG UV-32's GPS functionality, showing how it displays coordinates and facilitates location sharing for team coordination in outdoor environments.
6.8 Enhanced Airband Reception
For clearer reception of aviation signals, utilize the dedicated AM antenna included with your UV-32. This specialized antenna is designed to provide more accurate and stable airband listening compared to standard UV dual-band antennas.
6.9 NOAA-Wetterradio
The UV-32 can receive NOAA weather alerts. Consult the radio's menu for instructions on how to scan for and select NOAA channels in your area.
6.10 Anpassbare Seitentasten
The radio features four customizable side keys (P1, P2, and two others). These can be programmed via the menu or programming software to quickly access frequently used functions such as scan, monitor, or power level adjustment.

Image: A close-up of the BAOFENG UV-32's side, highlighting the customizable P1 and P2 function keys.
7. Wartung
7.1 Reinigung des Radios
Wischen Sie die Oberfläche des Radios mit einem weichen, fusselfreien Tuch ab.amp Mit einem Tuch abwischen. Keine scharfen Chemikalien oder Scheuermittel verwenden. Vor Gebrauch sicherstellen, dass alle Anschlüsse trocken sind.
7.2 Batteriepflege
- Laden Sie den Akku vor dem ersten Gebrauch vollständig auf.
- Vermeiden Sie ein Überladen oder vollständiges Entladen der Batterie.
- Bewahren Sie die Batterie an einem kühlen, trockenen Ort auf, wenn sie längere Zeit nicht benutzt wird.
7.3 Speicherung
When storing the radio for a long time, remove the battery and store it separately. Keep the radio in a dry, dust-free environment away from direct sunlight and extreme temperatures.
8. Fehlerbehebung
| Problem | Mögliche Ursache | Lösung |
|---|---|---|
| Das Radio lässt sich nicht einschalten | Batterie nicht richtig eingesetzt oder entladen. | Stellen Sie sicher, dass der Akku fest sitzt. Laden Sie den Akku vollständig auf. |
| Kann nicht übertragen werden | Antenna not connected. Incorrect frequency/channel. Low power setting. | Attach antenna. Verify frequency/channel. Increase power level. |
| Schlechter Empfang/Sendebereich | Obstructions. Low power setting. Incorrect antenna. | Move to an open area. Increase power. Ensure correct antenna is used and properly connected. |
| Programming errors with CHIRP/APP | Incorrect radio model selected. Connection issues. Outdated software/firmware. | Ensure "UV-17ProGPS" is selected in CHIRP. Re-establish Bluetooth connection. Update software/firmware if available. |
9. Spezifikationen
| Besonderheit | Detail |
|---|---|
| Marke | BAOFENG |
| Modellnummer | UV-32 |
| Anzahl der Kanäle | 1000 |
| Frequenzbereich | UHF, VHF |
| Leistungsabgabe | Up to 10W (selectable High, Medium, Low) |
| Anzeige | 2.0"-Farbdisplay |
| Batterie | 2500mAh Li-Ionen-Akku (im Lieferumfang enthalten) |
| Laden | USB-C, Desktop Charger Base |
| Besondere Merkmale | Digital Display, Dual Band, USB-C Rechargeable, Wireless APP Programming, Wireless Channel Clone, GPS, NOAA Reception |
| Konnektivitätsprotokoll | Bluetooth |
| Technische Daten | 1.2"T x 2.2"B x 4"H |
| Wasserbeständigkeit | Nicht wasserfest |
10. Garantie und Support
Your BAOFENG UV-32 radio comes with an 18 Monate Garantie. BAOFENG also provides lebenslange Unterstützung für dieses Produkt.
For technical assistance, warranty claims, or further inquiries, please visit the official BAOFENG website or contact their customer support directly. Keep your purchase receipt as proof of purchase for warranty services.