
1. Einleitung
This manual provides detailed instructions for the installation, operation, and maintenance of your Soundstream PSA4.2500D 4-Channel Waterproof Marine Amplifier. Dies amplifier is designed for high-performance audio in challenging marine and powersports environments, offering up to 2500 Watts Max output with Class D efficiency. Its robust construction ensures durability against water, mud, and UV exposure.
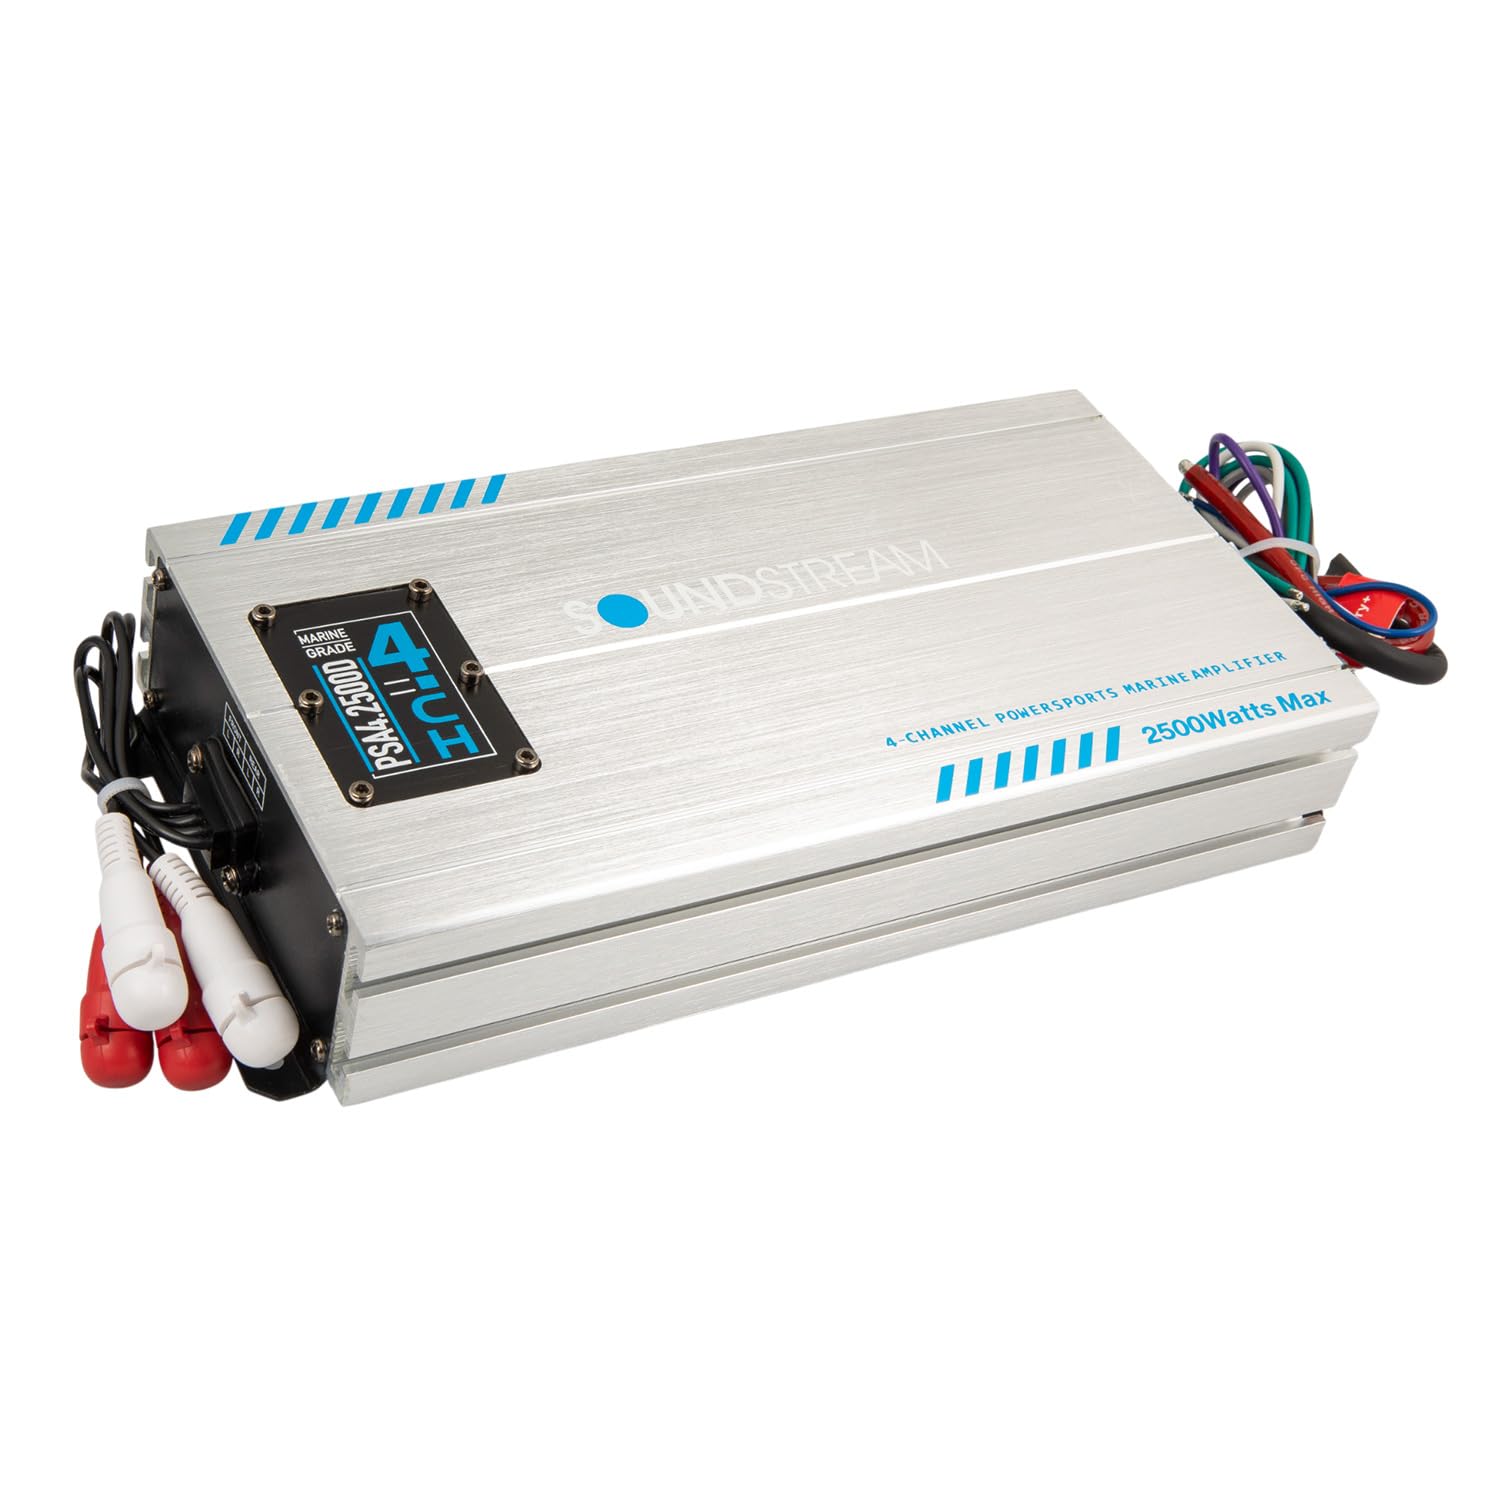
Abbildung 1.1: Oben view of the Soundstream PSA4.2500D ampVerstärker, Showcasing its marine-grade design and branding.
2. Sicherheitshinweise
Beachten Sie bei der Installation und dem Betrieb stets die folgenden Sicherheitsvorkehrungen:
- Um Kurzschlüsse zu vermeiden, klemmen Sie vor Beginn jeglicher elektrischer Arbeiten die Fahrzeugbatterie ab.
- Stellen Sie sicher, dass alle Kabel ordnungsgemäß isoliert und befestigt sind, um Beschädigungen durch Vibrationen oder Abrieb zu vermeiden.
- Use appropriate gauge wiring for power and ground connections to handle the ampAktueller Stromverbrauch des Verstärkers.
- Install an external fuse (not included) on the main power wire as close to the battery as possible.
- Vermeiden Sie die Montage der amplifier in locations where it may obstruct vehicle operation or be exposed to extreme heat or direct mechanical impact.
- Versuchen Sie nicht, das ampVerstärker. Alle Wartungsarbeiten sollten von qualifiziertem Fachpersonal durchgeführt werden.
3. Packungsinhalt
Überprüfen Sie, ob alle Artikel im Paket vorhanden sind:
- Wasserdicht Amplifier (PSA4.2500D)
- Montagezubehör
- Benutzerhandbuch (dieses Dokument)
- Bass Control Knob (if applicable to your model variant)

Image 3.1: Included components: the owner's manual and mounting hardware for the ampschwerer.
4. Produktmerkmale
The Soundstream PSA4.2500D amplifier incorporates several features for reliable and powerful audio performance:
- Hochleistungsausgang: Delivers up to 2500 Watts Max, suitable for driving marine speaker systems.
- Marine-Grade Durability: Features IP66 waterproof protection, sealed circuit boards, and corrosion-resistant components for harsh environments.
- Class D Efficiency: Advanced Class D technology ensures cooler operation, reduced power draw, and optimized sound output.
- Vielseitige Installation: Compact chassis with marine-grade terminals for secure connections in tight spaces.
- Allwetterleistung: Designed to resist salt, spray, mud, and UV exposure.
- Einstellbare Frequenzweichen: Includes fully variable 12dB low-pass and subsonic crossovers for precise audio tuning.
- Bassverstärkung: Adjustable bass boost feature to enhance low-frequency impact.
5. Installation und Einrichtung
Eine fachgerechte Installation ist entscheidend für optimale Leistung und Langlebigkeit Ihres Geräts. ampVerstärker. Wenn Sie sich bei einzelnen Schritten unsicher sind, wenden Sie sich an einen professionellen Installateur.
5.1 Montage der Ampschwerer
Select a mounting location that is secure, allows for adequate ventilation, and is protected from direct physical damage. The amplifier's compact size allows for flexible placement in boats, ATVs, UTVs, or motorcycles. Use the provided mounting hardware to secure the unit.
5.2 Kabelverbindungen
Befolgen Sie diese Schritte für den elektrischen Anschluss:
- Leistung (BATT+): Connect a 4-gauge power wire directly from the vehicle's positive battery terminal to the amplifier's +12V terminal. An inline 50-amp fuse (not included) must be installed on this wire within 18 inches (45 cm) of the battery.
- Masse (GND): Connect a 4-gauge ground wire from the amplifier's GND terminal to a clean, unpainted metal surface on the vehicle chassis or directly to the negative battery terminal. Ensure a solid, low-resistance connection.
- Fernbedienung (REM): Verbinden Sie ein Remote-Einschaltkabel vom Remote-Ausgang Ihres Autoradios mit dem ampDer REM-Anschluss des Verstärkers. Dieses Kabel signalisiert den ampVerstärker zum Ein- und Ausschalten mit Ihrem Audiosystem.
- Audioeingang (RCA oder High-Level):
- Cinch-Eingang: Schließen Sie RCA-Kabel von den Vor-/Unterbuchsen Ihres Autoradios an.amp Ausgänge zum amplifier's FRONT and REAR RCA input jacks.
- High-Level-Eingang: If your head unit does not have RCA outputs, use the high-level input harness (if provided) to connect directly to your head unit's speaker outputs.
- Lautsprecherausgang: Verbinden Sie Ihre Lautsprecher mit dem amplifier's speaker output terminals. Ensure correct polarity (+ to + and - to -) for each speaker. This is a 4-channel amplifier, allowing connection of up to four speakers.
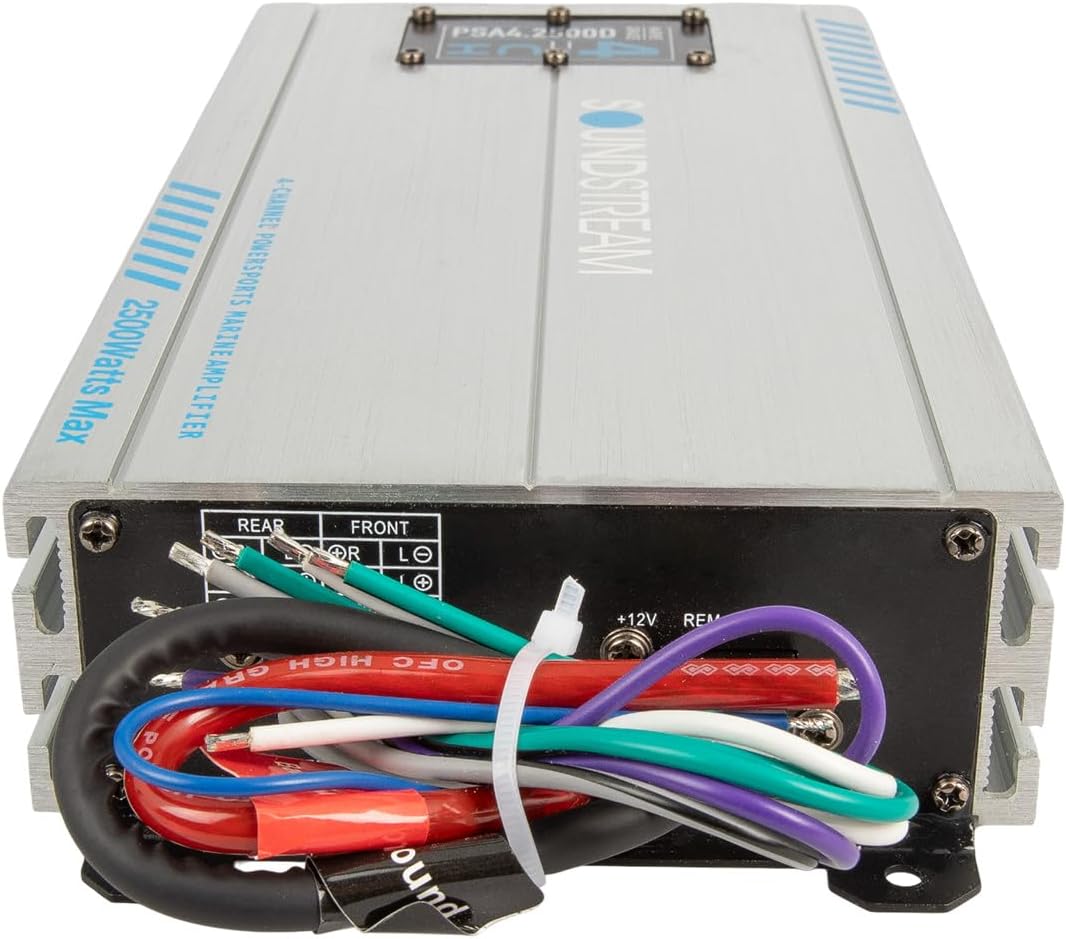
Bild 5.1: Hinten view der amplifier showing power, ground, remote, and speaker output connections.
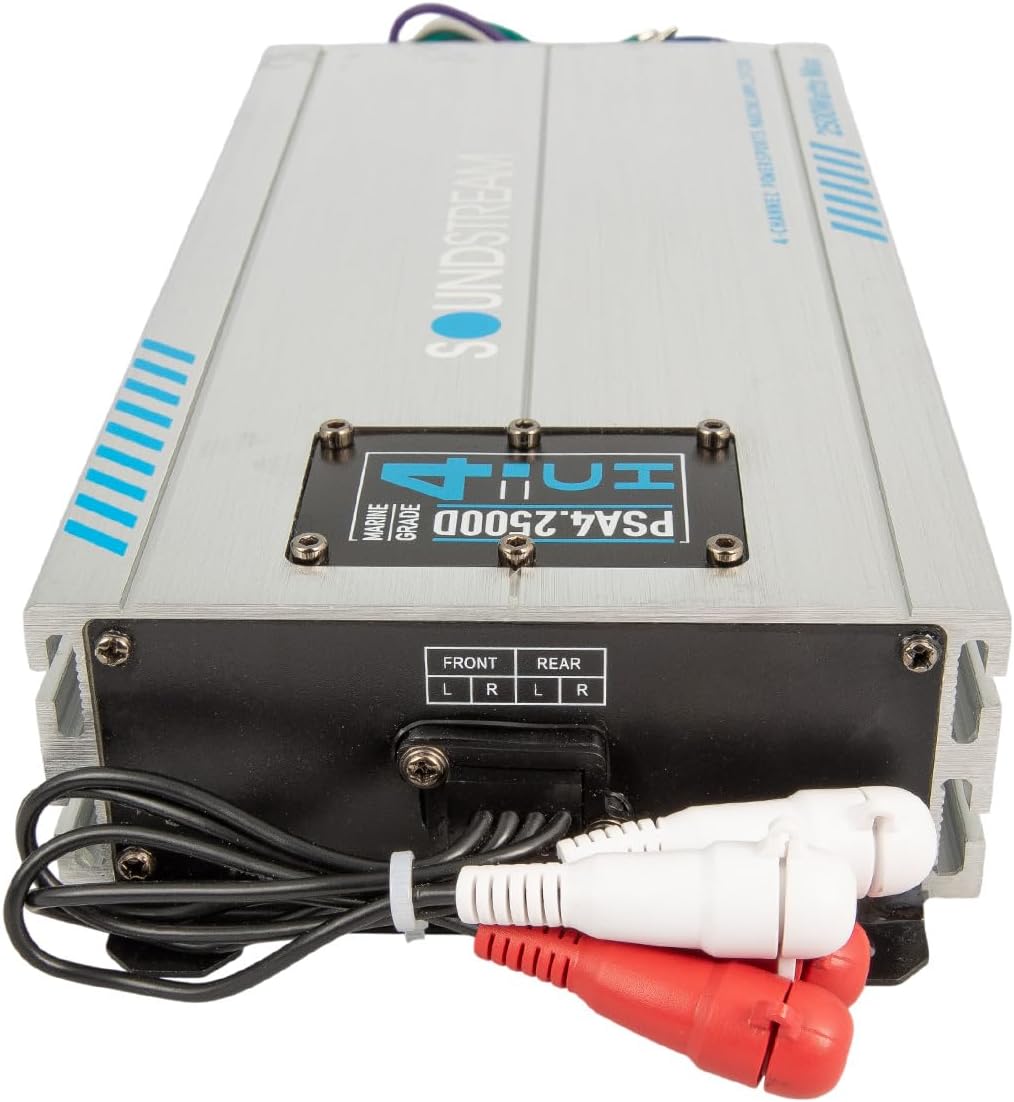
Bild 5.2: Vorderseite view der amplifier showing RCA input connections for front and rear channels.
6. Bedienungsanleitung
Einmal installiert, die amplifier requires initial setup of its audio controls to match your system and preferences.
6.1 Verstärkungseinstellung
The gain control (often labeled 'LEVEL' or 'GAIN') matches the ampEingangsempfindlichkeit des Verstärkers in Bezug auf die Ausgangslautstärketage of your head unit. Start with the gain set to minimum. Play a familiar track at about 75% of your head unit's maximum volume. Slowly increase the amplifier's gain until you hear distortion, then back it off slightly. This ensures maximum clean output.
6.2 Frequenzweicheneinstellungen
The PSA4.2500D features variable 12dB low-pass and subsonic crossovers. These filters allow you to direct specific frequency ranges to your speakers or subwoofers.
- Tiefpassfilter (LPF): Used for subwoofers, allowing only frequencies below the set point to pass.
- Unterschallfilter: Used with subwoofers to filter out extremely low, inaudible frequencies that can waste amplifier power and damage speakers.
Passen Sie diese Einstellungen an Ihre Lautsprechertypen und den gewünschten Klang an.file. For full-range speakers, you may bypass these filters or set them to a high frequency.
6.3 Bassverstärkung
The adjustable bass boost allows you to increase the output at a specific low frequency. Use this feature sparingly to avoid distortion and potential speaker damage. Start with the boost at minimum and increase gradually if desired.
Wichtiger Hinweis: Some users have reported that the amplifier's min/max settings for gain or other controls may be set to minimum from the factory. If you experience low or no output after installation, ensure these settings are adjusted using a small screwdriver.
7. Wartung
To ensure the longevity and performance of your marine ampReiniger:
- Reinigung: Periodically wipe down the amplifier mit Anzeigeamp cloth to remove salt, dirt, or grime. Avoid using harsh chemicals or abrasive cleaners.
- Inspektion: Regularly check all wiring connections for corrosion, fraying, or looseness. Tighten any loose connections.
- Belüftung: Stellen Sie sicher, dass die ampDie Kühlkörper des Verstärkers sind nicht behindert, um eine ordnungsgemäße Wärmeableitung zu gewährleisten.
- Umweltschutz: While waterproof, avoid prolonged submersion or direct high-pressure water spray.
8. Fehlerbehebung
Sollten Sie Probleme mit Ihrem amplifier, beachten Sie die folgenden häufigen Probleme und Lösungen:
| Problem | Mögliche Ursache | Lösung |
|---|---|---|
| Kein Strom / AmpVerstärker schaltet sich nicht ein | Blown fuse; Loose power/ground/remote wire; Faulty remote turn-on signal; AmpVerstärkerschutzmodus. | Check inline fuse (50A recommended); Verify all power, ground, and remote connections are secure; Test remote wire for 12V when head unit is on; Disconnect power for 30 seconds to reset protection mode. |
| Keine Tonausgabe | Gain set too low; RCA cables disconnected/faulty; Speaker wires disconnected/shorted; Head unit output issue; Amplifier settings (e.g., crossovers). | Increase gain setting (refer to Section 6.1); Check RCA and speaker connections; Ensure head unit is producing sound; Verify crossover settings are appropriate; Check internal min/max settings with a screwdriver if applicable. |
| Verzerrter Klang | Gain set too high; Speaker impedance mismatch; Damaged speakers; Poor ground connection. | Reduce gain setting; Ensure speaker impedance matches amplifier's capabilities; Test speakers individually; Verify ground connection is solid. |
| AmpVerstärkerüberhitzung | Insufficient ventilation; Overloading ampVerstärker; Niederohmige Last. | Sorgen Sie für ausreichende Luftzirkulation um amplifier; Reduce volume or check speaker wiring for shorts; Verify speaker impedance. |
9. Spezifikationen
Technical specifications for the Soundstream PSA4.2500D 4-Channel Waterproof Marine AmpReiniger:
- Modell: PSA4-2500D
- Anzahl der Kanäle: 4
- Ausgangsleistung: 2500 Watt max.
- Bandtage: 12.2 Volt
- Material: Aluminium
- Spezifikation erfüllt: IP66 (wasserdicht)
- Montageart: Oberflächenmontage
- Artikelabmessungen (L x B x H): 33 x 14.6 x 7 Zentimeter
- Artikelgewicht: 5.6 Pfund
- UPC: 709483066175
10. Garantieinformationen
Soundstream products are covered by a manufacturer's warranty. The specific terms and duration of the warranty may vary by region and retailer. Please retain your proof of purchase for any warranty claims. For detailed warranty information, refer to the documentation provided with your purchase or visit the official Soundstream webWebsite.
11. Unterstützung
For technical assistance, troubleshooting beyond this manual, or service inquiries, please contact Soundstream customer support. Contact information can typically be found on the official Soundstream weboder über Ihren autorisierten Händler.