1. Einleitung
The EVILTO RGB Digital Alarm Clock is designed to provide clear time display, dual alarm functionality, and ambient lighting options. It features a high-contrast screen that shows time, temperature, date, and day of the week. With customizable RGB display colors and ambient light settings, it complements various room decors while offering practical features like Daylight Saving Time (DST) adjustment and power-outage Speicher.
2. Sicherheitshinweise
- Stellen Sie sicher, dass das Gerät auf einer stabilen, ebenen Fläche steht, um ein Umfallen zu verhindern.
- Keep away from water or high humidity environments to avoid electrical hazards.
- Vor direkter Sonneneinstrahlung und extremen Temperaturen schützen.
- Verwenden Sie ausschließlich das mitgelieferte Netzteil und Kabel.
- Außerhalb der Reichweite von Kindern aufbewahren.
- Versuchen Sie nicht, das Gerät selbst zu zerlegen oder zu reparieren. Wenden Sie sich gegebenenfalls an den Kundendienst.
3. Packungsinhalt
Überprüfen Sie, ob alle Artikel im Paket vorhanden sind:
- EVILTO RGB Digital Alarm Clock Unit
- USB-C-Stromkabel
- Netzteil
- Bedienungsanleitung
4. Produktüberschreitungview
The alarm clock features a large digital display and intuitive controls. Familiarize yourself with the main components and buttons:
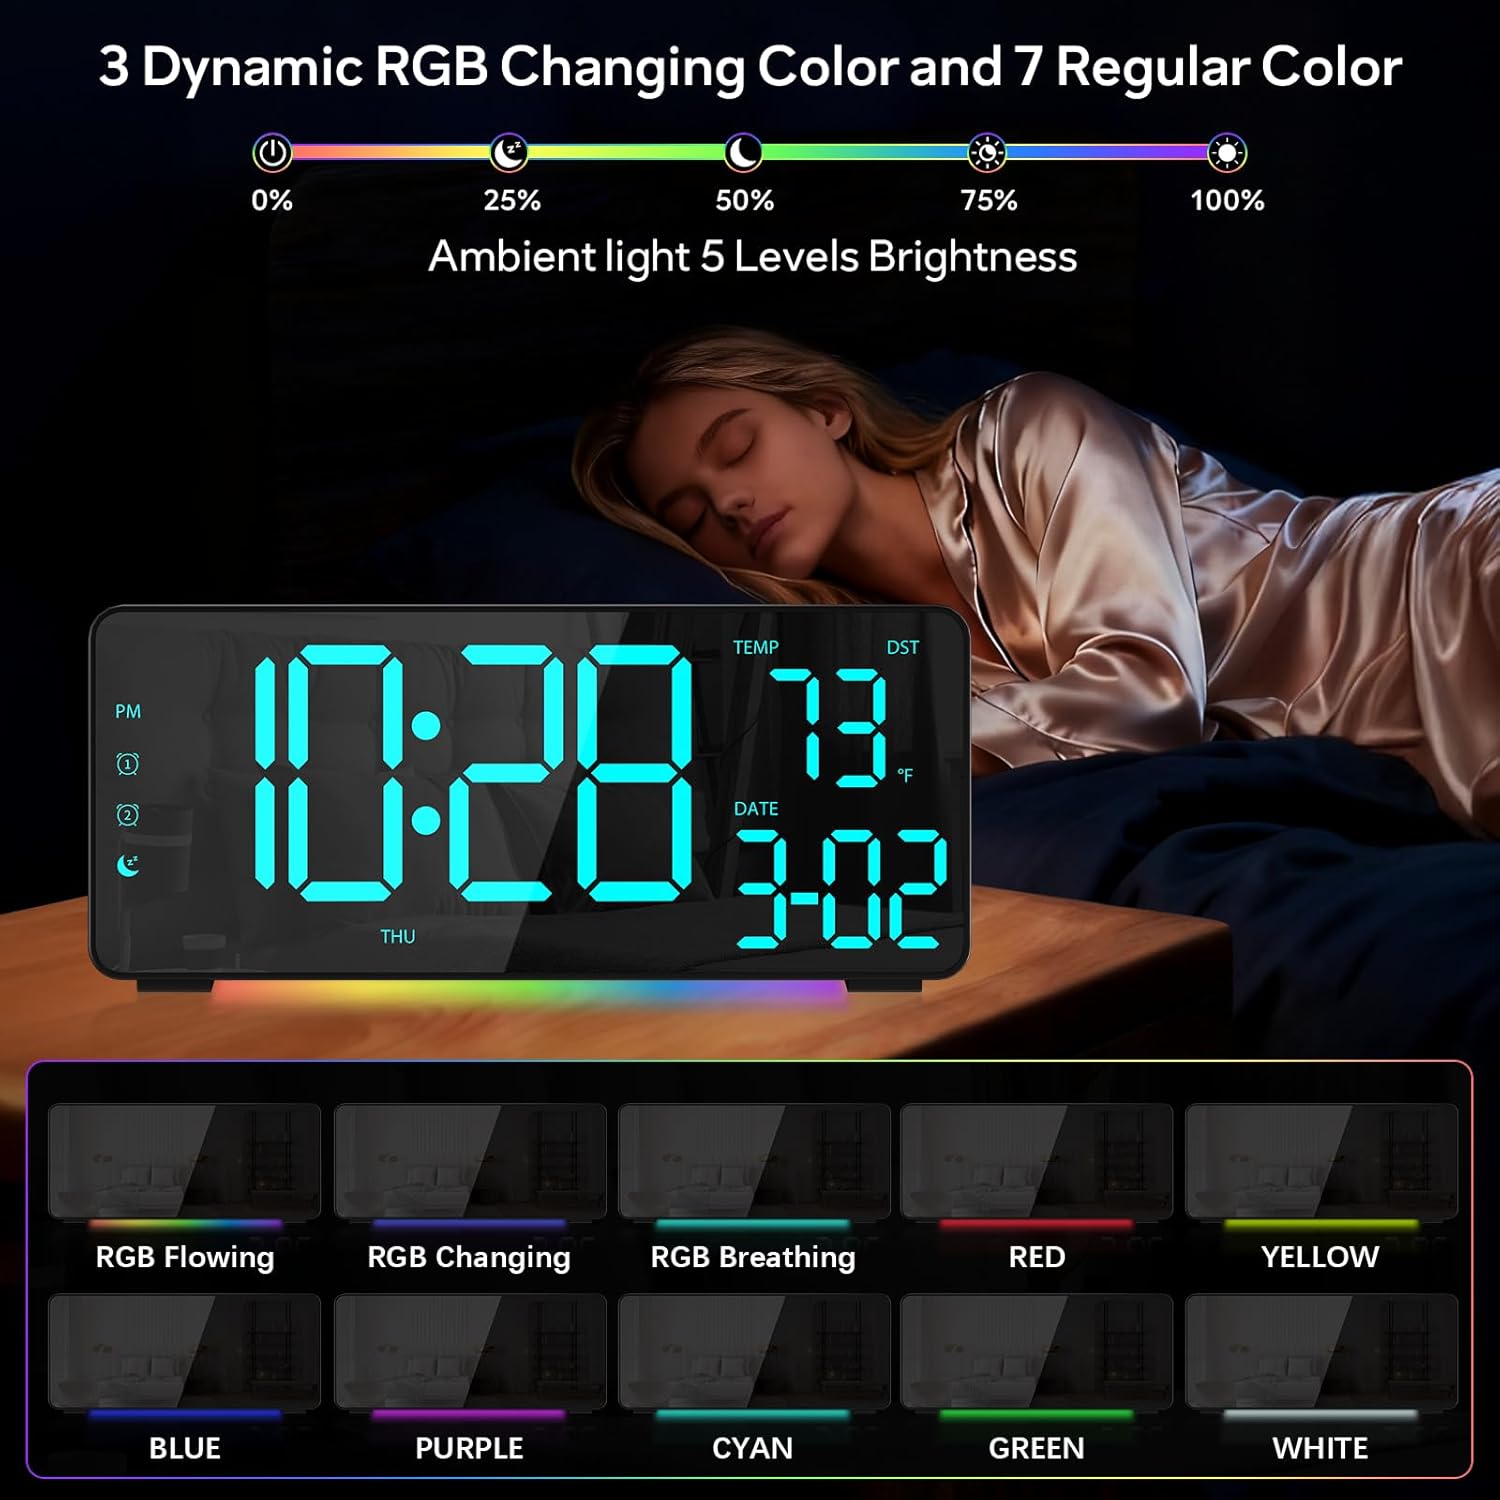
Abbildung 1: Vorderseite view of the EVILTO RGB Digital Alarm Clock, showing the time, temperature, date, and day of the week. The display features vibrant RGB colors.

Abbildung 2: Rückseite view of the EVILTO RGB Digital Alarm Clock, highlighting the control buttons for settings, alarms, display, and the USB-C input and USB output ports.
Bedientasten:
- Set-Taste: Enters/confirms settings.
- Helligkeitstaste: Passt die Displayhelligkeit an.
- RGB-Taste: Cycles through RGB display colors.
- Alarm 1/2 Tasten: Activates/deactivates and sets Alarm 1 or Alarm 2.
- Lautstärkeregler: Passt die Alarmlautstärke an.
- Sommerzeit-Taste: Schaltet die Sommerzeit ein und aus.
- 12/24-Stunden-Taste: Switches between 12-hour and 24-hour time format.
- °C/°F-Taste: Switches between Celsius and Fahrenheit for temperature display.
5. Einrichtung
5.1 Einschalten des Geräts
The alarm clock operates via a corded electric connection. For power-outage memory, install 3 AAA batteries (not included).
- Connect the USB-C power cable to the INPUT port on the back of the clock.
- Stecken Sie das Netzteil in eine normale Steckdose.
- For backup power, open the battery compartment on the back and insert 3 AAA batteries, ensuring correct polarity.

Figure 3: The clock connected via USB-C for power, demonstrating its USB output for charging other devices.

Figure 4: Illustration of the power-outage memory function, showing the battery compartment for AAA batteries to retain settings during power interruptions.
6. Bedienungsanleitung
6.1 Uhrzeit und Datum einstellen
- Halten Sie die SATZ button on the back of the clock for 3 seconds to enter time setting mode. The hour digits will begin to flash.
- Verwenden Sie die + Und - Tasten zum Einstellen der Stunde.
- Drücken SATZ again to move to minute setting. Use + Und - um die Minuten einzustellen.
- Drücken Sie weiter SATZ um die Einstellungen für Jahr, Monat und Tag durchzulaufen und jede einzelne anzupassen mit + Und -.
- Drücken SATZ Ein letztes Mal, um den Einstellungsmodus zu verlassen.
- Um zwischen 12-Stunden- und 24-Stunden-Format umzuschalten, drücken Sie kurz die 12/24 Uhr Taste.
- To switch between Celsius and Fahrenheit, short press the ° C / ° F Taste.
6.2 Alarme einstellen
The clock supports two independent alarms with four modes (Daily, Weekday 1, Weekday 2, Weekend).
- Halten Sie die 1-Alarm or 2-Alarm Durch Drücken der Taste für 3 Sekunden gelangen Sie in den Alarm-Einstellmodus. Die Stundenanzeige blinkt.
- Verwenden Sie die + Und - Tasten zum Einstellen der gewünschten Weckzeit.
- Drücken Sie die Alarm button again to set the minutes, adjusting with + Und -.
- Drücken Sie die Alarm button a third time to select the alarm mode (Daily, Weekday 1, Weekday 2, Weekend) using + Und -.
- Drücken Sie die Alarm button one last time to confirm and exit.
- To activate or deactivate an alarm, short press its respective 1-Alarm or 2-Alarm button. An icon will appear/disappear on the display.
- Wenn ein Alarm ertönt, drücken Sie die Taste SCHLAFEN button (top center) to activate snooze for 5 minutes. To turn off the alarm, press any other button.

Figure 5: The clock illustrating the setup for dual alarms with options for daily, weekday, or weekend modes.
6.3 Adjusting Display and Ambient Light
- Bildschirmhelligkeit: Drücken Sie kurz die Helligkeit button on the back to cycle through 5 adjustable brightness levels for the main display.
- RGB-Anzeigefarben: Drücken Sie kurz die RGB button on the back to cycle through 15 vibrant RGB display colors, including 4 dynamic RGB modes, 7 regular colors, and 4 specific color options.
- Umgebungsbeleuchtung: The clock features 10 ambient lighting options. These can be adjusted independently from the main display colors. Refer to the specific instructions in the included manual for ambient light control.
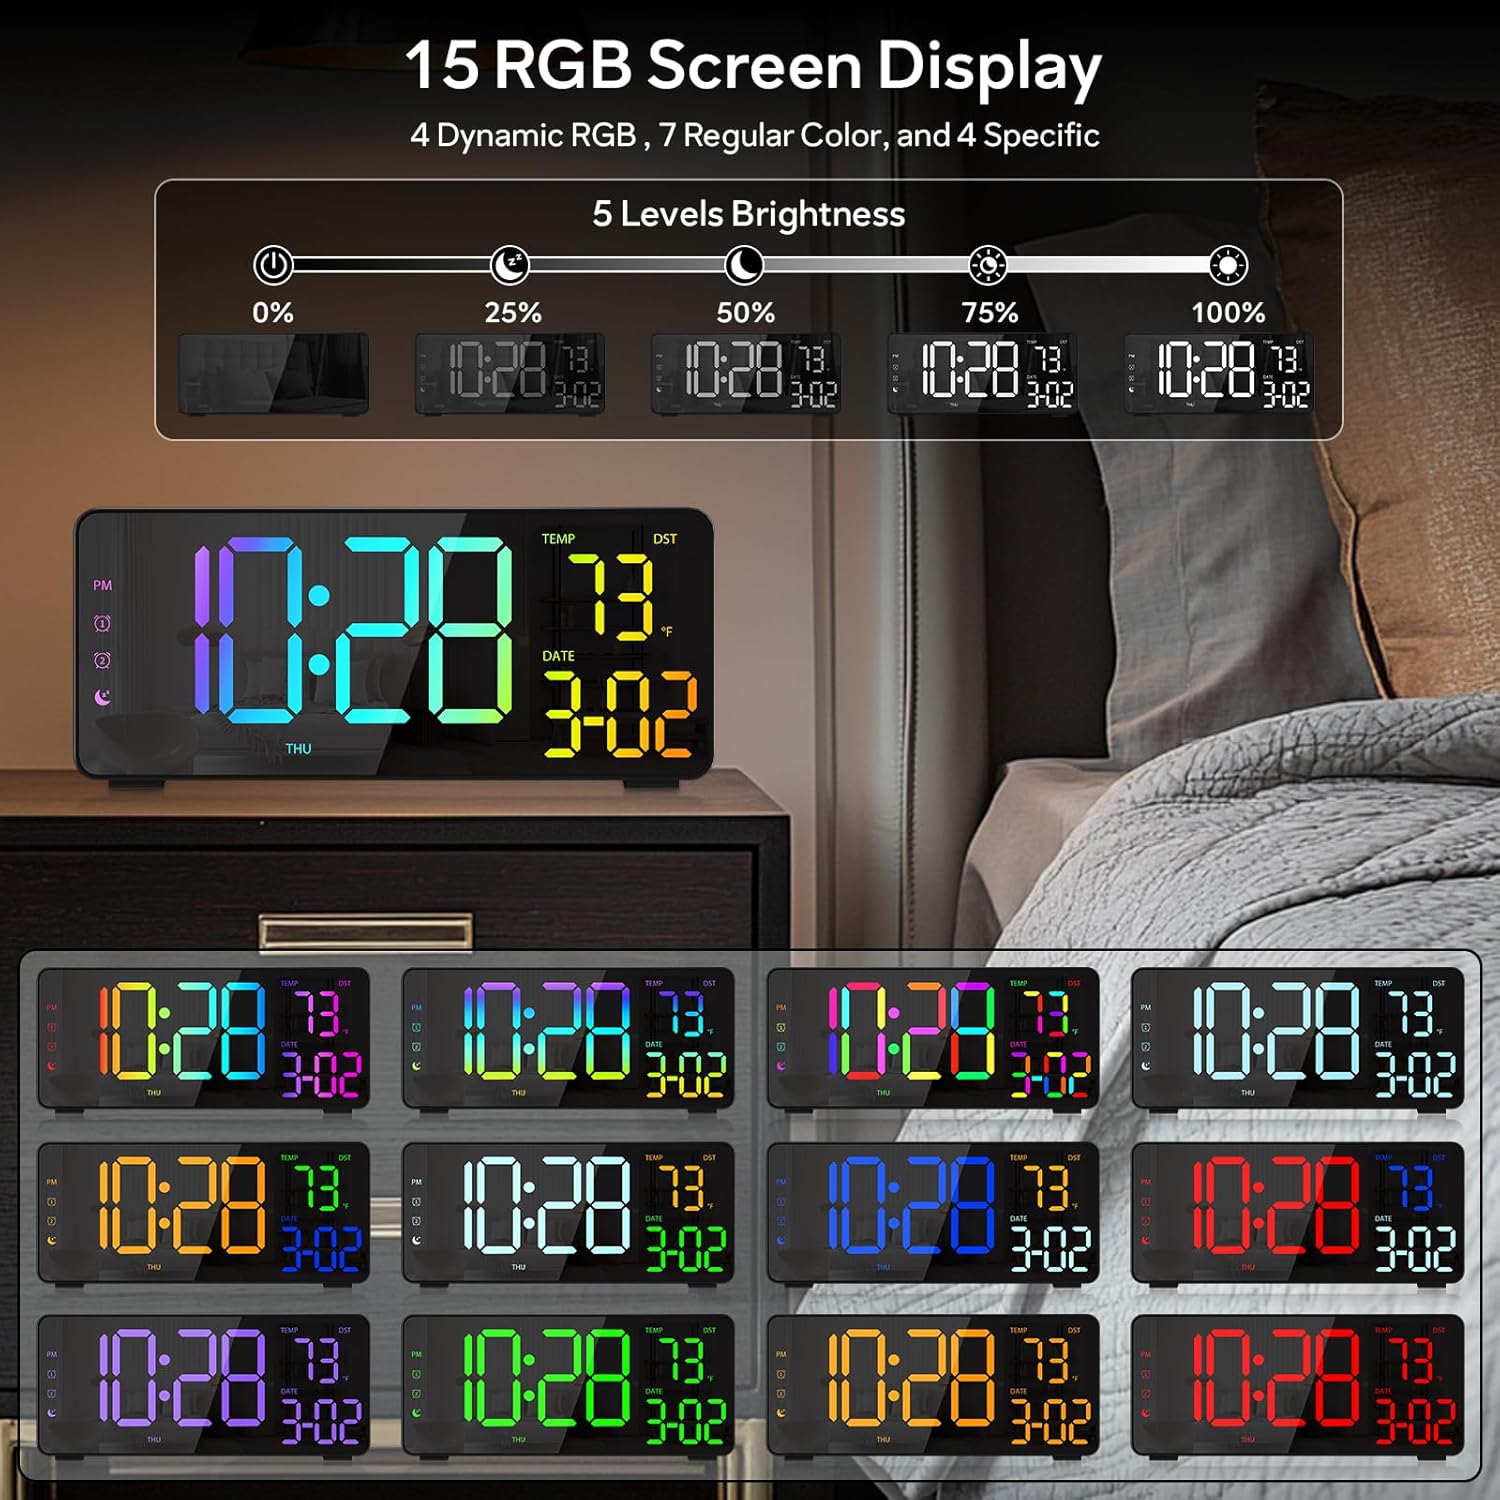
Figure 6: Various display color options and brightness levels of the digital alarm clock.
6.4 Sommerzeitumstellung
To adjust for Daylight Saving Time, simply press the Sommerzeit button on the back of the clock. This will move the time forward or backward by 1 hour, keeping your clock synchronized with seasonal changes.
7. Wartung
- Clean the clock's surface with a soft, dry cloth. Avoid abrasive cleaners or solvents.
- If the display appears scratched, gently remove any protective film that may be present.
- Ensure the USB-C port and USB output port are free from dust and debris.
8. Fehlerbehebung
8.1 Display leuchtet nicht auf
- Check if the power cable is securely connected to both the clock and the power outlet.
- Stellen Sie sicher, dass das Netzteil ordnungsgemäß funktioniert.
- If using battery backup, ensure batteries are correctly inserted and not depleted. Note that the display will not stay on continuously when running on battery power alone; it will only light up briefly when a button is pressed or an alarm sounds.
8.2 Alarm ertönt nicht
- Verify that the alarm is activated (alarm icon visible on the display).
- Check the alarm volume setting using the Volumen Taste.
- Ensure the alarm time and mode are set correctly.
8.3 Falsche Uhrzeit/Falsches Datum
- Geben Sie die Zeit- und Datumseinstellungen wie in Abschnitt 6.1 beschrieben erneut ein.
- If DST is active, ensure it is correctly set for your region.
9. Spezifikationen
| Besonderheit | Detail |
|---|---|
| Marke | BÖSE |
| Modellnummer | RGBNZ |
| Farbe | Schwarz |
| Anzeigetyp | Digitales |
| Besondere Merkmale | Adjustable Brightness, Adjustable Volume, Large Display, Loud Alarm, Temperature Display |
| Technische Daten | 6.89 Zoll B x 3.1 Zoll H |
| Stromquelle | Kabelgebundene Elektrik |
| Zimmertyp | Bedroom, Home Office, Kid's Room, Living Room, Study Room |
| Material | Plastik |
| Anzahl der Alarme | 2 |
| Bildschirmgröße | 8.1 Zoll |
| Artikelgewicht | 10.9 Unzen |
10. Garantie und Support
For warranty information or technical support, please refer to the contact details provided in the product packaging or contact EVILTO customer service directly. Keep your purchase receipt for warranty claims.