
1. Einleitung
Thank you for choosing the INTASTING Gooseneck Electric Kettle. This kettle is designed for precise temperature control, ideal for brewing pour-over coffee and various types of tea. Key features include a 9mm fine gooseneck spout for controlled pouring, accurate ±1℉ temperature regulation, a 2-hour temperature hold function, and a built-in brew stopwatch. Constructed with 100% food-grade 304 stainless steel interior, it ensures pure and safe water heating.
2. Sicherheitshinweise
Please read all instructions carefully before using the kettle. Keep this manual for future reference.
- Die Stromversorgungsbasis, das Kabel oder der Stecker dürfen nicht in Wasser oder andere Flüssigkeiten getaucht werden.
- Ensure the kettle is placed on a stable, flat, heat-resistant surface away from the edge of the countertop.
- Betreiben Sie den Wasserkocher nicht, wenn das Kabel oder der Stecker beschädigt ist oder wenn das Gerät eine Fehlfunktion aufweist.
- Bewahren Sie den Wasserkocher und sein Kabel außerhalb der Reichweite von Kindern auf.
- Do not fill the kettle above the 'MAX' line or below the 'MIN' line to prevent boiling dry or overflow.
- Achten Sie während des Betriebs stets darauf, dass der Deckel fest verschlossen ist.
- Exercise caution when handling hot water and steam.
- Ziehen Sie den Wasserkocher bei Nichtgebrauch und vor der Reinigung aus der Steckdose.
- Dieses Gerät ist nur für den Hausgebrauch bestimmt.
3. Packungsinhalt
- 1 x INTASTING Gooseneck Electric Kettle
- 1 x Power-Basis
- 1 x Benutzerhandbuch
4. Produktüberschreitungview
Familiarize yourself with the components and controls of your INTASTING Gooseneck Electric Kettle.

Abbildung 4.1: Temperature Control Knob and Preset Temperatures. The central knob allows for precise temperature selection, with common presets indicated.

Abbildung 4.2: Precise Pour-Over Control with Gooseneck Spout. The elongated spout provides a smooth, steady flow for optimal pour-over brewing.
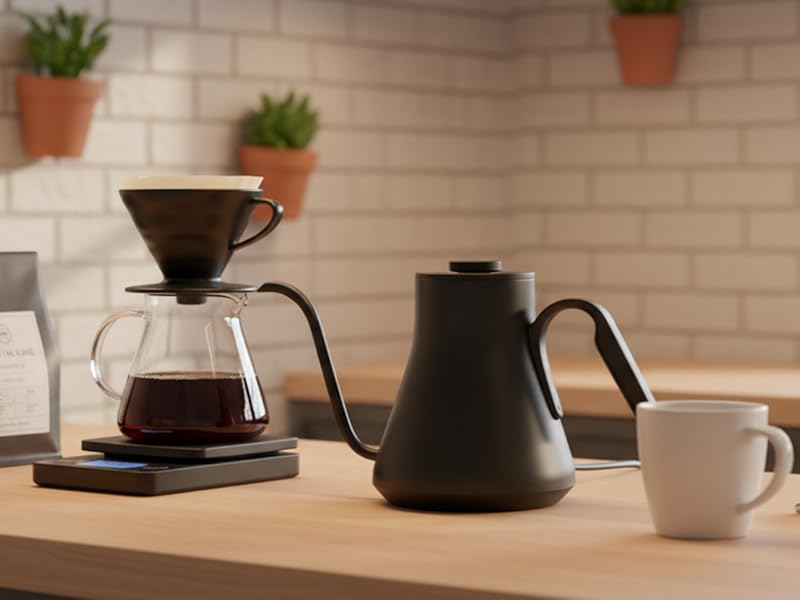
Abbildung 4.3: Quick Heating Element (1500W). The powerful heating element ensures rapid water boiling.
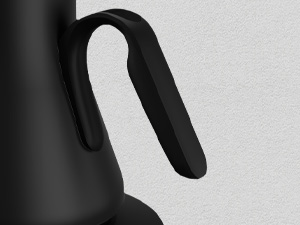
Abbildung 4.4: Counterbalance Handle Design. The ergonomic handle provides comfortable and controlled pouring.
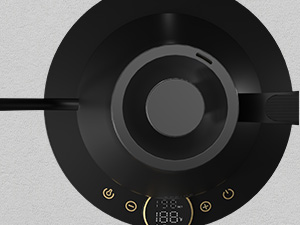
Abbildung 4.5: Built-in Brew Timer Display. The integrated timer helps achieve consistent brewing results.
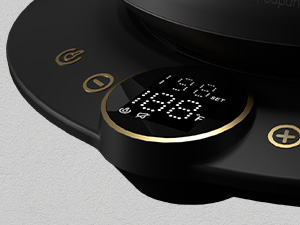
Abbildung 4.6: LED Digital Screen with Heating and Keep Warm Indicators. The clear display shows current and set temperatures, along with operational status.
5. Einrichtung
- Auspacken: Entfernen Sie sorgfältig sämtliches Verpackungsmaterial und vergewissern Sie sich, dass alle Komponenten vorhanden sind.
- Erstreinigung: Before first use, fill the kettle with water to the MAX line, boil, and then discard the water. Repeat this process 2-3 times to remove any manufacturing residues.
- Platzierung: Stellen Sie die Basisstation auf eine trockene, ebene und stabile Oberfläche. Achten Sie darauf, dass das Netzkabel nicht herabhängt oder mit heißen Oberflächen in Berührung kommt.
6. Bedienungsanleitung
6.1 Den Kessel füllen
- Remove the lid and fill the kettle with fresh, cold water.
- Do not fill below the MIN mark or above the MAX mark (0.9 Liters). Overfilling may cause boiling water to spill out.
- Setzen Sie den Deckel sicher wieder auf.
6.2 Ein-/Ausschalten
- Stellen Sie den Wasserkocher auf die Basisstation.
- Drücken Sie die Ein-/Ausschalten button to turn the kettle on. The display will illuminate.
- Drücken Sie zum Ausschalten die Taste Ein-/Ausschalten erneut die Taste.
6.3 Einstellen der gewünschten Temperatur
- Verwenden Sie die TEMP+ Und TEMP- buttons on the base to adjust the target temperature.
- For rapid temperature adjustment, long-press the TEMP+ or TEMP- Taste.
- The kettle will automatically begin heating to the set temperature.
6.4 Schalttemperatureinheiten (°F / °C)
- Um zwischen Fahrenheit (°F) und Celsius (°C) umzuschalten, halten Sie die Taste gedrückt. TEMP Und - Tasten gleichzeitig 3 Sekunden lang.
6.5 Using the 2-Hour Temperature Hold Function
- After setting your desired temperature, press the HALTEN Taste.
- The kettle will maintain the set temperature for up to 2 hours.
- To deactivate the hold function, press the HALTEN button again or remove the kettle from the base.
6.6 Using the Built-in Brew Stopwatch
- Once the water reaches your desired temperature, press the TIMER Taste.
- The display will start counting up, allowing you to time your pour-over brewing process for consistency.
- Drücken Sie die TIMER Drücken Sie erneut, um die Stoppuhr anzuhalten.
6.7 Pouring Technique
- The 9mm fine gooseneck spout is designed for precise and controlled pouring. Tilt the kettle gently to achieve a steady, even stream, ideal for pour-over coffee.
7. Wartung und Reinigung
Proper maintenance ensures the longevity and performance of your kettle.
7.1 Tägliche Reinigung
- Trennen Sie den Wasserkocher immer vom Netz und lassen Sie ihn vollständig abkühlen, bevor Sie ihn reinigen.
- Handwäsche nur: The kettle should be hand washed. Do not immerse the power base in water.
- Wischen Sie die Außenseite des Wasserkochers mit einem weichen,amp Tuch.
- Rinse the interior of the kettle with warm water and a mild dish soap. Use a soft sponge or brush if necessary.
- Vor dem Verstauen oder dem nächsten Gebrauch gründlich abspülen und vollständig trocknen lassen.
7.2 Entkalkung
- Over time, mineral deposits (limescale) may build up inside the kettle, especially in hard water areas. This can affect performance.
- Zum Entkalken füllen Sie den Wasserkocher mit einer Mischung aus 1 Teil Weißweinessig und 2 Teilen Wasser.
- Die Mischung zum Kochen bringen und mindestens 30 Minuten stehen lassen, bei starker Ablagerung auch länger.
- Empty the kettle and rinse thoroughly several times with fresh water.
- Bei hartnäckigen Ablagerungen kann gemäß der Gebrauchsanweisung des Produkts ein nicht scheuerndes Entkalkungsmittel für Wasserkocher verwendet werden.
8. Fehlerbehebung
Sollten Sie auf Probleme stoßen, beachten Sie bitte die folgenden häufigen Probleme und Lösungen:
| Problem | Mögliche Ursache | Lösung |
|---|---|---|
| Wasserkocher lässt sich nicht einschalten. | Kein Strom, Wasserkocher steht nicht richtig auf dem Sockel. | Check power outlet, ensure kettle is correctly placed on the base. |
| Das Wasser wird nicht warm. | Kettle not powered on, temperature not set. | Press power button, set desired temperature. |
| Kettle boils dry. | Unzureichendes Wasser. | Ensure water level is above MIN mark. The kettle has boil-dry protection and will shut off automatically. |
| Das Wasser hat einen seltsamen Geschmack. | New kettle residue, limescale buildup. | Führen Sie die ersten Reinigungsschritte erneut durch. Entkalken Sie den Wasserkocher. |
| Die Temperaturanzeige ist ungenau. | Sensorproblem. | Contact customer support if the issue persists after restarting. |
9. Spezifikationen
| Besonderheit | Detail |
|---|---|
| Marke | GENIAL |
| Modellname | Electric Ket;e |
| Artikelmodellnummer | CEK-219 |
| Kapazität | 0.9 Liter |
| Material | BPA-Free 304 Stainless Steel |
| Technische Daten | 12.05 Zoll L x 7.79 Zoll B x 7.95 Zoll H |
| Artikelgewicht | 2.66 Pfund |
| Besondere Merkmale | 2-Hour Temp Hold, 360° Swivel Base, Fahrenheit & Celsius Switch, Precise Temperature Control (±1℉), Rapid Boil, Built-in Brew Stopwatch |
| Leistung | 1500 W |
| Pflegehinweise | Handwäsche |
10. Garantie und Support
The INTASTING Gooseneck Electric Kettle comes with an 18 Monate Garantie. For any product inquiries, troubleshooting assistance, or warranty claims, please contact our U.S. Support team. Refer to the product packaging or our official webWebsite für Kontaktdaten.
11. Offizielles Produktvideo
Video 11.1: Ein Überview of the INTASTING Gooseneck Electric Kettle in black, demonstrating its features and design. This video is provided by Cocinare Coffee, the seller.