Einführung
Thank you for choosing the LIORQUE Wireless Weather Station YGH6208. This device provides accurate indoor and outdoor temperature and humidity readings, weather forecasts, and features a DCF radio-controlled clock with alarm functions. This manual will guide you through the setup, operation, and maintenance of your weather station.
Packungsinhalt
- 1 x LIORQUE Drahtlose Wetterstation (Haupteinheit)
- 1 x Außensensor
- 3 x AAA Batteries (for Main Unit)
- 2 x AAA Batteries (for Outdoor Sensor)
- 1 x Benutzerhandbuch (dieses Dokument)
Produkt überview
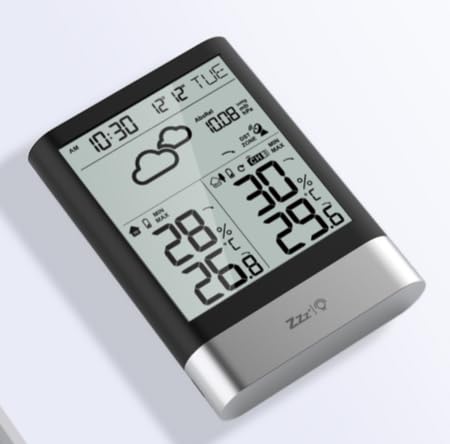
Bild 1: LIORQUE Wireless Weather Station Main Unit. This image shows the front view of the main display unit, highlighting its LCD screen and compact design.
Hauptgerät Merkmale:
- 4.3-inch LCD screen with backlight
- Anzeige von Innentemperatur und Luftfeuchtigkeit
- Anzeige von Außentemperatur und Luftfeuchtigkeit
- Wettervorhersage-Symbole
- DCF radio-controlled clock with manual setting option
- Double alarm clock with snooze function
- Calendar and day of the week display (7 languages)
- Aufzeichnungen von Maximal- und Minimaltemperatur und Luftfeuchtigkeit
- Air pressure display and weather trend
- 12/24 Stunden Zeitanzeige
Merkmale des Außensensors:
- Wireless transmission up to 100m (open area)
- Temperatur- und Feuchtigkeitsmessung
- Supports hanging or standing placement
- Data updated every 30 seconds
- Unterstützt bis zu 3 Sensoren (einer ist im Lieferumfang enthalten)
Aufstellen
1. Einlegen der Batterie
- Außensensor: Open the battery compartment cover on the back of the outdoor sensor. Insert 2 x AAA batteries, ensuring correct polarity (+/-). Close the cover.
- Haupteinheit: Öffnen Sie die Batteriefachabdeckung auf der Rückseite des Hauptgeräts. Legen Sie zwei AAA-Batterien ein und achten Sie dabei auf die richtige Polarität (+/-). Schließen Sie die Abdeckung.
- The main unit will power on and display indoor readings.
2. Sensorkopplung
After installing batteries in both units, the main unit will automatically search for the outdoor sensor. The outdoor temperature and humidity should appear on the main unit's display within a few minutes. If the outdoor readings do not appear:
- Ensure both units are within range (up to 100m in open air).
- Press the "TX" button inside the outdoor sensor's battery compartment to manually send a signal.
- On the main unit, press and hold the "CHANNEL" button to initiate a manual search for the sensor.
3. Grundeinstellungen (Zeit, Datum, Einheiten)
The weather station will attempt to synchronize with the DCF radio signal for automatic time setting. This may take several hours, especially in areas with weak signals. You can manually set the time and date if needed.
- Manuelle Zeiteinstellung: Press and hold the "MODE" button to enter time setting mode. Use the "UP" and "DOWN" buttons to adjust values and "MODE" to confirm and move to the next setting (e.g., 12/24 hour format, hour, minute, year, month, day, language for day of week).
- Temperatureinheiten: Drücken Sie die Taste "°C/°F", um zwischen Celsius und Fahrenheit umzuschalten.
- Luftdruckeinheiten: Press the "BARO" button to cycle through air pressure units (e.g., hPa, inHg).
Bedienungsanleitung
Informationen anzeigen
The 4.3-inch LCD screen displays various information:
- Uhrzeit und Datum: Aktuelle Uhrzeit, Datum und Wochentag.
- Lesungen für drinnen: Aktuelle Raumtemperatur und Luftfeuchtigkeit.
- Lesungen im Freien: Current outdoor temperature and humidity from the connected sensor.
- Wettervorhersage: Symbole, die die vorhergesagten Wetterbedingungen anzeigen (z. B. sonnig, bewölkt, regnerisch).
- Luftdruck: Current atmospheric pressure and trend.
- Hintergrundbeleuchtung: The screen backlight activates with a light touch and returns to normal brightness after 10 seconds to conserve battery.
Weckerfunktion
The weather station features a double alarm clock with snooze.
- Alarme einstellen: Drücken Sie die Taste "ALARM", um view Alarm 1. Press "ALARM" again to view Alarm 2. Hold "ALARM" to enter alarm setting mode. Use "UP" and "DOWN" to adjust the hour and minute, and "ALARM" to confirm.
- Alarme aktivieren/deaktivieren: Während viewing an alarm, press "UP" to toggle it on or off. An alarm icon will appear when active.
- Schlummerfunktion: When an alarm sounds, press any button (except "ALARM OFF") to activate snooze. The alarm will sound again after a set interval. Press "ALARM OFF" to stop the alarm completely.
Maximale und minimale Aufzeichnungen
The weather station records the maximum and minimum indoor/outdoor temperature and humidity values.
- Press the "MAX/MIN" button once to display maximum recorded values.
- Press "MAX/MIN" again to display minimum recorded values.
- Press "MAX/MIN" a third time to return to current readings.
- To clear records, hold the "MAX/MIN" button while viewdie Aufzeichnungen.
Wartung
- Batteriewechsel: Tauschen Sie die Batterien sowohl im Hauptgerät als auch im Außensensor aus, sobald die Anzeige für niedrigen Batteriestand erscheint. Ersetzen Sie immer alle Batterien gleichzeitig.
- Reinigung: Reinigen Sie die Display- und Geräteoberflächen mit einem weichen, fusselfreien Tuch.amp Tuch. Keine Scheuer- oder Lösungsmittel verwenden.
- Platzierung des Außensensors: For optimal performance and longevity, install the outdoor sensor in a shaded area, protected from direct sunlight and rain. Ensure it is within the 100m wireless range of the main unit.
Fehlerbehebung
| Problem | Mögliche Lösung |
|---|---|
| Keine Anzeige für Außentemperatur/Luftfeuchtigkeit. |
|
| Falsche Zeitanzeige. |
|
| Das Display ist dunkel oder leer. |
|
| Die Wettervorhersage scheint ungenau zu sein. |
|
Technische Daten
- Modell: YGH6208
- Marke: LIORQUE
- Anzeigetyp: LCD
- Stromversorgung (Haupteinheit): 3 x AAA-Batterien (im Lieferumfang enthalten)
- Stromversorgung (Außensensor): 2 x AAA-Batterien (im Lieferumfang enthalten)
- Drahtlose Reichweite: Bis zu 100 m (offenes Gebiet)
- Temperaturgenauigkeit: ±0.5 °C
- Sensortechnologie: Funk (drahtlos)
- Besondere Merkmale: DCF Radio Clock, Alarm, Snooze, Weather Forecast, Max/Min Records, Backlight
- Enthaltene Komponenten: Weather Station Main Unit, Outdoor Sensor
Garantie und Support
LIORQUE-Produkte sind auf Zuverlässigkeit und Leistung ausgelegt. Informationen zur Garantie oder zum technischen Support finden Sie in den mit Ihrem Kauf gelieferten Kontaktdaten oder auf der offiziellen LIORQUE-Website. webBitte bewahren Sie Ihren Kaufbeleg für Garantieansprüche auf.