
1. Produktüberschreitungview
The Shutao 4-Channel 18650 Battery Capacity Tester is designed for comprehensive analysis of 18650 lithium batteries. It features four independent channels, allowing simultaneous charging, discharging, and capacity testing. This device also includes internal resistance measurement and automatic cycling functions to optimize battery performance and assess health.
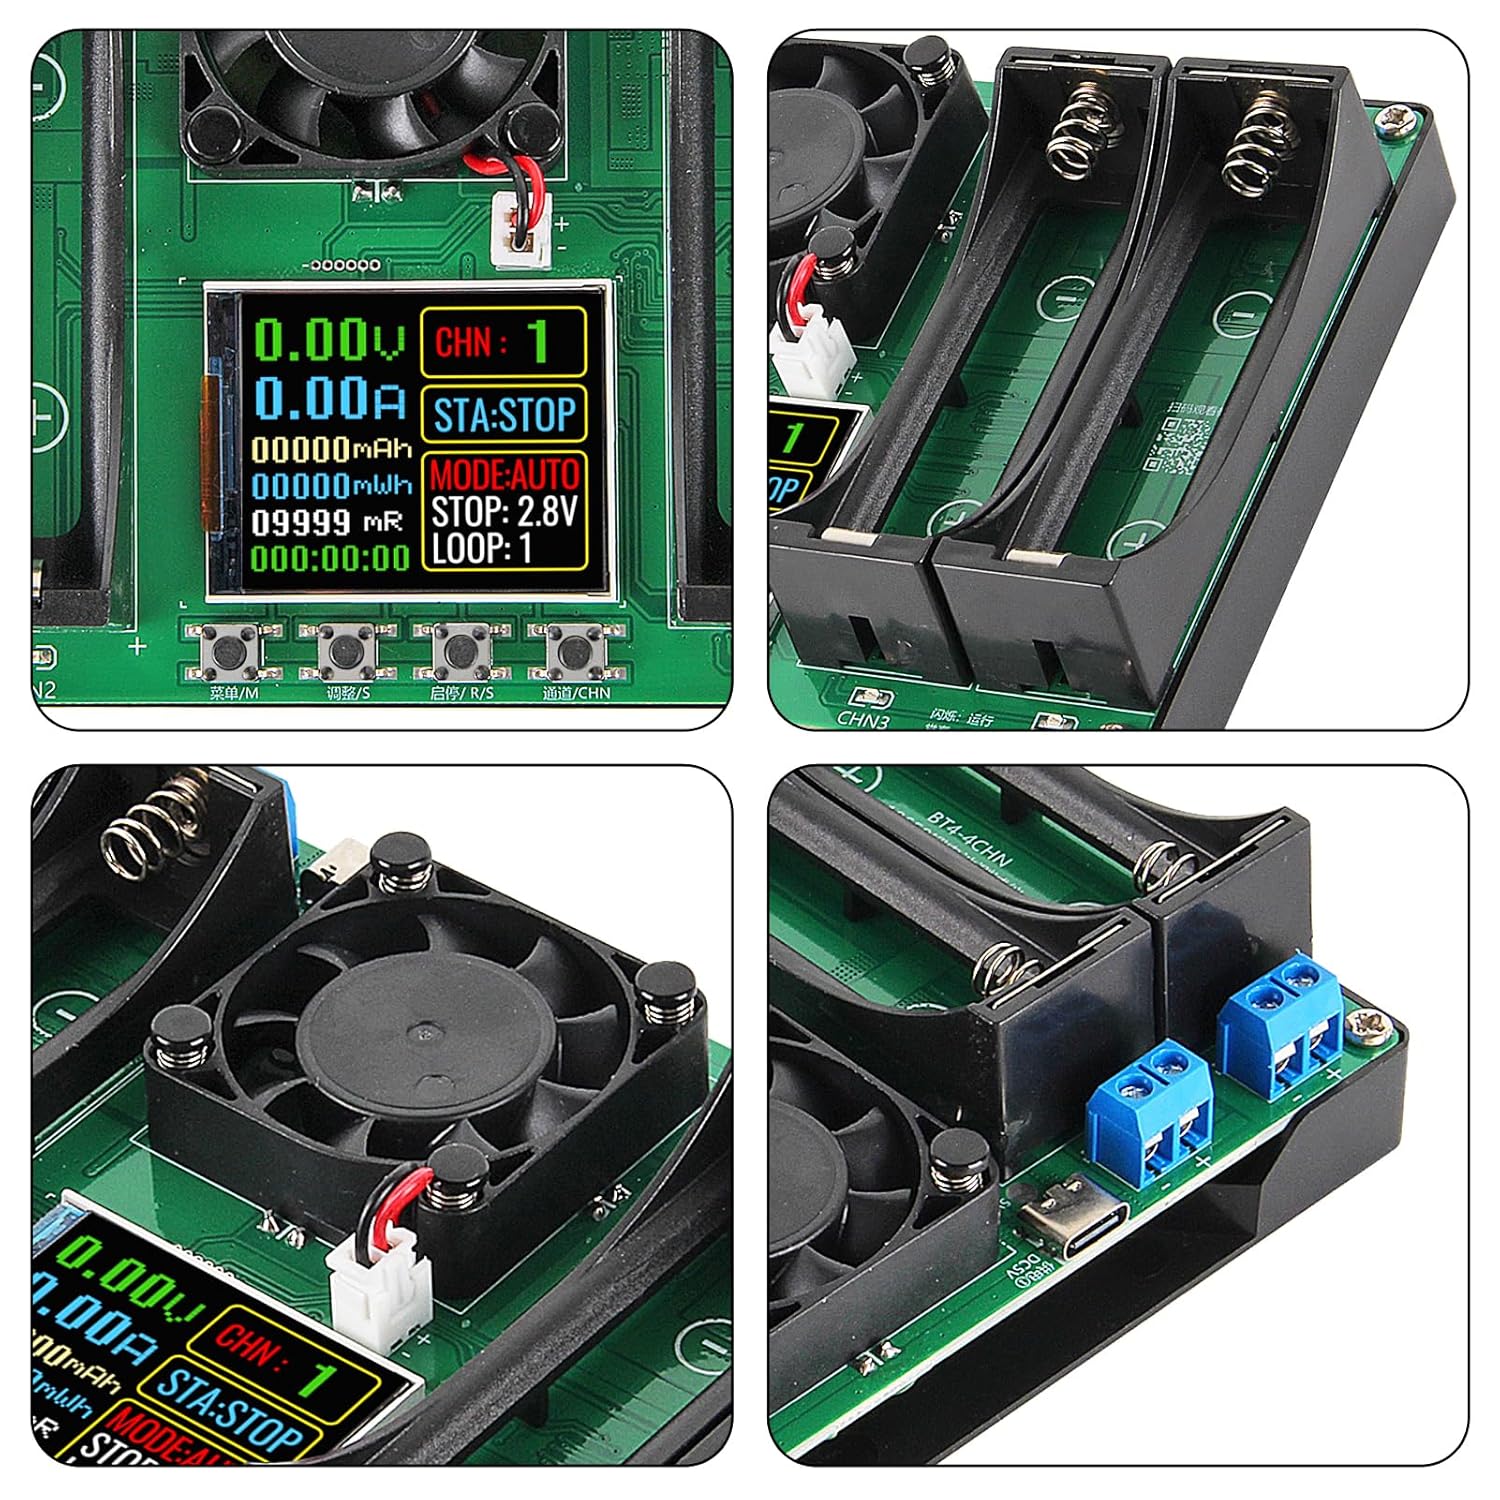
Abbildung 1: Überview of the Shutao 4-Channel 18650 Battery Capacity Tester. This image shows the device from an angled perspective, highlighting the four battery slots, the central cooling fan, and the display screen.
2. Packungsinhalt
Überprüfen Sie, ob alle Artikel in Ihrem Paket vorhanden sind:
- 1 x 18650 Lithium Battery Capacity Tester Module
3. Komponentenidentifikation
Familiarize yourself with the various components and interfaces of the tester.

Abbildung 2: Labeled diagram of the tester's components. This image provides a top-down view of the device with numbered labels pointing to specific parts for easy identification.
- Type-C 5V Power Supply Interface (Input 1)
- Type-C 5V Power Supply Interface (Input 2)
- Channel 1 Battery Holder
- Channel 2 Battery Holder
- Channel 3 Battery Holder
- Channel 4 Battery Holder
- Channel 1 External Terminal
- Channel 2 External Terminal
- Channel 3 External Terminal
- Channel 4 External Terminal
- Kühlerlüfter
- Monitoranzeige
- Menu /M Key
- Adjust /S Key
- Start/Stop /R/S Button
- Channel /CHN Key
- CHN1/1 Channel Status Indicator
- CHN2/2 Channel Status Indicator
- CHN3/3 Channel Status Indicator
- CHN4/4 Channel Status Indicator
The display provides real-time information during operation:

Abbildung 3: Display interface explanation. This image shows a close-up of the tester's screen, with numbered labels indicating what each displayed value represents.
- Echtzeit-Voltage
- Echtzeitstrom
- Cumulative Capacity (mAh)
- Akkumulierte Energie (mWh)
- Battery Internal Resistance (mR)
- Cumulative Running Time
- Kanalanzeige
- Status Indicator (e.g., STA:STOP)
- Mode Menu (e.g., MODE:AUTO)
- Entladung stoppen Voltage
- Cycles (LOOP)
4. Einrichtung
- Stromanschluss: Connect the tester to a 5V DC power source using one of the two Type-C interfaces. An adapter and cable are typically included.
- Einlegen der Batterie: Insert flat-top 18650 batteries into the designated battery holders (3, 4, 5, 6). Ensure correct polarity (+ and -). The tester supports flat-top 18650 batteries.
- Stabilisierung: After installing a battery, allow a few seconds for the voltage and internal resistance readings on the display to stabilize before proceeding with tests.
5. Bedienungsanleitung
The tester allows for independent operation of its four channels.
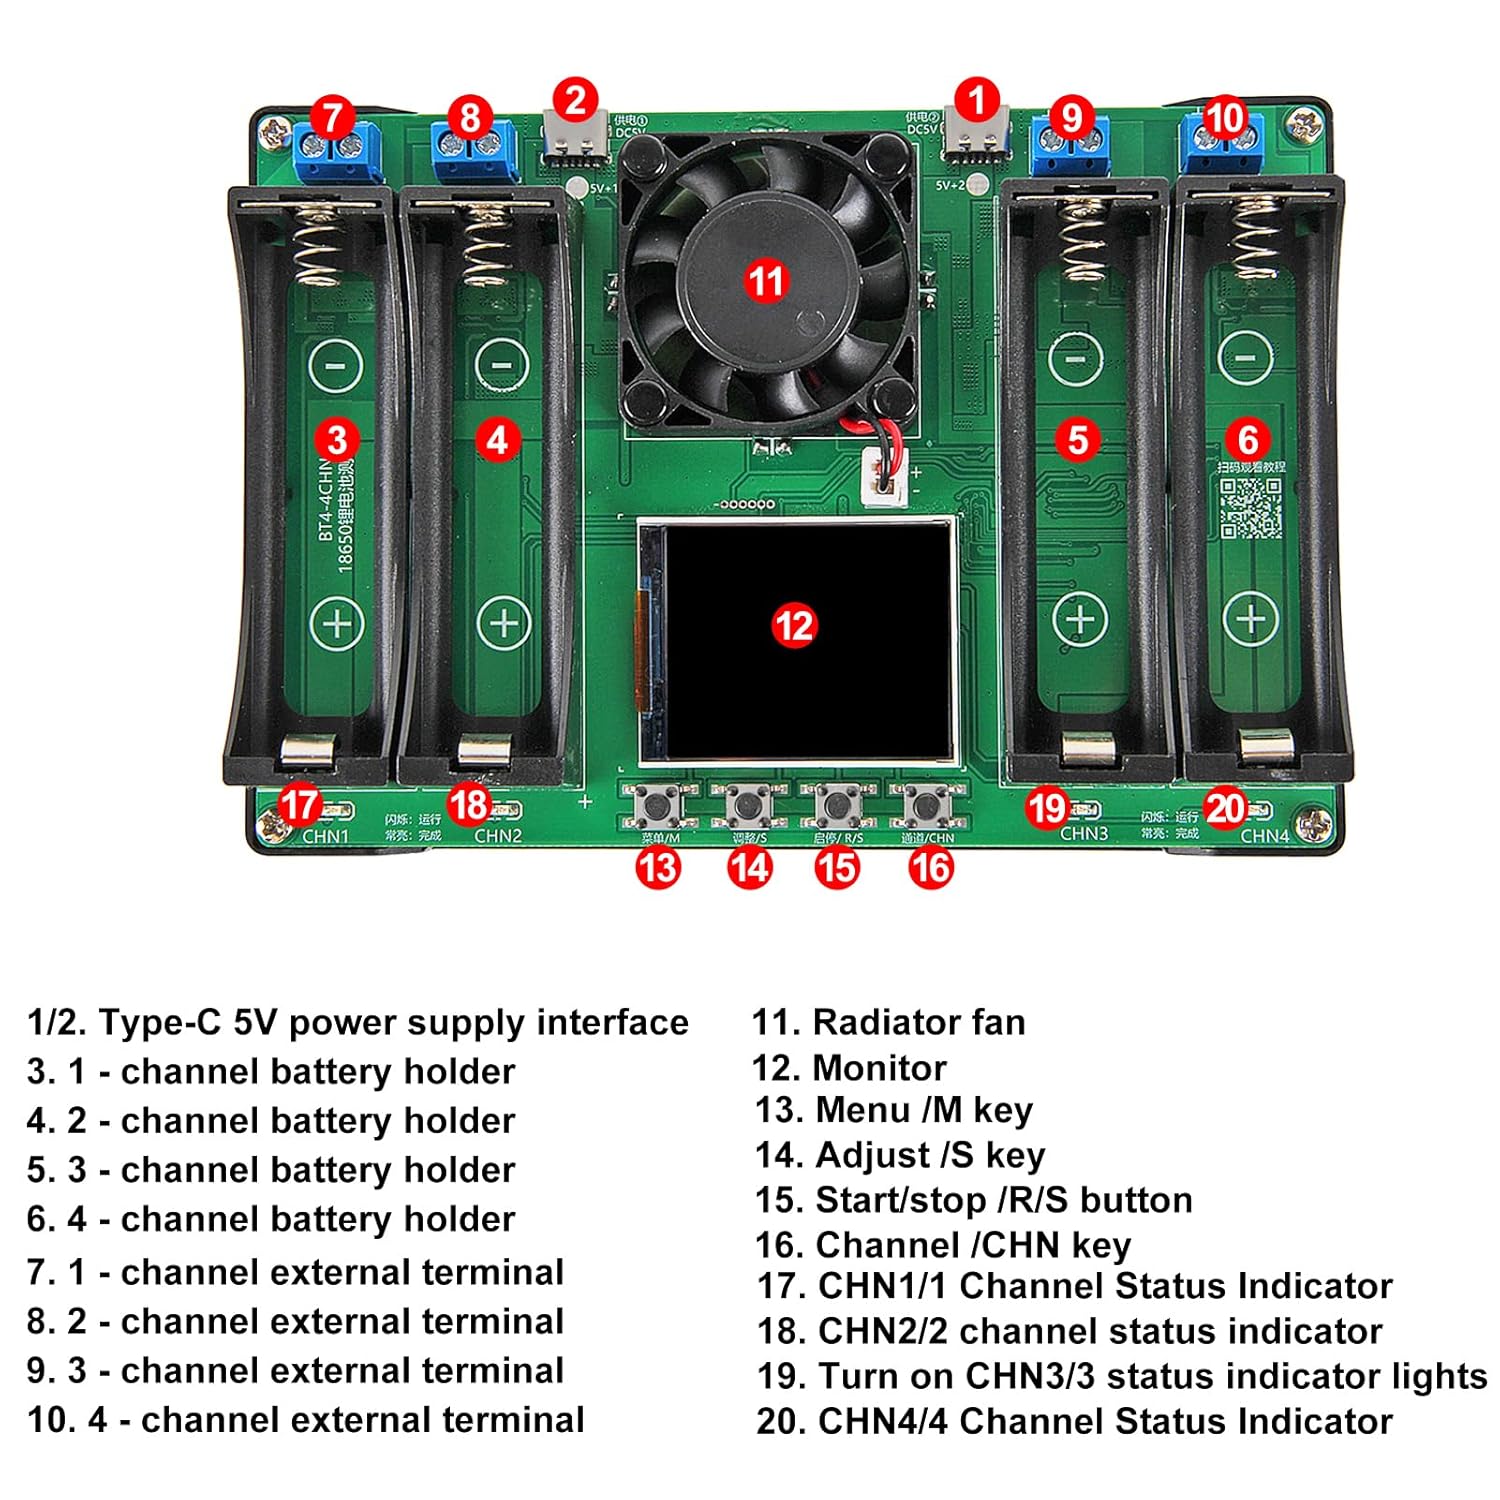
Abbildung 4: Display and control buttons. This image provides a detailed view of the tester's screen and the four control buttons located below it, used for navigation and operation.
5.1. Basic Navigation and Channel Selection
- Verwenden Sie die Channel /CHN Key (16) to switch between the four independent channels (CHN 1 to CHN 4).
- Der Menu /M Key (13) is used to enter or exit menu settings.
- Der Adjust /S Key (14) is used to change values or select options within a menu.
- Der Start/Stop /R/S Button (15) initiates or terminates a test cycle.
5.2. Automatic Charge and Discharge Cycles
The tester supports fully automatic charging and discharging cycles (1-9 cycles adjustable in auto mode).
- Select the desired channel using the Channel /CHN Key.
- Drücken Sie die Menu /M Key , um zur Modusauswahl zu gelangen.
- Verwenden Sie die Adjust /S Key to select 'AUTO' mode.
- Adjust the number of cycles (LOOP: 1-9) using the Adjust /S Key falls erforderlich.
- Drücken Sie die Start/Stop /R/S Button to begin the automatic cycle. The charging process automatically stops when the battery is full.
5.3. Messung des Innenwiderstands
The device utilizes the DC two-wire method to provide reference internal resistance values.
- For the most accurate reading, measure internal resistance when the battery is fully charged.
- The internal resistance value is displayed as 'mR' on the screen (5).
5.4. Setting Stop Discharge Voltage
You can choose from 11 stop-discharge voltage levels (2.5V to 3.5V).
- Wählen Sie den gewünschten Kanal aus.
- Enter the menu using the Menu /M Key.
- Navigate to the 'STOP' voltage Einstellung.
- Verwenden Sie die Adjust /S Key to select the desired stop discharge voltage (2.5V, 2.6V, ..., 3.5V).
- Bestätigen Sie die Einstellung und verlassen Sie das Menü.
5.5. Wichtige Hinweise zur Verwendung
- Discharge current is fixed at a maximum of approximately 1A (non-adjustable, non-constant current).
- Ladevolumentage is fixed at 4.2V.
- This tester is nicht kompatibel with LiFePO4 batteries.
6. Sicherheitshinweise
The device incorporates several safety features to ensure safe operation:
- Überhitzungsschutz: The integrated radiator fan (11) and internal sensors help prevent the device from overheating during operation.
- Automatische Abschaltung: Settings are automatically saved in case of power loss.
- Charge Cutoff: Automatic charge cutoff prevents overcharging of batteries.
- Entladestopp: Configurable stop discharge voltage prevents over-discharging.
Always ensure correct battery polarity when inserting batteries to prevent damage to the device or batteries.
7. Wartung
- Halten Sie das Gerät sauber und staubfrei. Verwenden Sie zum Reinigen ein weiches, trockenes Tuch.
- Avoid exposing the tester to moisture or extreme temperatures.
- Ensure the cooling fan (11) is not obstructed to maintain proper airflow.
- Bewahren Sie das Gerät bei Nichtgebrauch an einem trockenen, kühlen Ort auf.
8. Fehlerbehebung
- Internal Resistance Readings Appear High at Low Voltages: If internal resistance readings seem unusually high, reinstall the battery. This can often provide a more accurate measurement.
- Gerät lässt sich nicht einschalten: Ensure the Type-C power cable is securely connected to a functional 5V DC power source. Try a different cable or adapter if necessary.
- Batterie nicht erkannt: Verify that the battery is correctly inserted with the correct polarity and that it is a compatible 18650 flat-top lithium battery.
9. Spezifikationen
| Besonderheit | Spezifikation |
|---|---|
| Marke | Shutao |
| Modell | B0FSZYNBRH |
| Batteriekompatibilität | 18650 Flat-Top Lithium Batteries (Not compatible with LiFePO4) |
| Kanäle | 4 unabhängige Kanäle |
| Leistungsaufnahme | Dual Type-C, DC 5V |
| Ladevolumentage | Fest 4.2 V |
| Entladestrom | Max ~1A (Fixed, non-adjustable, non-constant current) |
| Entladung stoppen Voltage | Adjustable (2.5V to 3.5V, 11 levels) |
| Automatische Zyklen | 1-9 cycles (Adjustable in AUTO mode) |
| Innenwiderstandstest | DC Two-Wire Method |
| Im Lieferumfang enthaltene Komponenten | Battery capacity tester module |
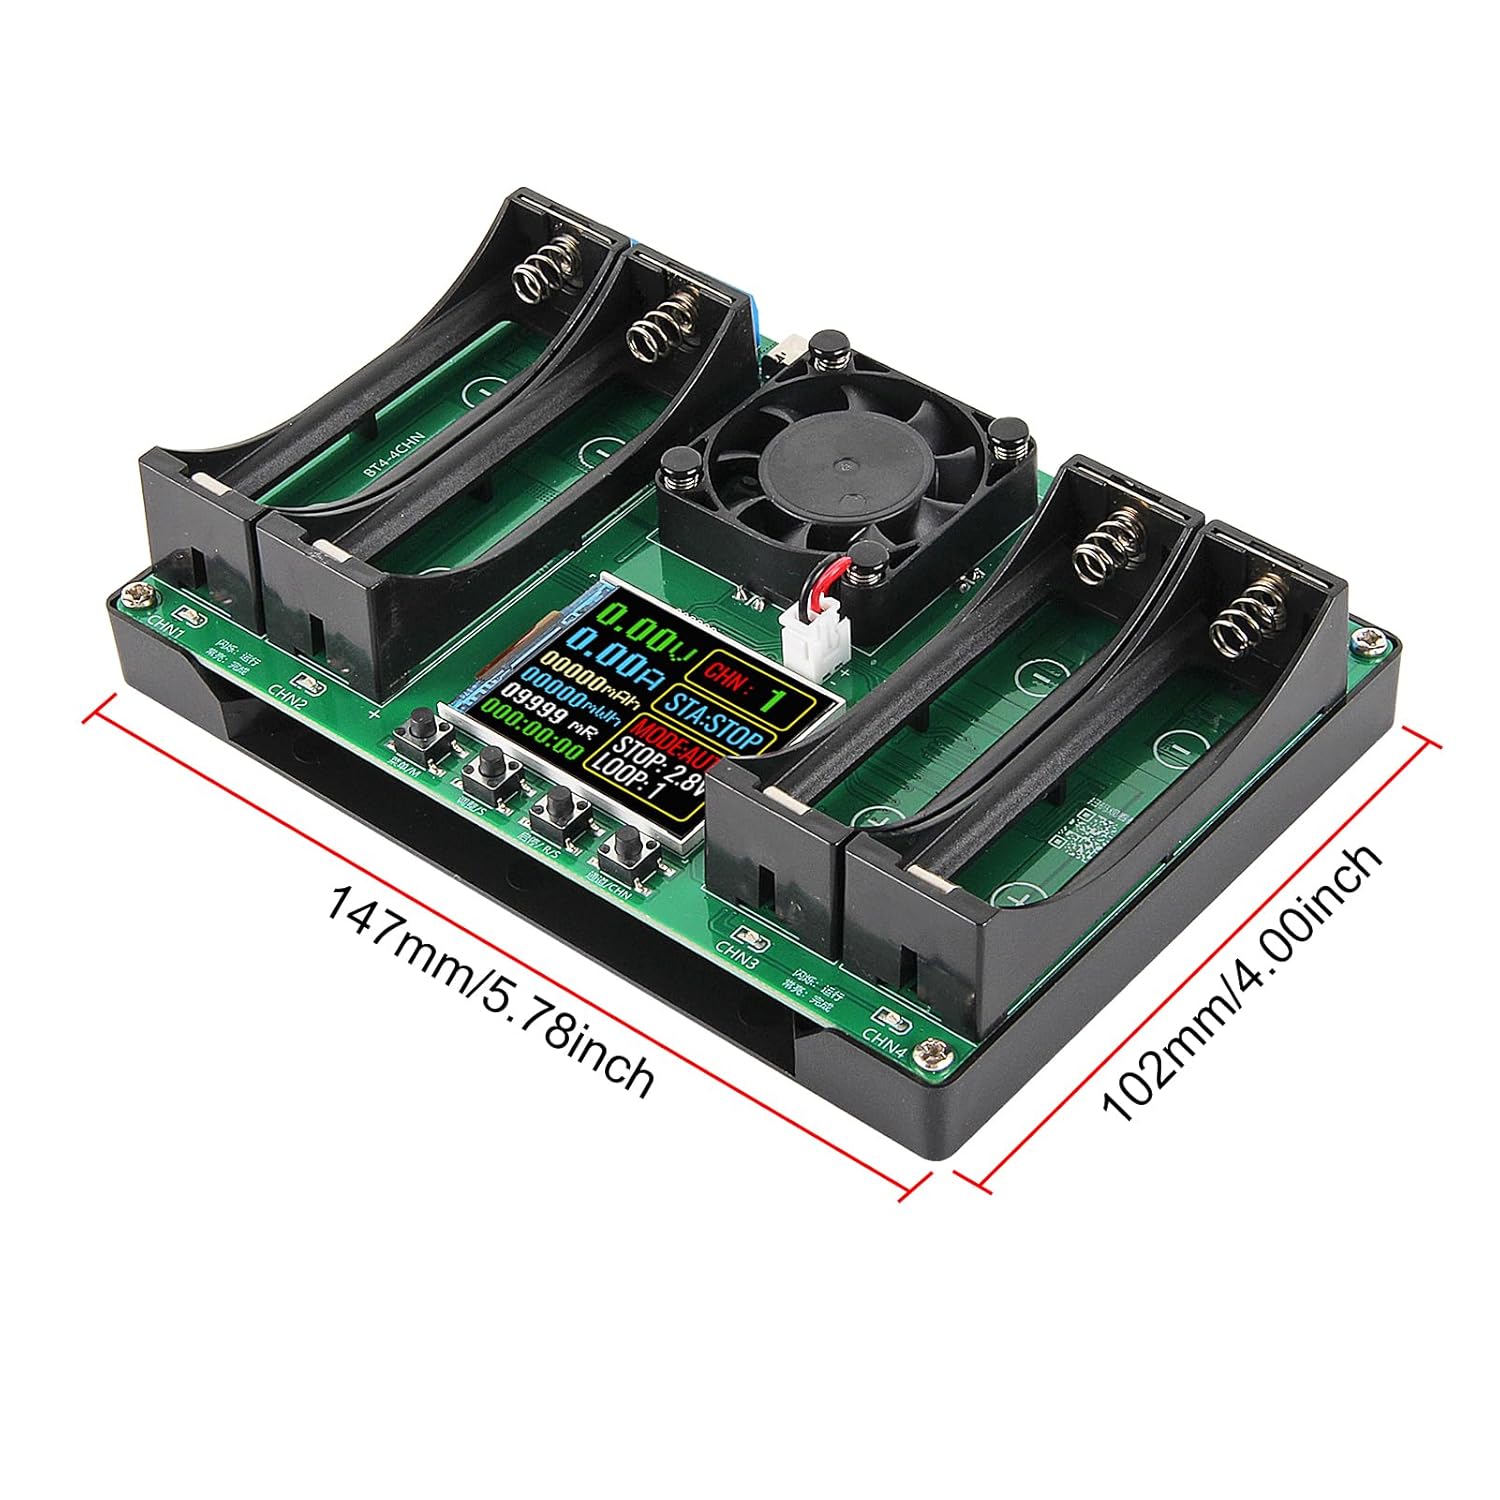
Abbildung 5: Device dimensions. This image shows the length and width of the tester, indicating measurements of 147mm (5.78 inches) and 102mm (4.00 inches).
10. Garantie und Support
For warranty information and technical support, please refer to the seller's policies or contact the manufacturer directly. Specific warranty details are not provided in this manual.