1. Einleitung
Thank you for choosing the Keenso Front Rear Dash Cam. This device is designed to provide reliable video recording of your journeys, offering enhanced safety and security for your vehicle. This manual will guide you through the installation, operation, and maintenance of your dash cam to ensure optimal performance.
2. Sicherheitshinweise
- Bedienen Sie die Dashcam nicht während der Fahrt. Nehmen Sie die Einstellungen nur vor, wenn das Fahrzeug sicher geparkt ist.
- Stellen Sie sicher, dass die Dashcam sicher befestigt ist und Ihre Sicht nicht behindert. view die Straße befahren oder die Fahrzeugsteuerung beeinträchtigen.
- Vermeiden Sie es, das Gerät extremen Temperaturen, direkter Sonneneinstrahlung über längere Zeiträume oder übermäßiger Feuchtigkeit auszusetzen.
- Use only the provided car charger and data cable to prevent damage to the device.
- Versuchen Sie nicht, die Dashcam selbst zu zerlegen oder zu reparieren. Wenden Sie sich an den Kundendienst.
- Sichern Sie regelmäßig wichtige Videos. files, um Verluste zu vermeiden.
3. Packungsinhalt
Überprüfen Sie, ob alle Artikel in Ihrem Paket vorhanden sind:
- 1 x Keenso Car DVR Unit
- 1 x Autoladegerät
- 1 x Benutzerhandbuch (dieses Dokument)
- 1 x Datenkabel (USB)
- 2 x Mounts (for installation)
- 1 x doppelseitiges Klebeband
- 1 x Magische Basis
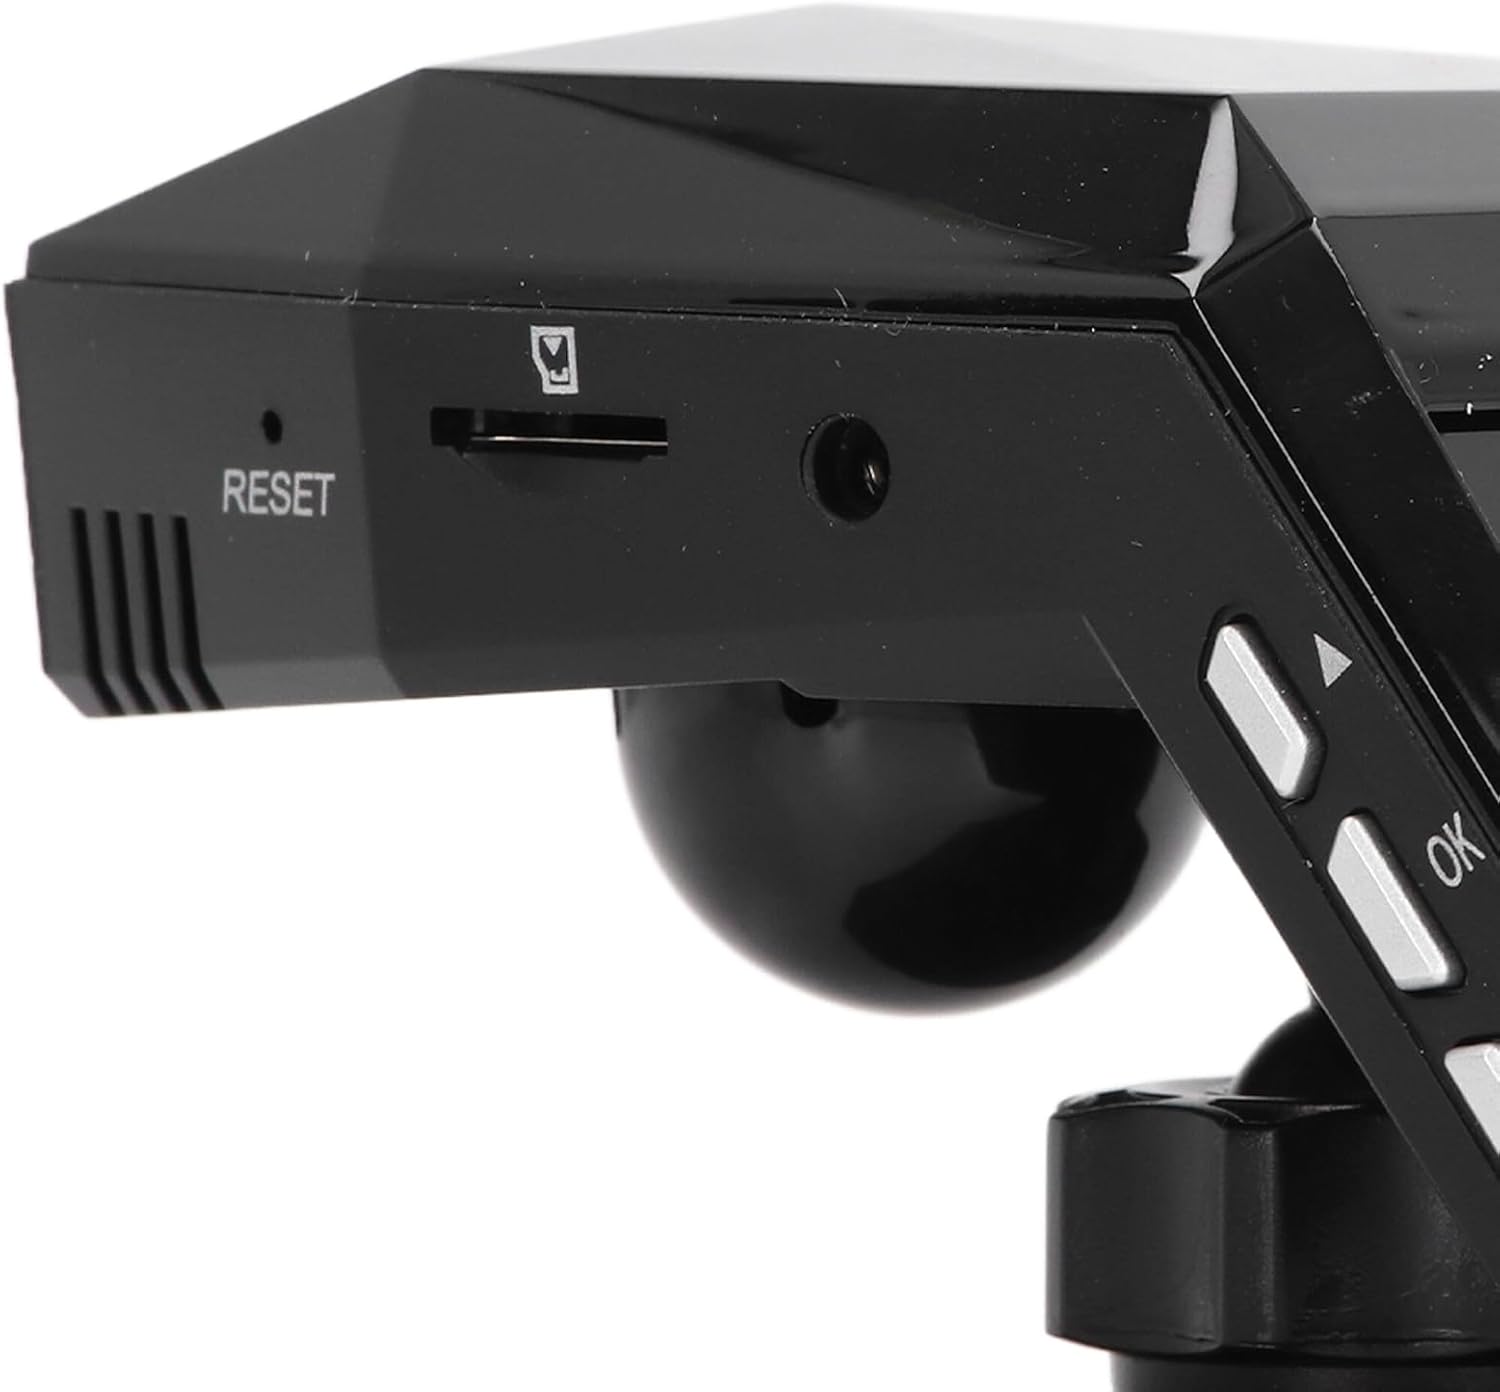
Abbildung 3.1: All components included in the Keenso Dash Cam package.
4. Produktmerkmale
The Keenso Front Rear Dash Cam offers a range of features for reliable vehicle monitoring:
- Hochwertiges Material: Constructed from durable ABS material for long-lasting performance.
- Eingebaute Lithiumbatterie: Features a 180mAh lithium-ion battery for continuous recording even when external power is interrupted.
- Benutzerfreundliche Anzeige: Equipped with a 2.0-inch screen (960x240 resolution) for easy viewing and management of recordings.
- Enhanced Parking Safety: Motion detection feature automatically records movement around your parked vehicle.
- Loop-Aufnahme: Überschreibt automatisch ältere, ungeschützte Dateien files when the memory card is full, ensuring continuous recording without manual deletion.
- Infrarot Nachtsicht: Professional configuration of 4 infrared night lights combined with WDR technology enhances night recording clarity.
- Supercapacitors: Designed to operate reliably in temperatures ranging from -10℃ to 70℃.
- Hochauflösende Kamera: 10MP image sensor with a 170-degree wide-angle lens, covering multiple lanes.

Abbildung 4.1: Vorderseite view of the dash cam, highlighting the display screen and control buttons.
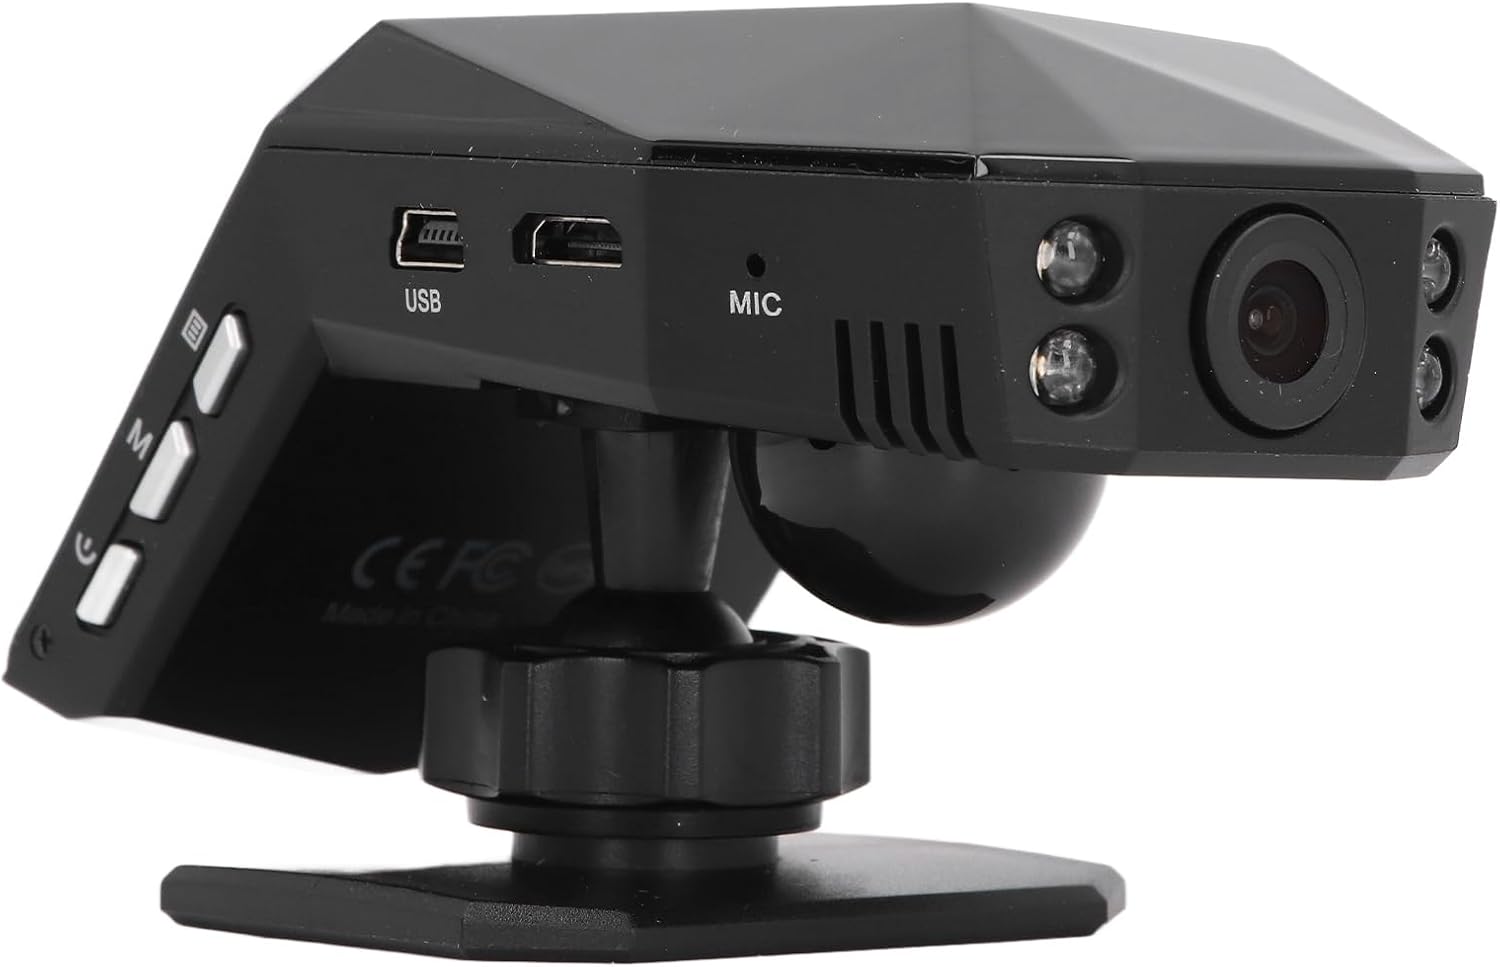
Abbildung 4.2: Hinteren view of the dash cam, showing the camera lens and four infrared night vision lights.
5. Einrichtung
5.1 Inserting the Micro Memory Card
- Stellen Sie sicher, dass die Dashcam ausgeschaltet ist.
- Locate the Micro Memory Card slot on the side of the device.
- Gently insert a Micro Memory Card (up to 32GB, not included) into the slot until it clicks into place.
- Zum Entnehmen die Karte vorsichtig hineindrücken, bis sie einrastet, dann loslassen, um sie auszuwerfen.

Abbildung 5.1: Seite view showing the Micro Memory Card slot and Reset button.
5.2 Montage der Dashcam
- Wählen Sie eine Stelle an Ihrer Windschutzscheibe, die Ihre Sicht nicht behindert. view, typischerweise hinter dem Heckview Spiegel.
- Reinigen Sie die Windschutzscheibe gründlich.
- Attach the magic base to the chosen location using the double-sided tape. Ensure it is firmly secured.
- Connect the dash cam to one of the provided mounts.
- Attach the mount with the dash cam to the magic base. Adjust the camera angle for optimal road coverage.
5.3 Stromversorgung anschließen
- Stecken Sie das Autoladegerät in die Zigarettenanzünderbuchse Ihres Fahrzeugs.
- Connect the other end of the car charger cable to the USB port on the dash cam.
- Verlegen Sie das Kabel ordentlich entlang der Windschutzscheibenleiste, um Beeinträchtigungen beim Fahren zu vermeiden.
- Die Dashcam schaltet sich normalerweise automatisch ein, wenn das Fahrzeug gestartet wird, und schaltet sich aus, wenn der Motor abgestellt wird.
6. Bedienungsanleitung
6.1 Grundlegende Bedienung
- Ein-/Ausschalten: The device powers on automatically when connected to vehicle power and off when power is cut. You can also manually power on/off using the power button.
- Aufnahme: Once powered on, the dash cam will automatically begin continuous loop recording. A recording indicator will be visible on the screen.
- Menüführung: Use the 'M' button to access the menu and the up/down arrow buttons to navigate. The 'OK' button confirms selections.
6.2 Loop-Aufnahme
The dash cam features intelligent loop recording. When the Micro Memory Card reaches its capacity, the system will automatically delete the oldest unprotected video fileUm Platz für neue Aufnahmen zu schaffen, wird eine kontinuierliche Aufnahme ohne manuelle Eingriffe gewährleistet.
6.3 24-Stunden-Parkraumüberwachung
To activate 24-hour parking monitoring, ensure the feature is enabled in the settings. When the car encounters a collision while parked, the dash cam will automatically start recording for approximately one minute. For continuous monitoring when the car is off, a voltage reducing cable (purchased separately) is required.
6.4 Bewegungserkennung
If enabled in the settings, the motion detection feature will automatically activate and begin recording if a significant object enters the camera's monitoring range while the vehicle is parked. It is recommended to turn off motion detection when driving to avoid unnecessary recordings.
6.5 ViewAufnahmen machen
Du kannst view recorded videos directly on the 2.0-inch display screen. Navigate to the playback mode in the menu to browse and play files. Alternatively, remove the Micro Memory Card and insert it into a computer to view files.
7. Wartung
- Reinigung: Reinigen Sie die Linse und den Bildschirm der Dashcam mit einem weichen, trockenen Tuch. Verwenden Sie keine Scheuermittel oder Lösungsmittel.
- Speicherkarte: Format the Micro Memory Card regularly (e.g., once a month) within the dash cam's settings to maintain optimal performance and prevent data corruption.
- Software-Updates: Überprüfen Sie die Angaben des Herstellers webBesuchen Sie die Website regelmäßig, um nach verfügbaren Firmware-Updates zu suchen. Befolgen Sie die mit dem Update bereitgestellten Anweisungen sorgfältig.
- Lagerung: Bei längerer Nichtbenutzung sollte die Dashcam an einem kühlen, trockenen Ort ohne direkte Sonneneinstrahlung aufbewahrt werden.
8. Fehlerbehebung
| Problem | Mögliche Ursache | Lösung |
|---|---|---|
| Die Dashcam lässt sich nicht einschalten. | No power supply; faulty car charger; depleted internal battery. | Check car charger connection and vehicle's power outlet. Ensure the car charger is functional. Charge the internal battery. |
| Die Aufnahme wird unerwartet abgebrochen. | Speicherkarte voll; Speicherkartenfehler; Stromausfall. | Format the memory card. Replace the memory card if errors persist. Check power connection. |
| Die Videoqualität ist schlecht. | Verschmutzte Linse; Schutzfolie auf der Linse; falsche Auflösungseinstellungen. | Clean the lens. Remove any protective film. Adjust video resolution settings to 1080P. |
| Die Dashcam friert ein oder stürzt ab. | Software error; memory card issue. | Press the RESET button (refer to Figure 5.1). Format or replace the memory card. |
| Die Parküberwachung funktioniert nicht. | Feature not enabled; no voltage reducing cable for continuous power. | Enable parking monitoring in settings. Consider installing a voltage reducing cable for 24/7 monitoring. |
9. Spezifikationen
| Besonderheit | Spezifikation |
|---|---|
| Produktmaterial | ABS |
| Videoauflösung | 1920x1080P/30fps |
| Bildauflösung | 10 Megapixel |
| Akku-Typ | Lithium-Ionen-Akku |
| Batteriekapazität | 180 mAh |
| Bildschirmgröße | 2.0 Zoll |
| Display-Bildschirmauflösung | 960 x 240 |
| Supported Micro Memory Card | Bis zu 32 GB (nicht im Lieferumfang enthalten) |
| Betriebstemperatur | -10℃ bis 70℃ |
| Produktabmessungen (T x B x H) | 5.91" x 4.72" x 3.54" |
10. Garantie und Support
This Keenso product is covered by a manufacturer warranty for 90 days from the date of purchase. This warranty covers defects in materials and workmanship under normal use.
For technical support, warranty claims, or any questions regarding your Keenso Front Rear Dash Cam, please contact your retailer or visit the official Keenso webWebsite mit Kundendienstinformationen.