Einführung
This manual provides comprehensive instructions for the setup, operation, and maintenance of your ASUS ROG Strix 27” 5K HDR Gaming Monitor (Model: XG27JCG). Please read this manual thoroughly before using the monitor to ensure proper functionality and to maximize your user experience.
The ROG Strix XG27JCG is a 27-inch 5K (5120 x 2880) Fast IPS display designed for high-performance gaming and detailed visual tasks. It features a 180Hz (overclocked) refresh rate, 0.3ms GTG response time, and a Dual Mode function allowing switching between 5K 180Hz and QHD 330Hz. Advanced features include G-SYNC Compatible technology, VESA DisplayHDR 600, and ROG Gaming A.I. Technology.
Video: Überview of the ASUS ROG Strix XG27JCG 27-inch 5K monitor, highlighting its key features and design.
Lieferumfang
Vergewissern Sie sich vor der Einrichtung, dass alle Komponenten in der Verpackung vorhanden sind.
- ASUS ROG Strix XG27JCG Monitor
- DisplayPort-Kabel
- Kurzanleitung
- ROG-Tasche
- ROG Aufkleber
- ROG tripod stand
- Garantiekarte
- Netzkabel
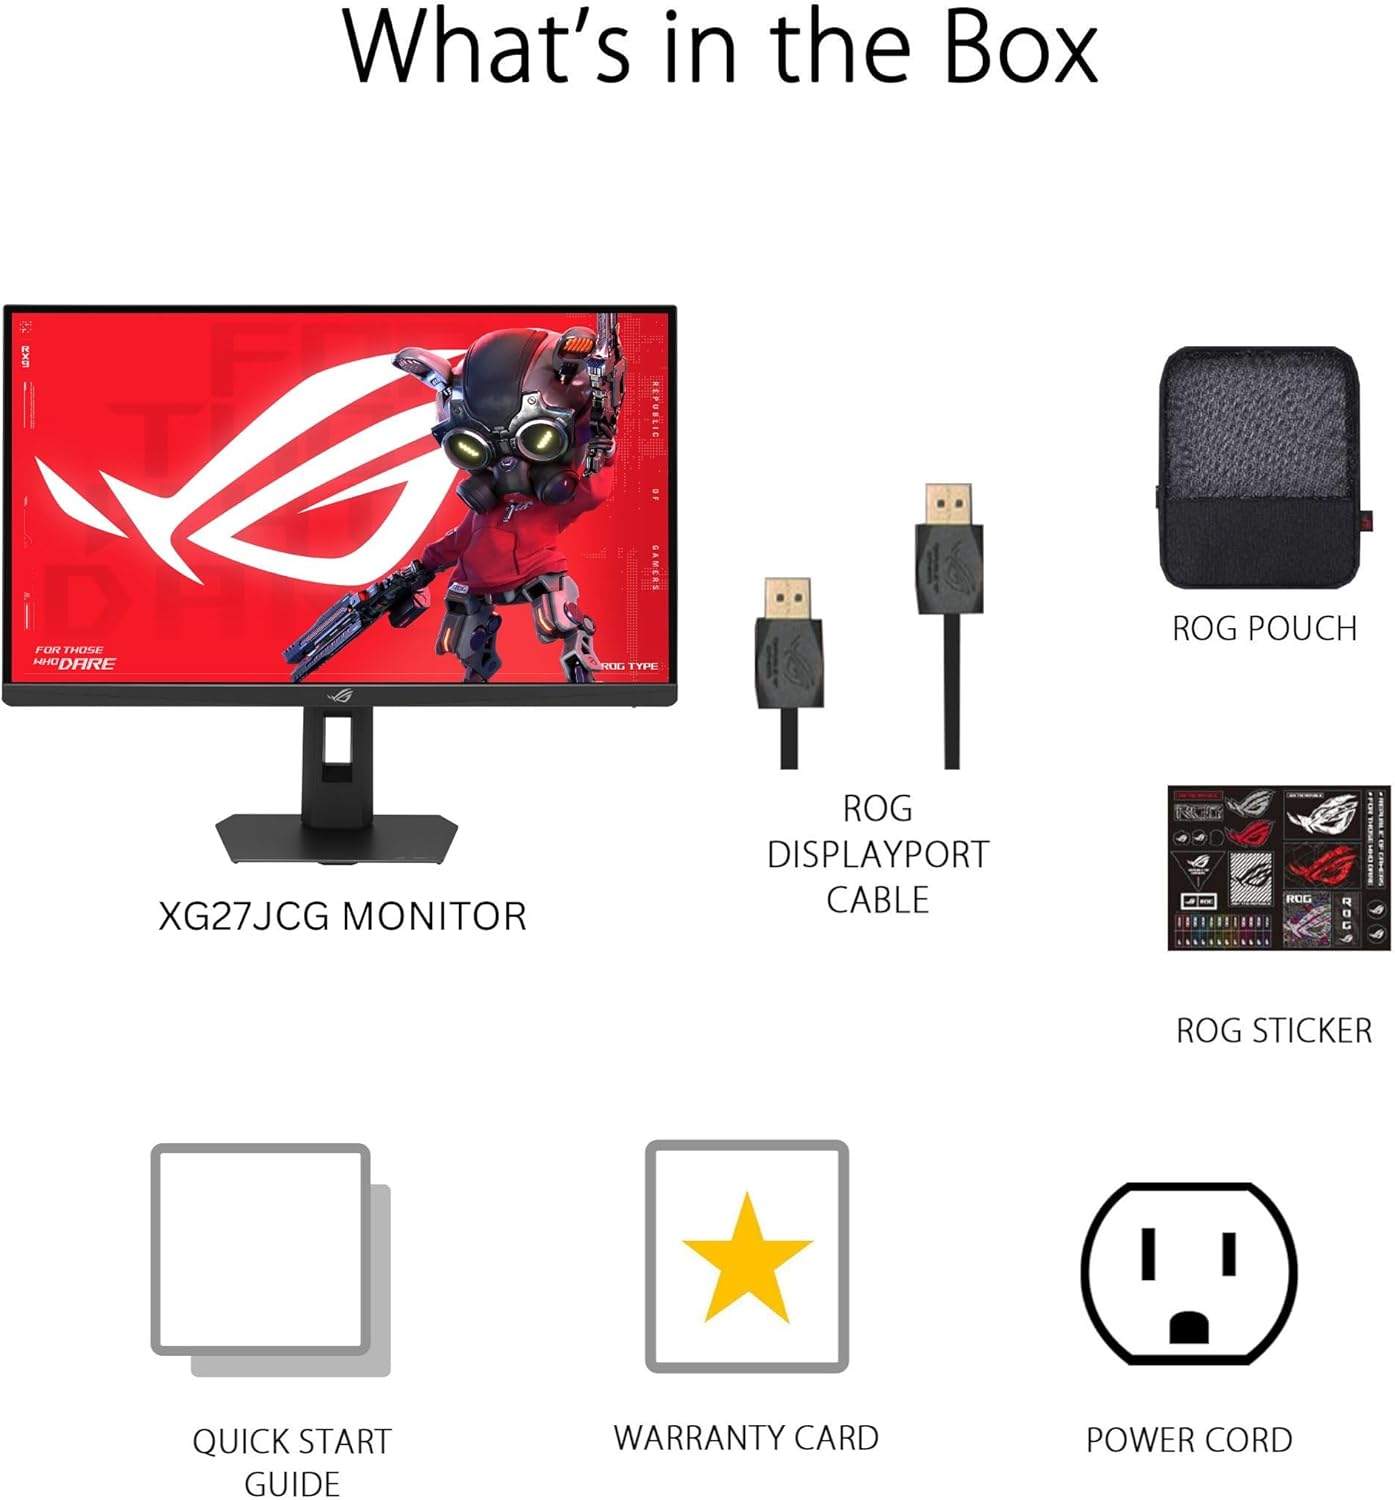
Bild: Contents of the monitor packaging, showing the monitor, DisplayPort cable, ROG pouch, ROG sticker, Quick Start Guide, Warranty Card, and Power Cord.
Installationsanweisungen
1. Zusammenbau des Ständers
Carefully remove the monitor from its packaging. Attach the stand base to the stand neck, securing it with the provided screw. Then, attach the assembled stand to the back of the monitor until it clicks into place. Ensure all connections are firm.
2. Anschließen an einen Computer
The monitor supports DisplayPort 1.4 (DSC), HDMI 2.1, and USB-C connectivity. Choose the appropriate cable for your system.
- DisplayPort: Verbinden Sie ein Ende des DisplayPort-Kabels mit dem DisplayPort-Eingang des Monitors und das andere Ende mit dem DisplayPort-Ausgang Ihres Computers.
- HDMI: Connect one end of an HDMI 2.1 cable to the monitor's HDMI input and the other end to your computer's HDMI output.
- USB-C: Connect a USB-C cable to the monitor's USB-C port and to a compatible USB-C port on your computer. This connection also supports 15W power delivery.

Bild: Hinteren view of the monitor's connectivity ports, including HDMI 2.1, DisplayPort 1.4, USB Type-C, and a Headphone Jack.
3. Stromanschluss
Schließen Sie das Netzkabel an den Stromeingang des Monitors an und stecken Sie das andere Ende in eine Steckdose.
4. Erstes Einschalten
Press the power button located on the monitor to turn it on. The monitor will automatically detect the input source. If no image appears, ensure all cables are securely connected and the computer is powered on.
Bedienungsanleitung
Bildschirmmenü (OSD)
Use the joystick and buttons on the back of the monitor to navigate the OSD menu. The OSD allows you to adjust various settings such as brightness, contrast, color, input source, and gaming features.
Display Modes and Refresh Rate
The monitor features a Dual Mode function, allowing you to switch between two primary display configurations:
- 5K (5120 x 2880) at 180Hz (OC): Provides ultra-sharp, immersive visuals suitable for cinematic content and detailed work.
- QHD (2560 x 1440) at 330Hz: Offers extremely high frame rates and responsive gaming action, ideal for competitive esports.
Switching between modes can be done via the OSD menu or a dedicated hotkey, if configured.

Bild: Visual representation of the monitor's Dual Mode, allowing users to switch between 5K 180Hz and QHD 330Hz for different gaming experiences.
ROG Gaming A.I. Technology
This monitor includes AI-powered features designed to enhance your gaming experience:
- Dynamic Shadow Boost: Automatically brightens dark areas of the game world without overexposing bright areas, improving visibility of hidden enemies or details.
- Dynamic Crosshair: Provides an on-screen crosshair that can adapt to the game environment, ensuring it remains visible against various backgrounds.
- AI Visual: Optimizes visual settings based on the game content for improved clarity and detail.

Bild: Examples of Dynamic Crosshair and Dynamic Shadow Boost in action, showing how these features enhance visibility in games.
DisplayWidget Center
The DisplayWidget Center software provides seamless control over monitor settings directly from your Windows or macOS operating system. This utility allows for easy adjustment of GameVisual modes, MultiScreen configurations, and system settings without using the OSD buttons.

Bild: Screenshot of the DisplayWidget Center software, demonstrating its user interface for adjusting monitor settings.
Ergonomics and Adjustments
The monitor stand offers multiple adjustment options to optimize your viewKomfort:
- Neigung: +20° bis -5°
- Schwenken: +40° bis -40°
- Drehpunkt: +90° to -90° (for portrait mode)
- Höhenverstellung: 0 bis 110 mm
Adjust the monitor to an ergonomic position that reduces strain on your neck and eyes. Ensure the top of the screen is at or slightly below eye level.

Bild: Diagram illustrating the monitor's ergonomic adjustments, including tilt, swivel, pivot, and height.
Wartung
Reinigen des Monitors
- Vor der Reinigung den Monitor immer ausschalten und das Netzkabel abziehen.
- Mit einem weichen, fusselfreien Tuch leichtampMit Wasser oder einem milden, nicht scheuernden Bildschirmreiniger abspülen.
- Sprühen Sie den Reiniger nicht direkt auf den Bildschirm. Tragen Sie ihn zuerst auf ein Tuch auf.
- Vermeiden Sie die Verwendung von Reinigungsmitteln auf Alkoholbasis, Ammoniak oder Scheuermitteln, da diese die Bildschirmoberfläche beschädigen können.
Allgemeine Pflege
- Schützen Sie den Monitor vor direkter Sonneneinstrahlung, übermäßiger Hitze und Feuchtigkeit.
- Sorgen Sie für ausreichende Belüftung rund um den Monitor, um eine Überhitzung zu vermeiden.
- Vermeiden Sie es, schwere Gegenstände auf den Monitor oder dessen Kabel zu stellen.
Fehlerbehebung
| Problem | Mögliche Lösung |
|---|---|
| Kein Bild auf dem Bildschirm |
|
| Das Bild ist unscharf oder verzerrt. |
|
| Screen flickers or shows artifacts |
|
| No sound from headphones (if connected to monitor) |
|
Technische Daten
| Besonderheit | Detail |
|---|---|
| Marke | ASUS |
| Modellnummer | XG27JCG |
| Bildschirmgröße | 27 Zoll |
| Auflösung | 5120 x 2880 (5K UHD) |
| Panel-Typ | Schnelles IPS |
| Bildwiederholrate | 180 Hz (OC) / QHD 330Hz (Dual Mode) |
| Ansprechzeit | 0.3 ms (GTG) |
| Seitenverhältnis | 16:9 |
| Kontrastverhältnis | 600:1 |
| Viewing-Winkel | 178 Grad (H/V) |
| HDR-Unterstützung | VESA DisplayHDR 600 |
| Farbumfang | 97 % DCI-P3 |
| Adaptive Synchronisierung | AMD FreeSync Premium Pro, G-SYNC Compatible |
| Konnektivität | 1x DisplayPort 1.4 (DSC), 2x HDMI 2.1, 1x USB-C (with 15W PD), Headphone Jack |
| Energieaufnahme | 40 Watt |
| Artikelabmessungen (T x B x H) | 8.59"T x 24.2"B x 20.1"H |
| Artikelgewicht | 6.9 Pfund |
| Ergonomische Anpassungen | Tilt (+20° ~ -5°), Swivel (+40° ~ -40°), Pivot (+90° ~ -90°), Height (0~110mm) |
Garantie und Support
This ASUS ROG Strix XG27JCG monitor comes with a 3 Jahr Garantie. For warranty claims, technical support, or service inquiries, please contact ASUS customer support. Refer to the included Warranty Card for detailed terms and conditions.
You can find additional support resources, drivers, and FAQs on the official ASUS support webWebsite: www.asus.com/support/