
Einführung
Thank you for choosing the RAINPOINT 4-Zone Programmable Watering Timer. This device is designed to automate your garden and lawn irrigation, providing flexible and efficient watering schedules for up to four independent zones. Please read this manual carefully to ensure proper installation, operation, and maintenance of your watering timer.
Produkteigenschaften
- 4 Individual Programmable Zones: Customize watering schedules (start time, duration, frequency) for each zone independently.
- Multiple Watering Cycle Modes: Set watering duration from 1 minute to 3 hours 59 minutes, and frequency for every 8 hours, every 12 hours, or every 1 to 7 days.
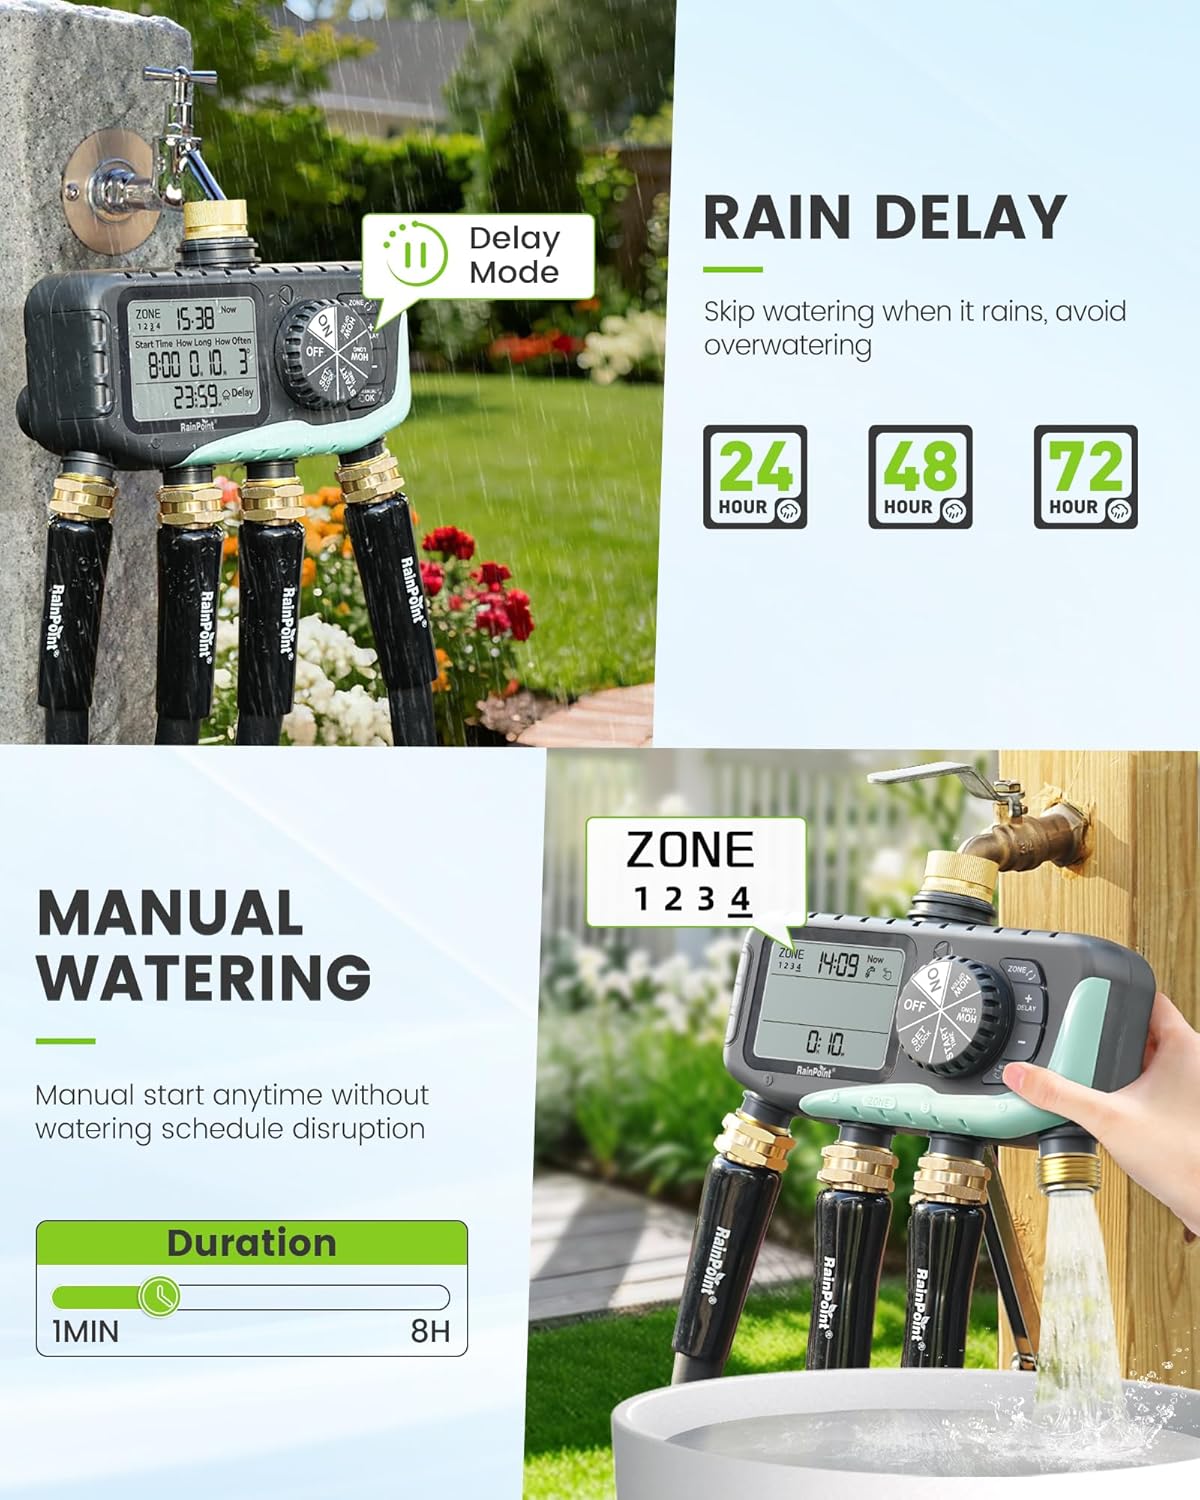
- Regenverzögerungsfunktion: Skip watering for 24, 48, or 72 hours to conserve water during rainy periods.
- Manueller Bewässerungsmodus: Initiate watering instantly for 1 minute to 8 hours without affecting programmed schedules.
- Einfache Programmierung: Features a large 3.4-inch LCD screen, a large dial, and clear buttons for intuitive setup.
- Langlebige Konstruktion: Equipped with solid brass inlet and outlet, leak-proof sealing rings, and an IP65 waterproof rating for outdoor use.
- Upgraded Coil Valve: Provides stronger water pressure and wider coverage compared to standard valves.
- Unterspannungsschutz: Valves automatically close when battery power is low to prevent water waste.


Packungsinhalt
- RAINPOINT 4-Zone Programmable Watering Timer
- Bedienungsanleitung
- Standard 3/4-inch faucet adapter (if applicable)
Setup und Installation
- Einlegen der Batterie: Open the battery compartment on the back of the timer. Insert two (2) AA alkaline batteries (not included), ensuring correct polarity. Close the compartment securely.
- Anschluss an den Wasserhahn: Screw the timer onto a standard 3/4-inch outdoor faucet. Ensure the connection is tight to prevent leaks. It is recommended to use a short hose between the faucet and the timer to reduce stress on the faucet connection and allow for easier positioning.
- Schläuche anschließen: Attach your garden hoses to the four independent outlets (Zone 1, Zone 2, Zone 3, Zone 4) at the bottom of the timer. Ensure each connection is secure.
- Erstes Einschalten: The LCD screen will light up, and the timer will be ready for programming.


Bedienungsanleitung
1. Aktuelle Uhrzeit einstellen
Rotate the dial to the 'SET CLOCK' position. Use the '+' and '-' buttons to adjust the current time. Press 'OK' to confirm and move to the next setting (e.g., AM/PM or 24-hour format). Rotate the dial away from 'SET CLOCK' to save.
2. Programming Watering Schedules (for each zone)
The timer allows individual programming for each of its four zones.
- Zone auswählen: Rotate the dial to 'PROGRAM'. Use the 'ZONE' button to select the desired zone (1, 2, 3, or 4) you wish to program.
- Startzeit einstellen: Use the '+' and '-' buttons to set the desired watering start time for the selected zone. Press 'OK' to confirm.
- Bewässerungsdauer einstellen: Use the '+' and '-' buttons to set how long the watering will last (from 1 minute to 3 hours 59 minutes). Press 'OK' to confirm.
- Frequenz einstellen: Use the '+' and '-' buttons to set how often the watering will occur (e.g., every 8 hours, every 12 hours, or every 1 to 7 days). Press 'OK' to confirm.
- Repeat steps a-d for each zone you wish to program. Rotate the dial to 'ON' to activate the programmed schedules.

3. Regenverzögerungsfunktion
Die Bewässerung aufgrund von Regen vorübergehend unterbrechen:
- Rotate the dial to 'ON'.
- Drücken Sie die Taste „DELAY“.
- Use the '+' or '-' buttons to select the desired delay duration (24, 48, or 72 hours).
- Press 'OK' to confirm. The timer will resume its programmed schedule after the delay period.
4. Manuelle Bewässerung
Sofort bewässern, ohne Ihren programmierten Zeitplan zu beeinträchtigen:
- Rotate the dial to 'ON'.
- Press the 'MANUAL/OK' button.
- Use the '+' or '-' buttons to set the desired manual watering duration (from 1 minute to 8 hours).
- Press 'OK' to start manual watering. The timer will automatically return to its programmed schedule after the manual watering duration ends.
5. Low Power Protection
When the battery level is critically low, the timer's valves will automatically close to prevent continuous water flow and waste. Replace batteries promptly when the low battery indicator appears on the screen.

Wartung
- Reinigung: Wischen Sie die Außenseite des Timers regelmäßig mit einem weichen, fusselfreien Tuch ab.amp Tuch. Keine Scheuer- oder Lösungsmittel verwenden.
- Batteriewechsel: Replace batteries annually or when the low battery indicator appears. Always use fresh AA alkaline batteries.
- Überwinterung: Before the first frost, disconnect the timer from the faucet and hoses. Drain any remaining water and store the unit indoors in a dry, protected area to prevent freezing damage.
- Unterlegscheiben prüfen: Regularly inspect the rubber washers in the inlet and outlet connections for wear or damage. Replace if necessary to prevent leaks.
Fehlerbehebung
- No Water Flow or Partial Flow:
- Prüfen Sie den Batteriestand und tauschen Sie die Batterie gegebenenfalls aus.
- Stellen Sie sicher, dass der Wasserhahn vollständig geöffnet ist.
- Verify that the watering schedule is correctly programmed and activated ('ON' mode).
- Inspect hose connections for kinks or blockages.
- Check the timer's inlet filter for debris.
- Leaks aus Connections:
- Ensure all connections (faucet, hoses) are tightened securely.
- Check rubber washers for proper seating and damage; replace if worn.
- Display Fading or Not Working:
- Ersetzen Sie die Batterien durch neue.
- Avoid prolonged exposure to direct sunlight, which can degrade LCD screens over time. Consider shielding the display if installed in a very sunny area.
- Water Hammer (Pipes Clanging):
- This can occur when valves close rapidly. Consider installing a water hammer arrester between the faucet and the timer.
- Timer reagiert nicht:
- Remove batteries for a few minutes, then reinsert them to reset the device. Reprogram as needed.
Technische Daten
| Modellnummer | iob447 |
| Marke | REGENPUNKT |
| ASIN | B0G32Z1HMB |
| Material | Kunststoff, Messing |
| Farbe | Blau |
| Produktabmessungen (L x B x H) | 2.54 x 2.54 x 2.54 cm (approx. 1 x 1 x 1 inch); 317.51 grams |
| Bildschirmgröße | 3.4 Zoll |
| Anzahl der Einstellungen | 7 (referring to programming options) |
| Wasserdichtigkeit | IP65 |
| Stromquelle | 2 x AA-Alkalibatterien (nicht im Lieferumfang enthalten) |
Garantie und Support
RAINPOINT products are designed for reliability and performance. For warranty information, technical support, or any questions regarding your 4-Zone Programmable Watering Timer, please contact RAINPOINT customer service through the official website or your retailer's support channels. Please have your model number (iob447) and purchase information ready when contacting support.