
1. Einleitung
The Daitsu Velar ceiling fan combines design, technology, and sustainability to provide comfort throughout the year. Its natural FSC-certified wooden blades, sourced from responsibly managed forests, add warmth to any room while committing to the protection of the planet's forest resources.
This manual provides detailed instructions for the safe installation, operation, and maintenance of your Daitsu Velar ceiling fan. Please read it thoroughly before installation and keep it for future reference.
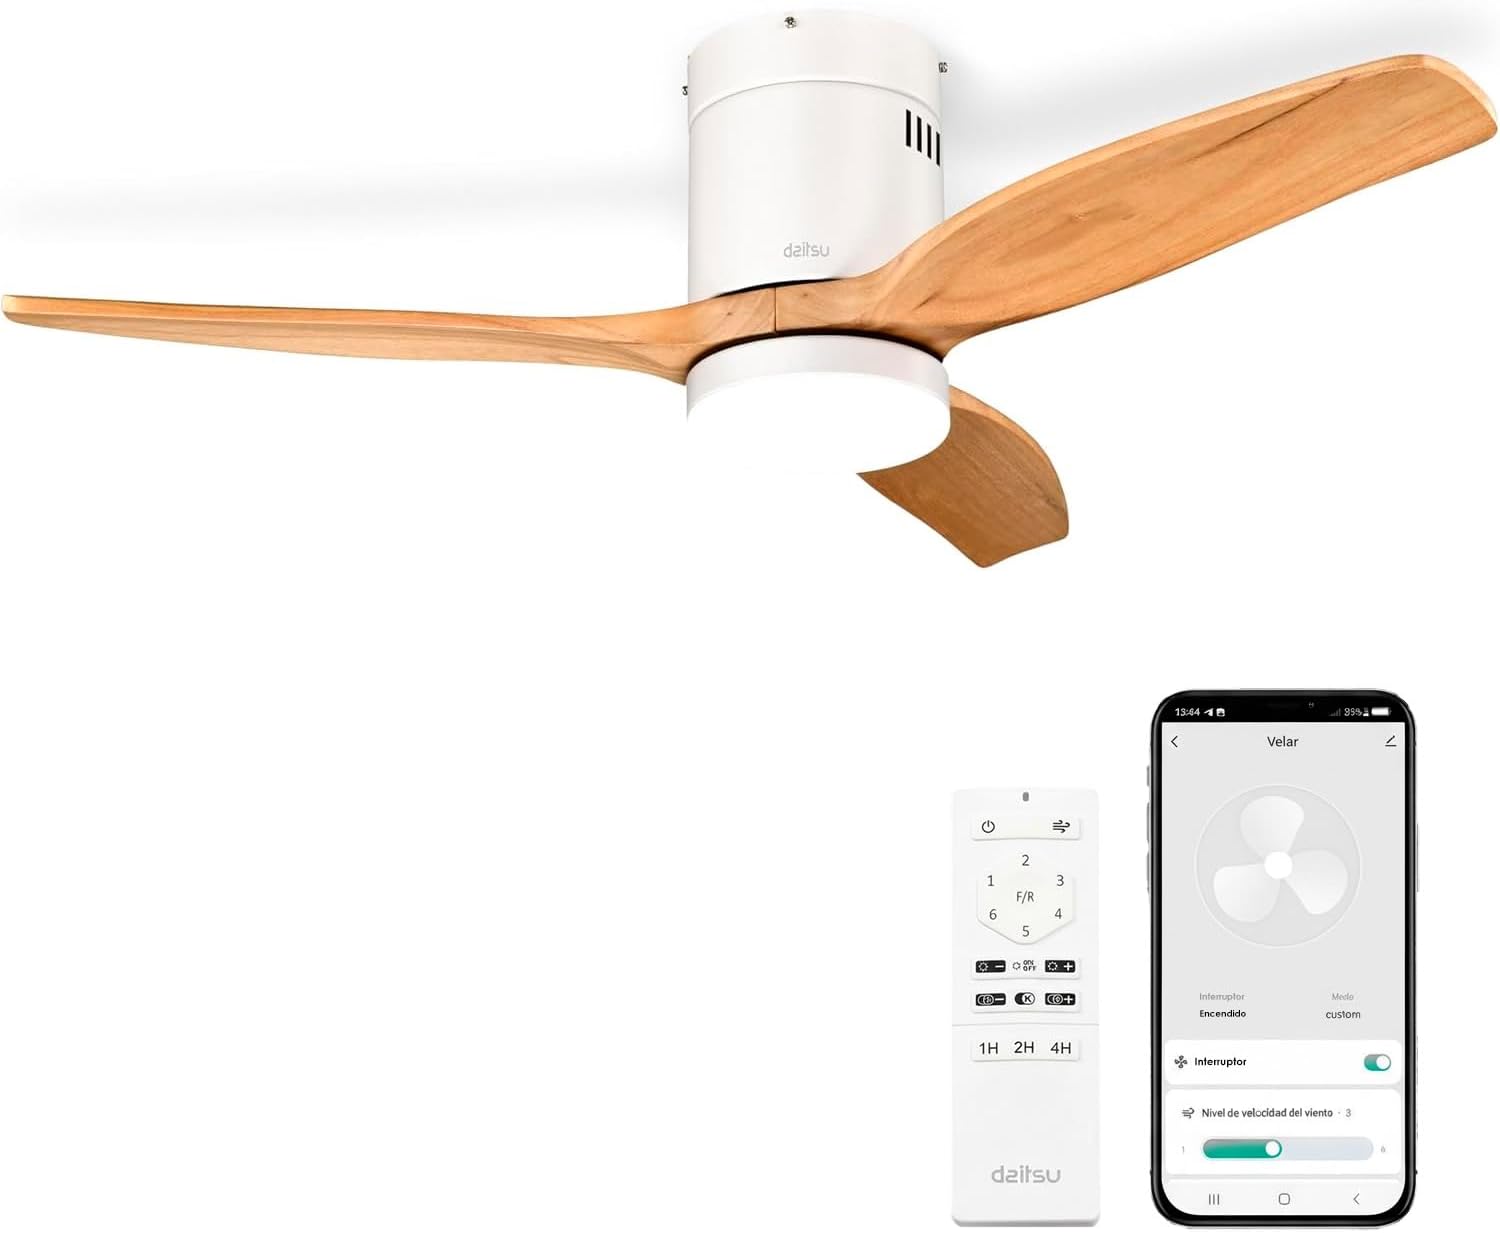
Image 1.1: Daitsu Velar Ceiling Fan in a living room setting.
2. Sicherheitshinweise
Wichtige Sicherheitshinweise:
- Lesen Sie alle Anweisungen vor der Installation und Verwendung sorgfältig durch.
- Vor der Installation oder Wartung muss sichergestellt werden, dass die Stromversorgung am Hauptleistungsschalter unterbrochen ist.
- Die Installation muss von einem qualifizierten Elektriker gemäß den örtlichen Elektrovorschriften durchgeführt werden.
- Die Montagekonstruktion muss in der Lage sein, das Gewicht des Ventilators (ca. 4.6 kg) zu tragen.
- Ensure the fan blades are at least 2.3 meters (7.5 feet) from the floor and have at least 0.5 meters (1.6 feet) clearance from walls or other obstructions.
- Führen Sie keine Gegenstände in den Bereich der rotierenden Klingen ein.
- Versuchen Sie nicht, den Lüfter selbst zu reparieren oder zu verändern. Wenden Sie sich an qualifiziertes Servicepersonal.
- Dieses Gerät ist nur für den Gebrauch in Innenräumen bestimmt.
3. Packungsinhalt
Vor Beginn der Installation prüfen Sie bitte, ob alle Komponenten vorhanden und unbeschädigt sind:
- Lüfterflügel (3x)
- Motor and Ceiling Mount Bracket
- LED Light Kit (plate + diffuser)
- Wireless Remote Control and Wall Mount Holder
- Mounting Screws (for ceiling and blades)
- Bedienungsanleitung (dieses Dokument)

Abbildung 3.1: Beispielample of product packaging, indicating included components.
4. Einrichtung und Installation
Erforderliche Werkzeuge: Screwdriver, wire strippers, electrical tape, ladder, drill (if necessary).
- Stromabschaltung: Turn off power at the main circuit breaker to prevent electrical shock.
- Installation der Montagehalterung: Securely attach the ceiling mount bracket to a ceiling joist or a suitable electrical junction box capable of supporting the fan's weight. Use the provided mounting screws.
- Verdrahtung: Connect the fan's electrical wires to the household wiring according to the wiring diagram in the full installation guide (not provided here, but typically included with the product). Ensure all connections are secure and insulated.
- Motormontage: Heben Sie die Lüftermotoreinheit vorsichtig an und hängen Sie sie in die Montagehalterung ein.
- Klingenbefestigung: Attach the three wooden blades to the motor housing using the provided screws. Ensure they are securely fastened.
- LED Light Kit Installation: Connect the LED light kit wiring and attach the light plate and diffuser to the bottom of the fan motor housing.
- Baldachin-Installation: Schieben Sie die Abdeckung bis zur Decke hoch und befestigen Sie sie so, dass die Verkabelung und die Montagehalterung abgedeckt sind.
- Wiederherstellung der Stromversorgung: Die Stromversorgung am Hauptleistungsschalter wiederherstellen.
- Einrichten der Fernbedienung: Insert batteries into the remote control. The fan should be ready for operation.
- Wi-Fi App Setup (Daitsu Connect):
- Download the "Daitsu Connect" app from your smartphone's app store.
- Follow the in-app instructions to pair your fan with your mobile device. This typically involves putting the fan into pairing mode (refer to the full app manual for specific steps).
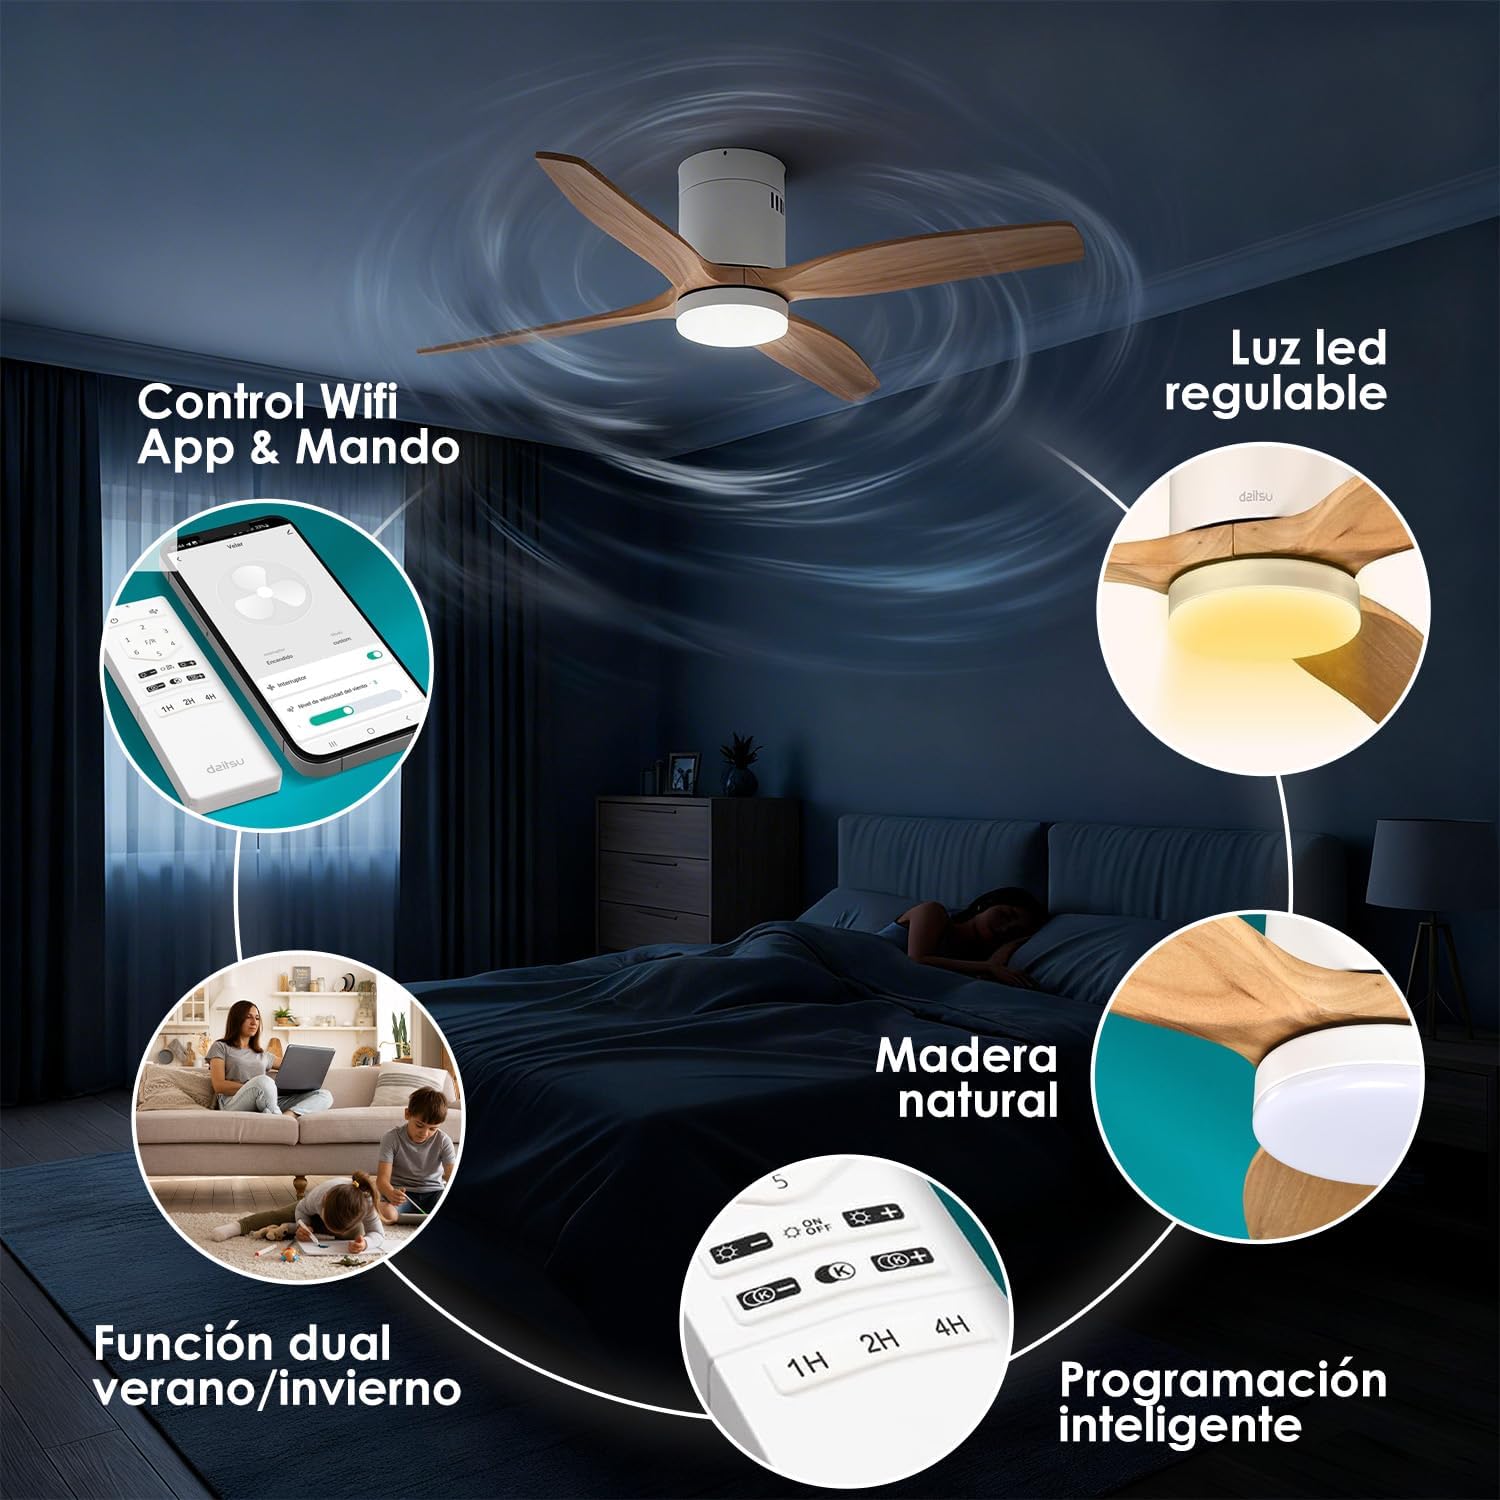
Bild 4.1: Überview of fan features, including Wi-Fi App & Remote Control.
5. Bedienungsanleitung
Your Daitsu Velar ceiling fan can be controlled using the included wireless remote control or the Daitsu Connect mobile application.
5.1. Fernbedienungsfunktionen

Image 5.1: Remote control and Daitsu Connect App interface.
- Ein-/Ausschalten: Drücken Sie die Leistung Taste, um den Lüfter und das Licht ein- oder auszuschalten.
- Lüftergeschwindigkeit: Use the speed buttons (1-6) to select one of the six available fan speeds. There is also a variable mode that alternates between low levels for a more natural air sensation.
- Summer/Winter Function (F/R): Drücken Sie die Vorne/Hinten button to switch between summer and winter modes.
- Sommermodus: Die Flügel drehen sich gegen den Uhrzeigersinn und drücken die Luft nach unten, um eine kühlende Brise zu erzeugen.
- Wintermodus: Blades rotate clockwise, drawing cool air up and pushing warm air down from the ceiling, optimizing heating efficiency.
- Lichtsteuerung:
- Licht ein/aus: Drücken Sie den Lichtknopf, um das LED-Licht ein- oder auszuschalten.
- Helligkeitsanpassung: Verwenden Sie die + Und - buttons to adjust the light intensity (9 levels).
- Anpassung der Farbtemperatur: Verwenden Sie die K+ Und K- buttons to change the color temperature from cool to warm (9 levels).
- Timer-Funktion: Set the fan to automatically turn off after 1, 2, or 4 hours using the respective timer buttons (1H, 2H, 4H).

Image 5.2: Summer/Winter function diagram for optimal air circulation.

Image 5.3: LED light adjustability with 9 intensity and color temperature levels.
5.2. Daitsu Connect App Control
The Daitsu Connect app provides full control over all fan functions, including speed, light, mode, and timer, directly from your mobile device. It also allows for personalized hourly programming to automate operation based on your daily or weekly routines.
- Volle Funktionalität: Access all remote control features and more.
- Advanced Scheduling: Program specific on/off times and settings for different days.
- Speicherfunktion: The fan automatically remembers its last state (speed, light, color temperature, and mode) if power is interrupted or turned off from the switch. Upon power restoration, it will resume the last settings.

Image 5.4: Key features including 6 speeds, programming, light levels, and dual control.
6. Wartung
Regelmäßige Wartung gewährleistet optimale Leistung und verlängert die Lebensdauer Ihres Ventilators.
- Reinigung:
- Trennen Sie vor der Reinigung immer die Stromversorgung.
- Wipe the fan housing and blades with a soft, damp Tuch. Keine Scheuer- oder Lösungsmittel verwenden.
- Dust the blades regularly to maintain balance and efficiency.
- Klingeninspektion: Überprüfen Sie regelmäßig, ob alle Schrauben der Klinge fest angezogen sind. Lose Schrauben können Wackeln und Geräusche verursachen.
- Lichtquelle: The integrated LED light is designed for long life. If it requires replacement, contact customer support.
7. Fehlerbehebung
Sollten Sie Probleme mit Ihrem Lüfter haben, beachten Sie bitte die folgenden häufig auftretenden Probleme und Lösungen:
| Problem | Mögliche Ursache | Lösung |
|---|---|---|
| Lüfter startet nicht. | Kein Strom, lose Verkabelung, Batterie der Fernbedienung leer. | Check circuit breaker. Ensure wiring is secure. Replace remote control batteries. |
| Lüfter wackelt. | Lose Klingenschrauben, unausgewogene Klingen, unsachgemäße Montage. | Tighten all blade screws. Ensure blades are balanced (a balancing kit may be required). Recheck mounting bracket security. |
| Licht funktioniert nicht. | Loose wiring, LED module failure. | Check light kit wiring connections. If issue persists, contact customer support for LED module replacement. |
| Fernbedienung reagiert nicht. | Dead batteries, interference, remote not paired. | Replace batteries. Ensure no obstructions. Re-pair remote if necessary (refer to full manual). |
| Probleme mit der WLAN-App-Verbindung. | Incorrect Wi-Fi password, poor signal, fan not in pairing mode. | Verify Wi-Fi password. Ensure fan is within Wi-Fi range. Follow app instructions to put fan in pairing mode. |
If the problem persists after attempting these solutions, please contact Daitsu customer support.
8. Spezifikationen
| Besonderheit | Detail |
|---|---|
| Marke | Daitsu |
| Modellnummer | VELAR |
| Größe | Ø122cm (suitable for rooms up to 25m²) |
| Abmessungen (T x B x H) | 106.5 cm x 106.5 cm x 31.5 cm (Note: The Ø122cm refers to the blade span, while 106.5cm might be the housing dimensions or a different measurement.) |
| Gewicht | 4.6 Kilogramm |
| Farbe | White with Wooden Blades |
| Anzahl der Klingen | 3 |
| Stromquelle | Kabelgebundene Elektrik |
| Bandtage | 240 Volt |
| Energieaufnahme | 30 Watt |
| Luftstromkapazität | 121 Kubikmeter pro Minute |
| Anzahl der Geschwindigkeiten | 6 |
| Geräuschpegel | 34 Decibels (Ultra-silent DC motor) |
| Besondere Merkmale | Natural wooden blades, Remote control, App control (Wi-Fi), Dimmable LED light (18W, 9 intensity levels, 9 color temperatures), Summer/Winter function, Smart memory function, Programmable auto-off. |
| Empfohlene Verwendung | Air circulation, Ventilation (Indoor use only) |

Image 8.1: Dimensions for the Ø122cm model.
9. Garantie und Support
Garantie: Für dieses Produkt gilt eine einjährige Herstellergarantie.
Kundendienst: For technical assistance, warranty claims, or any questions regarding your Daitsu Velar ceiling fan, please contact Daitsu customer service through their official webWebsite oder die Kontaktinformationen, die Sie mit Ihren Kaufunterlagen erhalten haben.
Please have your model number (VELAR) and proof of purchase ready when contacting support.