
1. Einleitung
This manual provides detailed instructions for the installation, operation, and maintenance of your JOOAN 4G Solar Security Camera. This outdoor wireless surveillance camera is designed for areas without traditional power or network infrastructure, utilizing 4G cellular connectivity and solar power for continuous operation. Please read this manual thoroughly before use to ensure proper setup and functionality.

Image 1.1: JOOAN 4G Solar Security Camera with its solar panel and a smartphone displaying the camera's live feed, highlighting its 4MP/5MP HD resolution capability.
2. Produktmerkmale
- 4G-Konnektivität: Operates independently using a SIM card, ideal for remote locations.
- Solarbetrieben: Equipped with a solar panel for continuous charging, reducing the need for external power sources.
- Hochauflösende Definition: Nimmt klare Videoaufnahmen auftage for effective surveillance.
- Farbnachtsicht: Offers multiple night vision modes including infrared, full-color, and smart color night vision for enhanced visibility in low-light conditions up to 10 meters.
- Lokaler und Cloud-Speicher: Supports up to 256GB SD card storage and optional cloud storage for recorded footage.
- Einfache Installation: Designed for straightforward setup and mounting.
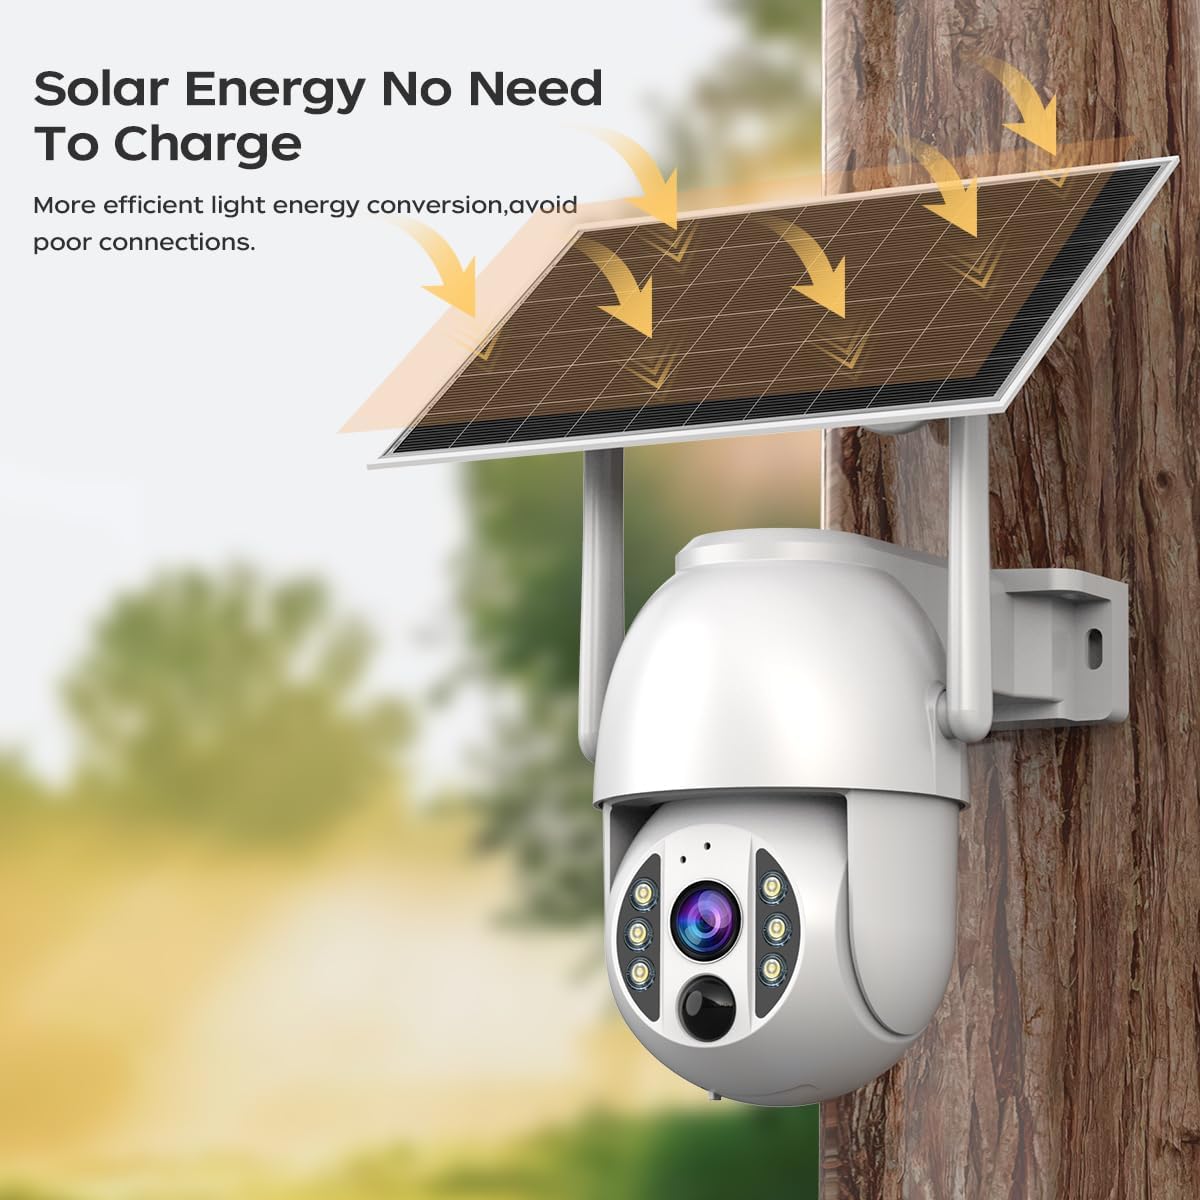
Image 2.1: The JOOAN 4G Solar Security Camera mounted with its solar panel, illustrating its solar energy capability for efficient light energy conversion and avoiding poor connections.
3. Einrichtung und Installation
3.1. Installation der SIM-Karte und der SD-Karte
Before mounting, install a 4G SIM card (not included) and an SD card (up to 256GB, not included) into the designated slots on the camera. Ensure the camera is powered off before inserting or removing cards.

Bild 3.1: Eine Nahaufnahme view of the JOOAN camera's SD card slot, indicating support for cloud storage and a maximum 256GB SD card.
3.2. Montageschritte
- Positionierung und Schlagtechnik: Select a suitable location for the camera and solar panel. Mark the drilling points on the wall. Use a drill to create holes at the marked positions.
- Dehnschrauben einsetzen: Gently tap the expansion screws into the drilled holes until they are flush with the surface.
- Montieren Sie die Kamera: Align the camera bracket with the expansion screws and secure it using the provided screws.
- Vollständige Installation: Attach the solar panel to the camera bracket or mount it separately in a location with ample sunlight. Ensure all connections are secure.

Image 3.2: Visual guide showing the four installation steps: 1. Positioning and punching, 2. Inserting expansion screws, 3. Mounting the camera with screws, and 4. Completing the installation with the solar panel.
3.3. App-Verbindung
Download the official JOOAN app from your smartphone's app store. Follow the in-app instructions to add your camera. There are typically two methods:
- Add APP Phone Code: Scan the QR code displayed on your mobile phone APP with the camera lens from a distance of 20-30cm to add the distribution network.
- Add Camera Body Code: Scan the QR code located on the camera body using the mobile phone APP to add the distribution network.

Image 3.3: Illustration of the two connection methods: scanning the APP phone code or scanning the camera body code to establish a network connection.
4. Bedienung
4.1. Ein-/Ausschalten
The camera automatically powers on when sufficient solar power is available or when connected to a power source. To power off, disconnect the power source and allow the battery to deplete, or use the app if a power-off function is available.
4.2. Leben View und Aufzeichnung
Once connected to the app, you can access the live video feed. The camera supports continuous recording to the SD card or cloud storage (subscription may be required). You can also manually record video or capture screenshots from the live view.
4.3. Bewegungserkennung und Benachrichtigungen
Configure motion detection sensitivity and alert settings within the app. The camera will send notifications to your smartphone when motion is detected. Recorded events can be reviewed in the app's playback section.
4.4. Nachtsichtmodi
The camera offers three night vision modes, selectable via the app:
- Infrarot Nachtsicht: Liefert klare Schwarzweißbilder in völliger Dunkelheit.
- Vollfarb-Nachtsicht: Nutzt eingebaute Scheinwerfer, um auch bei schwachen Lichtverhältnissen Farbbilder zu liefern.
- Intelligente Farbnachtsicht: Automatically switches from infrared to full-color vision upon detection of motion or specific events.

Image 4.1: Comparison of the three night vision modes: Infrared night vision, Full color night vision, and Smart color night vision, demonstrating the camera's ability to pick out details in darkness up to 10 meters away.
5. Wartung
- Reinigung der Linse: Reinigen Sie das Kameraobjektiv regelmäßig mit einem weichen, trockenen Tuch, um eine klare Bildqualität zu gewährleisten. Vermeiden Sie scheuernde Reinigungsmittel.
- Reinigung von Solarmodulen: Keep the solar panel free from dust, dirt, and debris to maximize charging efficiency. Clean with a damp Tuch nach Bedarf.
- Firmware-Updates: Check the app periodically for available firmware updates to ensure optimal performance and security.
- Batteriezustand: Ensure the solar panel receives adequate sunlight to maintain battery charge. Prolonged periods without sunlight may require temporary charging via a USB power adapter (not included).
6. Fehlerbehebung
6.1. Camera Not Connecting to 4G Network
- Stellen Sie sicher, dass die SIM-Karte korrekt eingelegt und mit einem gültigen Datentarif aktiviert ist.
- Überprüfen Sie die 4G-Signalstärke am Standort der Kamera.
- Starten Sie die Kamera neu, indem Sie sie kurzzeitig vom Stromnetz trennen und wieder anschließen.
6.2. No Video Feed or Poor Quality
- Verify the camera has sufficient power.
- Check the 4G signal strength.
- Reinigen Sie das Kameraobjektiv.
6.3. Solar Panel Not Charging
- Stellen Sie sicher, dass das Solarpanel so ausgerichtet ist, dass es täglich mehrere Stunden direktes Sonnenlicht erhält.
- Clean any dirt or obstructions from the solar panel surface.
- Überprüfen Sie das Verbindungskabel zwischen dem Solarpanel und der Kamera.
6.4. SD Card Not Recording
- Stellen Sie sicher, dass die SD-Karte korrekt eingesetzt und innerhalb der App formatiert ist.
- Prüfen Sie, ob auf der SD-Karte ausreichend freier Speicherplatz vorhanden ist.
- Überprüfen Sie die Aufnahmeeinstellungen in der App.
7. Spezifikationen
| Besonderheit | Detail |
|---|---|
| Marke | JOOAN |
| Modell | B0GCFGYCLX |
| Stromquelle | Solarbetrieben |
| Konnektivitätsprotokoll | 4G Cellular (SIM card required), Wi-Fi (for initial setup/local access if applicable) |
| Empfohlene Verwendung | Indoor/Outdoor Surveillance |
| Besonderheit | Einfach zu installieren |
| Lagerung | Supports up to 256GB SD card, Cloud Storage (subscription may apply) |
8. Garantie und Support
For warranty information and technical support, please refer to the JOOAN official webBesuchen Sie die Website oder kontaktieren Sie direkt den Kundenservice. Bewahren Sie Ihren Kaufbeleg als Kaufnachweis auf.
Für weitere Unterstützung besuchen Sie bitte: JOOAN Store auf Amazon