
1. Einleitung
The VIDCASTIVE 4K Mini Body Camera L20 is a compact, wearable camera designed for capturing high-quality point-of-view (POV) video and photos. Its small size, magnetic and clip mounts, and 4K resolution make it suitable for various activities, including outdoor sports, daily vlogging, and personal recording. This manual provides essential information for setting up, operating, maintaining, and troubleshooting your camera.

Image: The VIDCASTIVE 4K Mini Body Camera L20.
2. Lieferumfang
Überprüfen Sie, ob alle Artikel in Ihrem Paket vorhanden sind:
- Kamera
- USB-C-Kabel
- 12-Piece Accessory Kit (various mounts and clips)
- Bedienungsanleitung
- Memory Card (64GB V30-rated, pre-installed)

Image: All included accessories for the VIDCASTIVE 4K Mini Body Camera L20.
3. Produktüberschreitungview
The VIDCASTIVE L20 features a compact design with a 1.47-inch display for real-time viewing and playback. It records in 4K/30fps and includes a 750mAh rechargeable battery for up to 150 minutes of continuous recording.
Kamerakomponenten
- Linse: Main camera lens for capturing video and photos.
- 1.47-Zoll-Display: For menu navigation, live viewund Wiedergabe.
- Netzschalter: To turn the camera on/off and confirm selections.
- Modus-Taste: To switch between video, photo, and playback modes, and navigate menus.
- USB-C-Anschluss: Zum Aufladen und zur Datenübertragung.
- Micro-SD-Kartensteckplatz: Zum Einlegen der Speicherkarte.
- Mikrofon: Für Audioaufnahmen.
4. Einrichtung
4.1 Aufladen der Kamera
Before first use, fully charge the camera. Connect the provided USB-C cable to the camera's USB-C port and the other end to a USB power adapter (not included) or a computer's USB port. The camera supports recording while charging.

Image: The camera connected to a power source via USB-C cable for charging.
4.2 Einsetzen der Speicherkarte
The camera comes with a pre-installed 64GB V30-rated high-speed Micro SD card. If you need to insert or replace the card, ensure the camera is powered off. Open the Micro SD card slot cover and gently insert the card with the gold contacts facing the front of the camera until it clicks into place. Close the cover securely.

Image: A Micro SD card being inserted into the camera's slot.
4.3 Ein-/Ausschalten
- So schalten Sie das Gerät ein: Halten Sie den Ein-/Ausschalter einige Sekunden lang gedrückt, bis der Bildschirm aufleuchtet.
- So schalten Sie das Gerät aus: Halten Sie den Ein-/Ausschalter einige Sekunden lang gedrückt, bis sich der Bildschirm ausschaltet.
4.4 Grundeinstellungen
Upon first power-on or after a reset, you may need to set the date, time, and language. Use the Mode button to navigate through options and the Power button to confirm selections on the 1.47-inch display.
5. Bedienungsanleitung
5.1 Video aufnehmen
From the main menu, select 'Video Record'. Press the Power button to start recording. A red indicator light will flash, and a timer will appear on the screen. Press the Power button again to stop recording. Videos are saved to the Micro SD card in MP4 format.
5.2 Fotos aufnehmen
From the main menu, select 'Photo Shot'. Press the Power button to capture a photo. Photos are saved to the Micro SD card.
5.3 Wiedergabe
From the main menu, select 'Playback'. Use the Mode button to navigate through your recorded videos and photos. Press the Power button to view eine ausgewählte file.
5.4 WLAN-Verbindung und App-Nutzung
The camera features built-in WiFi for connecting to your smartphone via a dedicated companion app. This allows for live preview, wireless video transfer, and direct sharing. Refer to the app's instructions for detailed pairing and usage.

Image: The camera displaying WiFi connection information, with a smartphone showing the companion app interface.
5.5 Montagemöglichkeiten
The camera is designed for versatile mounting with its magnetic body and included accessory kit. Common mounting methods include:
- Magnethalterung: Attach directly to metallic surfaces or use with the magnetic necklace mount for hands-free recording on clothing.
- Clip-Halterung: Securely attach to shirt pockets, backpack straps, or other fabric edges.
- Helmhalterung: Use the helmet adapter for POV recording during cycling or other activities.
- Fahrradhalterung: Attach to bicycle handlebars for stable recording.
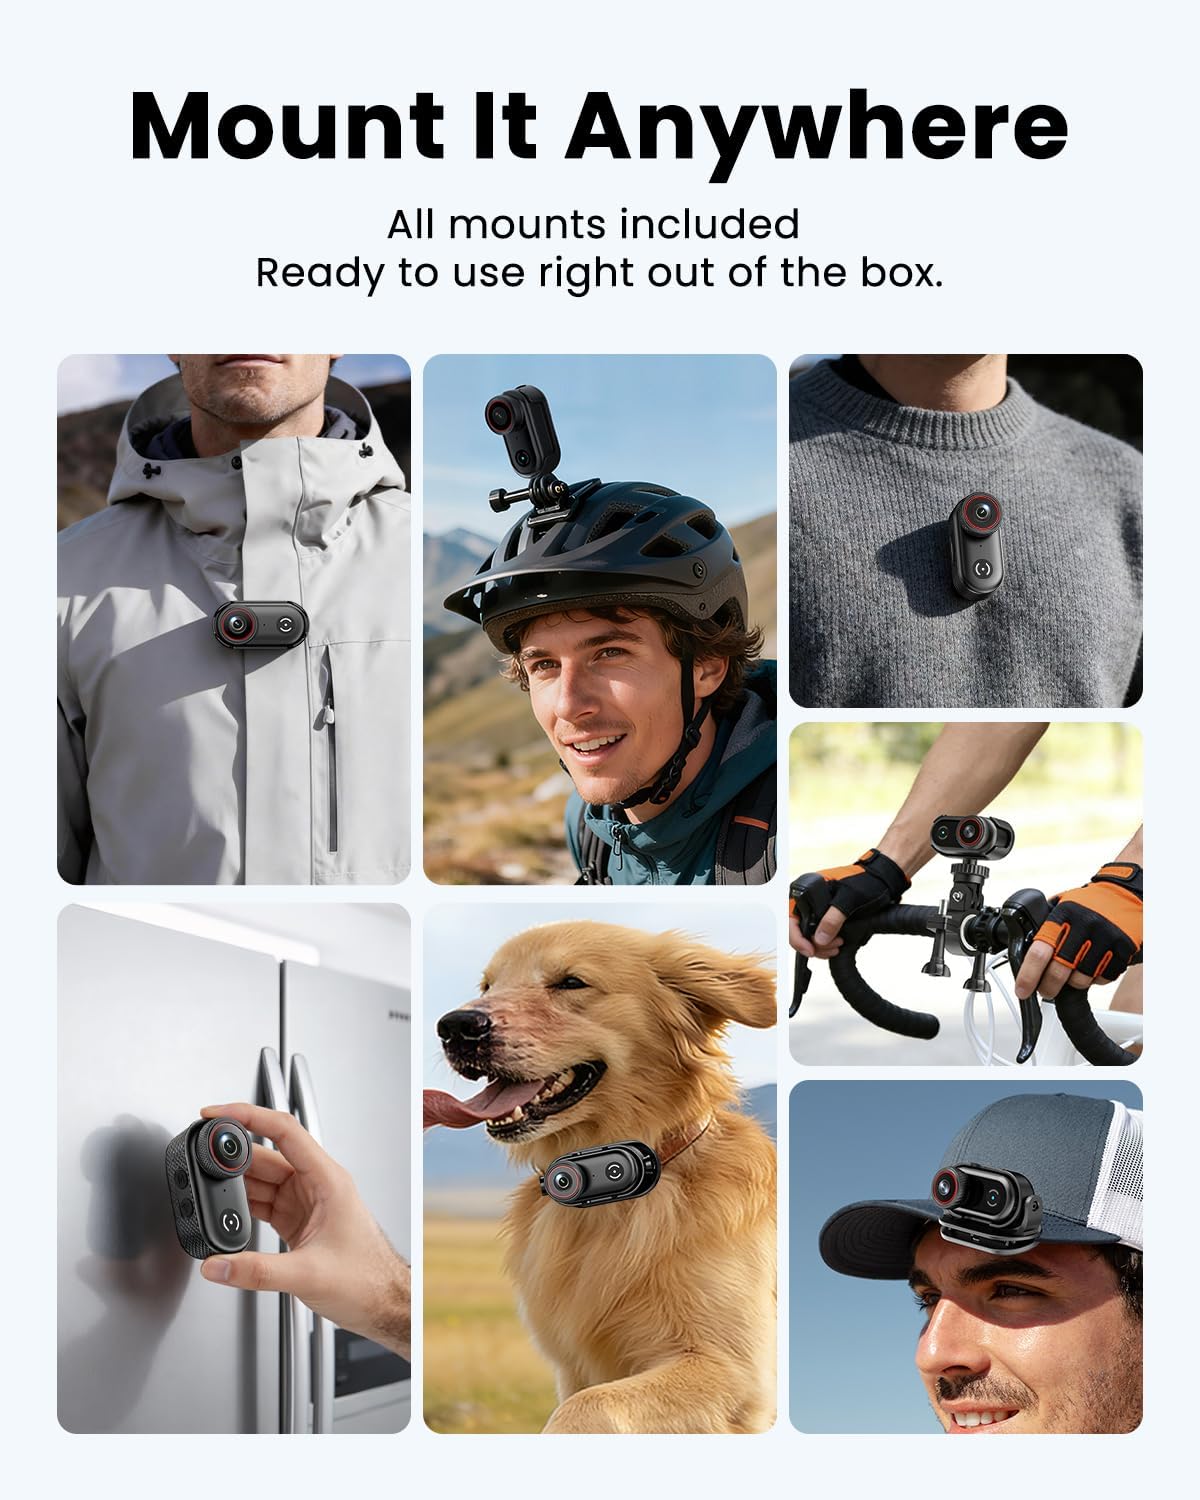
Image: The camera clipped onto a shirt for wearable recording.

Image: The camera mounted on a bicycle helmet.

Image: The camera mounted on bicycle handlebars.
6. Wartung
6.1 Reinigung
Use a soft, dry cloth to clean the camera body. For the lens, use a specialized lens cleaning cloth and solution. Avoid using harsh chemicals or abrasive materials.
6.2 Speicherung
Store the camera in a cool, dry place away from direct sunlight and extreme temperatures. Ensure the battery is partially charged (around 50%) if storing for extended periods to prolong battery life.
6.3 Speicherkartenverwaltung
Sichern Sie regelmäßig Ihre footage and format the Micro SD card in the camera's settings to maintain optimal performance and prevent data corruption. A V30-rated card is recommended for 4K recording.
7. Fehlerbehebung
If you encounter issues with your VIDCASTIVE L20 camera, refer to the following common solutions:
- Kamera lässt sich nicht einschalten: Stellen Sie sicher, dass der Akku geladen ist. Schließen Sie die Kamera an eine Stromquelle an und versuchen Sie es erneut.
- "Please plug in SD card" message: Verify that the Micro SD card is correctly inserted. Try re-inserting the card or using a different compatible V30-rated card. Ensure the card is not damaged.
- Schlechte Video-/Fotoqualität: Ensure the lens is clean. Check the recording resolution settings. Ensure sufficient lighting.
- Schlechte Audioqualität: Stellen Sie sicher, dass das Mikrofon nicht verdeckt wird.
- Camera freezing or unresponsive: Press and hold the Power button for 10-15 seconds to force a restart. If the issue persists, perform a factory reset via the camera's settings menu (note: this will erase custom settings).
- WLAN-Verbindungsprobleme: Ensure the camera's WiFi is enabled and your smartphone is within range. Restart both the camera and your phone. Reinstall the companion app if necessary.
Sollten die Probleme nach Durchführung dieser Schritte weiterhin bestehen, wenden Sie sich bitte an den Kundendienst.
8. Spezifikationen
| Besonderheit | Spezifikation |
|---|---|
| Marke | VIDCASTIV |
| Modellnummer | L20 |
| Auflösung der Videoaufnahme | 4K |
| Videoaufnahmeformat | MP4 |
| Bildschirmgröße | 1.47 Zoll |
| Durchschnittliche Batterielebensdauer | 2.5 Stunden (150 Minuten) |
| Installierte Flash-Speichergröße | 64 GB (V30-rated) |
| Konnektivitätstechnologie | USB, WLAN |
| Fotosensor-Technologie | CMOS |
| Maximale Blendenöffnung | 2.8 f |
| Wasserbeständigkeit | Nicht wasserfest |
| Bildstabilisierung | Anti-Shake (Digital) |
| Artikelgewicht | 0.37 Kilograms (approx. 1.59 oz / 45g) |
9. Garantie und Support
9.1 Garantieinformationen
The VIDCASTIVE 4K Mini Body Camera L20 comes with a 1 Jahr HerstellergarantieDiese Garantie deckt Material- und Verarbeitungsfehler bei normalem Gebrauch ab. Bitte bewahren Sie Ihren Kaufbeleg für Garantieansprüche auf.
9.2 Kundendienst
For technical assistance, warranty claims, or any questions regarding your product, please contact VIDCASTIVE customer support through the retailer's platform or the official VIDCASTIVE website. Provide your model number (L20) and a detailed description of the issue for faster service.