1. Sicherheitshinweise
Please read all instructions carefully before operating the Tehanld Commercial Ice Maker Machine. Retain this manual for future reference.
- Elektrische Sicherheit: Ensure the machine is connected to a properly grounded 115V/60Hz electrical outlet. Do not use extension cords. Disconnect power before cleaning or maintenance.
- Wasserversorgung: Connect only to a potable water supply. Ensure all water connections are secure to prevent leaks.
- Platzierung: Place the machine on a level, stable surface. Allow at least 6 inches of clearance around the unit for proper ventilation. Avoid direct sunlight, heat sources, or areas with high humidity.
- Kinder und Haustiere: Halten Sie Kinder und Haustiere während des Betriebs vom Gerät fern.
- Reinigung: Do not immerse the appliance in water or other liquids. Use only mild, non-abrasive cleaners.
- Schaden: Do not operate the machine if the power cord or plug is damaged, or if the machine malfunctions or has been dropped. Contact customer support for assistance.
2. Produktüberschreitungview
The Tehanld Commercial Ice Maker Machine is designed for high-volume ice production, suitable for commercial establishments and large home use. It features efficient ice making, a large storage capacity, and convenient functions like self-cleaning.
Hauptmerkmale:
- Hohe Kapazität: Produces up to 110 LBS of ice per 24 hours with a 33 LBS storage bin.
- Schnell-Eisproduktion: Generates 50 square ice cubes in approximately 7-15 minutes.
- Einstellbare Eisdicke: Offers 10 adjustable levels for ice thickness.
- Selbstreinigungsfunktion: Simplifies maintenance and ensures hygiene.
- Integrierter Wasserfilter: Provides cleaner ice.
- Langlebige Konstruktion: Stainless steel exterior, thick PP plastic interior, and corrosion-resistant copper-nickel plated ice tray.
- Benutzerfreundlich: Features a clear guide rail door, ice-full, and water-shortagE-Erinnerungen.
Komponenten:
Machen Sie sich mit den Hauptkomponenten Ihres Eiswürfelbereiters vertraut:
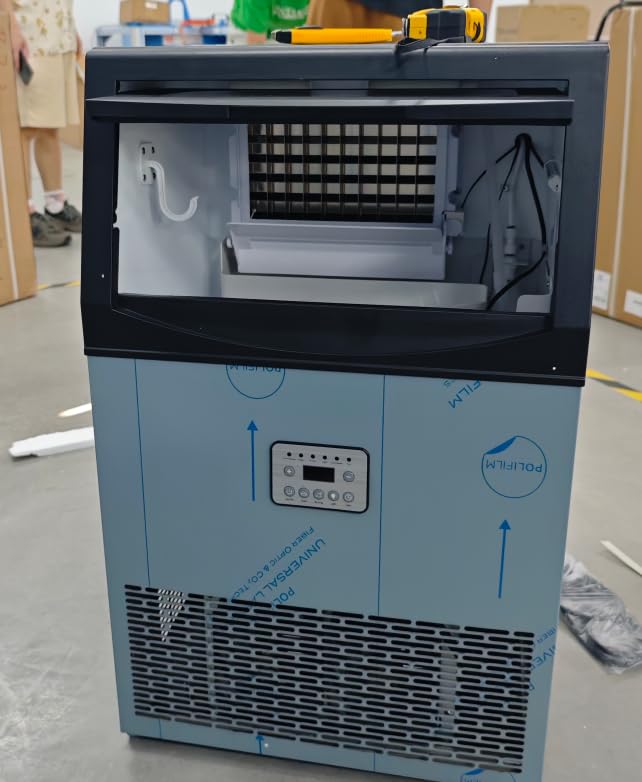
Bild 2.1: Vorderseite view of the Tehanld Commercial Ice Maker Machine. This image displays the stainless steel exterior, control panel, and the clear guide rail door for accessing the ice bin.
- Bedienfeld: Located on the front, with buttons and indicator lights.
- Eisbehälter: Storage area for produced ice.
- Wasserzulauf: Connection point for the water supply.
- Abfluss: For water drainage.
- Belüftungsöffnungen: Located on the sides or back for heat dissipation.
3. Einrichtungsanweisungen
3.1 Auspacken
- Nehmen Sie den Eisbereiter vorsichtig aus der Verpackung.
- Remove all packing materials, tape, and protective film from the unit.
- Inspect the machine for any shipping damage. If damaged, do not operate and contact customer support.
3.2 Platzierung
- Stellen Sie den Eisbereiter auf eine feste, ebene Fläche, die sein Gewicht im gefüllten Zustand mit Eis und Wasser tragen kann.
- Ensure there is at least 6 inches (15 cm) of space around the back and sides for proper air circulation.
- Vermeiden Sie es, das Gerät in der Nähe von Wärmequellen (z. B. Öfen, Heizkörpern) oder in direktem Sonnenlicht aufzustellen.
- The ambient temperature should be between 10°C (50°F) and 35°C (95°F) for optimal performance.
3.3 Wasseranschluss
The ice maker requires a continuous water supply.
- Locate the water inlet connection at the back of the machine.
- Install the provided water filter according to its instructions.
- Connect the water supply line to the water inlet. Ensure all connections are tight to prevent leaks.
- Connect the drain hose to the drain outlet and route it to a suitable drain. Ensure the drain hose has a continuous downward slope.
- Open the water supply valve and check for any leaks.
3.4 Stromanschluss
- Plug the power cord into a dedicated, grounded 115V/60Hz electrical outlet.
- Die Steckdose darf nicht zusammen mit anderen Hochleistungsgeräten verwendet werden.
3.5 Erstreinigung
Before first use, it is recommended to perform an initial cleaning cycle.
- Ensure the water supply is connected and the machine is powered on.
- Refer to the 'Self-Cleaning Function' section in Operating Instructions to initiate a cleaning cycle.
- After the cleaning cycle, discard the first batch of ice produced.
4. Bedienungsanleitung
4.1 Systemsteuerung
Das Bedienfeld umfasst typischerweise:
- POWER-Taste: Schaltet die Maschine ein/aus.
- ICE/CLEAN Button: Starts ice making or initiates the self-cleaning cycle.
- TIMER-Taste: Sets the timed operation.
- +/- Tasten: Passen Sie die Eisdicke oder die Timer-Einstellungen an.
- Indikatoren: Lights for 'Ice Full', 'Water Shortage', 'Ice Making', 'Cleaning'.
4.2 Eis herstellen
- Ensure the water supply is open and the machine is plugged in.
- Drücken Sie die LEISTUNG Taste, um die Maschine einzuschalten.
- The machine will automatically start the ice-making process. The 'Ice Making' indicator will illuminate.
- To adjust ice thickness, use the +/- buttons. There are 10 levels of adjustment. Thicker ice takes longer to produce.
- When the ice bin is full, the 'Ice Full' indicator will light up, and the machine will pause ice production. It will resume automatically once ice is removed.
- If the water supply is low, the 'Water Shortage' indicator will light up. The machine will pause until water supply is restored.
4.3 Selbstreinigungsfunktion
Regular use of the self-cleaning function helps maintain hygiene and efficiency.
- Ensure the ice bin is empty.
- Halten Sie die EIS/REINIG button for a few seconds to activate the self-cleaning cycle. The 'Cleaning' indicator will light up.
- The machine will automatically flush and clean its internal components. This cycle typically takes several minutes.
- Sobald der Zyklus abgeschlossen ist, kehrt das Gerät in den Standby-Modus zurück.
4.4 Timer-Funktion
Use the timer function to schedule when the machine turns on or off.
- While the machine is on or in standby, press the TIMER Taste.
- Verwenden Sie die +/- buttons to set the desired delay time (e.g., hours until turn on/off).
- Drücken Sie die TIMER button again to confirm the setting. The timer indicator will illuminate.
5. Wartung
Regelmäßige Wartung gewährleistet optimale Leistung und verlängert die Lebensdauer Ihres Eiswürfelbereiters.
5.1 Außenreinigung
- Wischen Sie das Äußere mit einem weichen Tuch ab. dampmit mildem Reinigungsmittel und Wasser beendet.
- Keine Scheuer- oder Lösungsmittel verwenden.
5.2 Innenreinigung und Entkalkung
Perform a thorough interior cleaning and descaling every 1-3 months, depending on water hardness and usage.
- Turn off the machine and disconnect it from the power supply.
- Empty the ice bin and drain any remaining water.
- Prepare a cleaning solution (e.g., a mixture of water and white vinegar or a commercial ice maker cleaner).
- Gießen Sie die Reinigungslösung in den Wasserbehälter.
- Initiate the self-cleaning cycle (refer to section 4.3). For manual cleaning, use a soft brush to clean the ice tray and water tank.
- After the cleaning cycle, drain the solution and rinse thoroughly with clean water. Run several cycles with clean water to ensure all cleaning solution residue is removed.
5.3 Wasserfilterwechsel
The included water filter should be replaced every 3-6 months, or more frequently if water quality is poor or ice production decreases.
- Turn off the water supply to the ice maker.
- Disconnect the old filter and dispose of it properly.
- Install the new water filter according to its specific instructions.
- Drehen Sie die Wasserzufuhr auf und prüfen Sie, ob es zu Lecks kommt.
6. Fehlerbehebung
| Problem | Mögliche Ursache | Lösung |
|---|---|---|
| Maschine lässt sich nicht einschalten | No power; Power cord loose; Fuse blown/circuit breaker tripped | Überprüfen Sie die Steckdose; Stellen Sie sicher, dass das Kabel fest eingesteckt ist; Setzen Sie den Leitungsschutzschalter zurück oder tauschen Sie die Sicherung aus. |
| Keine Eisproduktion | Water supply off; Water shortage; 'Ice Full' sensor activated; Ambient temperature too high | Check water supply valve; Refill water reservoir (if applicable) or check water line; Empty ice bin; Ensure proper ventilation and lower room temperature. |
| Ice is too thin or soft | Water temperature too high; Ambient temperature too high; Ice thickness setting too low | Ensure cold water supply; Improve ventilation; Adjust ice thickness setting to a higher level. |
| Wasserleck | Loose water connections; Clogged drain hose | Tighten all water inlet and drain connections; Clear any blockages in the drain hose. |
| Ungewöhnliche Geräusche | Maschine steht nicht waagerecht; Problem mit internen Komponenten | Stellen Sie sicher, dass die Maschine auf einer ebenen Fläche steht. Sollten die Geräusche weiterhin bestehen, wenden Sie sich bitte an den Kundendienst. |
7. Spezifikationen
- Marke: Tehanld
- Modell: 110 Pfund
- Eisproduktionskapazität: Up to 110 LBS per 24 hours
- Eisspeicherkapazität: 33 Pfund
- Ice Cube Production Cycle: Approximately 7-15 minutes for 50 cubes
- Stromversorgung: Wechselstrom 115V / 60Hz
- Betriebstemperaturbereich: 10 °C - 35 °C (50 °F - 95 °F)
- Material: Stainless Steel (exterior), PP Plastic (interior), Copper-Nickel Plated (ice tray)
- Merkmale: Self-cleaning, Water Filter, Adjustable Ice Thickness
8. Garantie und Support
Your Tehanld Commercial Ice Maker Machine comes with a manufacturer's warranty. Please refer to the warranty card included with your purchase for specific terms and conditions.
For technical support, troubleshooting assistance, or warranty claims, please contact Tehanld Customer Support:
- WebWebsite: Visit the Tehanld Store on Amazon
- E-Mail: support@tehanld.com (ExampDie E-Mail-Adresse kann abweichen.)
- Telefon: 1-800-XXX-XXXX (Example phone, actual number may vary)
When contacting support, please have your model number (110LBS) and purchase date available.