1. Einleitung
The Next Cine800S GoogleTV Projector is designed to provide a versatile and immersive home entertainment experience. This manual offers essential information for the safe and efficient setup, operation, and maintenance of your projector. Please read this manual thoroughly before using the device.
2. Sicherheitshinweise
- Stromversorgung: Use only the specified power adapter. Ensure the power cord is not damaged or pinched.
- Belüftung: Die Lüftungsöffnungen dürfen nicht blockiert werden. Um eine Überhitzung zu vermeiden, muss ausreichend Platz um den Projektor herum geschaffen werden, damit die Luft gut zirkulieren kann.
- Platzierung: Stellen Sie den Projektor auf eine stabile, ebene Fläche. Vermeiden Sie direkte Sonneneinstrahlung, die Nähe zu Wärmequellen oder Umgebungen mit hoher Luftfeuchtigkeit oder Staub.
- Reinigung: Vor der Reinigung die Stromzufuhr unterbrechen. Ein weiches, trockenes Tuch verwenden. Keine flüssigen oder Aerosolreiniger verwenden.
- Linsenpflege: Vermeiden Sie es, die Projektorlinse direkt zu berühren. Verwenden Sie bei Bedarf ein weiches, fusselfreies Tuch, das speziell für optische Linsen entwickelt wurde.
- Wartung: Versuchen Sie nicht, den Projektor selbst zu reparieren. Überlassen Sie alle Wartungsarbeiten qualifiziertem Fachpersonal.
3. Produktüberschreitungview
The Next Cine800S is a Full HD LED projector featuring Google TV. Below are key components and features.

Abbildung 3.1: Vorderseite view of the Next Cine800S GoogleTV Projector, highlighting its design and key features like 800 ANSI Lumens and Google TV integration.
3.1. Hauptmerkmale
- Bildschirmauflösung: Full HD 1920x1080, supporting screen sizes from 40 to 200 inches.
- Helligkeit: 800 ANSI Lumen.
- Videoverarbeitung: Supports 4Kx2K @ 60fps encode/decode.
- Focus & Keystone: Automatic or Manual Focus, Automatic Keystone Correction.
- Betriebssystem: Google TV with Android 14.
- Streaming-Dienste: Netflix L1, Prime Video, YouTube, Disney+ with L1 DRM Certification.
- Kabellose Verbindung: Wi-Fi 802.11 a/b/g/n/ac (2.4G & 5G) and Bluetooth 5.0.
- Erinnerung: 2GB LPDDR4 RAM / 8GB eMMC Storage.
- Audio: Integrated 12W (4W) Speaker.
- Optisches System: Dust-Sealed Optical Mechanism.
- Bildschirmspiegelung: Air Screen and Google Cast for iOS & Android devices.
3.2. Anschlüsse und Verbindungen
Identify the various input and output ports on your projector.
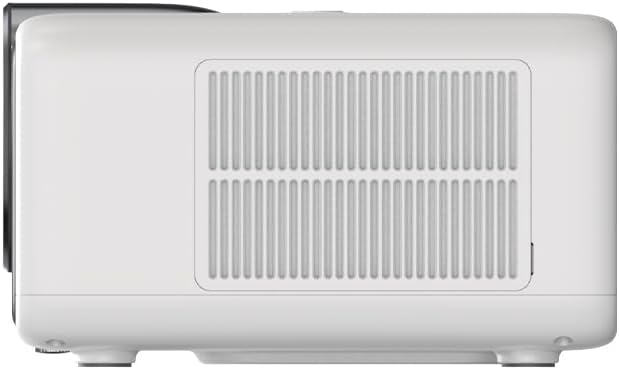
Figure 3.2: Rear panel of the projector, displaying available ports. Note: Actual ports may vary slightly by region or production batch. This model typically includes HDMI, USB, and a 2.5mm Audio Jack.
- HDMI: Connect to external video sources such as Blu-ray players, gaming consoles, or computers.
- USB: Zum Anschließen von USB-Speichergeräten zur Medienwiedergabe files.
- 2.5-mm-Audiobuchse: Zum Anschluss externer Audiogeräte wie Kopfhörer oder Lautsprecher.
4. Einrichtung
4.1. Auspacken und Erstinspektion
- Nehmen Sie den Projektor und sämtliches Zubehör vorsichtig aus der Verpackung.
- Check for any signs of damage during transit. If damage is found, contact your retailer immediately.
- Stellen Sie sicher, dass alle aufgeführten Zubehörteile vorhanden sind.
4.2. Aufstellung des Projektors
Die optimale Platzierung ist entscheidend für das Beste viewErfahrung.

Abbildung 4.1: Bspample of projector placement and adjustable screen sizes (40" to 200").
- Distanz: Position the projector at a suitable distance from the screen or wall to achieve your desired screen size (40 to 200 inches).
- Höhe: Place the projector on a stable surface or mount it to project the image at the desired height.
- Montage: The projector includes a mounting point on its base. Ensure any tripod or mount used is compatible with the projector's screw size and weight. Note that some standard tripod screws may not fit.
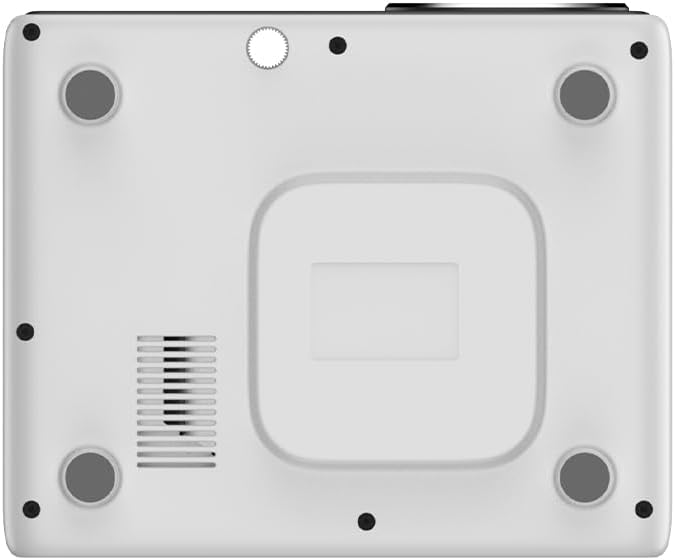
Abbildung 4.2: Unten view of the projector, indicating the mounting point and ventilation grilles.
4.3. Stromanschluss
- Schließen Sie das Netzteil an den Stromeingangsanschluss des Projektors an.
- Stecken Sie das Netzteil in eine geeignete Steckdose.
- Drücken Sie den Netzschalter am Projektor oder an der Fernbedienung, um ihn einzuschalten.
4.4. Ersteinrichtung und Netzwerkverbindung
- Upon first power-on, the projector will guide you through the initial Google TV setup process.
- Follow the on-screen instructions to select your language, connect to a Wi-Fi network (2.4G or 5G), and log in with your Google account.
- The projector features automatic focus and keystone correction. If the image is not perfectly clear or rectangular, you can access manual adjustment options in the settings menu.
5. Bedienungsanleitung
5.1. Navigation in Google TV
The projector runs on Google TV, providing a user-friendly interface for accessing content.

Figure 5.1: The Google TV interface on the Next Cine800S Projector, showing recommended content and installed applications.
- Use the remote control to navigate through menus, select apps, and control playback.
- The home screen provides personalized recommendations and quick access to your favorite streaming services.
5.2. Streaming-Anwendungen
Access popular streaming platforms directly from your projector.

Figure 5.2: Supported streaming applications and Google Play Store access.
- Pre-installed apps include Netflix, Prime Video, YouTube, and Disney+.
- Laden Sie weitere Anwendungen aus dem Google Play Store herunter.
- Ensure you are logged into your respective service accounts to access content.
5.3. Anschließen externer Geräte
- HDMI: Connect your device to an HDMI port. The projector will automatically detect the input or you can manually select it from the input source menu.
- USB: Insert a USB drive into the USB port. The media player application will typically launch automatically, allowing you to browse and play supported media files (JPG, PNG, BMP, JPEG, MP3, M4A, MP2, WAV, FLAC, MP4, MOV, TS, DAT, F4V, 3GP).
5.4. Bildschirmspiegelung
The projector supports Air Screen and Google Cast for mirroring content from your iOS or Android devices.
- Stellen Sie sicher, dass Ihr Mobilgerät und der Projektor mit demselben WLAN-Netzwerk verbunden sind.
- On your mobile device, open the screen mirroring function (e.g., 'Screen Cast', 'Smart View', 'AirPlay').
- Wählen Sie den Projektor aus der Liste der verfügbaren Geräte aus.
6. Wartung
Regelmäßige Wartung gewährleistet optimale Leistung und verlängert die Lebensdauer Ihres Projektors.
6.1. Reinigung der Linse

Figure 6.1: Close-up of the projector lens, which requires careful cleaning.
- Use a soft, lint-free cloth or a lens cleaning brush to gently remove dust from the lens surface.
- For stubborn smudges, use a specialized lens cleaning solution applied to a microfiber cloth, not directly to the lens.
- Avoid abrasive materials or excessive force, which can scratch the lens.
6.2. Cleaning Ventilation Ports
- Periodically check the ventilation grilles for dust accumulation.
- Use a soft brush or a vacuum cleaner with a brush attachment to gently clean the grilles.
- Stecken Sie keine Gegenstände in die Lüftungsöffnungen.
6.3. Software-Updates
- Ensure your projector is connected to the internet.
- Navigate to the system settings to check for and install available software updates. Updates can improve performance and add new features.
7. Fehlerbehebung
In diesem Abschnitt werden häufig auftretende Probleme behandelt, die bei Ihrem Projektor auftreten können.
| Problem | Mögliche Ursache | Lösung |
|---|---|---|
| Kein Strom | Netzkabel nicht angeschlossen, Problem mit der Steckdose | Überprüfen Sie den Netzanschluss. Versuchen Sie es mit einer anderen Steckdose. |
| Kein Bild | Input source not selected, device not connected, lens cap on | Ensure input source is correctly selected. Check HDMI/USB connections. Remove lens cap. |
| Bild ist verschwommen | Fokus nicht eingestellt | Adjust focus manually using the projector's focus ring or through the settings menu if automatic focus is not sufficient. |
| Das Bild ist verzerrt/trapezförmig | Keystone not adjusted, projector not perpendicular to screen | The projector has automatic keystone correction. If the image is still distorted, access the manual keystone correction settings to fine-tune the image. |
| Kein Ton oder schlechte Tonqualität | Volume too low, external audio device not connected, speaker issue | Increase volume. Check external audio connections if used. If internal speaker sound is distorted at low volumes, consider connecting external speakers via the 2.5mm audio jack or Bluetooth. |
| Probleme mit der Wi-Fi-Verbindung | Falsches Passwort, Routerprobleme, Signalstörungen | Verify Wi-Fi password. Restart router. Ensure projector is within Wi-Fi range. |
| Fernbedienung funktioniert nicht | Batteries low/dead, IR sensor blocked | Replace batteries. Ensure no obstructions between remote and projector's IR sensor. |
8. Spezifikationen
Detailed technical specifications for the Next Cine800S GoogleTV Projector.
| Besonderheit | Spezifikation |
|---|---|
| Modell | Cine800S |
| Display-Technologie | LED-Projektor |
| Native Auflösung | Full HD 1920x1080 |
| Helligkeit | 800 ANSI-Lumen |
| Projektionsgröße | 40" — 200" |
| Videodekodierung | 4Kx2K @ 60fps |
| Fokus | Automatisch oder manuell |
| Keystone-Korrektur | Automatisch |
| Betriebssystem | Google TV, Android 14 |
| DRM Certification | Netflix L1, Prime Video, YouTube, Disney+ L1 |
| W-lan | 802.11 a/b/g/n/ac (2.4G & 5G) |
| Bluetooth | 5.0 |
| RAM | 2 GB LPDDR4 |
| Interner Speicher | 8 GB eMMC |
| Lautsprecherausgang | 12 W (4 W) |
| Häfen | HDMI, 2.5mm Audio Jack, USB |
| Unterstützte Medienformate | JPG, PNG, BMP, JPEG, MP3, M4A, MP2, WAV, FLAC, MP4, MOV, TS, DAT, F4V, 3GP, FAT, NTFS |
| Optischer Mechanismus | Dust-Sealed System |
| Bildschirmspiegelung | Air Screen, Google Cast (iOS & Android) |
9. Garantie und Support
For warranty information, please refer to the documentation provided with your purchase or visit the official Next website. For technical support, product inquiries, or service requests, please contact Next customer service through their official channels.
Halten Sie Ihren Kaufbeleg und die Seriennummer des Produkts bereit, wenn Sie den Kundendienst kontaktieren.