
1. Einleitung
Thank you for choosing the Aigostar Gx-5555 Ceiling Fan with Light. This product combines a powerful ceiling fan with an integrated LED light, offering both comfort and illumination for your living space. It features a silent DC motor, five durable ABS blades, and a sleek black metal design. The light offers adjustable color temperature and brightness, while the fan provides six speed settings and a convenient timer function. This manual provides essential information for safe installation, operation, and maintenance of your new ceiling fan.
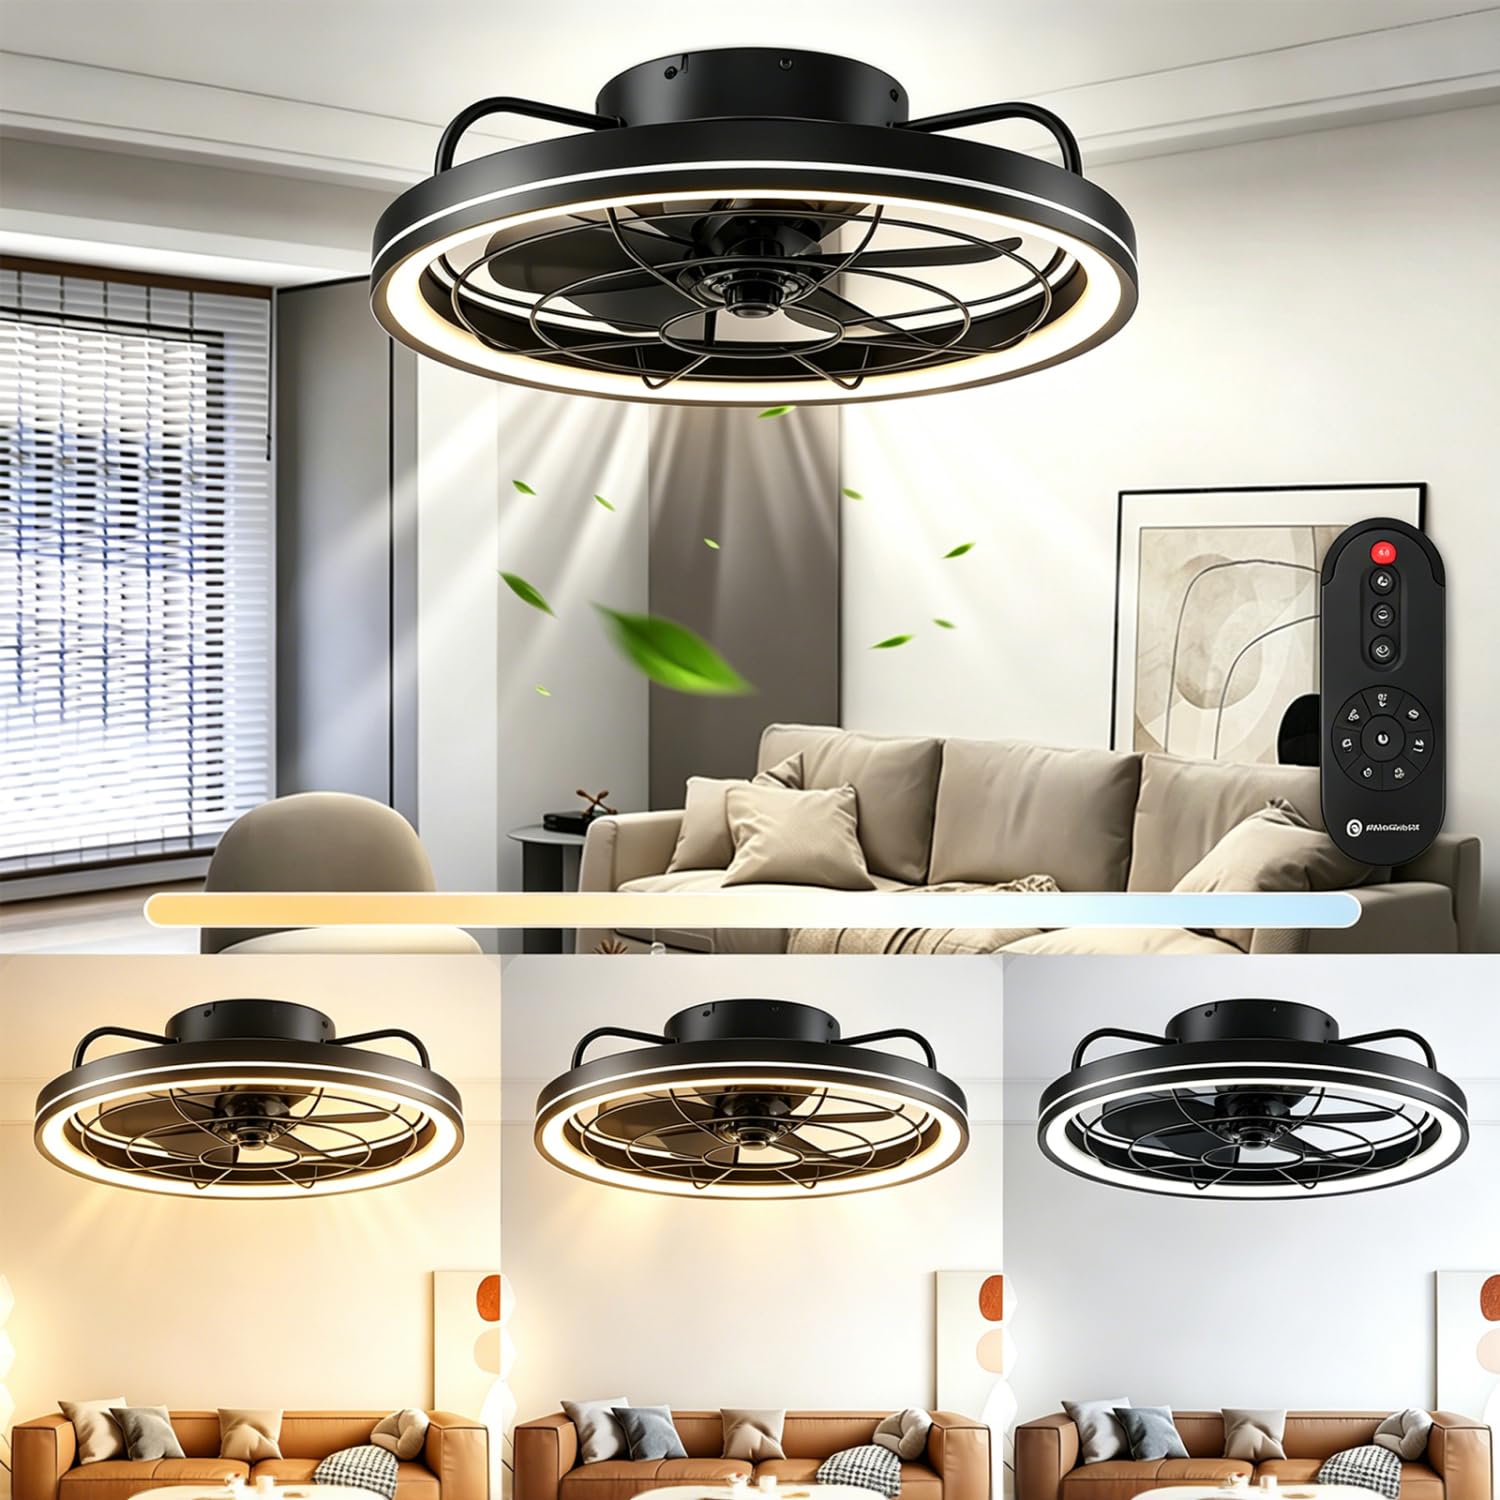
Abbildung 1: Überview of the Aigostar Gx-5555 Ceiling Fan with Light.
2. Sicherheitshinweise
Bitte lesen Sie vor der Installation und Inbetriebnahme alle Sicherheitshinweise sorgfältig durch. Bewahren Sie diese Anleitung zum späteren Nachschlagen auf.
- Vor Installation, Reinigung oder Wartung muss die Stromversorgung unterbrochen sein.
- Die Installation muss von einem qualifizierten Elektriker gemäß den örtlichen Verdrahtungsvorschriften durchgeführt werden.
- Die Montagekonstruktion muss in der Lage sein, das Gewicht des Ventilators (ca. 4.05 kg) zu tragen.
- Führen Sie keine Gegenstände in die Lüfterflügel ein, während der Lüfter in Betrieb ist.
- Halten Sie Kinder während des Betriebs vom Ventilator fern.
- Benutzen Sie den Ventilator nicht in damp oder an feuchten Orten.
- Verwenden Sie für die Bedienung ausschließlich die mitgelieferte Fernbedienung.
3. Packungsinhalt
Prüfen Sie beim Auspacken, ob alle Komponenten vorhanden und unbeschädigt sind.
- Aigostar Ceiling Fan Unit
- Fernbedienung
- Bedienungsanleitung
4. Spezifikationen
| Besonderheit | Spezifikation |
|---|---|
| Modellnummer | GX-5555 |
| Abmessungen (L x B x H) | 48 x 48 x 15.5 cm |
| Gewicht | 4.05 kg |
| Power (Light) | 40 W |
| Leistung (Lüfter) | 20 W |
| Lichtstrom | 4400 Lumen |
| Farbtemperatur | 2700K-6500K (einstellbar) |
| Helligkeit | 10-100% (einstellbar) |
| Lüftergeschwindigkeiten | 6 Ebenen |
| Timerfunktion | 1/2/4 Stunden |
| Motortyp | DC Motor (Silent) |
| Klingen | 5 ABS-Klingen |
| Bandtage | 230 V (Wechselstrom) |
| Kontrollmethode | Fernbedienung |
| Montagetyp | Deckenmontage |
| Zertifizierungen | CE, RoHS |
5. Einrichtung und Installation
Installation should only be performed by a qualified professional to ensure safety and proper functionality. Always disconnect power at the circuit breaker before beginning any installation work.
5.1 Auspacken
Carefully remove all components from the packaging. Inspect for any damage during transit. Retain packaging for future transport or returns.
5.2 Montageort
Choose a ceiling location that can safely support the fan's weight and allows for adequate clearance around the blades. The fan has a diameter of 480mm and a height of 155mm.

Abbildung 2: Produktabmessungen für die Installationsplanung.
5.3 Verdrahtung und Montage
Follow the detailed wiring diagrams and assembly instructions provided in the separate installation guide included with your product. Ensure all electrical connections are secure and comply with local electrical codes. After wiring, securely attach the fan unit to the ceiling mount.
6. Bedienungsanleitung
The Aigostar Gx-5555 Ceiling Fan with Light is operated using the included remote control. Ensure batteries are correctly inserted into the remote.
6.1 Lichtfunktionen
Use the remote control to adjust the light settings:
- Anpassung der Farbtemperatur: Cycle through warm white (2700K), neutral white (4500K), and cool white (6500K) to suit your preference.
- Helligkeitsanpassung: Stellen Sie die Lichtintensität von 10 % auf 100 % ein.
- The light features a memory function, retaining the last setting when turned off and on again.

Figure 3: Adjustable color temperature and brightness settings.
6.2 Lüfterfunktionen
Control the fan speed and direction with the remote:
- Geschwindigkeitsanpassung: Select from 6 fan speeds. Lower speeds (1-2) are ideal for sleeping, medium speeds (3-4) for daily activities, and higher speeds (5-6) for increased air circulation.

Figure 4: Fan speed settings for various comfort levels.
- Leiser Betrieb: The DC motor ensures quiet operation, minimizing disturbance, especially during sleep.

Figure 5: The fan's quiet operation for undisturbed rest.
- Rückwärtsdrehung: The fan can rotate clockwise for downward airflow (ideal for cooling in summer) or counter-clockwise for upward airflow (to circulate warm air in winter). Refer to the remote control for the specific button to change rotation direction.
6.3 Timer-Funktion
Set the fan and/or light to automatically turn off after a specified period:
- Press the timer button on the remote to select 1, 2, or 4 hours.
- Note: Pressing any other button after setting the timer will cancel the timer function.

Figure 6: Remote control displaying the timer function.
7. Wartung
Regelmäßige Wartung gewährleistet optimale Leistung und Langlebigkeit Ihres Deckenventilators.
- Reinigung: Vor der Reinigung immer die Stromzufuhr unterbrechen. Verwenden Sie ein weiches, fusselfreies Tuch.amp Verwenden Sie ein Tuch, um das Lüftergehäuse und die Lüfterflügel abzuwischen. Verwenden Sie keine Scheuermittel oder Lösungsmittel.
- Klingeninspektion: Periodically check the fan blades for any dust buildup or damage.
- Dichtheit: Stellen Sie sicher, dass alle Schrauben und Verbindungen fest sitzen.
8. Fehlerbehebung
Sollten Sie auf Probleme stoßen, konsultieren Sie bitte die folgenden häufigen Probleme und Lösungen:
| Problem | Mögliche Ursache | Lösung |
|---|---|---|
| Lüfter funktioniert nicht | No power supply; Remote control battery low/dead; Incorrect wiring. | Check circuit breaker; Replace remote batteries; Consult a qualified electrician to check wiring. |
| Licht geht nicht an | No power supply; Light component fault. | Check circuit breaker; Contact customer support if light component is faulty. |
| Fernbedienung funktioniert nicht | Batteries incorrectly inserted or dead; Remote not paired (if applicable). | Check battery orientation and replace if necessary; Refer to remote pairing instructions in the full manual. |
| Lüfter wackelt | Lose Befestigungsschrauben; Unwucht der Klingen. | Ensure all mounting screws are tight; Check for balanced blades and re-tighten if necessary. |
If the problem persists after attempting these solutions, please contact Aigostar customer support.
9. Garantie und Support
Aigostar products are designed and manufactured to the highest quality standards. This product comes with a standard manufacturer's warranty. For detailed warranty information, please refer to the warranty card included in your package or visit the official Aigostar webWebsite.
For technical support, replacement parts, or any other inquiries, please contact Aigostar customer service through the contact information provided on our website or in your product documentation. Please have your model number (Gx-5555) and purchase date ready when contacting support.