1. Einleitung
This manual provides essential instructions for the safe and effective use of your Sealey SX030 Alloy Wheel Impact Socket Set. This set is designed for use with 1/2-inch square drive impact wrenches to remove and install alloy wheel nuts. The sockets feature a protective sleeve to prevent damage to alloy wheels during use.
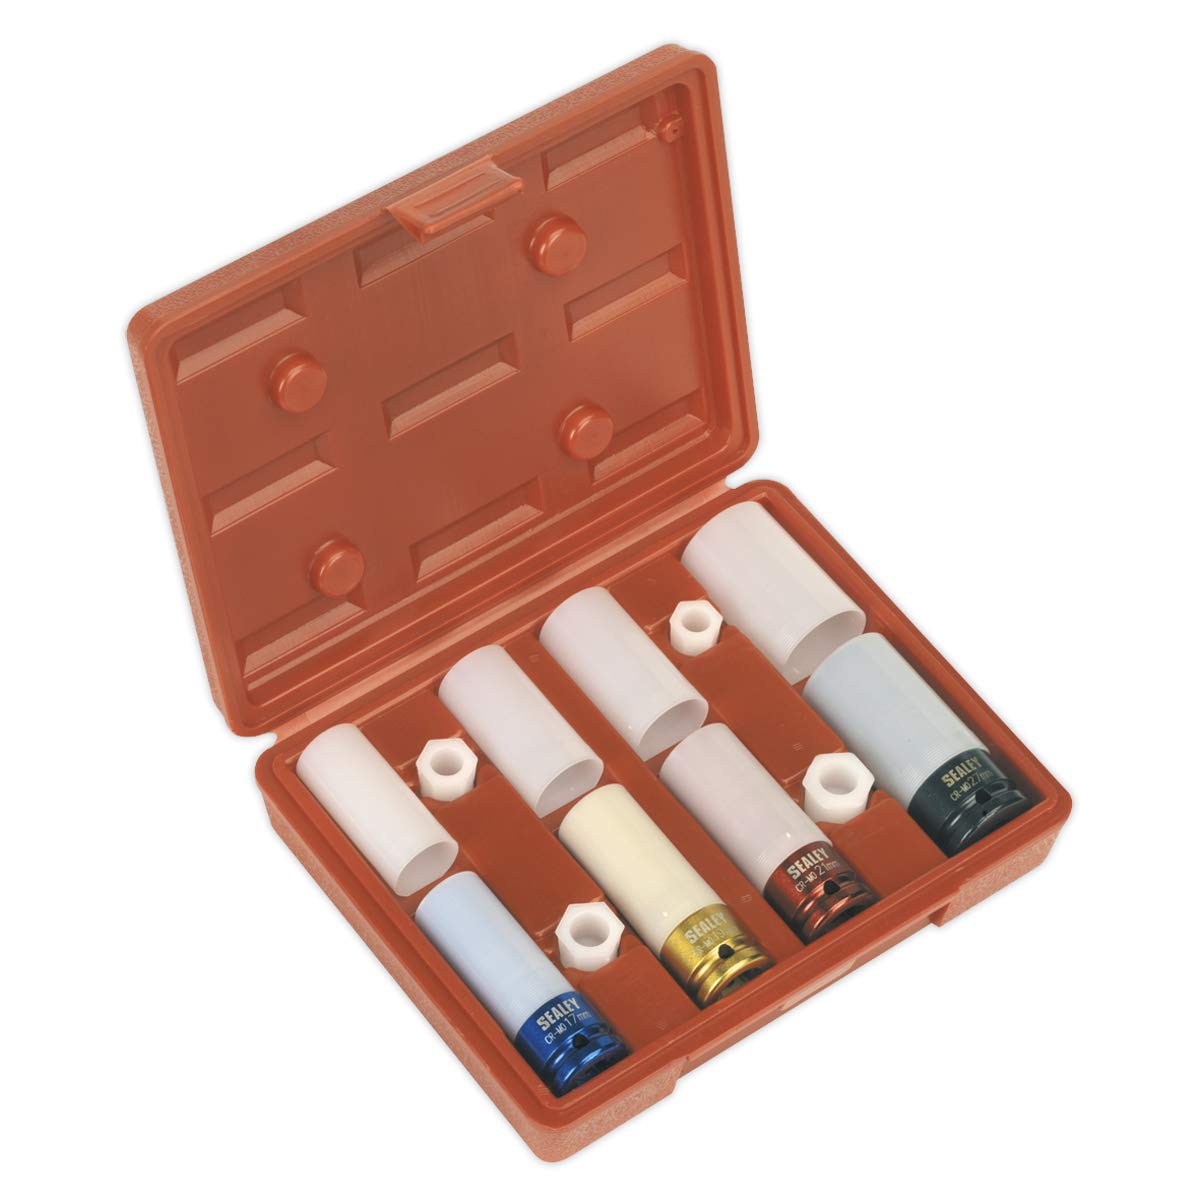
Image 1.1: The Sealey SX030 Alloy Wheel Impact Socket Set, showcasing the four sockets and their protective case.
2. Sicherheitshinweise
Always observe the following safety precautions to prevent personal injury and damage to the product or vehicle.
- Augenschutz: Always wear approved safety glasses or goggles when using impact tools.
- Handschutz: Wear appropriate gloves to protect hands from pinch points and vibrations.
- Werkzeugzustand: Inspect sockets for cracks, chips, or wear before each use. Do not use damaged sockets.
- Richtige Größe: Ensure the correct socket size is selected for the wheel nut to prevent rounding or damage.
- Kompatibilität mit Schlagschraubern: Use only with 1/2-inch square drive impact wrenches. Ensure the impact wrench is in good working order.
- Sichere Befestigung: Ensure the socket is fully seated and securely attached to the impact wrench anvil.
- Zu festes Anziehen: Avoid over-tightening wheel nuts with an impact wrench. Always use a torque wrench for final tightening to the vehicle manufacturer's specifications.
- Sauberkeit: Keep sockets clean and free from oil or grease to maintain a secure grip.
- Lagerung: Store sockets in their protective case in a dry, secure location away from children.
3. Packungsinhalt
The Sealey SX030 Alloy Wheel Impact Socket Set includes the following items:
- 1 x 17mm Alloy Wheel Impact Socket (Blue)
- 1 x 19mm Alloy Wheel Impact Socket (Gold)
- 1 x 22mm Alloy Wheel Impact Socket (Black)
- 1 x langlebiger Aufbewahrungskoffer

Image 3.1: The four alloy wheel impact sockets (17mm, 19mm, 21mm, 22mm) neatly arranged in their protective case.
4. Einrichtung
Before using the sockets, ensure your impact wrench is disconnected from its power source (air or electric) and is in good working condition.
- Sockel auswählen: Identify the correct size socket (17mm, 19mm, 21mm, or 22mm) that matches the wheel nuts on your vehicle. The protective sleeve on each socket is designed to prevent scratching your alloy wheels.
- An Schraubenschlüssel befestigen: Firmly push the selected socket onto the 1/2-inch square drive anvil of your impact wrench. Ensure it clicks into place or is secured by the detent pin/ball on the wrench.
- Passform überprüfen: Gently test the fit of the socket on a wheel nut before applying power to ensure it seats correctly and fully engages the nut.
5. Bedienungsanleitung
Follow these steps for safe and effective removal and installation of alloy wheel nuts.
- Fahrzeugvorbereitung: Park the vehicle on a level surface, engage the parking brake, and if lifting the vehicle, ensure it is securely supported by jack stands.
- Loosening Nuts: With the correct socket attached to the impact wrench, position the socket squarely over the wheel nut. Apply short bursts of power to loosen the nut. Avoid continuous impact, which can damage the nut or socket.
- Removing Nuts: Once loosened, remove the nuts completely by hand or with the impact wrench at a low setting.
- Installing Nuts: When installing, always start threading the wheel nuts by hand to prevent cross-threading.
- Erstes Anziehen: Use the impact wrench on a low setting or by hand to snug the nuts. The protective sleeve will help prevent damage to the wheel finish.
- Endgültiges Drehmoment: Crucially, always use a calibrated torque wrench to apply the final tightening torque to the wheel nuts according to the vehicle manufacturer's specifications. Impact wrenches are not suitable for final torque settings.
6. Wartung
Proper maintenance ensures the longevity and performance of your socket set.
- Reinigung: After each use, wipe the sockets clean with a dry cloth to remove dirt, grease, and debris. Do not use harsh chemicals that could damage the protective sleeves.
- Inspektion: Regularly inspect each socket for signs of wear, cracks, deformation, or damage to the protective sleeve. Replace any damaged sockets immediately.
- Lagerung: Store the sockets in their original durable storage case in a dry, cool, and secure environment. This protects them from corrosion and physical damage.
7. Fehlerbehebung
If you encounter issues while using your Sealey SX030 socket set, consider the following:
- Steckdose passt nicht: Ensure you have selected the correct metric size (17mm, 19mm, 21mm, or 22mm) for your wheel nuts. Check for any debris inside the socket or on the wheel nut.
- Steckdose rutscht: Verify that the socket is fully engaged on the wheel nut and securely attached to the impact wrench. Worn nuts or sockets can cause slipping.
- Damage to Wheel/Nut: This often indicates incorrect socket size, improper technique, or excessive force. Always use the correct size and finish tightening with a torque wrench.
- Socket Cracking/Breaking: This can be due to using a damaged socket, excessive force, or using the socket with an impact wrench that exceeds its rated capacity. Always inspect sockets before use.
8. Spezifikationen
| Marke | Sealey |
| Modellnummer | SX030 |
| Laufwerksgröße | 1/2-Zoll-Vierkantantrieb |
| Sockelgrößen | 17 mm, 19 mm, 21 mm, 22 mm |
| Menge | 4 Stück |
| Technische Daten | 5.6 x 23.7 x 21.1 cm (Gehäuse) |
| Artikelgewicht | 1.3 kg |
9. Garantieinformationen
For specific warranty details regarding your Sealey SX030 Alloy Wheel Impact Socket Set, please refer to the warranty card included with your purchase or visit the official Sealey website. General warranty terms typically cover manufacturing defects under normal use conditions.
10. Unterstützung
Should you require technical assistance, replacement parts, or have questions regarding the use of your Sealey SX030 Alloy Wheel Impact Socket Set, please contact Sealey customer support through their official webWebsite oder die Kontaktinformationen, die auf Ihrer Produktverpackung angegeben sind.


