Einführung
The GARDENA Angled Tap Connector (Model 2999-20) is designed to provide a reliable and flexible connection between your garden tap and hose. Its unique rotating and swiveling angled design prevents the garden hose from kinking or twisting at the tap, ensuring unhindered water flow and protecting your hose from damage. This manual provides detailed instructions for installation, operation, and maintenance to ensure optimal performance and longevity of your product.

Image: The GARDENA Angled Tap Connector, featuring its distinctive grey and orange construction and angled shape, designed for flexible hose connection.
Produkteigenschaften
- Rotating and Swiveling Angled Design: Prevents the garden hose from kinking or twisting at the tap, allowing water to flow freely and preventing hose damage.
- Hose Trolley Compatibility: The tap connector is suitable for use with a hose trolley, enhancing convenience.
- Langlebige Konstruktion: Manufactured with proven GARDENA quality for a long service life.
- Original GARDENA System Integration: Ensures simple, quick, and leak-proof connection of accessories to the tap or hose.
Packungsinhalt
- 1 x GARDENA Angled Tap Connector (Model 2999-20)
Kompatibilität
The GARDENA Angled Tap Connector is designed for use with the following tap thread sizes:
- 26.5 mm (G 3/4") taps with 33.3 mm (G 1") threads
- 21 mm (G 1/2") taps with 26.5 mm (G 3/4") threads
Notiz: Please verify your tap's thread size before installation to ensure proper fit and prevent leaks. The connector includes various adapters to accommodate these common sizes.
Setup und Installation
Follow these steps to correctly install your GARDENA Angled Tap Connector:
Schritt 1: Komponenten identifizieren
Familiarize yourself with the parts of the Angled Tap Connector, including the main angled unit and the various tap thread adapters.
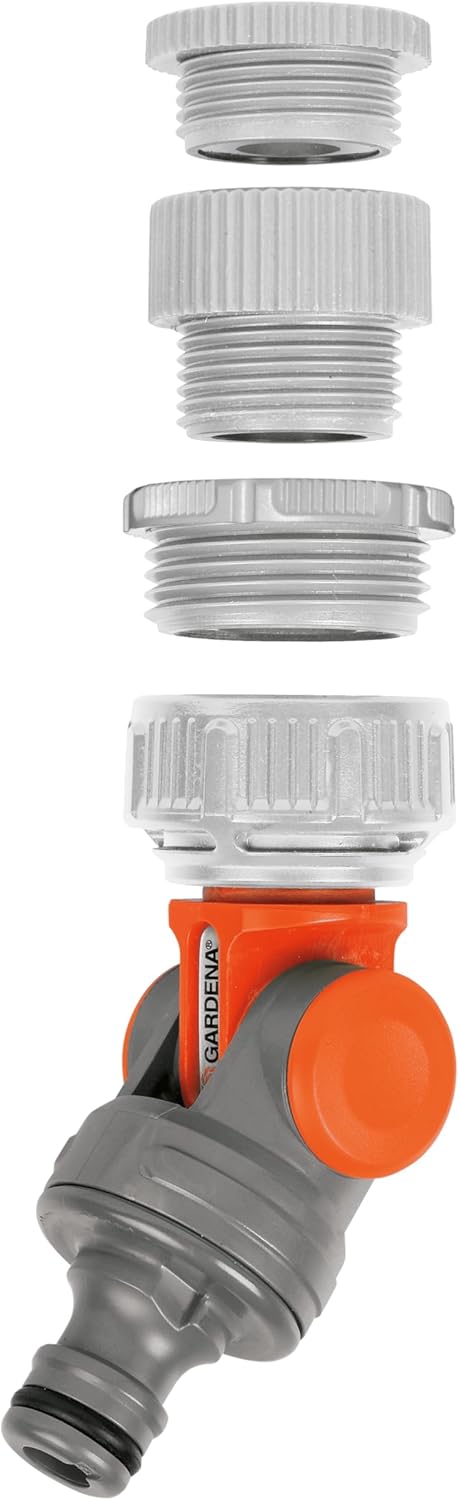
Bild: Eine explodierte view of the GARDENA Angled Tap Connector, illustrating its separate parts including different tap adapters and the main angled body.
Step 2: Prepare the Tap and Attach Adapter
Unscrew and remove any existing aerator or connector from your tap. Ensure the tap threads are clean. Select the appropriate thread adapter (G1 or G3/4) that matches your tap. Screw this adapter onto your tap. Hand-tighten first, then use a wrench if necessary, but avoid overtightening to prevent damage. Ensure a rubber washer is correctly seated within the adapter to create a watertight seal.

Image: The GARDENA Angled Tap Connector securely attached to an outdoor tap, demonstrating the initial connection phase.
Step 3: Connect the Angled Unit
Attach the main angled connector unit to the tap adapter you just installed. Push it firmly until it clicks securely into place. This connection should be leak-proof. The angled unit is designed to rotate and swivel freely, allowing for flexible hose positioning.
Schritt 4: Schlauch anschließen
Attach your garden hose, which should be equipped with a standard GARDENA hose connector, to the angled tap connector. Push the hose connector onto the angled unit until it clicks into place. This completes the installation.

Image: The GARDENA Angled Tap Connector with a garden hose connected, illustrating how the angled design directs the hose downwards from the tap.

Image: The GARDENA Angled Tap Connector with a garden hose connected, demonstrating the flexibility to position the hose straight out from the tap.
Bedienungsanleitung
Once installed, the GARDENA Angled Tap Connector operates automatically. The primary function is to provide a flexible connection point that prevents hose kinking. The rotating and swiveling mechanism allows you to adjust the direction of the hose as needed, reducing strain on both the tap and the hose itself. This is particularly beneficial when using hose trolleys or when the tap is in an awkward position.
Wartung
To ensure the long-term performance and reliability of your Angled Tap Connector, follow these maintenance guidelines:
- Regelmäßige Inspektion: Periodically check all connections for tightness. Ensure the tap adapter is securely fastened to the tap and the hose connector is firmly attached to the angled unit.
- Reinigung: If you notice reduced water flow or mineral buildup, carefully detach the connector and clean any lime scale or debris from the tap adapter and internal components. A mild descaling solution can be used, followed by thorough rinsing.
- Winterlager: During winter months or periods of frost, disconnect the Angled Tap Connector from the tap and store it in a frost-free environment. This prevents potential damage from freezing water.
- Dichtungsprüfung: Inspect rubber washers and seals for wear or damage. Replace them if necessary to maintain a leak-proof connection.
Fehlerbehebung
If you encounter issues with your Angled Tap Connector, refer to the following troubleshooting tips:
- Issue: Water Leakage at Tap Connection
Lösung: Ensure the correct thread adapter is used and securely tightened to the tap. Check that the rubber washer inside the adapter is properly seated and not damaged. Replace the washer if it shows signs of wear. - Issue: Water Leakage at Hose Connection
Lösung: Verify that the GARDENA hose connector is fully engaged with the angled tap connector. Inspect the rubber seal within the hose connector for damage or debris and clean or replace as needed. - Problem: Reduzierter Wasserdurchfluss
Lösung: Check for any blockages in the tap adapter or the hose itself. Ensure the tap is fully open. Clean any lime scale buildup from the tap adapter and the connector's internal passages.
Technische Daten
- Material: Plastik
- Compatible Tap Threads: 26.5 mm (G 3/4") with 33.3 mm (G 1") and 21 mm (G 1/2") with 26.5 mm (G 3/4")
- Artikelabmessungen (L x B x H): Ungefähr 8.66 x 4.13 x 1.57 Zoll (22 x 10.5 x 4 cm)
- Artikelgewicht: Ungefähr 2.08 Unzen (59 Gramm)
- Modellnummer: 2999-20
Garantie
This GARDENA Angled Tap Connector (Model 2999-20) is covered by a five-year GARDENA warranty. Please retain your proof of purchase for any warranty claims. The warranty covers defects in material and workmanship under normal use and service.
Unterstützung
For further assistance, technical support, or to inquire about replacement parts, please visit the official GARDENA website or contact their customer service department. You can typically find contact information on the GARDENA webauf der Website oder auf der Produktverpackung.


