Einführung
Welcome to the user manual for your Flipper Big Button Remote. This remote is designed for simplicity and ease of use, especially for seniors, allowing control of two devices: a television and a cable/satellite/DTV box. Its intuitive design and large, color-coded buttons simplify the viewErfahrung.
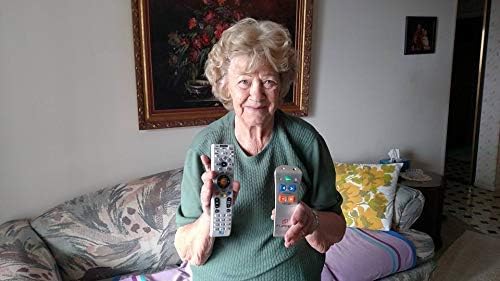
Image: An older woman demonstrates the Flipper remote's simplicity by holding it alongside a more complex standard remote, emphasizing its user-friendly design.
Sicherheitshinweise
Please read all safety instructions before using the Flipper remote to ensure safe operation and prevent damage.
- Do not expose the remote to water or excessive moisture.
- Mischen Sie keine alten und neuen Batterien. Mischen Sie keine Alkali-, Standard- (Kohle-Zink) oder wiederaufladbaren (Nickel-Cadmium) Batterien.
- Entsorgen Sie gebrauchte Batterien ordnungsgemäß gemäß den örtlichen Vorschriften.
- Außerhalb der Reichweite von kleinen Kindern aufbewahren.
Packungsinhalt
Your Flipper Big Button Remote package should contain the following items:
- 1 x Flipper Big Button Remote (Model A22)
- 1 x Benutzerhandbuch (dieses Dokument)
Produkt überview
Layout der Fernbedienung
The Flipper remote features a simplified layout for common functions and a hidden sliding panel for advanced controls such as direct channel entry.

Image: The Flipper remote with its main, large, color-coded buttons visible: green ON/OFF, gray MUTE, blue CHANNEL up/down, and orange VOLUME up/down.

Image: The Flipper remote with its lower panel slid open, exposing the numeric keypad (0-9), LC (Last Channel), TV, STB (Set Top Box), ADD, and DEL buttons.
Main Buttons:
- ON/OFF (Green): Powers on/off both the TV and Set Top Box simultaneously.
- MUTE (Gray): Schaltet den TV-Ton stumm/hebt die Stummschaltung auf.
- CHANNEL (Blue Arrows): Schaltet die Kanäle nach oben oder unten.
- VOLUME (Orange +/-): Stellt die Lautstärke nach oben oder unten ein.
Hidden Panel Buttons:
Slide down the lower panel to access these functions:
- Ziffernblock (0-9): Für den direkten Kanalzugang.
- LC (Last Channel): Kehrt zur vorherigen viewed-Kanal.
- FERNSEHER: Selects TV mode for programming or direct control.
- STB (Set Top Box): Selects Set Top Box mode for programming or direct control.
- HINZUFÜGEN: Used for adding favorite channels.
- DES: Used for deleting favorite channels.
Aufstellen
Einlegen der Batterie
The Flipper remote requires two (2) AAA batteries (not included).
- Öffnen Sie den Batteriefachdeckel auf der Rückseite der Fernbedienung.
- Legen Sie zwei AAA-Batterien ein und achten Sie dabei auf die richtige Polarität (+ und -).
- Schließen Sie den Batteriefachdeckel fest.
Device Pairing (Simple Setup)
The Flipper remote is designed for easy setup with most TVs and cable/satellite boxes. Follow these steps:

Image: A visual guide illustrating the three steps for setting up the Flipper remote: 1. Test presets using VOL and CH buttons. 2. Sync TV by holding TV button, entering codes, and pressing VOL. 3. Sync STB by holding STB button, entering codes, and pressing CH.
- Test Presets: The Flipper remote is pre-synced to many TVs and Set Top Boxes (cable boxes). Test by pressing the VOLUMEN Und KANAL buttons. If one or both presets do not work, proceed to the next steps.
- Sync TV:
- Halten Sie die TV button (under the sliding panel) until the red light on the remote turns solid.
- Enter the 3-digit code for your TV brand (refer to the Flipper website or included code list for common codes). The light will turn off.
- Drücken VOLUMEN to test. If it doesn't work, try another code for your TV brand.
- Special Note for no STB/cable box: If you only have a TV and no Set Top Box, press and hold TV until the light is solid, then enter 970. This syncs the Channel buttons to the TV.
- Sync STB (Set Top Box):
- Halten Sie die STB button (under the sliding panel) until the red light on the remote turns solid.
- Enter the 3-digit code for your cable, satellite, or DTV box brand (refer to the Flipper website or included code list). The light will turn off.
- Drücken KANAL to test. If it doesn't work, try another code for your STB brand.
- Tipp: For Xfinity boxes, you may need to look behind the TV or furniture to find the box.
- Once both devices are synced, the EIN/AUS button will control both simultaneously.
Bedienungsanleitung
Grundsteuerung
- Leistung: Drücken Sie die grüne EIN/AUS button to turn both your TV and Set Top Box on or off.
- Kanal: Verwenden Sie die blaue KANAL arrows to navigate through channels.
- Volumen: Use the orange VOLUMEN +/- buttons to adjust the sound level.
- Stumm: Drücken Sie die graue MUTE Taste zum Stummschalten des Tons. Erneut drücken, um die Stummschaltung aufzuheben.
Favorite Channel Feature
Program up to 30 of your favorite channels for quick access.
- Stellen Sie sicher, dass die Fernbedienung eingeschaltet ist. STB mode (if using a cable/satellite box) or TV mode (if only controlling TV channels directly).
- Halten Sie die HINZUFÜGEN button (under the sliding panel) until the red light turns solid.
- Enter the channel number you wish to add using the numeric keypad.
- Drücken HINZUFÜGEN again. The light will flash and turn off, indicating the channel is saved.
- Repeat for all desired favorite channels.
- To scroll through favorite channels, use the blue KANAL Pfeile.
Locking Feature (Prevent Reprogramming)
The Flipper remote includes an optional locking feature to prevent accidental reprogramming.
- Zu Sperren the remote: Press and hold HINZUFÜGEN Und DEL simultaneously for 5 seconds until the red light flashes twice.
- Zu Freischalten the remote: Press and hold HINZUFÜGEN Und DEL simultaneously for 5 seconds until the red light flashes three times.
Wartung
Reinigung
Wipe the remote with a soft, dry cloth. Do not use liquid cleaners or abrasive materials, as these may damage the remote's surface or internal components.
Batteriewechsel
Replace batteries when the remote's response becomes sluggish or the indicator light does not illuminate consistently. Refer to the "Battery Installation" section for instructions.
Fehlerbehebung
Häufige Probleme und Lösungen
| Problem | Mögliche Ursache | Lösung |
|---|---|---|
| Fernbedienung funktioniert nicht. | Tote oder falsch eingelegte Batterien. | Ersetzen Sie die Batterien durch neue AAA-Batterien und achten Sie dabei auf die richtige Polarität. |
| Remote controls one device but not the other. | Only one device is programmed, or incorrect code used. | Re-program the unresponsive device using the "Device Pairing" instructions. Try alternative codes for your device brand. |
| ON/OFF button only controls one device. | Both devices are not properly synced for the one-touch power feature. | Ensure both TV and STB are programmed correctly. The ON/OFF button will then control both. |
| Cannot add or delete favorite channels. | Remote is locked. | Unlock the remote using the "Locking Feature" instructions. |
Technische Daten
Technische Details
- Modell: A22
- Marke: Flipper
- Hersteller: Flipper LLC
- Kompatible Geräte: TV, Set Top Box (Cable, Satellite, DTV)
- Maximale Anzahl unterstützter Geräte: 2
- Energiequelle: 2 x AAA-Batterien (nicht enthalten)
- Konnektivitätstechnologie: Infrarot
- Eingabe der menschlichen Schnittstelle: Buttons, Keypad
- Produktabmessungen: 17.78 x 5.08 x 5.08 cm
- Artikelgewicht: 141.75 g
- Besondere Merkmale: Favorite channel feature (up to 30 channels), Locking feature to prevent reprogramming, Large tactile friendly buttons.
Garantie und Support
Garantieinformationen
Spezifische Garantiebedingungen finden Sie in der Regel in Ihren Kaufunterlagen oder auf der offiziellen Website des Herstellers. website. Please refer to those resources for the most accurate and up-to-date warranty terms regarding your Flipper remote.
Kundenservice
For further assistance, troubleshooting, or to find device codes not listed in this manual, please visit the official Flipper webWebsite oder wenden Sie sich an den Kundendienst.
Note: Contact information and support resources may vary by region. Please check the product packaging or manufacturer's webWebsite für Details.


