1. Einleitung
This manual provides essential instructions for the safe assembly, operation, and maintenance of your Sealey IHS1 stand. This stand is designed to convert the Sealey IWMH1809R wall-mounted infrared heater into a freestanding IFSH1809R unit. Please read these instructions thoroughly before use and retain them for future reference.

Figure 1: The Sealey IHS1 stand with a compatible infrared heater installed, showcasing seine freistehende Konstruktion.
2. Sicherheitshinweise
Always observe the following safety precautions to prevent personal injury or damage to the product.
- Ensure the stand is assembled on a flat, stable, and level surface.
- Do not exceed the maximum weight capacity of the stand. This stand is specifically designed for Sealey IWMH1809R/IFSH1809R heaters.
- Überprüfen Sie regelmäßig alle Befestigungselemente und Verbindungen, um sicherzustellen, dass sie fest sitzen.
- Keep children and pets away from the stand and attached heater during operation.
- Versuchen Sie nicht, den Ständer in irgendeiner Weise zu verändern.
- When moving the stand with the heater attached, ensure the heater is switched off and cooled, and move with care to prevent tipping.
3. Packungsinhalt
Vor Beginn der Montage prüfen Sie, ob alle Komponenten vorhanden sind:
- 1 x Sealey IHS1 Stand Assembly (includes base, pole sections, and mounting bracket)
- Required Fasteners and Tools (if applicable, refer to heater manual for heater-specific fasteners)
4. Aufbau und Montage
Follow these steps to assemble the IHS1 stand and attach your compatible heater.
- Zusammenbau der Basis: Place the stand base on a flat, stable surface. Ensure the base is fully seated and stable.

Figure 2: The robust circular base of the Sealey IHS1 stand, designed for stability.
- Stangensegmente anbringen: Securely connect the pole sections to the base and to each other, following the instructions provided with the stand's packaging. Ensure all connections are tightened.
- Heizgerät montieren: Attach your Sealey IWMH1809R heater to the top mounting bracket of the IHS1 stand. Refer to your heater's instruction manual for specific mounting hardware and procedures. Ensure the heater is securely fastened and balanced on the stand.
- Kabelmanagement: Route the heater's power cable along the stand pole using the provided cable clips to prevent tripping hazards and maintain a tidy appearance.

Abbildung 3: Eine Nahaufnahme view of the cable management clip on the stand's pole, used to secure the power cord.
5. Bedienungsanleitung
The IHS1 stand provides a stable platform for your heater. Its primary operational feature is height adjustment.
- Höhe einstellen: To adjust the height of the heater, loosen the height adjustment collar on the stand pole. Carefully raise or lower the upper pole section to the desired height (between 1340mm and 1700mm). Once the desired height is achieved, securely tighten the adjustment collar to lock the pole in place.

Figure 4: The height adjustment collar on the stand's pole, allowing for variable height settings.
- Positionierung: Place the stand with the attached heater in a location where it can provide optimal heating without obstruction. Ensure there is adequate clearance around the heater as specified in the heater's manual.
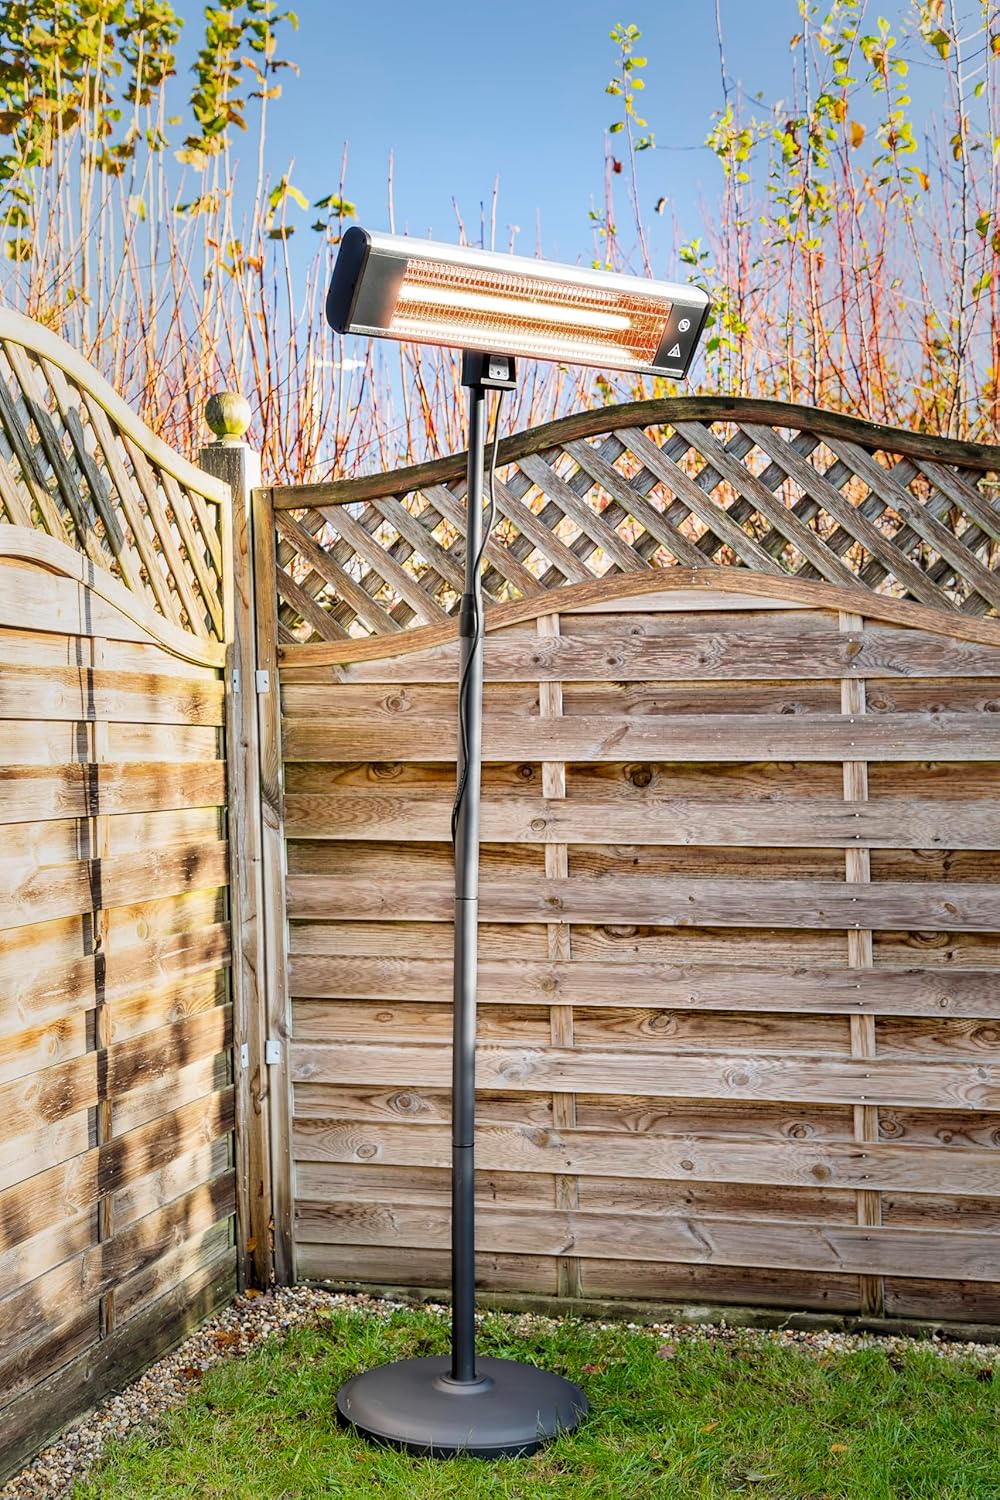
Figure 5: The Sealey IHS1 stand with an infrared heater positioned outdoors, demonstrating its freestanding utility.
Note: For specific operating instructions regarding the heater's power, heat settings, and sensor functions, please refer to the instruction manual provided with your Sealey IWMH1809R/IFSH1809R heater. An example of a heater control panel is shown below for reference.

Abbildung 6: Bspample of a control panel found on compatible Sealey heaters, featuring ON, OFF, and SENSOR buttons.
6. Wartung
To ensure the longevity and safe operation of your IHS1 stand:
- Reinigung: Wischen Sie den Ständer mit einem weichen, fusselfreien Tuch ab.amp Tuch. Keine Scheuer- oder Lösungsmittel verwenden.
- Inspektion: Periodically check all bolts, screws, and connections for tightness. Retighten if necessary.
- Lagerung: If storing the stand for an extended period, disassemble it if desired and store in a dry, protected area.
7. Fehlerbehebung
If you encounter issues with your IHS1 stand, consider the following:
- Standinstabilität:
- Stellen Sie sicher, dass der Ständer auf einer absolut ebenen und waagerechten Fläche steht.
- Verify all pole sections and the base are securely tightened.
- Confirm the heater is properly centered and balanced on the mounting bracket.
- Schwierigkeiten bei der Höhenverstellung:
- Ensure the height adjustment collar is fully loosened before attempting to adjust.
- Prüfen Sie, ob sich innerhalb der Mastsegmente Hindernisse oder Ablagerungen befinden.
For issues related to the heater's functionality, refer to the heater's specific instruction manual.
8. Spezifikationen
| Besonderheit | Detail |
|---|---|
| Modellnummer | IHS1 |
| Compatible Heaters | Sealey IWMH1809R, IFSH1809R |
| Mindesthöhe | 1340 mm |
| Maximale Höhe | 1700 mm |
| Produktabmessungen (verpackt) | Ungefähr 0.62 x 3.23 x 0.62 Zoll |
| Artikelgewicht | 22.2 Pfund (ca. 10.07 kg) |
| Farbe | Schwarz |
9. Garantie und Support
This Sealey IHS1 stand comes with a 1 Jahre Garantie. For full terms and conditions, please refer to the official Sealey website or contact Sealey customer support.

Figure 7: Sealey's 1 Year Guarantee emblem, indicating product assurance.
Für technische Unterstützung, Ersatzteile oder Garantieansprüche wenden Sie sich bitte an Ihren autorisierten Sealey-Händler oder besuchen Sie die offizielle Sealey-Website. webWebsite für Supportinformationen.
Please note: "Terms and conditions apply" as indicated by the manufacturer.


