Wichtige Sicherheitsinformationen
Please read all instructions carefully before assembly and use. Failure to follow these instructions may result in injury or damage to the product. Keep this manual for future reference.
- Gewichtskapazität: Die maximale Tragfähigkeit von 300 lbs (136 kg) darf nicht überschritten werden.
- Stabilität: Ensure all legs are stable and on a level surface before use.
- Montage: Verify all parts are securely fastened before each use.
- Wartung: Regularly inspect the commode for wear, damage, or loose parts. Discontinue use if any issues are found.
- Aufsicht: Individuals with limited mobility or cognitive impairment should be supervised during use.
- Verriegelungsmechanismus: Always ensure the seat is fully depressed and locked in place before sitting.
Packungsinhalt
Verify that all components are present and undamaged upon opening the package. If any parts are missing or damaged, contact customer support immediately.
- Commode Frame (main assembly)
- Seat with Lifting Mechanism
- Commode Bucket with Lid (if included)
- Montagezubehör (Schrauben, Stifte usw.)
- Bedienungsanleitung
Einrichtung und Montage
Follow these steps to assemble your Uplift Bedside Commode Lift Chair. It can be used as a standalone bedside commode or positioned over a standard toilet.
- Komponenten auspacken: Nehmen Sie alle Teile vorsichtig aus der Verpackung und legen Sie sie auf eine saubere, ebene Fläche.
- Rahmen zusammenbauen: Connect the frame sections according to the diagrams provided in the separate assembly sheet (not included in this digital manual). Ensure all locking pins or screws are fully engaged and tightened.
- Sitz anbringen: Secure the seat with the lifting mechanism to the assembled frame. Confirm that the seat is firmly attached and does not wobble.
- Höhe anpassen: The commode's height can be adjusted from 17 inches to 23 inches. Adjust each leg to the desired height, ensuring all four legs are set to the same level for stability. Secure adjustment pins firmly.
- Toiletteneimer einsetzen: If using as a bedside commode, place the commode bucket into the designated slot under the seat.
- Endkontrolle: Before first use, double-check all connections and adjustments to ensure the commode is stable and safe.
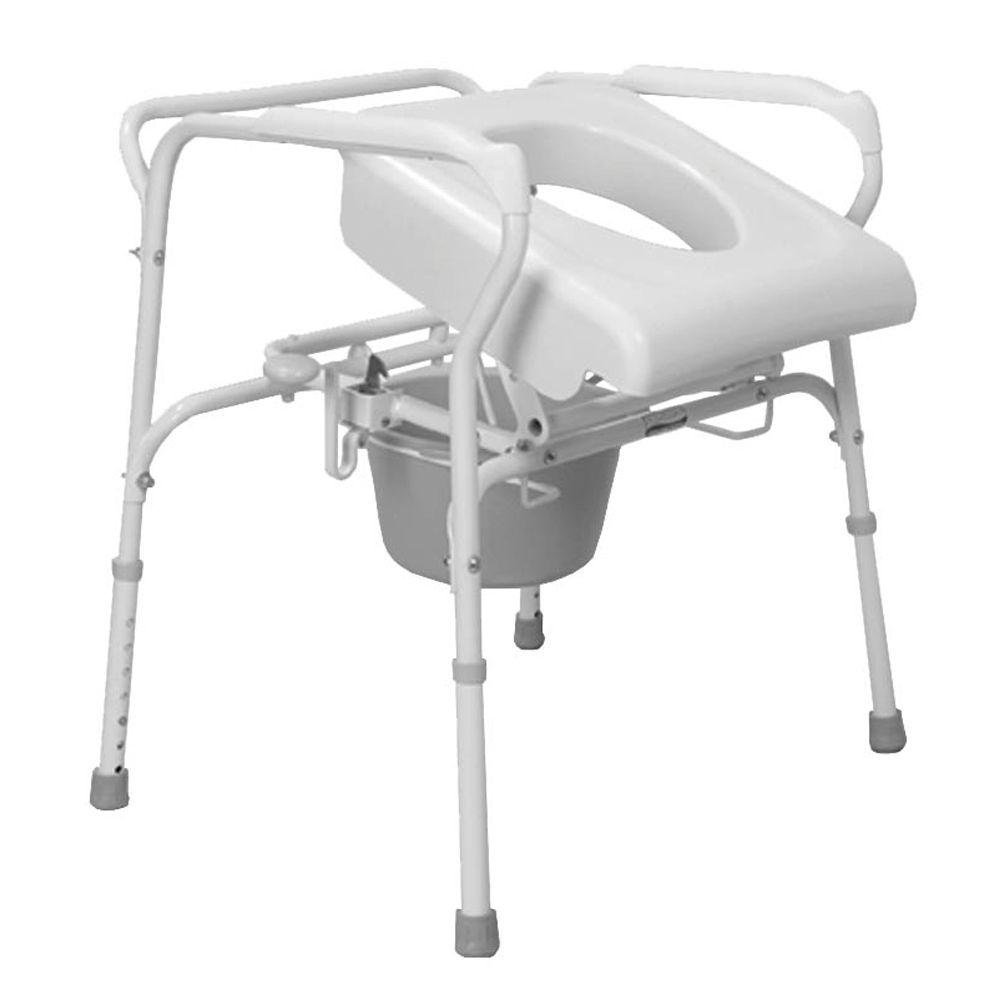
Image: The Uplift Bedside Commode Lift Chair installed over a standard toilet, demonstrating its dual functionality.
Bedienungsanleitung
The Uplift Bedside Commode Lift Chair is designed to assist users in sitting down and standing up with reduced effort.
- Im Sitzen:
- Approach the commode and turn to face away from it.
- Gently lower yourself onto the seat. The seat will fully depress and lock into place, providing a stable surface for use.
- Ensure you are centered and balanced on the seat.
- Aufstehen:
- Once ready to stand, position your feet firmly on the floor.
- Locate the lift assist lever (typically on the side of the seat mechanism).
- Depress the lever and begin to lean forward slightly. The seat will provide a gentle lift, assisting up to 80% of your body weight, making it easier to stand.
- Maintain a firm grip on the commode's armrests for additional support as you rise.
- Verwendung als Nachttisch-Toilettenstuhl:
- Ensure the commode bucket is correctly placed under the seat.
- After use, remove the bucket, empty its contents, and clean thoroughly.
- Verwendung über einer Toilette:
- Position the commode frame directly over a standard toilet.
- Ensure the commode is stable and centered over the toilet bowl before use.
- The commode bucket is not used in this configuration.
Wartung und Reinigung
Regular cleaning and maintenance will ensure the longevity and hygienic use of your commode.
- Tägliche Reinigung: Clean the seat, frame, and commode bucket (if used) after each use with a mild soap and water solution. Rinse thoroughly and dry.
- Desinfektion: For disinfection, use a household disinfectant spray or wipe, following the product's instructions.
- Inspektion: Periodically inspect all nuts, bolts, and pins to ensure they are tight and secure. Check the lifting mechanism for smooth operation and any signs of wear.
- Lagerung: Store the commode in a dry, clean environment when not in use.
- Vermeiden Sie aggressive Chemikalien: Verwenden Sie keine Scheuermittel, Lösungsmittel oder aggressive Chemikalien, da diese die Materialien beschädigen können.
Fehlerbehebung
| Problem | Mögliche Ursache | Lösung |
|---|---|---|
| Lift mechanism not working or stiff. | Mechanism may be jammed, dirty, or damaged. User weight outside range. |
|
| Commode feels unstable or wobbly. | Legs unevenly adjusted or loose connections. Not on a level surface. |
|
| Die Teile passen beim Zusammenbau nicht zusammen. | Falsche Ausrichtung oder Herstellungsfehler. |
|
Technische Daten
- Marke: Erheben
- Modell: B003Y5KXYG
- Hersteller: Carex
- Gewichtskapazität: 80 bis 300 kg (36 bis 136 Pfund)
- Mindestgröße: 17 Zoll (43.2 cm)
- Einstellbarer Höhenbereich: 17 Inches to 23 Inches (43.2 cm to 58.4 cm)
- Sitztiefe: 16.5 Zoll (41.9 cm)
- Sitzbreite: 16.5 Zoll (41.9 cm)
- Overall Depth (outside legs): 20.5 Zoll (52.1 cm)
- Overall Width (outside legs): 25.75 Zoll (65.4 cm)
- Produktgewicht: 21 kg
- Frühestmöglicher Termin: 2. August 2010
Garantie und Support
For warranty information, product support, or to inquire about replacement parts, please contact the manufacturer, Carex, directly. Refer to the packaging or the official Carex website for their contact details and specific warranty terms applicable to your region.
Note: Statements regarding dietary supplements have not been evaluated by the FDA and are not intended to diagnose, treat, cure, or prevent any disease or health condition. This product is a medical aid.


