Einführung
Vielen Dank für Ihren Einkauf.asing the CASIO TQ-720J-7JF Analog Radio Alarm Clock. This manual provides detailed instructions for the proper setup, operation, and maintenance of your new alarm clock. Please read this manual thoroughly before use and keep it for future reference.
Sicherheitsvorkehrungen
- Do not expose the clock to direct sunlight, high temperatures, or high humidity.
- Vermeiden Sie starke Stöße oder Vibrationen.
- Halten Sie die Uhr von starken Magnetfeldern fern.
- Use only the specified battery type (AA alkaline batteries). Incorrect battery usage can lead to leakage or explosion.
- Um ein Auslaufen zu verhindern, entfernen Sie die Batterien, wenn die Uhr längere Zeit nicht benutzt wird.
Produkt überview
Familiarize yourself with the components of your CASIO TQ-720J-7JF alarm clock.

Abbildung 1: Vorderseite View. This image displays the front of the alarm clock, featuring a white analog dial with clear black numbers, hour, minute, and second hands, and the CASIO logo. The clock has a classic twin-bell design with a white body and silver bells and feet.

Abbildung 2: Seite View. This image shows the alarm clock from a side angle, highlighting its depth and the design of the twin bells and feet.

Abbildung 3: Zurück View mit Steuerelementen. This image shows the rear of the alarm clock, highlighting the battery compartment, time setting knob, alarm setting knob, alarm ON/OFF switch, and radio wave reception ON/OFF switch. The light button is also visible on the top.
Aufstellen
1. Einlegen der Batterie
- Open the battery compartment cover located on the back of the clock (refer to Figure 3).
- Insert two (2) AA alkaline batteries, ensuring the correct polarity (+ and -) as indicated inside the compartment.
- Schließen Sie den Batteriefachdeckel fest.
2. Initial Time Setting (Radio Wave Reception)
This clock features a radio reception function to automatically set the time. For optimal reception, place the clock near a window and away from electronic devices that may cause interference.

Figure 4: Wave Ceptor Technology. This image displays the 'Wave Ceptor' logo, signifying the clock's ability to receive radio signals for accurate time synchronization.
- Upon battery installation, the clock will attempt to receive a time calibration signal automatically. This process may take several minutes.
- If automatic reception is unsuccessful, you can manually initiate reception or set the time manually.
- To manually initiate reception: Refer to the specific instructions for your region in the full manual (not provided here, but generally involves holding a button).
- To manually set the time: Use the time setting knob on the back of the clock (refer to Figure 3) to adjust the hour and minute hands.
- Ensure the Radio Wave Reception ON/OFF switch (refer to Figure 3) is in the 'ON' position for automatic synchronization.
Bedienung der Uhr
1. Einstellen des Alarms
- Use the alarm setting knob on the back of the clock (refer to Figure 3) to move the alarm hand to your desired alarm time.
- Ensure the alarm ON/OFF switch (refer to Figure 3) is in the 'ON' position.
2. Alarmfunktionen
- Bell Alarm: When the alarm time is reached, the twin bells will ring loudly.
- Schlummerfunktion: To temporarily stop the alarm and activate snooze, press the light button on top of the clock. The alarm will sound again after approximately 5 minutes.
- Stoppen des Alarms: To permanently stop the alarm, slide the alarm ON/OFF switch to the 'OFF' position.
3. Lichtfunktion
- Press the light button on the top of the clock to illuminate the dial. The light features an afterglow function, remaining lit for a short period after the button is released.
4. Second Hand Stop Function
- When the alarm is set (alarm ON/OFF switch is 'ON'), the second hand will automatically stop at the 12 o'clock position to reduce noise. It will resume normal movement when the alarm is turned 'OFF'.
Wartung
- Reinigung: Reinigen Sie die Uhr mit einem weichen, trockenen Tuch. Verwenden Sie keine Scheuermittel oder Lösungsmittel.
- Batteriewechsel: Replace batteries when the clock's display becomes dim or the alarm sound weakens. Always replace both batteries at the same time with new AA alkaline batteries.
Fehlerbehebung
- Clock not displaying correct time: Ensure batteries are correctly installed and have sufficient power. Check if the radio wave reception is enabled and the clock is in a location with good signal. Manually set the time if automatic reception fails.
- Kein Alarm: Verify that the alarm ON/OFF switch is in the 'ON' position and the alarm time is correctly set. Check battery power.
- Kein Licht: Akkuleistung prüfen.
- Second hand not moving: If the alarm is set to 'ON', the second hand will stop at 12 o'clock. This is normal operation. If the alarm is 'OFF' and the second hand is still not moving, check battery power.
Technische Daten
| Modellnummer | TQ-720J-7JF |
| Marke | Casio |
| Anzeigetyp | Analog |
| Abmessungen (H x B x T) | Ca. 14.9 x 11.3 x 7.7 cm (5.8 x 4.5 x 3.0 Zoll) |
| Gewicht | Ca. 385 g (13.6 oz) |
| Material | Harz |
| Stromversorgung | 2 x AA alkaline batteries (included) |
| Funktionen | Radio reception (automatic/manual), Radio wave reception ON/OFF, Bell alarm, Snooze, Light (with afterglow), Second hand stop (with alarm setting) |
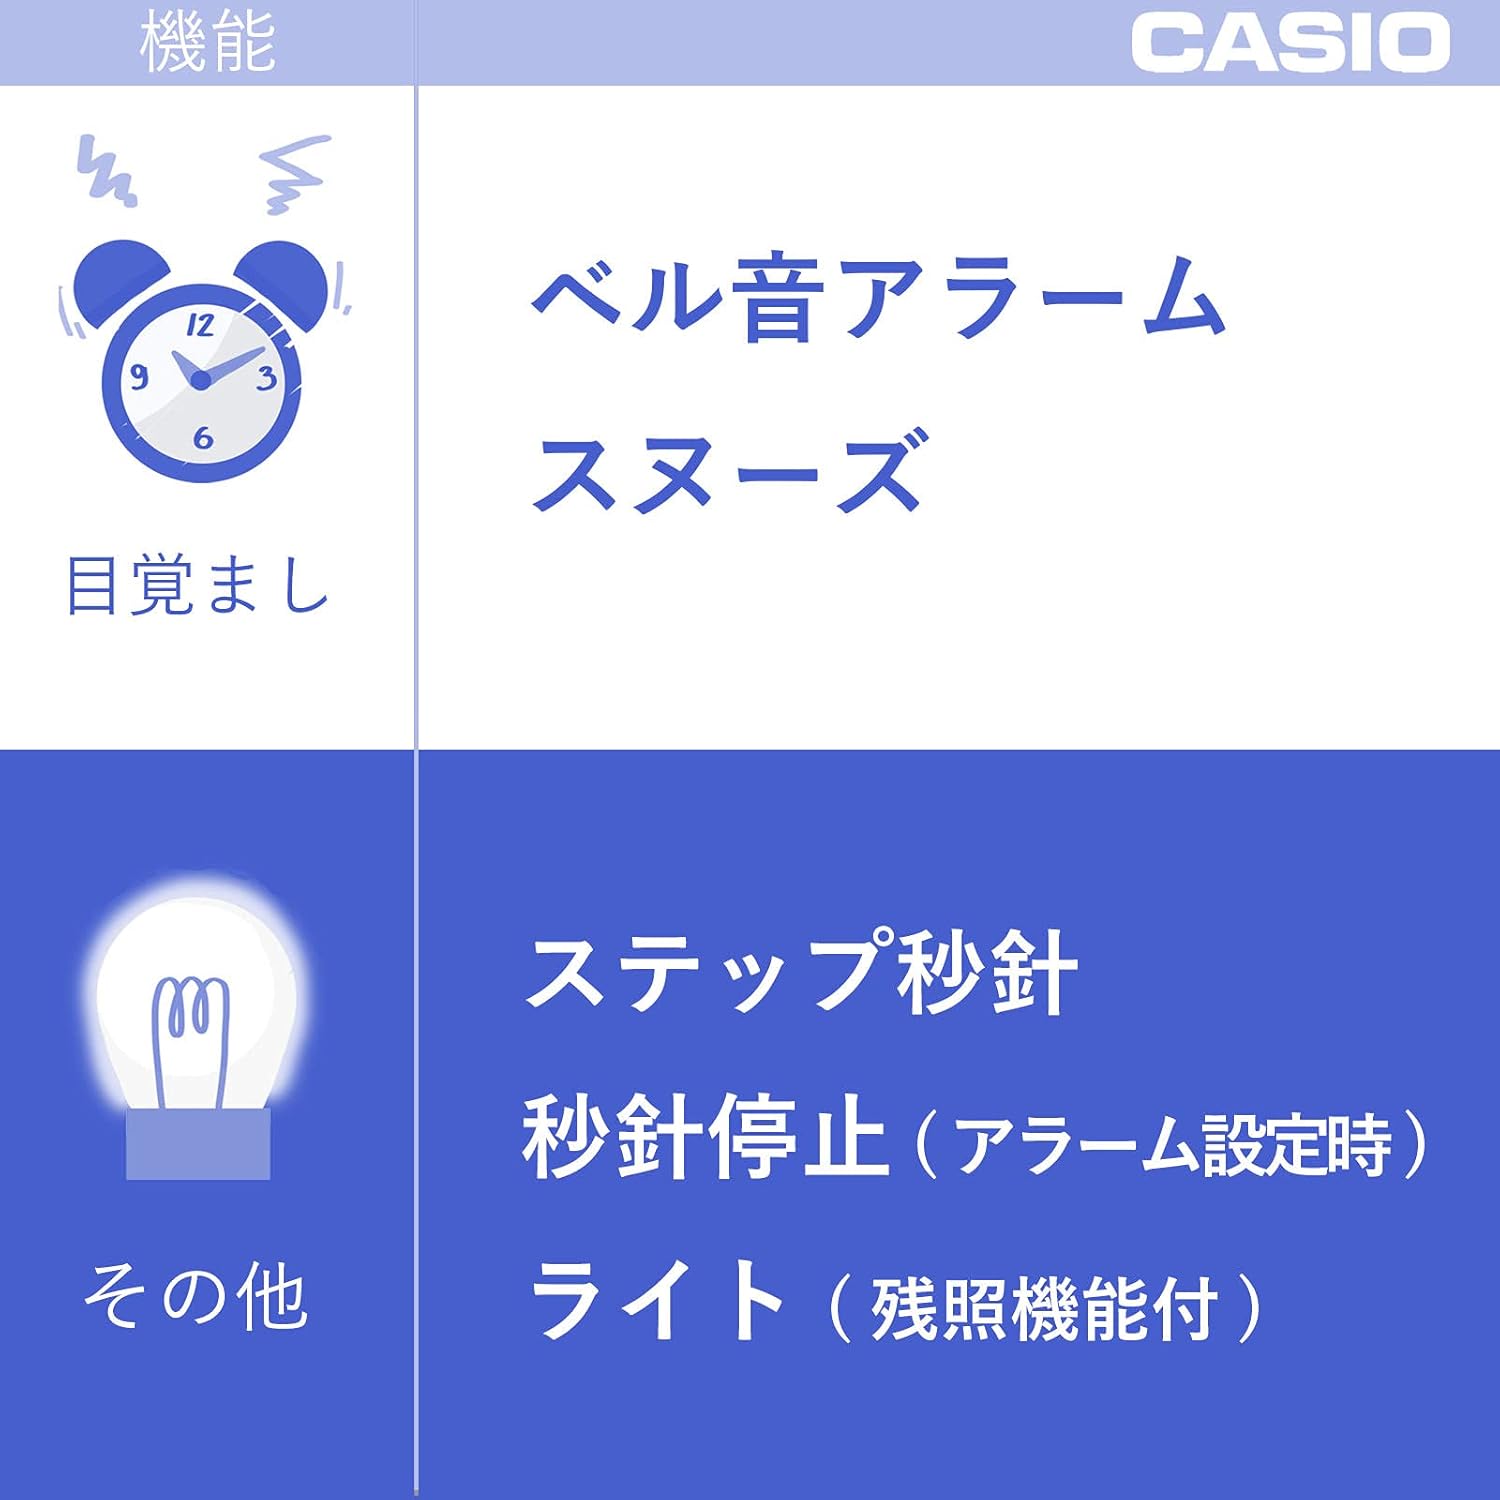
Abbildung 5: Produktabmessungen. This image illustrates the approximate dimensions of the alarm clock: 14.9 cm (height), 11.3 cm (width), and 7.7 cm (depth), with a weight of approximately 385g.
Garantie und Support
For warranty information or technical support, please refer to the warranty card included with your product or visit the official Casio webBewahren Sie Ihren Kaufbeleg als Kaufnachweis auf.
For further assistance, you may contact Casio customer service through their official channels.


