Wichtige Sicherheitshinweise
Always read and understand all safety warnings and instructions before operating the snow thrower. Failure to follow these instructions may result in electric shock, fire, and/or serious injury.
- Lesen Sie das Handbuch: Machen Sie sich mit den Bedienelementen und der korrekten Verwendung des Geräts vertraut.
- Tragen Sie angemessene Kleidung: Always wear safety glasses or eye shields, and appropriate footwear.
- Bereich freihalten: Ensure the area to be cleared is free of objects that could be thrown by the auger.
- Avoid Power Cord Damage: Be aware of the power cord's location at all times to prevent cutting or damaging it. Use only outdoor-rated extension cords of appropriate gauge (e.g., 12-gauge for 100 ft).
- Halten Sie einen Sicherheitsabstand ein: Keep bystanders, children, and pets at a safe distance from the operating area.
- Never Direct Discharge at People: Do not direct discharge snow towards people or property.
- Stromversorgung trennen: Vor jeglichen Justierungen, Reinigungs- oder Wartungsarbeiten muss immer das Netzkabel abgezogen werden.
- Operate in Daylight or Good Artificial Light: Ensure good visibility.
- Nicht überladen: Do not attempt to clear snow at a rate faster than the machine is designed for. If the motor slows, reduce the forward speed.
- Avoid Wet Snow: Heavy, wet snow can clog the chute. Use the provided clean-out tool to clear blockages, never your hands.
Montageanleitung
The Snow Joe Ultra SJ622E requires minimal assembly. Follow these steps to prepare your snow thrower for use.
1. Griffmontage
Attach the upper handle to the lower handle using the provided knobs and bolts. Ensure the handle is securely fastened.

Abbildung: Seite view of the Snow Joe Ultra SJ622E, showing the assembled handle and chute mechanism.
2. Chute Deflector Assembly
Connect the chute deflector to the main unit. The chute crank rod connects to the deflector to allow for directional control of snow discharge.

Bild: Vorderseite view of the snow thrower, highlighting the auger and the adjustable discharge chute.
3. Sichern Sie das Netzkabel
Route the power cord along the handle and secure it with the provided clips to prevent it from interfering with operation or becoming damaged.
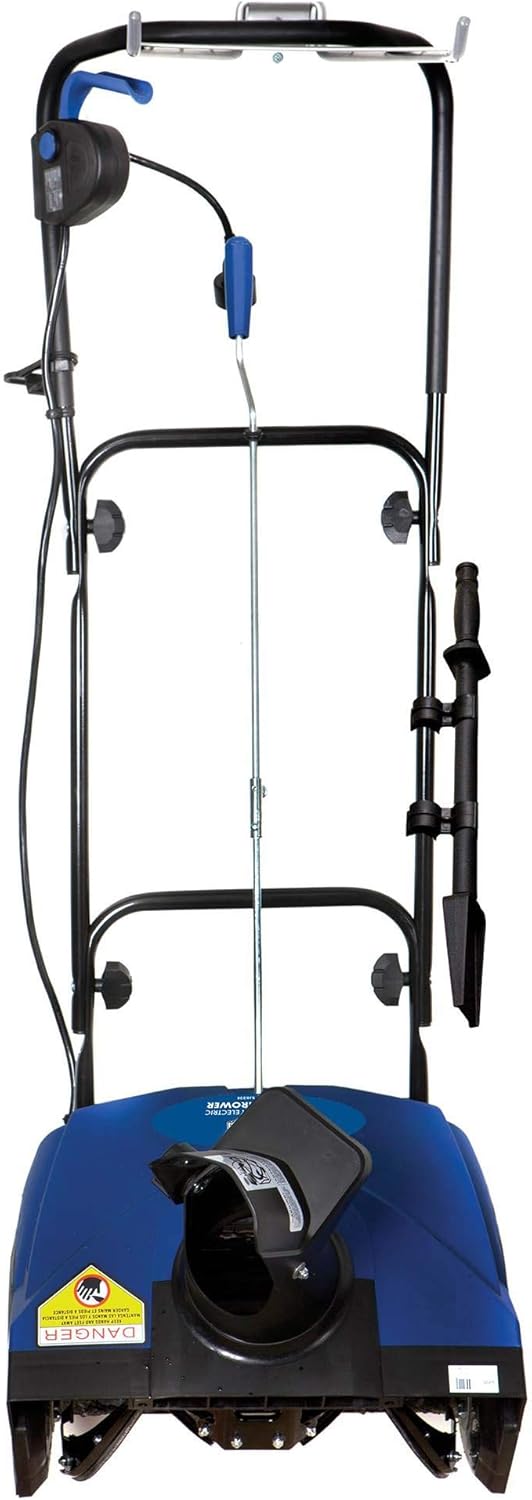
Bild: Draufsicht view of the snow thrower, illustrating the handle, control switches, and the chute crank.
Bedienungsanleitung
1. Vor dem Start
- Inspect the area for debris, rocks, or other objects that could be thrown.
- Ensure all fasteners are tight and the unit is in good working condition.
- Connect a suitable outdoor-rated extension cord (12-gauge, up to 100 feet recommended) to the snow thrower's power inlet.
- Stecken Sie das Verlängerungskabel in eine geerdete 120-V-Wechselstromsteckdose.
2. Starting the Snow Thrower
- Halten Sie die Sicherheitsschaltertaste gedrückt.
- While holding the safety switch, squeeze the switch bar lever against the handle. The motor will start.
- Release the safety switch button once the motor starts.
3. Schneeräumen
- Push the snow thrower forward into the snow. Do not force the machine; allow the auger to do the work.
- For deep or heavy snow, clear in narrower passes or in layers.
- Adjust the discharge chute direction using the crank handle to throw snow away from cleared areas, people, and property. The chute can rotate 180 degrees.
- Always be mindful of the power cord's position to avoid running over it.

Image: A person operating the Snow Joe Ultra SJ622E to clear snow from a paved surface, demonstrating the snow discharge.
4. Stopping the Snow Thrower
Release the switch bar lever. The motor will stop. Disconnect the power cord from the outlet after use.
Wartung
Regular maintenance ensures optimal performance and extends the life of your snow thrower.
- Reinigung: After each use, disconnect power and clean snow and debris from the unit, especially around the auger and chute. Use the provided clean-out tool for the chute.
- Inspektion: Periodically check for loose fasteners, damaged parts, or worn components. Replace any damaged parts immediately.
- Schmierung: No specific lubrication is required for the motor. For the chute rotation mechanism, a silicone spray can help maintain smooth operation.
- Lagerung: Store the snow thrower in a dry, protected area when not in use. The handle can be folded for compact storage. Storing the unit in a warm environment (e.g., heated cellar) can help prevent plastic components from becoming brittle in extreme cold.
Fehlerbehebung
| Problem | Mögliche Ursache | Lösung |
|---|---|---|
| Die Schneefräse springt nicht an. |
|
|
| Motor slows down or stalls during operation. |
|
|
| Snow discharge is weak or chute clogs. |
|
|
Technische Spezifikationen
- Modell: SJ622E
- Energiequelle: Kabelgebundene Elektrik
- Motor: 15-Amp
- Bandtage: 120 Volt
- Räumbreite: 18 Zoll
- Räumtiefe: 10 Zoll
- Gewicht: Ungefähr 16.72 Pfund
- Produktabmessungen: 45 x 19 x 38 Zoll (L x B x H)
- Zertifizierungen: ETL-geprüft
Garantie und Support
The Snow Joe Ultra SJ622E is covered by a full 2-year warranty from the date of purchase. For warranty claims, technical support, or replacement parts, please contact Snow Joe customer service.
Refer to the official Snow Joe webDie aktuellsten Kontaktdaten finden Sie auf unserer Website oder in Ihren Kaufunterlagen.