1. Einleitung
This manual provides essential instructions for the safe operation and maintenance of your VTech VM333 Safe & Sound Video Baby Monitor. Please read this manual thoroughly before using the product to ensure proper setup and functionality. The VTech VM333 is designed to help you monitor your baby with a high-resolution color LCD screen, automatic night vision, and two-way audio communication.
2. Produktüberschreitungview
The VTech VM333 system includes a Parent Unit (monitor) and a Baby Unit (camera). Familiarize yourself with the components and controls of each unit.
2.1. Parent Unit
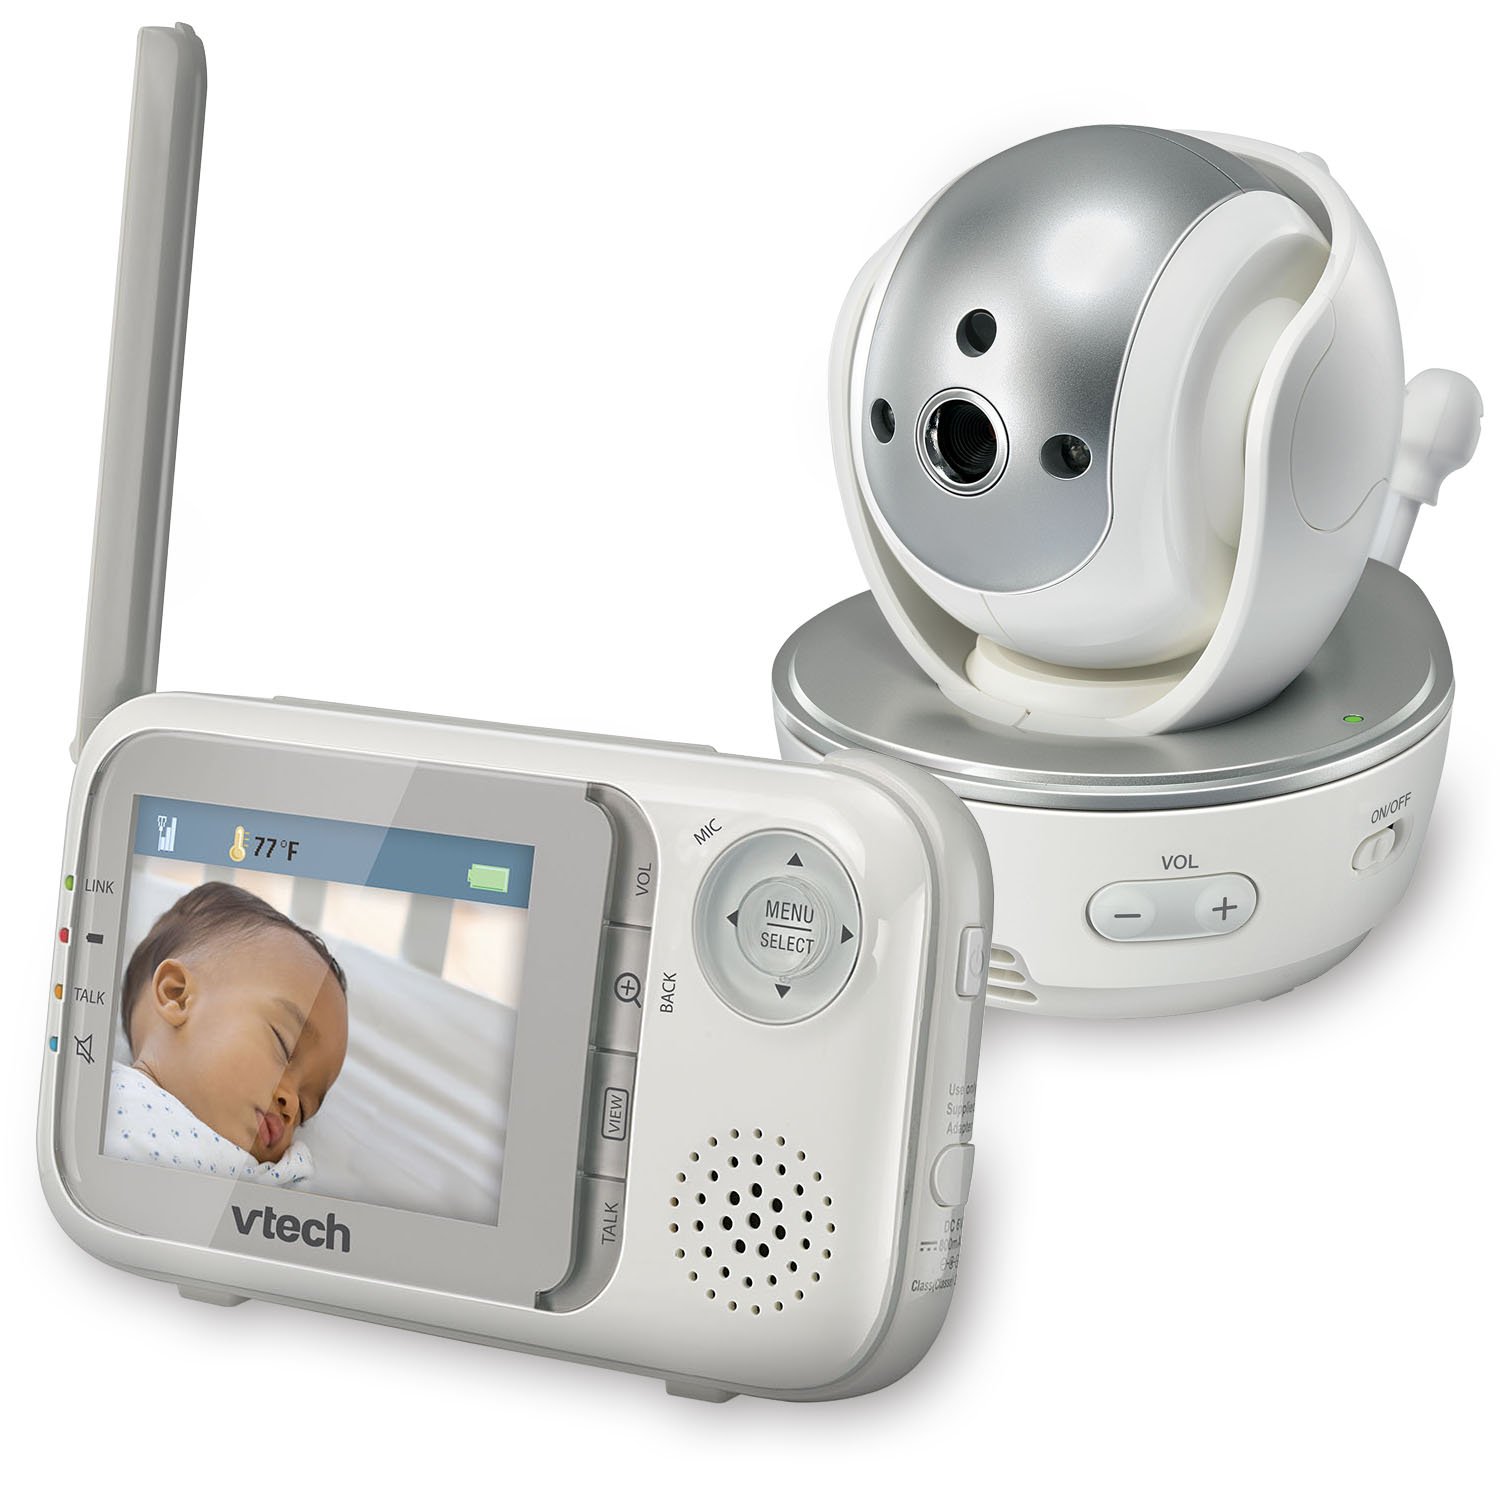
Bild: Vorderseite view of the VTech VM333 Parent Unit.
- 2.8-Zoll-Farb-LCD-Bildschirm: Displays live video feed from the Baby Unit.
- MENÜ-/AUSWAHL-Taste: Accesses menu options and confirms selections.
- Richtungspfeile (Oben/Unten/Links/Rechts): Navigates menus and controls camera pan/tilt.
- ZOOM Button (+/-): Magnifies the video image.
- TALK-Taste: Activates two-way audio communication.
- VOLUME Buttons (+/-): Adjusts the Parent Unit speaker volume.
- LINK-Anzeige: Shows connection status between units.
- Batterieanzeige: Zeigt den aktuellen Batteriestand an.
- Temperaturanzeige: Shows the temperature detected by the Baby Unit.
2.2. Baby Unit (Camera)

Bild: Vorderseite view of the VTech VM333 Baby Unit camera.
- Kameraobjektiv: Nimmt Videos auf.
- Infrarot-LEDs: Provide night vision in low light conditions.
- Mikrofon: Detects sound from the baby's room.
- Lautsprecher: Für die bidirektionale Audiokommunikation.
- Temperatursensor: Überwacht die Raumtemperatur.
- EIN/AUS-Schalter: Turns the Baby Unit on or off.
- Stromanschluss: Wird mit dem Netzteil verbunden.

Abbildung: Seite view of the VTech VM333 Baby Unit, illustrating the wall-mount bracket.
3. Einrichtung
3.1. Einschalten der Geräte
- Schließen Sie die Babyeinheit an: Plug the small end of the power adapter into the power jack on the back of the Baby Unit. Plug the large end into a wall outlet.
- Connect the Parent Unit: Plug the small end of the power adapter into the power jack on the side of the Parent Unit. Plug the large end into a wall outlet. The Parent Unit battery will begin charging.
- Einschalten: Slide the ON/OFF switch on the Baby Unit to the ON position. Press and hold the POWER button on the Parent Unit until the screen turns on.
The units are pre-linked. If they do not link automatically, refer to the "Troubleshooting" section for re-pairing instructions.
3.2. Positionierung der Babyeinheit (Kamera)
Place the Baby Unit at least 3 feet (1 meter) away from your baby to avoid potential hazards. Ensure the camera is positioned to capture the desired viewing area. Avoid placing the Baby Unit where it can be easily reached by children.
- For optimal performance, place the Baby Unit on a flat surface or mount it to a wall using the included wall-mount bracket.
- Keep the Baby Unit and Parent Unit within range (up to 1,000 feet / 300 meters in open space). Obstacles like walls and furniture can reduce the range.
Image: Proper placement of the Baby Unit near a crib.
4. Bedienung
4.1. Grundlegende Überwachung
Once both units are powered on and linked, the Parent Unit will display live video from the Baby Unit. Adjust the volume using the LAUTSTÄRKE + Und VOL - buttons on the Parent Unit.
4.2. Schwenken, Neigen und Zoomen
The Baby Unit camera can be remotely controlled from the Parent Unit to adjust its viewEinfallswinkel und Zoomstufe.
- Schwenken/Neigen: Verwenden Sie die Richtungspfeile (Up, Down, Left, Right) on the Parent Unit to move the camera lens horizontally (up to 270 degrees) and vertically (up to 124 degrees).
- Zoom: Drücken Sie die ZOOMEN + button to zoom in (2x magnification) and ZOOM - herauszuzoomen.
Video: Demonstration of the VTech VM333's pan, tilt, and zoom features, showing remote camera control from the Parent Unit.
4.3. Zwei-Wege-Gespräch
You can speak to your baby through the Baby Unit's speaker.
- Halten Sie die SPRECHEN Schaltfläche auf der übergeordneten Einheit.
- Sprechen Sie deutlich in das Mikrofon der Elterneinheit.
- Lassen Sie den SPRECHEN button to stop speaking and hear your baby again.

Image: Using the two-way talk feature on the Parent Unit.
4.4. Automatic IR Night Vision
The Baby Unit is equipped with infrared LEDs that automatically activate in low light conditions, providing a clear black and white video image of your baby in the dark.
Image: The Baby Unit operating in night vision mode.
4.5. Tonaktivierungsmodus
This mode allows the Parent Unit screen to turn off automatically to save power and reduce light disturbance, and then turn back on when sounds are detected from the Baby Unit.
- Drücken Sie die MENÜ/AUSWÄHLEN Schaltfläche auf der übergeordneten Einheit.
- Navigieren Sie zum VOX-Empfindlichkeit or Tonaktivierung Einstellung.
- Select your desired sound sensitivity level. A higher sensitivity will activate the screen with softer sounds.
Image: Parent Unit displaying the sound activation icon.
4.6. Temperature Monitoring and Alerts
The Baby Unit monitors the room temperature and displays it on the Parent Unit screen. You can set alerts for temperature deviations.
- Drücken Sie die MENÜ/AUSWÄHLEN Taste.
- Navigieren Sie zum Temperaturalarm Einstellungen.
- Set your desired minimum and maximum temperature thresholds. The Parent Unit will beep if the temperature goes outside this range.
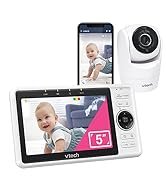
Image: Parent Unit displaying room temperature.
4.7. Multiple Camera Monitoring (Expandable System)
The VM333 system supports up to four cameras (additional cameras sold separately). You can view multiple cameras in different modes.
- Einzel View: Displays video from one camera at a time. Use the VIEW button to cycle through connected cameras.
- Teilt View: Displays video from multiple cameras simultaneously on a split screen.
- Patrouillenmodus: Automatically cycles through all connected cameras, displaying each for a few seconds.
Video: Demonstration of multi-camera viewing modes, including single view, Teilt view, and patrol mode.
5. Wartung
- Reinigung: Clean the surfaces of the Parent Unit and Baby Unit with a soft, damp Tuch. Keine Reinigungssprays oder flüssige Reinigungsmittel verwenden.
- Batteriepflege: The Parent Unit uses a rechargeable Lithium-Ion battery. For optimal battery life, fully charge the unit before first use. Avoid extreme temperatures. If storing the unit for an extended period, remove the battery.
- Linsenpflege: Keep the camera lens clean to ensure clear video quality. Use a soft, lint-free cloth to gently wipe the lens if needed.
6. Fehlerbehebung
| Problem | Lösung |
|---|---|
| No video/audio on Parent Unit. |
|
| Schlechte Videoqualität. |
|
| Parent Unit beeps (low battery, out of range, temperature). |
|
| Störungen mit anderen Geräten. |
|
7. Spezifikationen
| Besonderheit | Detail |
|---|---|
| Modellnummer | VM333 |
| Bildschirmgröße | 2.8 inches (LCD) |
| Wireless-Technologie | 2.4 GHz FHSS digital transmission |
| Reichweite | Bis zu 300 Meter (1,000 Fuß) im Freien |
| Schwenkwinkel | Up to 270 degrees horizontal |
| Neigungswinkel | Up to 124 degrees vertical |
| Zoom | 2-facher Digitalzoom |
| Nachtsicht | Automatic infrared (IR) |
| Zwei-Wege-Audio | Ja |
| Tonaktivierung | Ja (VOX) |
| Temperatursensor | Ja, mit Benachrichtigungen |
| Erweiterbar | Bis zu 4 Kameras (zusätzliche Kameras separat erhältlich) |
| Akkulaufzeit der Elterneinheit | Bis zu 3.5 Stunden (Videostreaming) |
| Stromquelle | Rechargeable Lithium-Ion battery (Parent Unit), AC power (Baby Unit) |
| Farbe | Weiß / Silber |
| Artikelgewicht | 2 Pfund |
8. Garantie und Support
For warranty information and technical support, please contact VTech customer service.
- Kundendienstnummer: (800) 595-9511
- WebWebsite: www.vtechbabycare.com
- E-Mail: support@vtechbabycare.com
Bitte bewahren Sie Ihren Kaufbeleg als Kaufnachweis für Garantiezwecke auf.


