1. Einleitung
This manual provides instructions for the safe and effective use of your Aspira AirFresher. This device functions as an air ionizer and humidifier, designed to improve air quality and diffuse fragrances in your living space. It features an integrated LED lighting system for ambient effects.
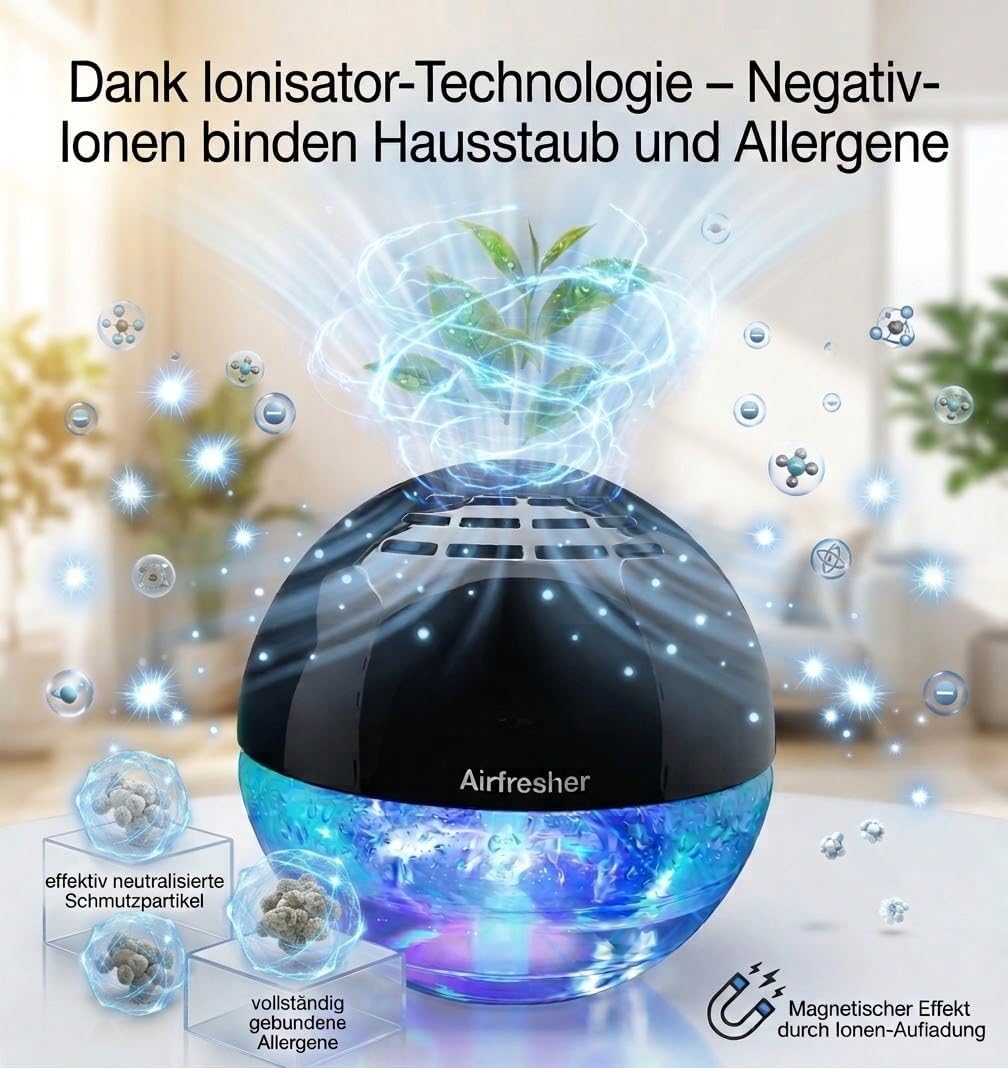
Image 1.1: The Aspira AirFresher unit alongside its packaging.
2. Sicherheitshinweise
- Lesen Sie alle Anweisungen, bevor Sie das Gerät in Betrieb nehmen.
- Tauchen Sie das Gerät nicht in Wasser oder andere Flüssigkeiten.
- Vergewissern Sie sich, dass das Netzkabel nicht beschädigt ist und ordnungsgemäß an eine geeignete Steckdose angeschlossen ist.
- Außerhalb der Reichweite von Kindern und Haustieren aufbewahren.
- Die Lüftungsöffnungen dürfen während des Betriebs nicht blockiert werden.
- Verwenden Sie ausschließlich sauberes Leitungswasser oder destilliertes Wasser.
- Vor der Reinigung oder dem Nachfüllen das Gerät vom Stromnetz trennen.
- Benutzen Sie keine Scheuer- oder Lösungsmittel am Gerät.
3. Packungsinhalt
Überprüfen Sie, ob alle Artikel im Paket vorhanden sind:
- Aspira AirFresher Unit
- Netzteil
- Bedienungsanleitung
- Fernbedienung
4. Einrichtung
- Platzierung: Place the AirFresher on a flat, stable surface away from direct sunlight or heat sources.
- Wassertank auffüllen: Carefully remove the top cover of the unit. Fill the water tank with clean tap water or distilled water up to the maximum fill line. Do not overfill.
- Duft hinzufügen (optional): If desired, add a few drops of your preferred essential oil or fragrance concentrate directly into the water tank.
- Abdeckung ersetzen: Securely place the top cover back onto the unit.
- Strom anschließen: Plug the power adapter into the unit and then into a standard electrical outlet.

Image 4.1: The AirFresher utilizing ionizer technology to bind dust and allergens.

Image 4.2: Adding essential oils to the AirFresher for a customized aroma. Essential oils are not included.
5. Bedienungsanleitung
5.1 Ein-/Ausschalten
Press the power button on the unit or the remote control to turn the device on or off. The unit will begin air purification and humidification.
5.2 Air Purification and Humidification
The AirFresher uses hydro-ionic technology for 360-degree air purification, effectively covering areas up to 40 square meters. It operates quietly to maintain a comfortable environment.
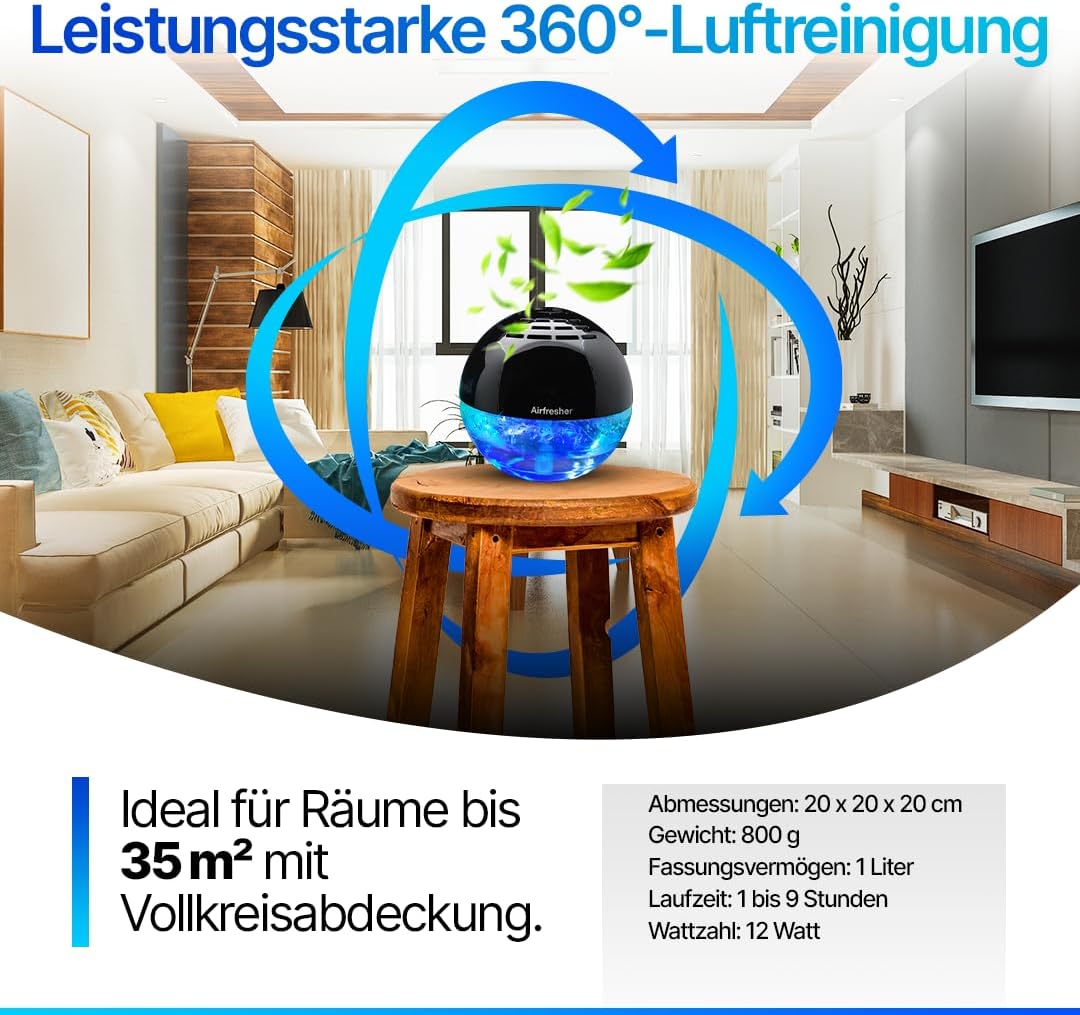
Image 5.1: The AirFresher providing 360-degree air purification in a room.
5.3 LED-Beleuchtung
The device features 14 different LED color effects. Use the dedicated button on the unit or remote control to cycle through the color options or turn the lighting off.
5.4-Betriebsmodi
The AirFresher offers different operating modes:
- Normalmodus: Activates a stronger water flow for thorough air purification.
- Schlafmodus: Provides ultra-quiet operation with minimal water movement, ideal for undisturbed nights.

Image 5.2: Comparison of Sleep Mode (ultra-quiet operation) and Normal Mode (stronger air purification).
5.5 Geruchskontrolle
The AirFresher effectively neutralizes pet odors, food smells, and nicotine odors, contributing to a fresher indoor environment.

Image 5.3: The AirFresher effectively managing pet odors.
6. Wartung
Regular cleaning ensures optimal performance and longevity of your AirFresher.
- Stecker ziehen: Ziehen Sie vor der Reinigung immer den Stecker aus der Steckdose.
- Wassertank leeren: Nehmen Sie den Deckel ab und leeren Sie den Tank vollständig.
- Saubere Einheit: Wipe the interior and exterior surfaces of the unit with a soft, damp cloth or microfiber cloth. Do not use harsh chemicals or abrasive materials.
- Spültank: Spülen Sie den Wassertank gründlich mit klarem Wasser aus.
- Trocken: Allow all parts to air dry completely before reassembling and storing or refilling.
Wichtig: The water tank is not suitable for dishwashers.

Image 6.1: Regular cleaning with a soft cloth ensures optimal performance.
7. Fehlerbehebung
If you encounter issues with your Aspira AirFresher, refer to the following common problems and solutions:
- Gerät lässt sich nicht einschalten:
- Ensure the power adapter is securely plugged into both the unit and the wall outlet.
- Überprüfen Sie, ob die Steckdose funktionsfähig ist.
- Kein Nebel oder reduzierter Nebel:
- Check if there is enough water in the tank.
- Ensure the unit is clean and free from mineral buildup, especially around the mist outlet.
- Make sure the top cover is correctly seated.
- Ungewöhnliches Geräusch:
- Stellen Sie sicher, dass das Gerät auf einer ebenen und stabilen Oberfläche steht.
- Check for any foreign objects in the water tank or around the fan.
- LED-Leuchten funktionieren nicht:
- Press the LED light button on the unit or remote control to cycle through options.
- Stellen Sie sicher, dass das Gerät eingeschaltet ist.
Sollte das Problem weiterhin bestehen, wenden Sie sich bitte an den Kundendienst.
8. Spezifikationen
| Besonderheit | Spezifikation |
|---|---|
| Modellnummer | AirFresher (AS10061) |
| Abmessungen (L x B x H) | 17 x 17 x 17 cm |
| Gewicht | 800 Gramm |
| Stromquelle | Kabelgebundene Elektrik |
| Energieaufnahme | 15 Watt |
| Geräuschpegel | 50 Dezibel |
| Abdeckungsbereich | Bis zu 40 Quadratmeter |
| Filtertyp | Elektrostatisch |
| Kontrollmethode | Fernbedienung |
| LED-Effekte | 14 different color settings |
| Zertifizierungen | CE-zertifiziert |

Image 8.1: Quality certification details for the Aspira Home Air Freshener/Humidifier.
9. Garantie und Support
9.1 Garantieinformationen
The Aspira AirFresher comes with a 3-year manufacturer's warranty, covering defects in materials and workmanship under normal use. Please retain your proof of purchase for warranty claims.
9.2 Kundendienst
For technical assistance, troubleshooting not covered in this manual, or warranty inquiries, please contact Aspira customer support. Contact details can typically be found on the product packaging or the official Aspira webWebsite.


