1. Wichtige Sicherheitshinweise
Please read all instructions carefully before using the Mesko MS 4403 Espresso Machine. Retain this manual for future reference.
- Stellen Sie sicher, dass die LautstärketagDie auf dem Gerät angegebene Spannung entspricht der örtlichen Netzspannung.tage before connecting the machine.
- Tauchen Sie das Gerät, das Netzkabel oder den Stecker nicht in Wasser oder andere Flüssigkeiten.
- Dieses Gerät ist nicht für den Gebrauch durch Personen (einschließlich Kinder) mit eingeschränkten physischen, sensorischen oder geistigen Fähigkeiten oder Mangel an Erfahrung und Wissen bestimmt, es sei denn, sie werden von einer für ihre Sicherheit verantwortlichen Person beaufsichtigt oder erhalten Anweisungen zur Verwendung des Geräts.
- Kinder sollten beaufsichtigt werden, um sicherzustellen, dass sie nicht mit dem Gerät spielen.
- Unplug the machine from the outlet when not in use and before cleaning. Allow it to cool before putting on or taking off parts, and before cleaning the appliance.
- Betreiben Sie kein Gerät, dessen Kabel oder Stecker beschädigt ist, oder wenn das Gerät eine Fehlfunktion aufweist oder auf sonstige Weise beschädigt wurde.
- Stellen Sie das Gerät nicht auf oder in die Nähe eines heißen Gas- oder Elektrobrenners oder in einen beheizten Ofen.
- Im Wassertank darf nur kaltes Wasser verwendet werden.
- Always ensure the water tank is filled to at least the minimum level before operating the machine.
- Vermeiden Sie während des Betriebs den Kontakt mit heißen Oberflächen, insbesondere mit der Dampflanze und dem Siebträger.
2. Produktüberschreitungview
The Mesko MS 4403 is a semi-automatic espresso machine designed for home use, capable of brewing espresso and frothing milk for various coffee beverages. Familiarize yourself with its components:

Bild 2.1: Gesamt view of the Mesko MS 4403 Espresso Machine. This image displays the machine from a front-right perspective, showing the main body, control panel, portafilter handle, steam wand, and the transparent water tank on the side.
- Bedienfeld: Buttons for power, single espresso, double espresso, and steam function.
- Einstellrad: Adjusts steam intensity or hot water flow.
- Siebträger: Hält gemahlenen Kaffee zum Aufbrühen.
- Dampfdüse: Wird zum Aufschäumen von Milch verwendet.
- Wassertank: Abnehmbarer Wassertank.
- Tropfschale: Sammelt überschüssige Flüssigkeit und ist zur Reinigung abnehmbar.

Bild 2.2: Close-up of the control dial. This image focuses on the rotary dial, which is used to control the steam output for frothing milk and the hot water dispenser. Markings for 'OFF', steam, and water are visible.

Bild 2.3: Seite view of the machine showing the water tank. This image provides a clear view of the transparent water tank attached to the side of the espresso machine, with visible 'MAX' and 'MIN' fill level indicators.
3. Einrichtung
3.1 Auspacken und erste Reinigung
- Entfernen Sie sämtliches Verpackungsmaterial und alle Aufkleber von der Maschine.
- Wash the water tank, portafilter, filter basket, and drip tray with warm, soapy water. Rinse thoroughly and dry.
- Wischen Sie die Außenseite der Maschine mitamp Tuch.
3.2 Füllen des Wassertanks
- Entfernen Sie den Wassertank von der Rückseite der Maschine.
- Fill the tank with fresh, cold water up to the 'MAX' line. Do not exceed this line.
- Setzen Sie den Wassertank wieder an seinen Platz und achten Sie darauf, dass er richtig sitzt.
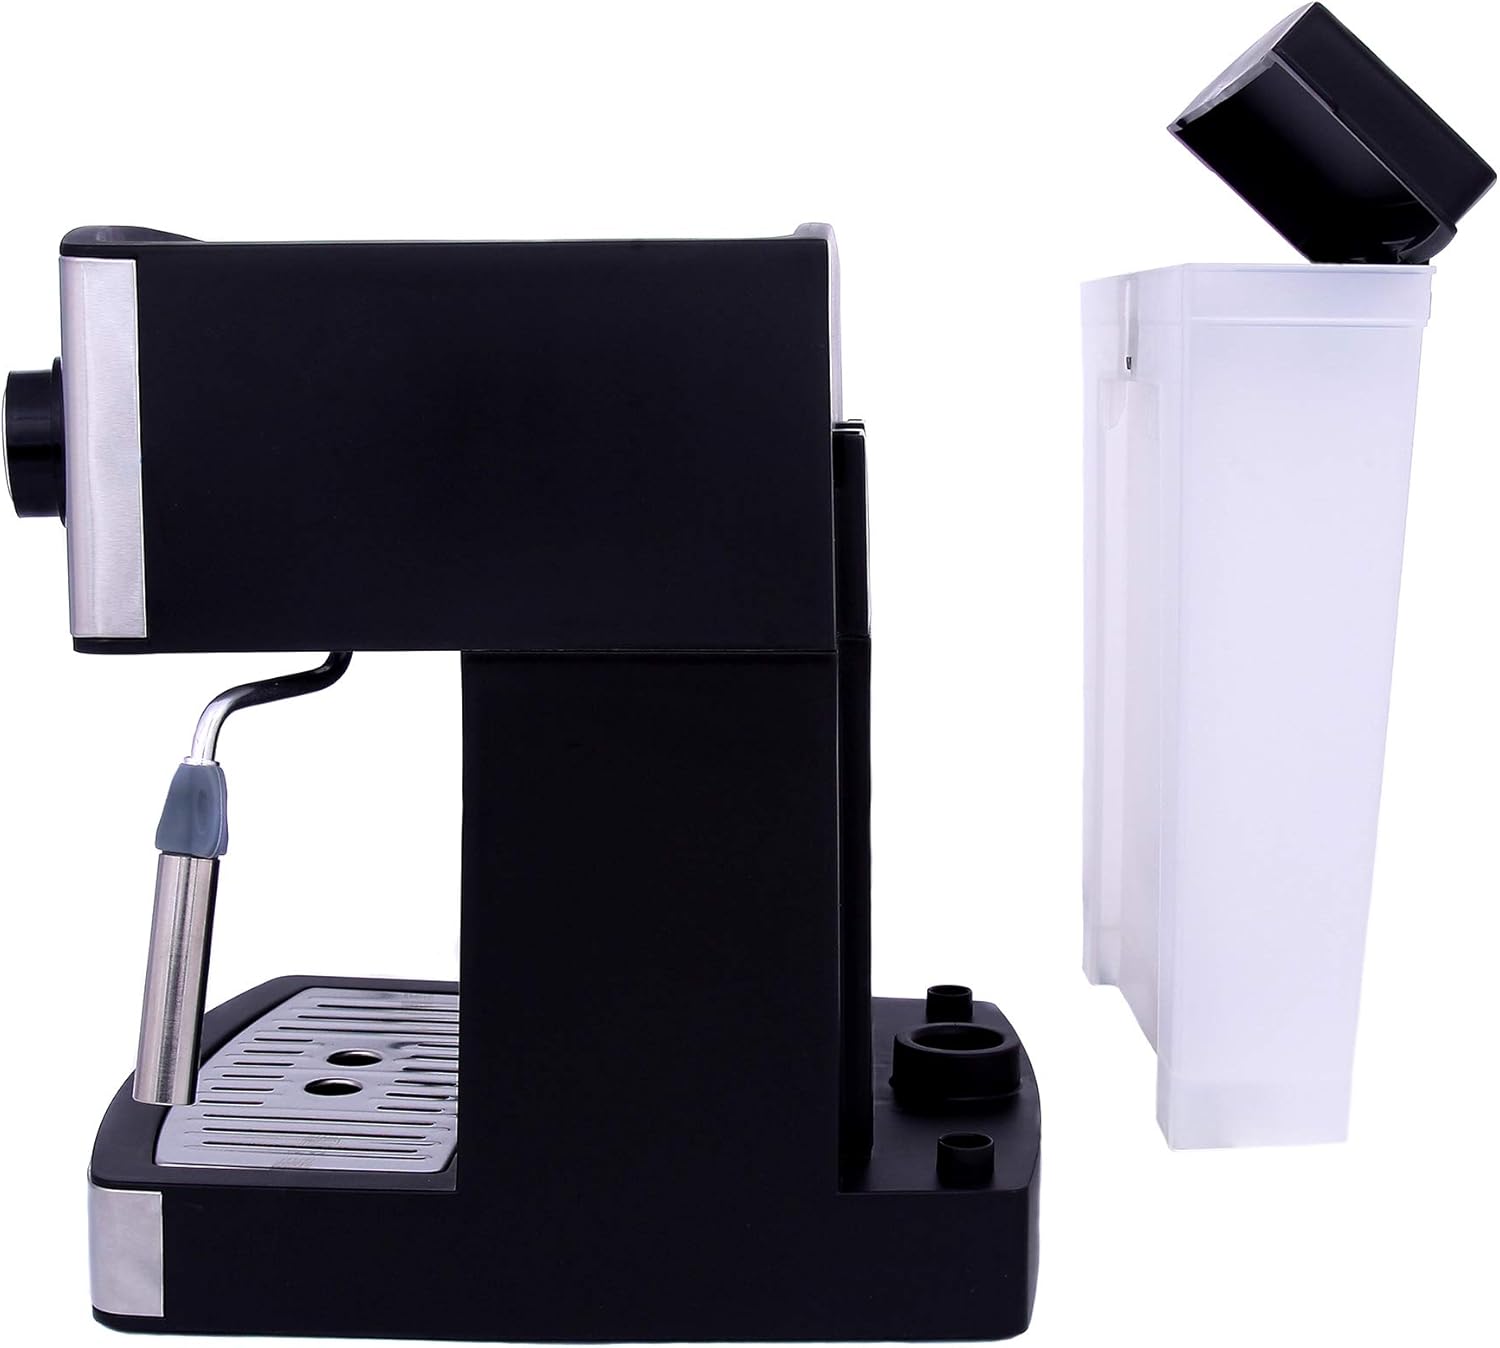
Bild 3.1: Water tank removed from the machine. This image shows the side of the espresso machine with the water tank detached, illustrating how the tank can be easily removed for filling or cleaning.
3.3 Priming the Pump (First Use)
- Stellen Sie sicher, dass der Wassertank gefüllt ist.
- Schließen Sie das Gerät an eine Steckdose an.
- Stellen Sie eine Tasse unter die Dampfdüse.
- Turn the control dial to the hot water position (faucet icon) and press the power button. Allow water to flow through the steam wand for about 30 seconds to prime the pump.
- Turn the control dial back to 'OFF' and press the power button to stop. The machine is now ready for use.
4. Bedienungsanleitung
4.1 Espresso zubereiten
- Vorheizen: Turn on the machine and allow it to preheat for approximately 2-3 minutes until the indicator light signals readiness.
- Siebträger vorbereiten: Setzen Sie den gewünschten Filterkorb (für einfachen oder doppelten Espresso) in den Siebträger ein.
- Kaffee hinzufügen: Grind fresh coffee beans to a fine consistency suitable for espresso. Use the provided scoop to add ground coffee to the filter basket. For a single shot, use one scoop (approx. 7g); for a double shot, use two scoops (approx. 14g).

Bild 4.1: Portafilter and coffee scoop. This image shows the detached portafilter, which holds the ground coffee, alongside a black plastic coffee measuring scoop, essential tools for preparing espresso.
- Tamp Kaffee: Verwenden Sie das tamper (often found on the back of the scoop) to press the ground coffee firmly and evenly into the filter basket. Ensure the surface is level.
- Siebträger anbringen: Align the portafilter with the group head on the machine. Insert it and twist firmly to the right until it is securely locked in place.
- Espresso zubereiten: Place your espresso cup(s) on the drip tray under the portafilter spouts. Press the single or double espresso button. The machine will brew the coffee and stop automatically.
- Siebträger entfernen: Once brewing is complete, carefully twist the portafilter to the left to remove it. Dispose of the used coffee grounds.
4.2 Milch aufschäumen
- Milch zubereiten: Füllen Sie einen Milchaufschäumkännchen aus Edelstahl mit kalter Milch (Milchprodukte oder pflanzliche Alternativen) bis kurz unter den Ausguss.
- Steam aktivieren: Press the steam button on the control panel. Wait for the indicator light to signal that the machine has reached steaming temperature.
- Dampfdüse reinigen: Briefly turn the control dial to the steam position to release any condensed water from the wand into an empty cup. Turn it back to 'OFF'.
- Milch aufschäumen: Immerse the tip of the steam wand just below the surface of the milk. Turn the control dial to the steam position. Angle the pitcher slightly to create a swirling motion.
- Temperatur überwachen: Continue frothing until the milk reaches the desired temperature and texture (typically around 60-70°C or when the pitcher is too hot to touch comfortably).
- Dampf abstellen: Turn the control dial back to 'OFF' and remove the pitcher.
- Reinigung der Dampfdüse: Wischen Sie die Dampfdüse sofort mit einem Tuch ab.amp Mit einem Tuch eventuelle Milchreste entfernen. Den Sauger nochmals kurz durchspülen, um verbliebene Milchreste zu entfernen.
5. Wartung und Reinigung
Regelmäßige Reinigung gewährleistet optimale Leistung und Langlebigkeit Ihrer Espressomaschine.
5.1 Tägliche Reinigung
- Tropfschale: Leeren und spülen Sie die Tropfschale nach jedem Gebrauch oder wenn der Indikator nach oben schwimmt.
- Siebträger und Filterkorb: Remove used coffee grounds and rinse the portafilter and filter basket under running water.
- Dampfdüse: Wischen Sie die Dampfdüse nach jedem Gebrauch sofort mit einem feuchten Tuch ab.amp cloth and purge briefly.
5.2 Wöchentliche Reinigung
- Wassertank: Remove and wash the water tank with warm, soapy water. Rinse thoroughly.
- Gruppenleiter: Wischen Sie den Brühkopf (wo der Siebträger befestigt ist) mit einem Tuch ab.amp Mit einem Tuch eventuelle Kaffeereste entfernen.
5.3 Entkalkung
Descaling is essential to remove mineral buildup and should be performed every 2-3 months, or more frequently in areas with hard water.
- Bereiten Sie eine Entkalkungslösung gemäß den Anweisungen des Entkalkungsgeräteherstellers zu.
- Füllen Sie den Wassertank mit der Entkalkungslösung.
- Stellen Sie einen großen Behälter unter die Brühgruppe und die Dampflanze.
- Run half of the solution through the group head by pressing the espresso button.
- Die restliche Hälfte der Lösung durch die Dampfdüse leiten, indem die Dampffunktion aktiviert wird.
- Spülen Sie den Wassertank gründlich aus und füllen Sie ihn mit frischem Wasser.
- Repeat the process with fresh water to rinse the internal components, ensuring no descaling solution remains.
6. Fehlerbehebung
In der folgenden Tabelle finden Sie häufig auftretende Probleme und deren Lösungen.
| Problem | Mögliche Ursache | Lösung |
|---|---|---|
| Kein Kaffeeautomat | Water tank empty or not properly seated. Pump not primed. Coffee too finely ground or tampzu hart gearbeitet. | Fill water tank and ensure it's seated. Prime the pump. Use coarser grind or lighter tamp. |
| Der Kaffee brüht zu langsam oder tropft. | Kaffee zu fein gemahlen oder tampZu stark gedrückt. Filterkorb verstopft. | Verwenden Sie einen gröberen Mahlgrad oder eine leichtere Temperatur.amp. Clean filter basket. |
| Coffee brews too quickly or is weak | Der Kaffee ist zu grob gemahlen oder es wird zu wenig Kaffeepulver verwendet. | Verwenden Sie einen feineren Mahlgrad oder mehr Kaffee. |
| Kein Dampf aus der Lanze | Steam function not activated or not at temperature. Steam wand clogged. | Ensure steam button is pressed and indicator light is on. Clean steam wand. |
| Maschine verliert Wasser | Water tank not properly seated. Drip tray full. Seal issues. | Ensure water tank is correctly placed. Empty drip tray. Contact support if seals are damaged. |
7. Spezifikationen
| Besonderheit | Spezifikation |
|---|---|
| Marke | Mesko |
| Modellnummer | MS 4403 |
| Farbe | Schwarz |
| Abmessungen (L x B x H) | 21 x 26 x 30.5 cm |
| Gewicht | 800 Gramm |
| Kapazität | 1.6 Liter (Wassertank) |
| Leistung | 850 Watt |
| Bandtage | 240 Volt |
| Material | Edelstahl |
| Merkmale | Milchaufschäumer |
8. Garantieinformationen
The Mesko MS 4403 Espresso Machine comes with a standard manufacturer's warranty. Please refer to the warranty card included with your purchase for specific terms, conditions, and duration. Keep your proof of purchase for any warranty claims.
9. Kundendienst
If you encounter any issues not covered in this manual or require further assistance, please contact Mesko customer support. Contact details can typically be found on the product packaging, the official Mesko webWebsite oder die Supportseite Ihres Händlers.
When contacting support, please have your product model number (MS 4403) and proof of purchase readily available.


